The Water Heater Flush: Removing Sediment for Efficiency
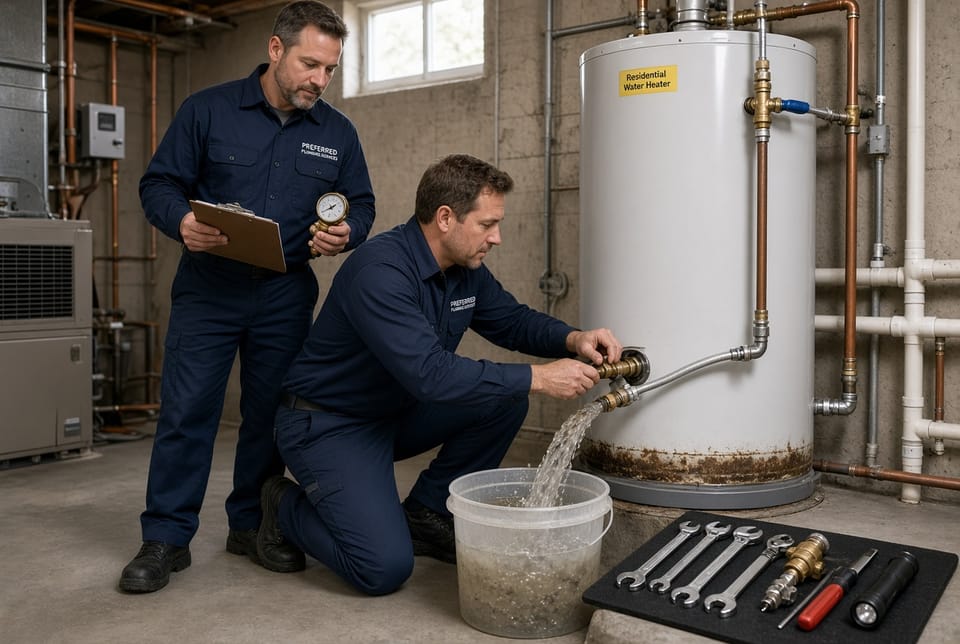
A properly maintained water heater delivers reliable hot water while keeping energy costs under control. Over time, however, mineral sediment settles at the bottom of the tank and quietly undermines performance. Performing an annual water heater flush removes that buildup, restores efficiency, and extends the life of the unit. This guide explains exactly why sediment forms, how to recognize the warning signs, and the precise steps required to flush the tank safely and effectively.
Remove Sediment Buildup Today – Call for Expert Service!
Why Sediment Builds Up Inside Your Water Heater
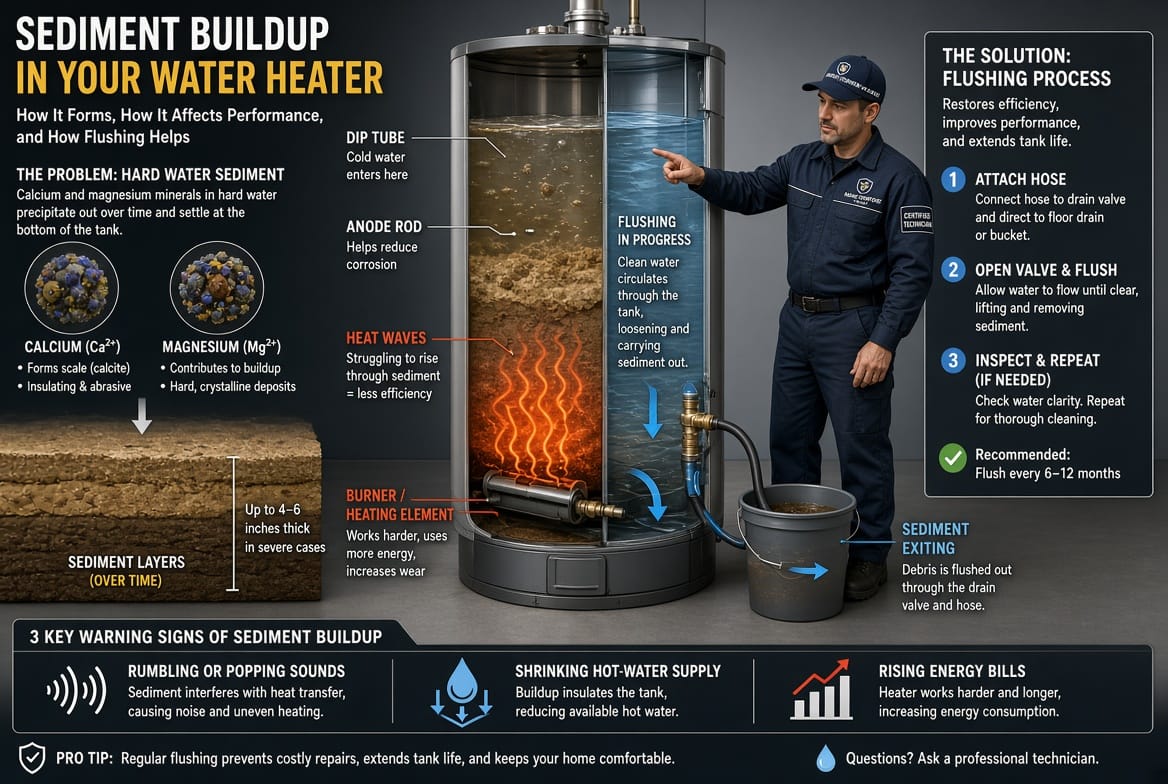
Most household water contains dissolved minerals—primarily calcium and magnesium. When water is heated, these minerals precipitate out of solution and settle as a fine layer of sediment on the tank floor. In areas with hard water the accumulation happens faster, but even moderately hard water produces measurable deposits within twelve months.
The sediment layer acts like an insulating blanket. Heat from the burner or heating elements must first pass through this barrier before it can warm the water above it. As a result the system runs longer, consumes more energy, and develops hot spots that stress the tank lining. Left unchecked, the layer thickens, traps moisture against the metal, and accelerates corrosion. Understanding this natural process is the first step toward preventing costly repairs.
Hard-water regions see the heaviest deposits, yet any home with a tank-style heater will eventually face the same issue. Municipal water treatment reduces some minerals but rarely eliminates them completely. Private well systems often introduce additional sand or iron particles that compound the problem. Regardless of the source, the solution remains the same: regular removal of the settled material through a thorough flush.
Recognizing the Clear Signs of Sediment Buildup
Your water heater communicates problems long before a complete failure occurs. The most common indicators appear gradually and become more pronounced as the sediment layer grows.
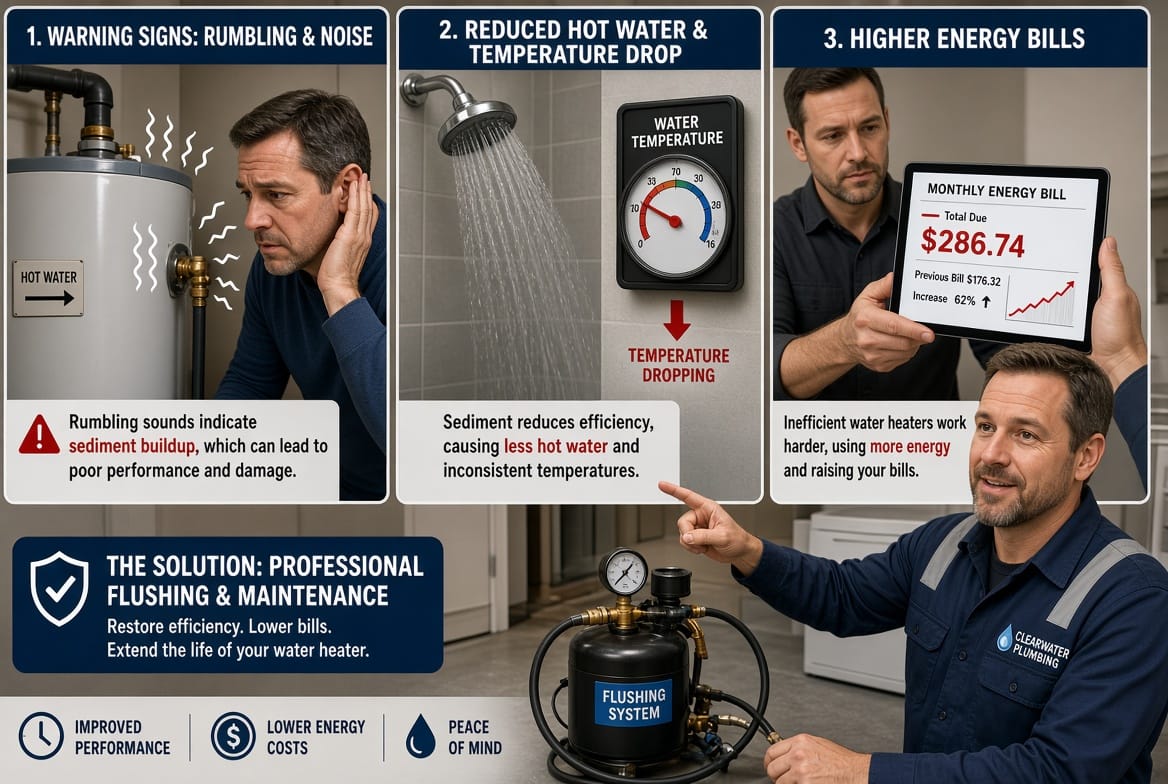
- Rumbling or popping sounds during heating cycles. These noises occur when water trapped under the sediment boils and creates steam bubbles that burst against the tank wall.
- Reduced hot-water volume or faster temperature drop. Sediment displaces usable water capacity, so the tank delivers less hot water before cold water begins to mix in.
- Noticeably higher energy bills without a change in usage habits. The heater works harder and longer to overcome the insulating effect of the mineral layer.
- Longer recovery times after heavy use, such as back-to-back showers.
- Occasional cloudy or discolored hot water when sediment particles are stirred into the flow.
Any one of these symptoms warrants attention. When two or more appear together, the need for a water heater flush becomes urgent. Addressing the issue promptly restores comfort and prevents the progressive damage that leads to leaks or premature replacement.
How a Proper Flush Restores Efficiency
Flushing removes the insulating barrier so heat transfers directly to the water. The result is faster recovery, consistent temperature, quieter operation, and measurable energy savings. Most homeowners notice an immediate improvement in hot-water availability and a gradual decline in utility costs over the following billing cycles. In addition, eliminating standing sediment reduces the risk of tank corrosion and extends the expected service life of the unit by several years.
The process itself is straightforward when performed correctly, yet it requires attention to safety and sequence. Homeowners comfortable with basic tools can complete the task; others prefer the reassurance of a trained technician. Either approach yields the same core benefit: a cleaner, more efficient water heater.
Step-by-Step Guide to Flushing Your Water Heater
Gather the necessary materials before beginning: a standard garden hose long enough to reach a floor drain or exterior, a flat-head screwdriver or adjustable wrench for the drain valve, and a bucket for residual water. Protective gloves and eye protection are recommended.
- Turn off the power or gas supply. For electric units switch the dedicated breaker to the off position. For gas units set the control valve to the “pilot” or “off” setting. Confirm the unit is no longer heating before proceeding.
- Shut off the cold-water inlet. Locate the valve on the cold-water pipe entering the top of the tank and close it completely. This prevents new water from entering while the tank empties.
- Attach the hose to the drain valve. The drain valve is typically located near the bottom of the tank. Screw the hose firmly onto the threaded outlet and route the free end to a suitable drain location. Place a bucket beneath the connection as a precaution against minor leaks.
- Open a nearby hot-water faucet. Choose a sink or tub faucet and open it fully. This equalizes pressure and allows air to enter the system so the tank drains smoothly.
- Open the drain valve and empty the tank. Turn the drain valve counterclockwise until water begins to flow. Allow the tank to empty completely. The first water may appear cloudy or contain visible particles—this is the sediment leaving the system.
- Flush residual sediment. Once the tank is empty, briefly open the cold-water inlet valve for thirty to sixty seconds while the drain remains open. Fresh water stirs remaining particles and carries them out the hose. Repeat this short flush cycle two or three times until the water runs clear.
- Close the drain valve and remove the hose. Ensure the valve is fully closed and no drips remain. Disconnect the hose and store it for future use.
- Refill the tank. Open the cold-water inlet valve fully. Keep the hot-water faucet open until a steady stream of water flows without sputtering—this indicates the tank is full and air has been purged. Close the faucet.
- Restore power or gas. Return the breaker to the on position or relight the pilot according to the manufacturer’s instructions. The heater will begin warming the fresh water. Allow thirty to sixty minutes for the tank to reach normal temperature before checking performance.
Throughout the process watch for any unexpected leaks at fittings or valves. If the drain valve itself appears corroded or fails to close tightly, replace it before finishing the job or contact a professional for assistance.
Safety Considerations and Common Pitfalls
Never attempt a flush while the heater is under full pressure or while power and gas remain active. Scalding water can cause serious injury, and residual heat can damage components. If the tank is more than ten years old or shows external rust, exercise extra caution—sediment removal may reveal underlying weaknesses. In such cases professional evaluation is the safer choice.
Avoid using chemical descalers unless specifically recommended by the manufacturer; mechanical flushing with clean water is usually sufficient and far less aggressive toward the tank lining. Finally, never leave the drain hose unattended during the process; a sudden surge of water can flood the surrounding area.
Frequency and Long-Term Maintenance Strategy
Most manufacturers and plumbing professionals recommend a complete water heater flush at least once every twelve months. Homes with very hard water or high daily usage may benefit from flushing every six to nine months. Pair the annual flush with a visual inspection of the anode rod—the sacrificial component that protects the tank from corrosion. Replacing a depleted anode rod at the same time multiplies the protective effect of the flush.
Keeping a simple maintenance log that records the date of each flush, any observed sediment volume, and changes in energy bills provides useful trend data. Over successive years the amount of sediment removed should decrease if water quality remains stable, confirming that regular service is keeping the system healthy.
When Professional Service Adds Extra Value
While the steps outlined above are accessible to many homeowners, certain situations favor calling trained technicians. These include multi-story homes where draining is logistically difficult, tanks located in tight mechanical rooms, units with specialized valves or recirculation systems, and any heater showing signs of external corrosion or previous leakage. Professionals arrive with high-capacity pumps, specialized fittings, and the experience to diagnose related issues such as failing thermostats or compromised dip tubes.
A professional flush also includes a thorough system check—verifying temperature and pressure relief valve function, testing expansion tanks if present, and confirming proper combustion or electrical draw. This comprehensive approach delivers peace of mind that extends beyond simple sediment removal.
The Lasting Benefits of Consistent Care
Homeowners who commit to an annual water heater flush consistently report quieter operation, more reliable hot-water supply, and lower monthly utility statements. The modest investment of time or professional service fees is recovered many times over through avoided emergency repairs and deferred replacement costs. A clean tank also maintains manufacturer warranty compliance in many cases, protecting the original purchase investment.
Beyond pure economics, the comfort of predictable hot water contributes to daily quality of life. Families no longer ration showers or wait extended periods for the tank to recover. Guests experience consistent performance, and the household avoids the frustration of unexpected cold-water interruptions.
Taking Action Today
Sediment accumulation is inevitable, yet its negative effects are entirely preventable. Schedule a water heater flush at least once each year to keep the system operating at peak efficiency. Whether you perform the task yourself using the steps detailed above or prefer the expertise of trained technicians, the outcome is the same: restored performance, quieter operation, and measurable energy savings.
For professional maintenance that guarantees thorough sediment removal and a complete system inspection. Experienced technicians are ready to restore your water heater’s efficiency and provide the authoritative service that keeps hot water flowing reliably for years to come.
Prevent Costly Repairs with a Pro Flush – Call Now!