The Solar Panel Installation Process: From Site Survey to Activation
Choosing solar is a major home improvement and a long-term energy decision. Understanding the solar panel installation process removes guesswork and builds confidence. From the first site survey through design, permits, physical installation, inspection, and final activation, each stage has a clear purpose, typical duration, and quality checkpoints.
Call Now to Map Your Solar Installation Timeline
This article explains the full sequence using one major residential project as a running example: a 10.4 kW system on a two-story suburban home with mixed roof planes, chimney shading, an aging electrical service, and both HOA and utility requirements. The goal is simple—so you know what happens, when it happens, and how a professional team protects your roof, your electrical system, and your investment.
Why a Structured Process Matters
A solar array is not a single afternoon of panel placement. It is an engineered electrical generating system attached to your roof and tied to the public grid. Skipping steps or rushing documentation creates permitting delays, failed inspections, water-intrusion risk, or utility rejection.
A disciplined process does the opposite. It documents roof condition, electrical capacity, shade patterns, and local code requirements before anyone climbs a ladder with modules. Homeowners who understand the roadmap feel calmer, ask better questions, and recognize quality work when they see it.
Typical overall timeline for a straightforward residential project is 8–14 weeks from signed agreement to Permission to Operate (PTO). Complex roofs, panel upgrades, historic districts, or slow utilities can extend that window. The project described here finished in 11 weeks.
The Site Survey: Measuring Reality, Not Assumptions
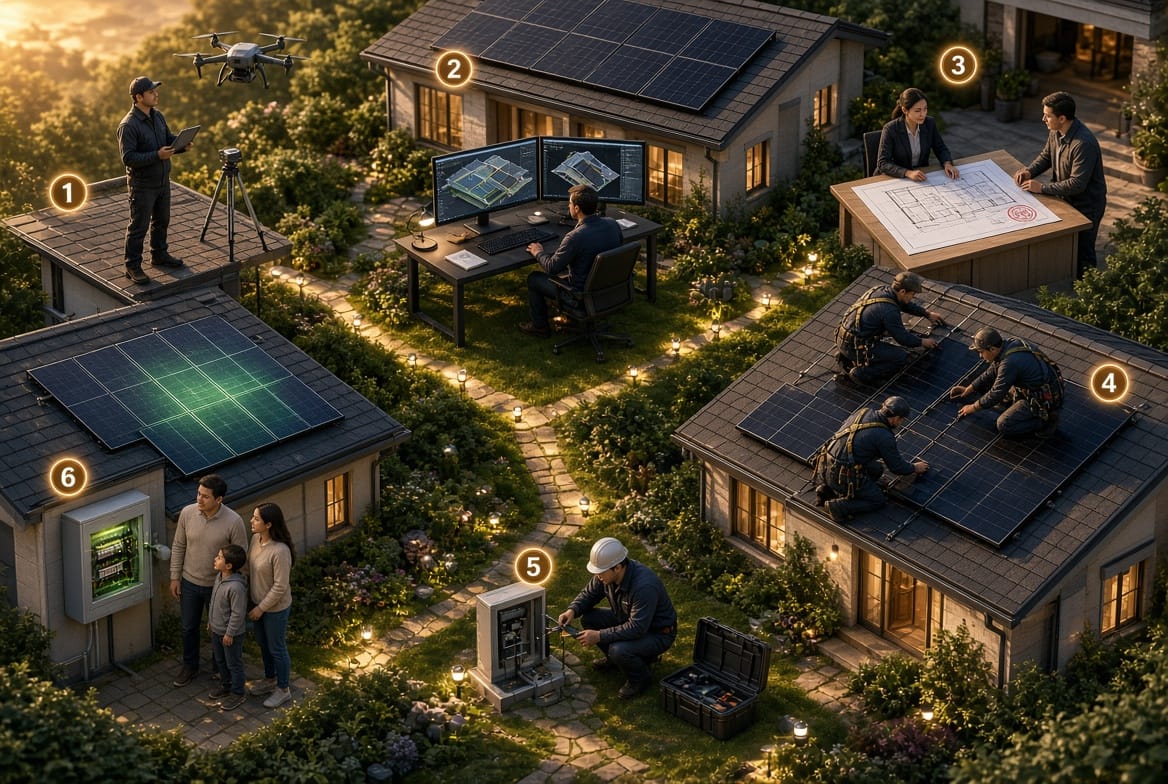
Everything begins with a site survey. This is not a casual walk-around. A trained assessor documents the physical and electrical conditions that will govern design and installation.
On survey day the team typically records:
- Roof type, age, pitch, and structural feel
- Rafter or truss spacing and accessible attic conditions
- Existing flashing, vents, skylights, and penetrations
- Compass orientation and shading analysis (trees, chimneys, neighboring structures)
- Main service panel amperage, bus rating, available breaker space, and grounding
- Preferred inverter and disconnect locations
- Access paths for materials and crew safety
Modern surveys often combine on-roof measurements with drone imagery and satellite irradiance data. The assessor notes any red flags: curling shingles, soft decking, undersized service, or trees that will require trimming.
Timeline expectation: 45–90 minutes on site; written findings usually follow within 3–7 business days.
In the example project, the survey revealed two issues that would have caused expensive change orders later: the 150-amp main panel lacked room for a solar breaker and the south-facing plane had a two-hour afternoon chimney shadow. Both findings were captured before design began. That early honesty is how professionals prevent surprise costs.
Homeowners should prepare by clearing attic access, noting any planned roof work, and listing questions about aesthetics or future battery readiness. A thorough survey is the foundation of a system that actually performs as promised.
Custom System Design: Engineering Performance and Code Compliance
Design turns survey data into a buildable plan. Engineers and designers select module count and layout, rail and attachment method, inverter topology, conductor sizing, and rapid-shutdown equipment required by current electrical code.
A complete design package normally includes:
- Roof plan showing array boundaries and setbacks
- Electrical single-line diagram
- Structural attachment details and load calculations
- Equipment specification sheets
- Estimated annual production and offset
Optimizers or microinverters are often specified when shade or multiple roof planes would otherwise drag string performance down. Attachment hardware is matched to roofing material—composition shingle, tile, metal, or membrane—so waterproofing remains intact.
Timeline expectation: 5–12 business days after survey, depending on revision rounds and whether an electrical-panel upgrade is required.
For the example home, designers specified 26 high-efficiency modules, module-level power electronics to isolate the chimney shade, and a 200-amp service upgrade. The production model showed an estimated 14,800 kWh in year one—enough to cover the household’s historical usage with a modest buffer. The homeowner reviewed a 3D layout before anything was submitted for permits. That review step prevents “I didn’t realize it would look like that” conversations after the crew arrives.
Good design is conservative on structure, generous on production modeling assumptions, and explicit about future expansion. If you may add a battery or EV charger later, say so now. Retrofitting later is always more expensive.
Permits and Approvals: The Paperwork That Protects Everyone
No reputable installer begins physical work without approved building, electrical, and often utility interconnection permits. Many communities also require HOA or architectural-review board sign-off.
The installer typically prepares and submits:
- Construction drawings and structural calculations
- Electrical diagrams meeting the National Electrical Code and local amendments
- Product listings and fire-setback documentation
- Interconnection application to the serving utility
Authority Having Jurisdiction (AHJ) review times vary widely. Some cities stamp plans in a week; others take six to eight weeks. Utilities add their own queue. HOA packets can add another two to four weeks if design guidelines are strict.
Risks of incomplete permitting: stop-work orders, failed final inspection, inability to interconnect, or insurance complications after a weather event. These are avoidable when the file is complete the first time.
Timeline expectation: 2–8 weeks, occasionally longer in constrained jurisdictions.
The example project required city building and electrical permits, utility interconnection, and an HOA packet with color-matched flashings and a sight-line drawing. The HOA requested one minor array shift away from the street-facing plane; the design team revised and resubmitted in four days. Total permit-and-approval window: 5.5 weeks. Transparent status updates kept the homeowners from wondering whether anything was happening.
Ask your installer who “owns” the permit process, how you will receive status notices, and what happens if the AHJ requests revisions. Clarity here is a mark of a professional operation.
Installation Day: Precision Work on Your Roof and Electrical System
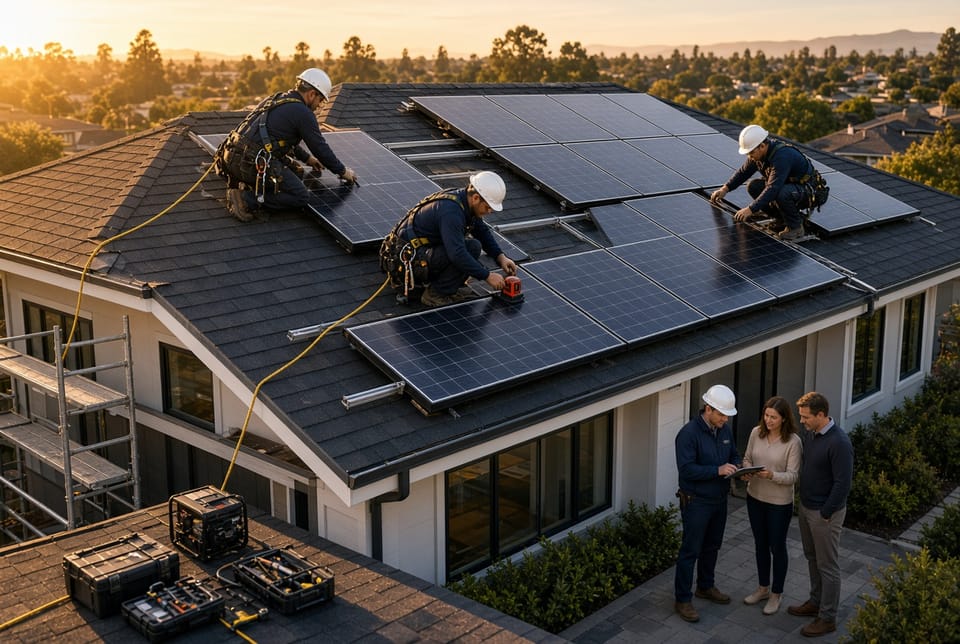
Once permits are in hand, the crew schedules installation. Residential roof work for a system of this size is commonly one to three days, plus a half-day if a panel upgrade is included.
A well-run install follows a predictable sequence:
- Protect landscaping and lay walk boards
- Install flashings and rails with manufacturer-specified fasteners and sealant
- Land modules, torque connections, and dress conductors
- Mount inverter, disconnects, production meter (if required), and labeling
- Complete home-run wiring to the main service or new subpanel
- Perform internal quality checks: polarity, insulation resistance, and torque audit
Weather and safety govern the calendar. Crews do not work on wet or high-wind roofs. Fall protection, lockout/tagout, and rapid-shutdown testing are non-negotiable.
In the example project, day one completed the service upgrade and rail layout. Day two set all 26 modules and landed the inverter. Day three finished terminations, labels, and a full internal commissioning checklist. The crew photographed flashings before covering them—documentation that later satisfied both the inspector and the homeowner.
What you should see: organized staging, daily cleanup, a designated lead who can answer questions, and no improvised penetrations. What you should not see: rushed sealant work, unlabeled conductors, or debris left in gutters.
If something unexpected appears—soft decking, hidden plumbing vent, or a different rafter layout—the lead should stop, document, and propose a coded solution rather than improvise. That pause is professionalism, not delay.
Inspection: Independent Verification Before the System Goes Live
After installation, the AHJ inspects the work. Some jurisdictions split building (roof attachments and fire setbacks) and electrical (wiring, grounding, labels, rapid shutdown) into two visits; others combine them.
Inspectors typically verify:
- Attachment pattern and flashing quality
- Conductor sizing, routing, and support
- Grounding electrode and equipment grounding
- Disconnect placement and labeling
- Rapid-shutdown initiation and indicator
- Match between the approved drawings and as-built conditions
Timeline expectation: inspection request to visit is often 3–14 days, depending on municipal backlog.
A clean first-pass inspection is the result of design accuracy plus crew discipline. Failed items—missing labels, incorrect breaker type, or undocumented field changes—create re-inspection fees and extra weeks.
The example project passed electrical and building on the first visit because the as-built photos and a red-line drawing were ready for the inspector. That preparation is standard on well-managed jobs.
You do not need to be an electrician to participate. Walk the site with the lead before the inspector arrives. Confirm labels are present and the work area is swept. Small courtesies help the visit go smoothly.
Activation and Permission to Operate
Passing inspection does not automatically mean the system can export power. The utility must grant Permission to Operate (PTO) after reviewing the interconnection package and, in some territories, installing or reprogramming a bidirectional meter.
Until PTO arrives, the system remains off or in a non-export mode. Turning it on early can violate interconnection rules and void warranties.
Timeline expectation: 1–6 weeks after final inspection, longer in utilities with heavy solar queues.
Activation day itself is brief: the installer or utility confirms meter configuration, the system is commissioned, monitoring is linked to your phone or portal, and you receive a walkthrough of shutdown procedures and production expectations.
In the example project, PTO arrived 12 days after inspection. The family watched first-day production on the monitoring app that afternoon. Year-one actual output later tracked within 4 percent of the design model—evidence that survey, design, and installation had aligned.
Keep the commissioning packet: as-built drawings, equipment serial numbers, warranty registrations, and PTO letter. Those documents matter for insurance, resale, and future service.
Timeline at a Glance
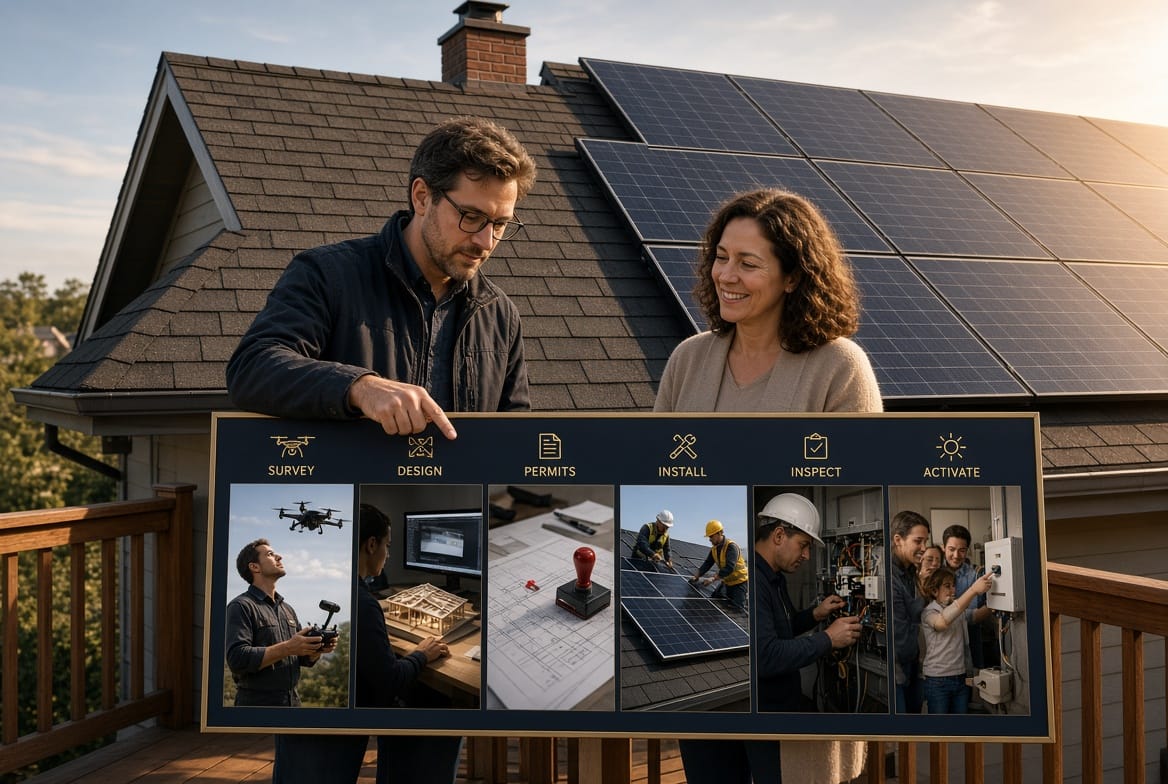
Use this as a planning frame, not a guarantee. Local rules and weather always govern the calendar.
- Site survey: scheduled within 1–2 weeks of agreement; results in 3–7 days
- Design and homeowner review: 1–2 weeks
- Permits, HOA, and interconnection filing: 2–8 weeks
- Installation: 1–3 days on site
- Municipal inspection: 3–14 days in queue
- Utility PTO / activation: 1–6 weeks after inspection
Major-project total in the example: 11 weeks contract-to-activation, including a service upgrade and HOA revision.
Ask for a written milestone schedule at kickoff and a single point of contact who updates you when a date moves. Silence is the most common source of homeowner frustration; good companies eliminate it.
How to Stay Comfortable While the Work Happens
You do not need to manage subcontractors. You do need clear communication.
Request, in writing:
- Who to call on install morning
- How roof penetrations will be warranted
- Whether a panel upgrade is included or extra
- How monitoring will be set up and whose name is on the portal
- What happens if inspection fails
A reassuring, authoritative installer answers those questions before you ask a second time. They photograph hidden work, register warranties in your name, and leave the property cleaner than they found it.
Solar is a 25-year asset. The installation process is only a few weeks. Done correctly, those weeks produce decades of quieter utility bills and a documented, insurable system.
Understand the Solar Installation Process
If you are ready to see how this sequence applies to your roof, electrical service, and energy goals, the next step is a conversation—not a high-pressure close.
A specialist can review your usage, discuss survey timing, and outline a realistic path from first measurement to activation. Understanding the process is the surest way to choose a team that will treat your home with the care a major energy project deserves.
Call Now for Site Survey to Activation Guidance