The Roof Leak Repair: Finding and Fixing the Source
A roof leak rarely announces itself at the exact spot where water first enters. A brown ceiling ring in a hallway may start at a cracked pipe boot, a failed valley, or loose flashing several feet away. That is why successful roof leak repair begins with diagnosis, not with a random tube of sealant.
Stop Roof Damage Today – Call for Repair
When you locate the true entry point, the repair is smaller, more durable, and far less likely to return after the next storm. When you guess, water keeps moving through decking, insulation, and framing. This guide explains how to find roof leaks using water stains, a careful attic inspection, and a controlled hose test; how to recognize the most common sources — flashing, valleys, and vents; and which repair methods actually close the path water is using.
The goal is not to turn every homeowner into a full-time roofer. The goal is to help you understand the problem clearly so you can act early, ask the right questions, and protect the structure before a small leak becomes interior damage.
Why Finding the Source Matters More Than Wiping the Stain
Water follows gravity, then it follows the easiest path. On a sloped roof that path is often a rafter edge, a seam in the sheathing, a fastener, or the back of a soffit. The stain you see on drywall is the exit, not always the entry.
Treating only the stain can hide an active leak. Paint and stain blockers make a ceiling look finished while moisture continues to wet insulation, corrode fasteners, and support mold. A proper diagnosis answers three questions:
- Where is water entering the roof system?
- What material failed — flashing, valley metal, a vent boot, shingles, or a penetration?
- How far has moisture already traveled into the attic or walls?
Once those answers are clear, repair becomes a targeted job instead of a cycle of caulk, hope, and repeat.
Reading Water Stains as Diagnostic Clues
Interior stains are useful when you treat them as evidence, not as the full story. Look at color, shape, timing, and location.
Fresh leaks often show a tan or yellow ring with a darker center. Older or repeated leaks may look brown, brittle, or slightly sagging. A stain that darkens during rain and lightens as it dries is still active. A stain that never changes may be historic — but only an attic check can confirm that the path is truly dry.
Pay attention to patterns:
- A stain directly below a bathroom fan, plumbing stack, or attic vent often points to a vent boot or housing leak.
- A stain near an interior chimney wall frequently traces back to chimney flashing.
- A long, wandering discoloration along a ceiling line can mean water is running down a rafter from a valley or sidewall.
- Multiple small spots under the same roof plane may indicate scattered shingle or fastener issues rather than one dramatic hole.
Photograph stains before and after storms. Note the date, wind direction, and whether the rain was wind-driven. Those details help a roofing technician narrow the search when the roof itself looks almost normal from the ground.
The Attic Inspection: Where Most Hidden Leaks Reveal Themselves
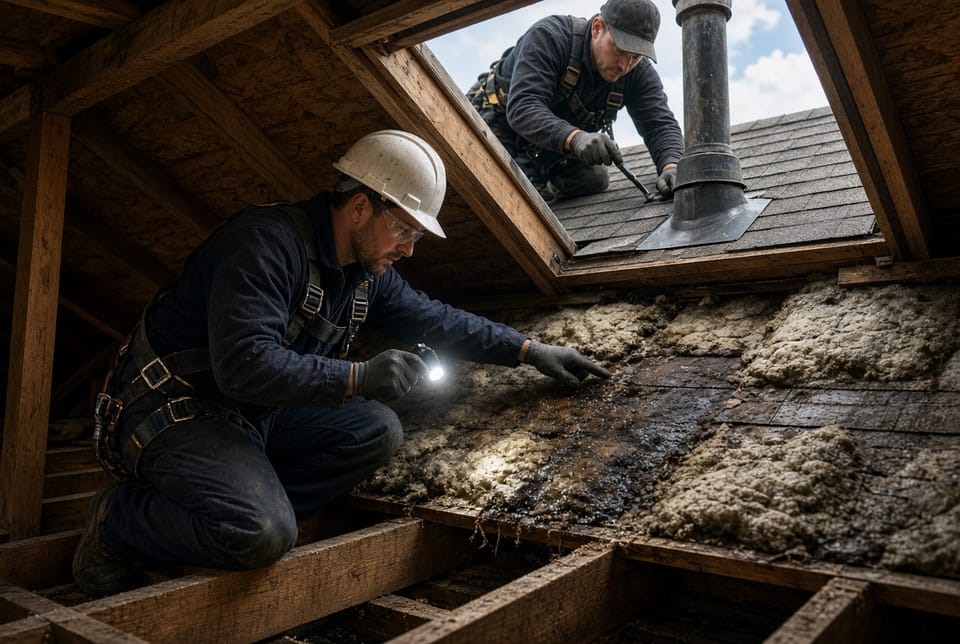
If the attic is accessible, it is usually the most valuable diagnostic space in the house. Bring a bright light, wear gloves, step only on joists or secure boards, and watch for electrical wiring and insulation dust.
Start at the stain location, then work upslope. You are looking for the highest point of moisture, because water generally enters above the lowest wet mark.
Common attic clues include:
- Darkened or compressed insulation
- Damp, dusty, or musty wood
- Black or gray staining on the underside of roof decking
- Rusted nails or “black dots” where water has run along fasteners
- Daylight visible through a crack, hole, or failed penetration
- Mold growth on sheathing or truss members
- Water tracks along a rafter that lead toward a vent, chimney, or valley line
Dry water tracks can still be useful. Dust that has been washed into streaks, or insulation that is matted in one channel, can show an old path that becomes active again in wind-driven rain.
Do not confuse every wet spot with a roof covering failure. In cold weather, condensation from poor ventilation or a warm, moist attic can drip onto insulation and mimic a leak. Condensation usually appears more broadly on cold surfaces. A true weather leak is more likely to line up with a penetration, valley, or flashing detail and to worsen during rain.
If you find soaked insulation, lift it only enough to inspect the deck, then leave a clear note of the area. Wet insulation loses R-value and should be addressed after the leak source is closed.

The Hose Test: Confirming the Path Without Waiting for the Next Storm
A controlled hose test is one of the most practical ways to confirm a suspected source. It is not a pressure wash, and it should never drive water under shingles with a hard jet. The method is slow, sectional, and observed from inside.
One person works on the roof or from a stable ladder with a standard garden hose on a gentle shower pattern. A second person stays in the attic or under the stained ceiling with a light and a phone for quick communication.
Work from the bottom up:
- Wet the area directly above the interior stain first, including the nearby drip edge or lower course, for several minutes.
- If nothing appears inside, move upslope in small zones — around a vent, along a section of flashing, then into a valley.
- Isolate one detail at a time. Do not soak the entire roof at once, or you will not know which component failed.
- Pause between zones long enough for water to travel. Some leaks take a few minutes to show.
If water appears while only one detail is wet, you have a strong diagnosis. If the hose test stays dry, the leak may be wind-driven from a side you did not wet, intermittent ice-damming in winter, or a wall/window path rather than the roof field.
Safety comes first. Wet shingles are slick. Stay off steep or fragile roofs. If the pitch, height, or weather makes the test unsafe, a professional should perform it with proper fall protection.
Common Leak Source: Flashing
Flashing is the thin metal that directs water around interruptions in the roof — chimneys, sidewalls, skylights, dormers, and roof-to-wall joints. When flashing is bent, rusted, short, unsealed at the wrong place, or installed without counter-flashing, water finds the gap.
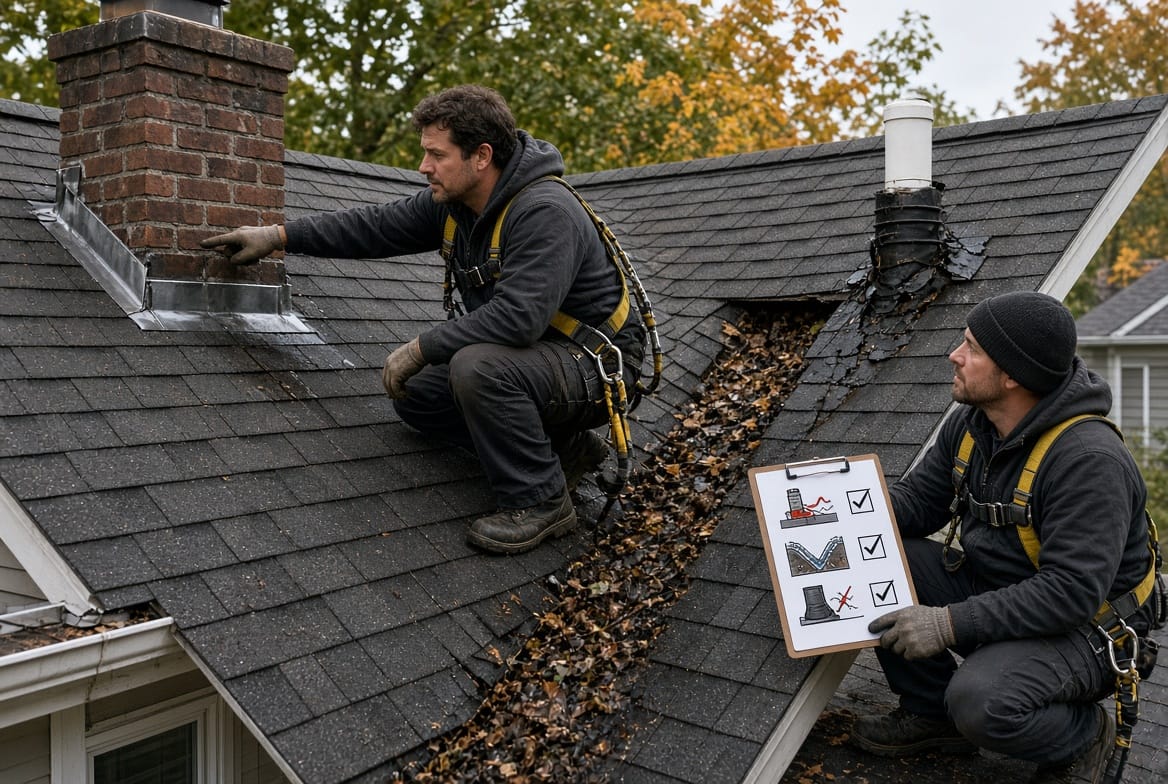
Chimney flashing is a frequent source because it combines step flashing, counter-flashing, and sometimes a cricket on the high side. A missing cricket lets water and debris pile against the upslope face. Separated counter-flashing at the masonry lets wind-driven rain in even when the shingles look fine.
Sidewall or step flashing fails when boards are butted to siding without a proper kick-out, or when new siding is installed over the top of flashing that should discharge water out and away. The leak then shows up at a ceiling or wall corner far from the roof edge.
Repair methods for flashing problems usually include:
- Removing enough shingles to expose the metal
- Replacing rusted or undersized flashing with compatible material
- Rebuilding step flashing so each course laps correctly
- Adding or restoring counter-flashing at masonry
- Installing a cricket where water ponds against a wide chimney
- Correcting kick-out flashing so water leaves the wall line
Sealant alone is a temporary patch on flashing. It can buy time in an emergency, but metal that has pulled away or rusted through needs to be replaced and lapped the way the roof was designed to shed water.
Common Leak Source: Valleys
Roof valleys concentrate a large amount of water into a narrow channel. Leaves, pine needles, and shingle granules collect there, dams form, and water is forced sideways under the shingle edges.
There are several valley styles — open metal valleys, woven shingle valleys, and closed-cut valleys. Each can leak for a different reason. Open metal may rust, split at an oil-canning crease, or lose its seal at the top intersection. Woven or closed valleys may wear through where shingles flex, or they may have been installed without an ice-and-water underlayment beneath.
From the attic, a valley leak often appears as a dark line along the valley framing. From the exterior, look for:
- Debris packed in the channel
- Exposed or wrinkled underlayment
- Cracked or punctured valley metal
- Shingles eroded at the cut edge
- Fasteners showing in the water path
Repair may be as simple as cleaning the valley and replacing a short run of damaged metal. More often it requires lifting shingles on both sides, installing a new ice-and-water membrane, setting new valley metal, and re-lacing or re-cutting the shingles so water stays in the channel.
Because valleys carry so much volume, a weak repair fails quickly. This is one of the details where professional workmanship pays for itself.
Common Leak Source: Vents
Vents and other roof penetrations are among the most common residential leak sources, especially plumbing vent boots. The rubber collar around a pipe dries, cracks, and splits. Water then runs down the pipe into the attic and follows the nearest framing line to a ceiling.
Bathroom fans, kitchen vents, ridge vents, and attic box vents can leak at the flange, at cracked plastic housings, or where nails have backed out. A boot that looks intact from the ground may be split on the upslope side, exactly where water hits first.
Typical vent-related repairs include:
- Replacing the entire boot rather than caulking the cracked collar
- Using a metal base with a flexible collar sized to the pipe
- Resetting a fan housing on a new flange and underlayment
- Sealing only the exposed edges that are designed to be sealed — never blocking the drainage path under a shingle with a heavy bead of tar
- Checking that the pipe flashing sits in the correct shingle course, not buried too high or too low
If several boots on an older roof are brittle at once, replacing them together is usually smarter than waiting for each one to fail during a different storm.
Other Sources Worth Checking After the Big Three
If flashing, valleys, and vents are sound, continue the search in a logical order:
- Damaged or missing shingles on the field of the roof
- Exposed or backed-out nails
- Failed skylight curbs and older skylight seals
- Deteriorated pipe collars on older galvanized stacks
- Poorly terminated satellite mounts, solar attachments, or abandoned jacks
- Clogged gutters that force water back under the first course
- Ice dams in cold climates, where melted water backs up under shingles
Each of these still benefits from the same rule: find the highest wet mark, match it to an exterior detail, and confirm with weather history or a hose test when safe.
Repair Methods That Last
Emergency tarping is appropriate when rain is still in the forecast and the deck is open. A tarp is not a repair. It is a pause that protects drywall and insulation until the source can be opened correctly.
Durable roof leak repair usually follows this sequence:
- Confirm the entry point from attic evidence and exterior detail
- Remove only the materials needed to expose the failed component
- Dry or replace wet underlayment and damaged sheathing
- Install ice-and-water shield at valleys, penetrations, and vulnerable eaves where the climate calls for it
- Replace flashing, valley metal, or vent boots with compatible, lapped materials
- Reinstall shingles so water sheds over each course
- Recheck the attic after the first significant rain
Avoid “roof glue” as the primary strategy on a detail that has physically separated. Sealant can help at a tiny pin-hole or at a fastener head in an emergency. It does not rebuild missing metal, restore a cracked boot, or recreate a valley’s drainage plane.
If decking is soft, dark, and spongy, the repair must include the wood. Covering rotten sheathing traps moisture and shortens the life of the new materials.
When to Call a Roofing Professional
Call for help when the roof is steep, wet, two stories or higher, or covered with brittle aging shingles. Call when stains are spreading, when you see daylight through the deck, when insulation is soaked, or when electrical fixtures sit near the drip path.
A professional diagnosis should sound specific: the technician should be able to name the detail, explain how water is traveling, and describe the repair layers — not just “we will coat the roof.” That specificity is how you know the source, not only the symptom, is being addressed.
Homeowners who stay off the roof and document stains, storm dates, and attic photos still play an important role. Good information shortens the inspection and reduces exploratory tear-off.
Protect the House While You Plan the Repair
Move furniture, place a bucket under active drips, and keep people away from sagging drywall. If a ceiling bulge is heavy with water, a small, controlled puncture can release pressure and reduce the chance of a sudden collapse — then catch the water. Run a dehumidifier if the attic or room is damp, and do not install fresh insulation over a leak that is still open.
These steps do not fix the roof. They limit secondary damage while the source is being located and closed.
A Clear Path From Stain to Finished Repair
Roof leaks feel unpredictable until you treat them as a tracing problem. Water stains show where moisture arrived. An attic inspection shows how it traveled. A careful hose test can confirm the detail. Most often the failed piece is flashing, a valley, or a vent. Repair those components with proper lapping and dry substrate, and the ceiling can be refinished with confidence.
Do not wait for the stain to grow. The least expensive repair is almost always the one done while the wood is still sound.
Fix roof leaks before they cause damage.
Call Today for Expert Attic & Roof Inspection