The Roof Inspection: What to Look For After a Storm
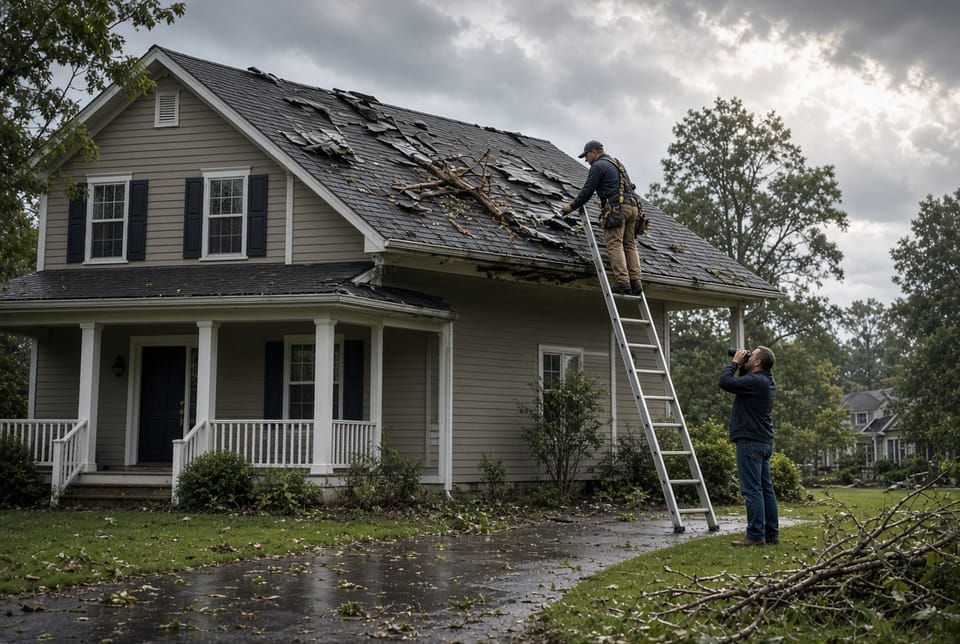
A severe storm can pass in an hour and still leave your roof carrying hidden stress. Wind lifts tabs that looked sealed the day before. Hail bruises shingles that still appear intact from the street. Debris scuffs flashing and clogs gutters. The result is rarely a dramatic collapse. More often it is a small opening that lets water into the deck, the insulation, and eventually the ceiling.
Call Now for a Post-Storm Roof Inspection
A post-storm roof inspection is not about panic. It is a structured check that protects the largest envelope of your home. You can complete a useful first pass from the ground and from the attic. A licensed professional then confirms what you cannot safely see on the slope itself. This guide explains what to inspect, which signs matter, and when to call for help—so you can act with confidence instead of guessing.
Inspect your roof after storms. If anything looks uncertain, call for a professional assessment at (855) 321-3154.
Why a Post-Storm Check Matters
Asphalt shingles, metal flashing, and gutter systems are designed to shed water, not to absorb repeated impact. After high wind or hail, three things change quickly:
- Seals break. Factory adhesive on shingle tabs can separate even when the shingle stays in place.
- Protective granules loosen. Those mineral chips shield the asphalt from ultraviolet light. Once they leave, aging accelerates.
- Water finds new paths. A lifted piece of flashing or a dented pipe boot does not leak in dry weather. It leaks in the next rain band.
Waiting weeks “to see if it leaks” is how small storm damage becomes interior staining, wet insulation, and mold. A calm inspection within 24 to 72 hours—once the weather is safe—gives you the best chance to document the event and stop secondary damage.
Safety First: Inspect Without Climbing a Compromised Roof
Do not walk the roof after a storm unless you are a trained professional with fall protection. Wet shingles are slick. Decking can be soft where water already entered. Hidden punctures and lifted tabs create trip and fall hazards.
Stay off the roof if any of the following apply:
- Surfaces are still wet, icy, or covered in debris
- Wind remains above a light breeze
- Power lines are down or hanging near the house
- The roof line looks sagging or uneven
- A large limb is resting on the structure
Your safest tools are binoculars, a phone camera with zoom, a flashlight, and access to the attic. Photograph every concern from multiple angles and note the date of the storm. Those images support both repair decisions and any insurance conversation that follows.
Start on the Ground: A Systematic Walk-Around
Walk the full perimeter of the house. Pause at each corner. Wind uplift is strongest at eaves, rakes, ridges, and valleys, so those edges deserve extra attention. Look up the slope that faced the prevailing wind first.
From the yard and driveway, scan for:
- Gaps in the shingle field that expose dark underlayment
- Tabs that sit higher than their neighbors or look creased
- Ridge-cap pieces that are missing, twisted, or out of line
- Branches, shingles, or torn underlayment on the lawn
- Dents in soft metal: vents, gutter faces, and flashing
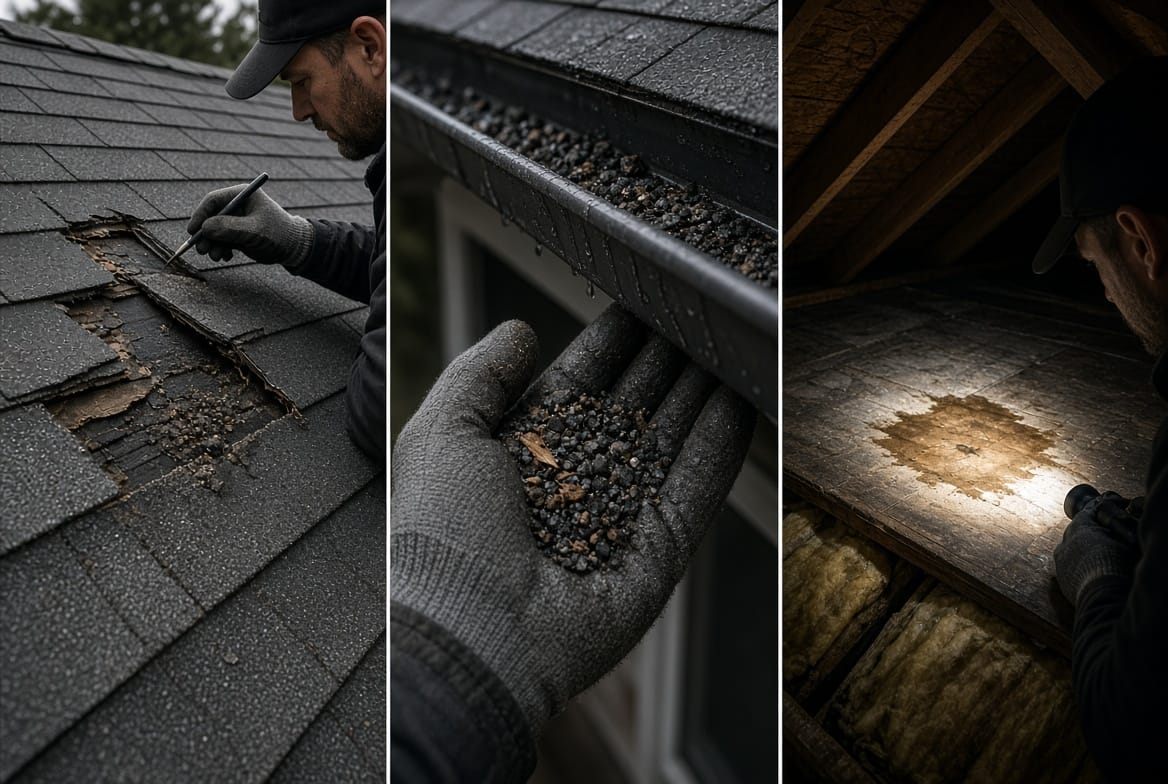
A few loose granules after years of weather is normal aging. A sudden pile of grit under a downspout after one storm is different. Treat that pile as evidence, not as routine dirt.
Shingles: The First Line of Defense
Asphalt shingles are the most common residential covering and the most frequent place storm damage appears. You are looking for more than “something missing.”
Missing shingles leave a dark patch of felt or synthetic underlayment. That patch is not waterproof for long. The next rain can soak the deck.
Lifted or curled tabs often mean the adhesive seal failed. The shingle may still be attached at the nail line, yet it can flap in later wind and allow driven rain underneath.
Creased or cracked tabs show that wind folded the material. A clean horizontal crease across a tab is a classic wind-damage mark.
Granule loss shows as bald or darker spots on the shingle face and as grit in gutters. Granules protect against sun and add impact resistance. Heavy loss after hail shortens remaining life even if no leak exists today.
Hail bruises are circular, slightly darker marks where impact fractured the mat beneath the granules. They are easy to miss from the street and easier for a trained eye to confirm up close.
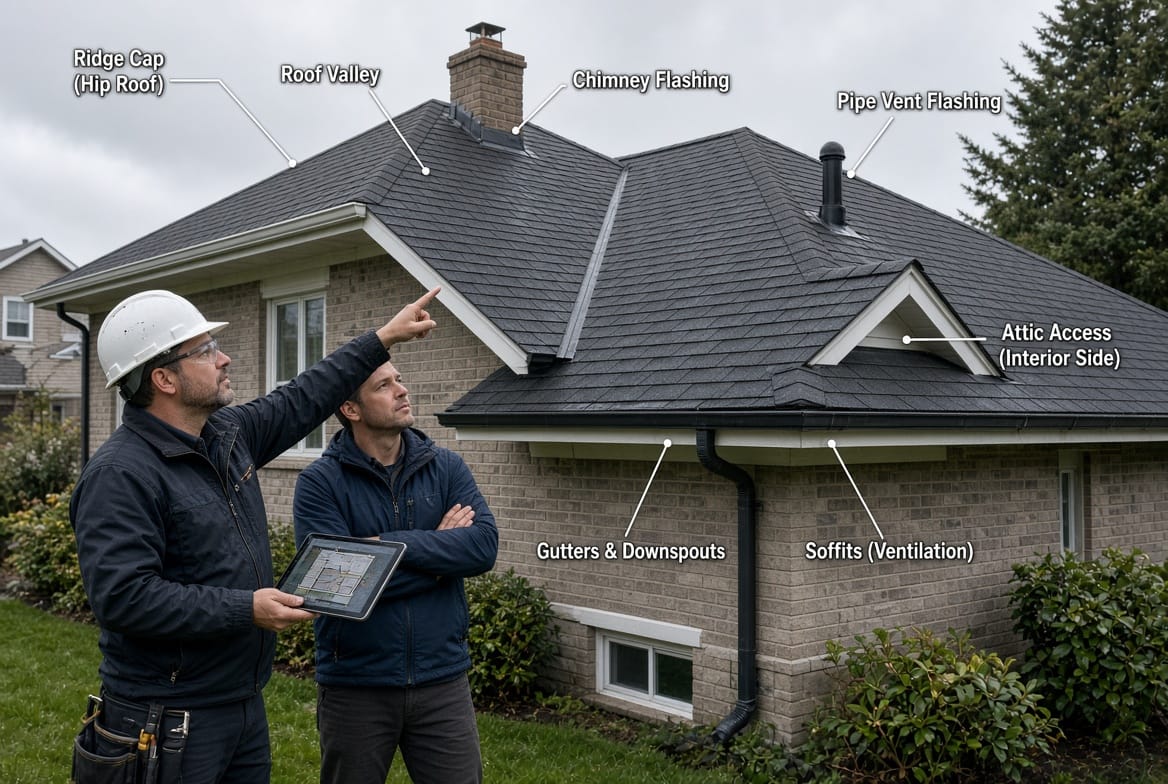
Pay special attention to the ridge and hips. Ridge-cap shingles sit at the highest, most exposed line. They are often the first pieces to lift.
If you see exposed underlayment, a cluster of missing tabs, or a pattern of damage along one edge, treat it as urgent documentation, not as a cosmetic issue.
Flashing: Where Water Tries to Enter First
Flashing is the thin metal that seals transitions—chimneys, sidewalls, skylights, plumbing stacks, and roof-to-wall joints. Storms loosen fasteners, bend metal, and crack sealant. Those failures are among the most common sources of interior leaks.
Inspect every penetration you can see from the ground:
- Chimney flashing for gaps, lifted step flashing, or crumbling sealant at the counterflashing
- Pipe boots for split rubber collars or displaced storm collars
- Skylight frames for bent metal, cracked seals, or shifted glass
- Valley metal for debris dams, dents, or separation
- Drip edge at the eaves for lifting or missing sections
A smear of roofing cement over a joint is not a repair. It is often a sign that the flashing already failed once. Bent or rusted metal after hail is also useful evidence: soft metals record impact even when shingles look only slightly worn.
If flashing has pulled away even a few millimeters, water can travel sideways under shingles and appear as a stain far from the actual opening. That is why flashing problems feel “mysterious” until someone traces them.
Gutters and Downspouts: Drainage and Evidence
Gutters do two jobs after a storm. They carry water away from the foundation, and they collect proof of what happened on the roof.
Look for:
- Sections pulled away from the fascia
- Sagging runs or separated joints
- Dents that suggest hail or flying debris
- Overflow stains on siding
- Granule accumulation in the trough and at downspout exits
A light dusting of granules can be ordinary. A sudden, heavy deposit after one event usually means the shingle surface lost a meaningful amount of its protective layer. Clear debris so water can move, but save a photo of the grit before you rinse everything away.
Confirm that downspouts still discharge several feet from the foundation. Storms can knock extensions loose. Water dumped at the base of the wall creates a different problem: foundation and basement moisture that looks unrelated to the roof until you connect the path.
The Attic: The Check That Finds What the Curb Misses
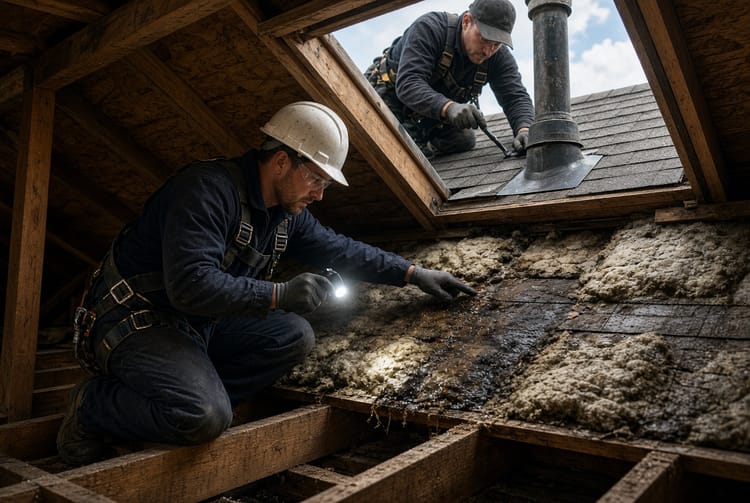
The most important half of a homeowner inspection happens indoors. Enter the attic with a bright flashlight after the storm and again after the next rain if possible.
Search the underside of the deck and the insulation for:
- New water stains or dark streaks on sheathing and rafters
- Wet, compressed, or discolored insulation, especially near eaves and penetrations
- Daylight showing through gaps, nail holes, or torn underlayment
- Musty odor or early mold on wood
- Dampness around plumbing stacks, fans, and chimney chases
Daylight through the deck is an emergency signal. Wet insulation loses R-value and holds moisture against wood. Stains that were not there before the storm are the interior fingerprint of a roof opening.
Also glance at interior ceilings on the top floor. Yellow or brown rings, bubbling paint, and soft drywall often appear after the next rain, not during the storm itself. Note the location so a professional can match it to a roof plane above.
Signs of Damage at a Glance
Use this list as a field checklist. Any single item is worth documenting. Several items together usually mean you should stop DIY assessment and bring in a professional.
- Missing shingles or bare underlayment patches
- Lifted, curled, or creased shingle tabs
- Missing or twisted ridge-cap pieces
- Dark or bald spots from granule loss
- Heavy granules in gutters or at downspout outlets
- Circular hail marks or spongy spots on shingles
- Lifted, bent, or unsealed flashing
- Split pipe boots or displaced vent caps
- Dented or detached gutters
- New attic stains, wet insulation, or visible daylight
- Interior ceiling rings or a sudden musty smell
Normal aging and storm damage can look similar on an older roof. The timing is the clue. If the change appeared right after a named wind event or a hail report in your area, treat it as storm-related until a licensed inspector says otherwise.
When to Call a Professional
A ground-and-attic check is a screening tool. It is not a substitute for a full roof evaluation. Call a licensed roofer when you see any of the following:
- Active leaking or new interior stains
- Exposed underlayment or a cluster of missing shingles
- Visible sagging along the ridge or between rafters
- Flashing that has pulled away from a chimney, wall, or skylight
- Significant granule piles after a single storm
- Hail-size dents in gutters, vents, or HVAC fins
- A tree limb impact, even if the branch is already removed
- A steep roof, multi-story height, or any condition that would require walking the surface
- You need documentation for an insurance claim
Professionals bring ladders, harnesses, moisture meters, and the experience to distinguish cosmetic scuffing from functional failure. They can also install temporary protection—such as a properly fastened tarp—if another rain band is coming.
Be cautious with unsolicited door-to-door offers after a widespread storm. Verify licensing, insurance, and a local business presence. A reputable company will inspect, photograph, and explain findings without pressure.
Inspect your roof after storms.
Document, Protect, Then Repair
If you find damage, take clear photos of the roof from the ground, close-ups of problem areas, gutter granules, and any attic or ceiling stains. Keep a simple note of the storm date and what you observed. Do not begin major repairs before you understand coverage if you plan to file a claim. Do not wait to stop active water entry. Interior protection—buckets, plastic over furnishings, and a professional emergency dry-in—limits the second wave of cost.
After repairs, ask what caused the failure and whether nearby components should be upgraded: better pipe boots, improved flashing details, gutter fasteners, or ridge ventilation. A storm inspection is also a chance to catch wear that the storm only made visible.
A Calm, Repeatable Habit
You do not need to become a roofer. You need a habit: after every significant wind or hail event, walk the yard, scan the edges, check the gutters, and look through the attic with a flashlight. Most homes will show nothing urgent. The ones that do show something are the homes that avoid a soaked ceiling three rains later.
Your roof is still the shield over everything you own. A short, methodical inspection after the clouds clear is one of the highest-value checks a homeowner can perform. Inspect your roof after storms.
Protect Your Home From Hidden Storm Damage – Call Now