The Roof Flashing Drip Edge: Protecting Eaves from Rot
A well-maintained roof does far more than keep rain out of living spaces. One of its most critical yet frequently overlooked components is the drip edge—a simple metal flashing installed at the roof perimeter. This unassuming strip plays an outsized role in safeguarding the vulnerable edges of your home. Without it, water can seep behind gutters, saturate the fascia boards, and trigger progressive rot that compromises structural integrity, invites pests, and leads to expensive repairs. Understanding the roof drip edge, recognizing early warning signs, and knowing when to replace it empowers homeowners to protect their investment with confidence.
Protect Your Eaves from Rot – Call Now!
This guide explores every essential aspect of the drip edge: what it is, why it matters, how damage develops, the replacement process, and the long-term benefits of professional attention. With clear explanations and practical insights, you will gain the knowledge needed to keep your eaves dry, strong, and free from the silent threat of rot.
What Exactly Is a Roof Drip Edge?
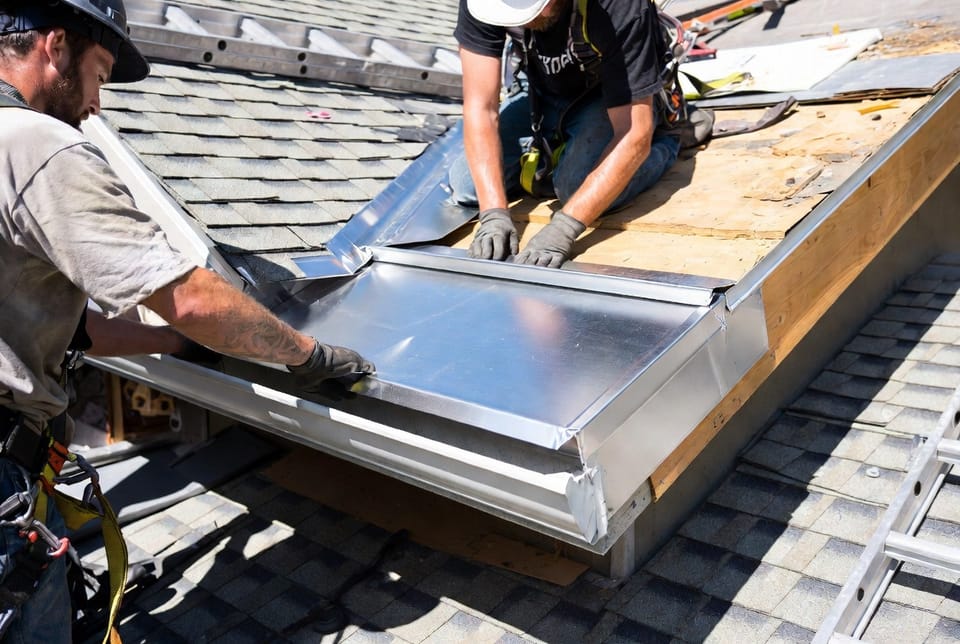
A drip edge is a narrow, L-shaped or T-shaped piece of metal flashing installed along the lower edges of a roof, precisely where the roof covering meets the eaves and rakes. Typically fabricated from aluminum, galvanized steel, or occasionally copper, it extends slightly beyond the roof deck and fascia board. Its design features a projecting lip that forces water to drip clear of the underlying structure rather than clinging and traveling backward.
In modern roofing systems the drip edge sits beneath the underlayment and shingles at the eaves, creating a continuous barrier. At the rakes it often overlaps the fascia for added protection. Building codes in many regions now require drip edge on new construction and major reroofs because of its proven ability to manage water. When correctly installed, it works in harmony with gutters, downspouts, and the roof covering to form a complete drainage pathway.
The metal itself resists corrosion when properly coated or alloyed, and its rigid profile maintains shape under temperature swings and wind loads. Homeowners sometimes confuse drip edge with other flashings such as step flashing or valley metal; however, the drip edge is uniquely dedicated to the perimeter edge and the critical task of directing runoff away from wood components.
Why the Drip Edge Matters for Eave Protection
Water is relentless. Gravity pulls it downward, capillary action draws it into tiny gaps, and wind can drive it sideways. At the roof edge these forces converge. Without a drip edge, rainwater flowing off the shingles can curl under the roof edge, run behind the gutter, and soak the fascia board—the horizontal board that caps the ends of the roof rafters. Once saturated, wood begins to soften, lose strength, and eventually rot.
Rot does not remain isolated. Softened fascia can allow moisture to reach the roof sheathing, rafter tails, and even interior framing. Gutters that fill with debris or pull away from the house exacerbate the problem by channeling water directly against unprotected wood. Over time the damage spreads, creating ideal conditions for carpenter ants, termites, and mold. Exterior paint peels, siding warps, and the home’s curb appeal declines.
A properly installed drip edge interrupts this cycle. Its projecting lip ensures that water free-falls into the gutter or clear of the wall rather than traveling backward. It also provides a clean termination for the underlayment, preventing wind-driven rain from lifting the edge of the roofing material. In freezing climates the drip edge helps reduce ice-dam formation by keeping the eave edge free of standing water that can freeze and expand.
The financial stakes are high. Replacing a few linear feet of drip edge costs a fraction of reconstructing rotted fascia, repairing sheathing, or addressing interior water damage. Early investment in this critical component delivers peace of mind and preserves the structural health of the entire roof assembly.
How Water Flow Works With and Without Drip Edge
Visualizing water movement clarifies the drip edge’s value. On a roof equipped with a continuous drip edge, rain travels down the shingle surface, reaches the metal lip, and drops cleanly into the gutter. Capillary action is blocked because the metal creates a physical break. Wind-driven rain is deflected outward.
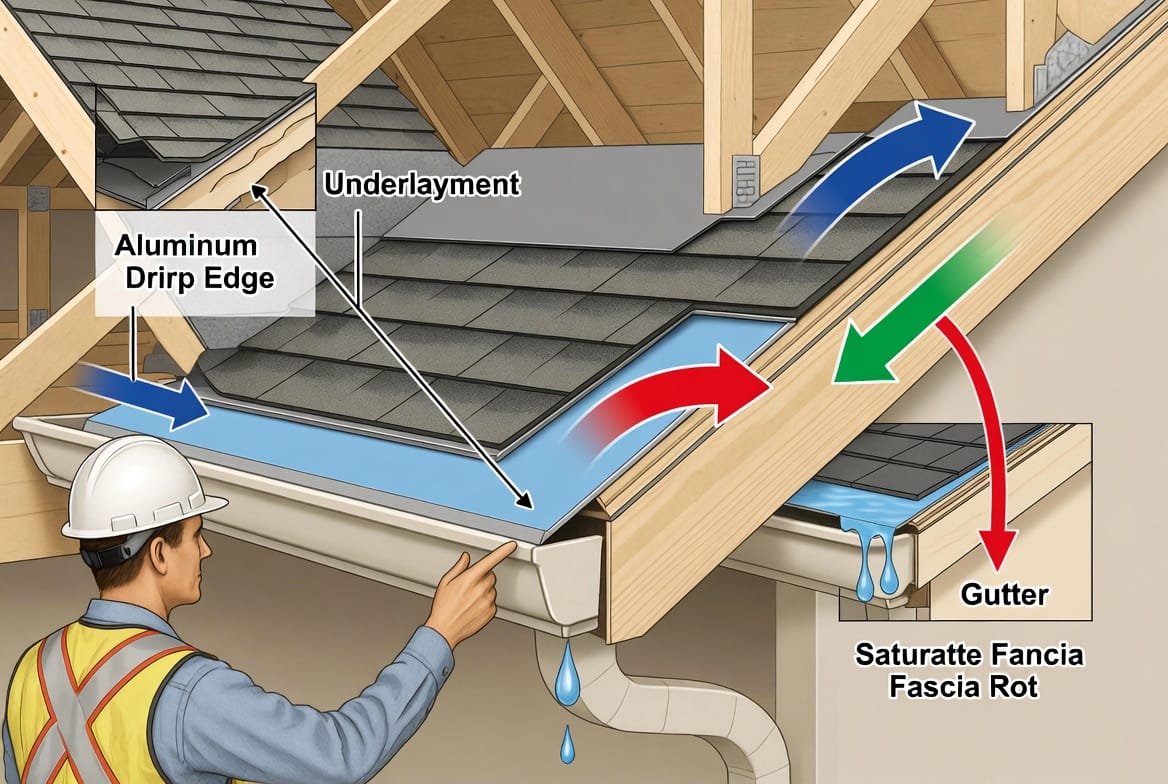
Contrast this with a missing or damaged drip edge. Water follows the underside of the shingles or roof decking via surface tension, migrates behind the gutter hanger, and saturates the fascia. Repeated wetting and drying cycles accelerate decay. In winter, ice can form in these gaps, prying boards apart and enlarging pathways for future intrusion. The difference between protected and unprotected edges is often the difference between decades of reliable service and premature structural failure.
Signs That Your Drip Edge Needs Attention
Regular visual inspection from the ground or a stable ladder reveals most problems. Watch for these clear indicators:
- Missing sections – Gaps along the eave or rake where metal should be present.
- Rusted or corroded metal – Orange or white oxidation that weakens the flashing and creates holes.
- Bent, loose, or lifted edges – Distortion caused by wind, ice, or improper fastening.
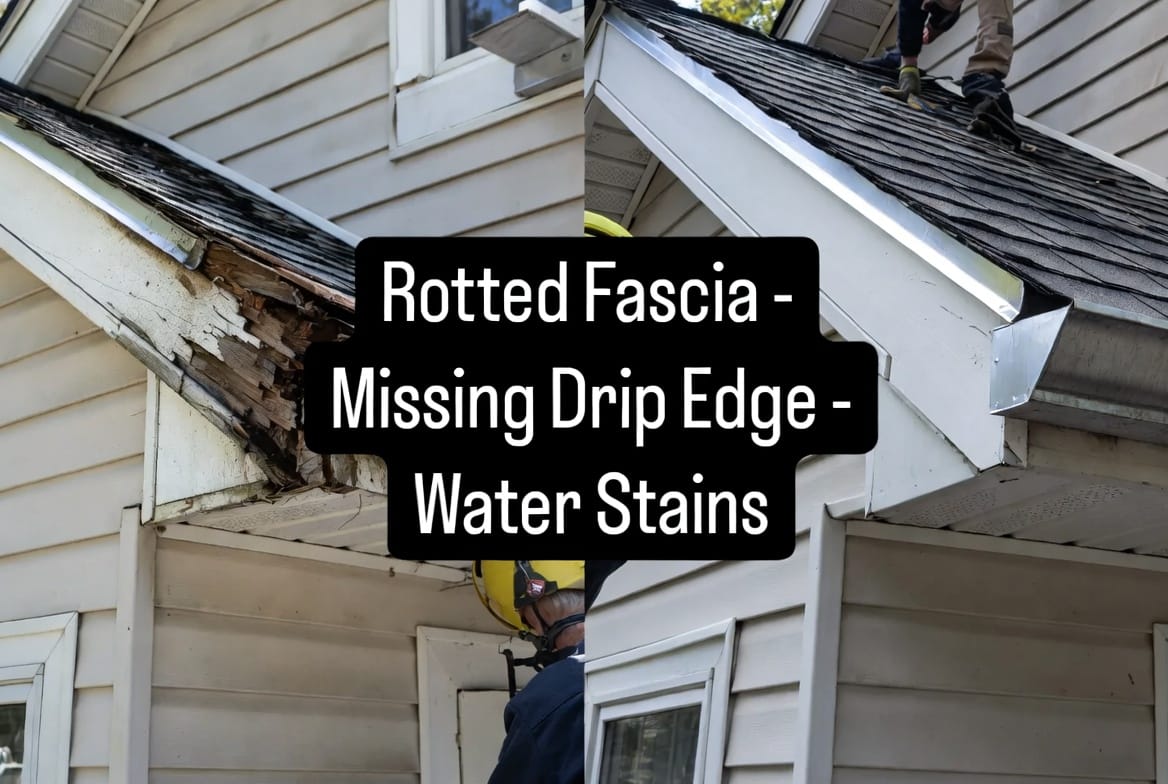
- Water stains on fascia or siding – Dark streaks or discoloration immediately below the roof edge.
- Soft or crumbling fascia boards – Wood that yields to gentle pressure or shows visible decay.
- Peeling paint and blistering – Moisture trapped behind the finish.
- Gutters pulling away or overflowing – Often linked to water undermining the attachment points.
- Visible mold or mildew – Especially along the lower edge of the roof.
Any one of these signs warrants closer examination. Multiple signs typically indicate progressive damage that requires prompt professional evaluation.
The Consequences of Neglecting Drip Edge Problems
Ignoring early warning signs allows minor issues to escalate. Softened fascia can no longer support gutter weight, leading to sagging or detachment. Water then cascades down exterior walls, staining siding and saturating insulation. Interior ceilings may develop stains or drips during heavy storms. Structural members begin to lose load-bearing capacity, potentially affecting roof pitch and attic ventilation.
Insurance claims related to long-term neglect are frequently denied because gradual rot is considered maintenance rather than sudden damage. Property value declines when inspectors note compromised eaves. In severe cases, entire sections of the roof edge must be rebuilt—an expense many times greater than timely drip edge replacement.
Fortunately, the pathway is reversible when addressed early. Professional intervention restores the protective barrier and often includes fascia repair or replacement, returning the eave to a weather-tight condition.
Materials and Styles of Modern Drip Edge
Today’s drip edge options balance durability, appearance, and cost. Aluminum remains the most common choice: lightweight, corrosion-resistant, and available in a wide range of colors to match roofing and trim. Galvanized steel offers superior strength in high-wind zones but requires careful coating maintenance. Copper provides unmatched longevity and develops an attractive patina, though at a premium price.
Profiles vary. Type C (or C-style) features a simple hemmed edge. Type D includes a wider bottom flange for greater coverage. Type F offers an extended leg for use over existing fascia. Some manufacturers produce continuous-length coils that minimize seams. Color-matched finishes ensure the metal blends seamlessly with architectural details.
Selecting the correct gauge and finish for local climate conditions is essential. Coastal environments demand higher corrosion resistance; freeze-thaw regions benefit from profiles that shed ice efficiently. A knowledgeable roofing professional matches material to the specific demands of the home and region.
The Professional Replacement Process
Replacement begins with a thorough assessment. Technicians inspect the entire perimeter, measure existing conditions, and identify any secondary damage to fascia, sheathing, or gutters. Safety protocols include secure ladder placement, fall protection, and protection of landscaping.
Damaged or missing sections are carefully removed. Any rotted wood is cut out and replaced with pressure-treated or rot-resistant material. New drip edge is cut to length, overlapped at joints according to manufacturer guidelines, and fastened with corrosion-resistant nails or screws at prescribed intervals. The metal is positioned so the lower edge projects beyond the fascia by the recommended distance—usually one-half to three-quarters of an inch—while the upper flange tucks beneath the underlayment and shingles.
Where shingles must be lifted, technicians work methodically to avoid cracking or displacing surrounding material. Sealants and underlayment repairs restore water-tight continuity. Gutters are realigned or reattached as needed so water flows freely into the drainage system. A final quality check confirms continuous coverage, secure fastening, and proper drip clearance.
Most residential projects are completed in a single day, minimizing disruption. Homeowners receive documentation of materials used and work performed, supporting future maintenance records and potential warranty claims.
Benefits of Choosing Professional Installation
While the concept of drip edge appears straightforward, proper installation demands skill and experience. Incorrect fastening can create new leak paths. Insufficient overlap invites wind-driven water. Mismatched materials may accelerate corrosion. Professionals bring specialized tools, code knowledge, and the ability to address hidden damage discovered during the process.
A quality installation delivers multiple advantages:
- Immediate restoration of water management
- Extended service life of fascia and roof edge
- Improved gutter performance
- Enhanced resistance to ice dams and wind uplift
- Preservation of manufacturer warranties on roofing materials
- Documented workmanship that supports home resale value
Authoritative contractors stand behind their work with clear warranties and responsive service, giving homeowners lasting reassurance.
Maintenance Practices That Prolong Protection
Once a sound drip edge is in place, simple habits keep it effective. Clean gutters at least twice yearly so debris does not force water over the edge. Inspect the metal after major storms for dents or displacement. Keep tree limbs trimmed away from the roof perimeter to reduce impact damage. During routine roof inspections, ask the technician to verify continuous coverage and secure attachment.
In regions with heavy snowfall, carefully remove ice dams when they form, taking care not to damage the drip edge itself. Avoid leaning ladders directly against the metal edge. These modest steps, combined with professional check-ups every few years, maximize the component’s protective lifespan.
Addressing Common Misconceptions
Some homeowners believe drip edge is optional or purely cosmetic. In reality it is a functional necessity recognized by building codes and insurance underwriters. Others assume that new shingles alone solve edge problems; without the metal barrier, water can still reach the fascia. A third misconception holds that any metal strip will suffice—proper gauge, profile, and installation technique are equally important.
Clearing these misunderstandings encourages timely action and prevents avoidable damage.
Selecting a Trusted Roofing Partner
When the time comes for inspection or replacement, choose a contractor who demonstrates thorough knowledge of edge detailing, carries appropriate insurance, and provides transparent written estimates. Ask about material options, expected timeline, and cleanup procedures. A reputable firm will gladly explain the role of the drip edge and show examples of completed work.
Look for teams that emphasize education over pressure. The goal is not merely to sell a service but to deliver lasting protection for the home.
Long-Term Value and Peace of Mind
Investing in a complete, correctly installed drip edge yields returns far beyond the initial cost. Dry fascia remains strong for decades. Gutters function as designed. The roof edge resists the combined forces of rain, wind, and temperature extremes. Homeowners enjoy the quiet confidence that comes from knowing a critical vulnerability has been closed.
In the broader context of home maintenance, few upgrades deliver such high impact at relatively modest expense. The drip edge stands as a quiet guardian—out of sight yet constantly working to keep the eaves free from rot.
Protect Your Eaves Today
Water damage never improves with time. If you notice missing metal, rust, stains, or soft wood along your roof edge, schedule a professional evaluation without delay. Early intervention preserves both structure and budget.
Protect your eaves with drip edge. A knowledgeable team is ready to inspect, advise, and restore the protective barrier your home deserves—delivering authoritative craftsmanship and lasting peace of mind.
Prevent Water Damage – Book a Free Inspection