The Lawn Soil Testing: Why pH Matters for Grass Health
A beautiful lawn is not only about mowing height, fertilizer bags, and watering schedules. The real foundation sits a few inches below the surface. Soil pH controls whether grass roots can actually use the nutrients you apply. When pH drifts too far from the range most turfgrasses prefer, even a well-fed lawn can look thin, yellow, or weedy. Soil testing removes the guesswork. It tells you whether the ground is acidic, alkaline, or balanced—and what to do next.
Call Now to Fix Acidic or Alkaline Lawn Soil
This guide explains the soil science behind pH, how to test it with a DIY kit or a professional lab, the optimal pH range of 6.0–7.0 for most lawn grasses, and how to correct it safely with lime or sulfur. The goal is practical: a healthier root zone, better color, and fewer wasted inputs.
Soil Science Under Your Feet
Soil is a living mixture of mineral particles, organic matter, water, air, and microorganisms. Those mineral particles—sand, silt, and clay—carry electrical charges. Hydrogen ions (H+) and hydroxide ions (OH−) in the soil solution determine whether the soil reads as acidic or alkaline. That balance is expressed as pH.
pH is a logarithmic scale from 0 to 14. A reading of 7.0 is neutral. Every whole-number drop (from 7 to 6, for example) means ten times more acidity. That matters because plant roots and soil microbes operate in a relatively narrow chemical window. Outside that window, nutrients stay locked in forms roots cannot absorb, even when a soil test shows those nutrients are “present.”
Organic matter and microbial activity also influence pH over time. Decomposing thatch, pine needles, and some fertilizers can slowly acidify soil. Irrigation water, limestone parent material, and certain amendments can push it the other way. Regular lawn soil testing is the only reliable way to see where your yard actually sits on that scale.
What Soil pH Really Measures
Soil pH measures the concentration of hydrogen ions in the soil solution. Acidic soils have more H+ ions. Alkaline soils have fewer. The number itself is simple; the consequences for grass are not.
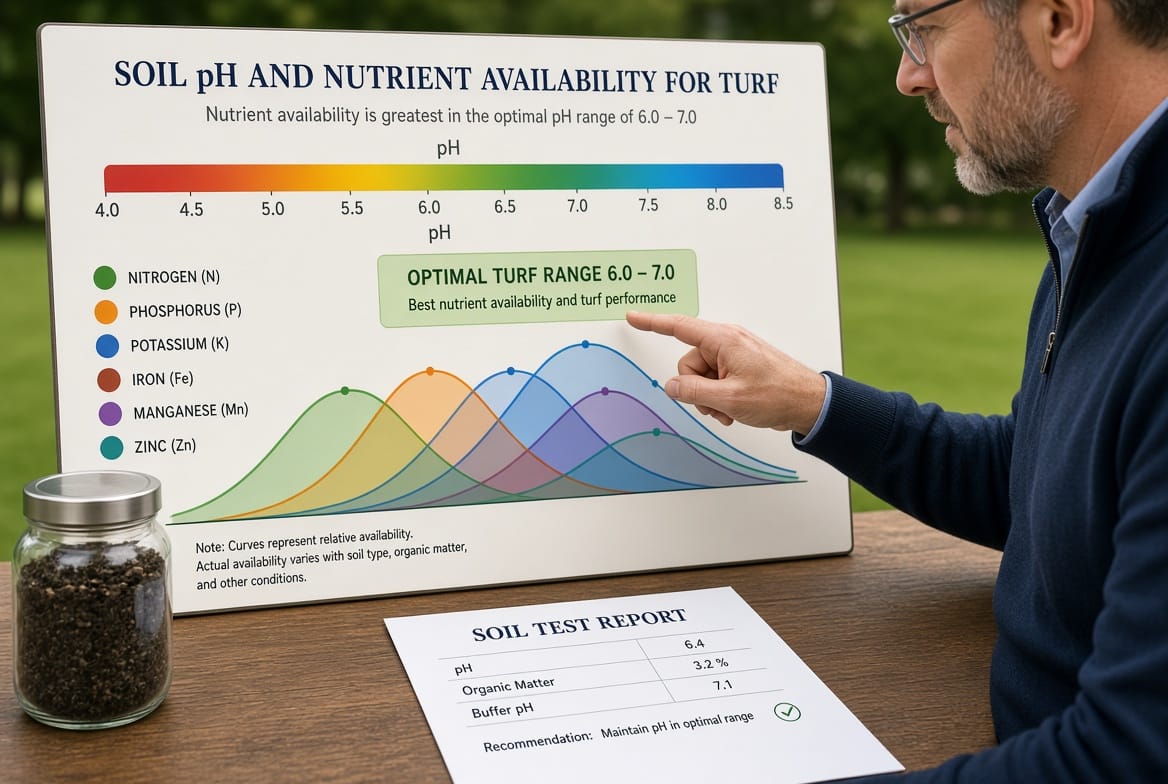
In acidic soil, aluminum and manganese can become more soluble and reach levels that stress roots. Phosphorus often becomes less available. In alkaline soil, iron, manganese, zinc, and sometimes phosphorus become less available. Nitrogen cycling by soil bacteria also slows outside a comfortable range. The result is not always an obvious “dead lawn.” More often you see slow growth, uneven color, increased moss, or a turf that never quite responds to fertilizer the way you expect.
Understanding this chemistry is the first step toward a lawn that uses every nutrient you give it.
Why pH Matters for Grass Health
Grass does not “eat” fertilizer granules. Roots take up dissolved ions. Those ions are only available in certain pH ranges. When pH is wrong, you can apply the right product at the right rate and still see nutrient lockout.
Key effects of off-target pH include:
- Reduced nutrient uptake — phosphorus, iron, and micronutrients become chemically unavailable.
- Root stress — excess aluminum in very acidic soils damages fine roots.
- Weaker microbial activity — beneficial bacteria that convert nitrogen work best near neutrality.
- Increased weed and moss pressure — some weeds and moss tolerate low pH better than desirable turf.
- Wasted money — fertilizer that cannot be absorbed does not improve the lawn.
A balanced pH does not replace good cultural practices. It makes those practices work. Watering, mowing, and feeding become more efficient when the soil chemistry cooperates.
The Optimal pH Range for Lawn Grass
For most common turfgrasses—Kentucky bluegrass, perennial ryegrass, tall fescue, and many warm-season lawns in mixed climates—the target soil pH is 6.0–7.0. Slightly acidic to neutral soil keeps major and minor nutrients in plant-available forms.
A reading around 6.5 is often considered a practical sweet spot for mixed lawns. Some species tolerate a bit more acidity; others prefer the upper end of the range. The important point is consistency: a lawn that stays between 6.0 and 7.0 year after year is far easier to manage than one that swings from 5.2 to 7.8.
If a test shows pH below 6.0, the soil is too acidic for efficient nutrient use. If it sits above 7.0–7.5, alkaline conditions can lock out iron and other micronutrients and produce the familiar yellowing that looks like a nitrogen problem but is not.
How to Test Soil pH: DIY Kit or Professional Lab
You have two practical options: a home DIY soil pH test kit or a professional soil test. Both have a place. Accuracy and actionable recommendations differ.
Using a DIY Soil pH Test Kit
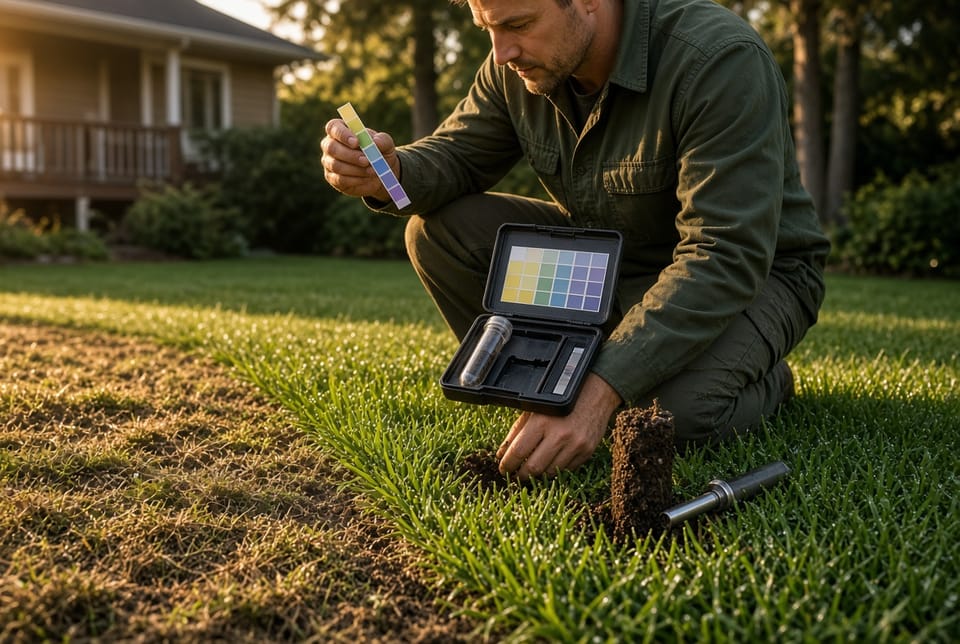
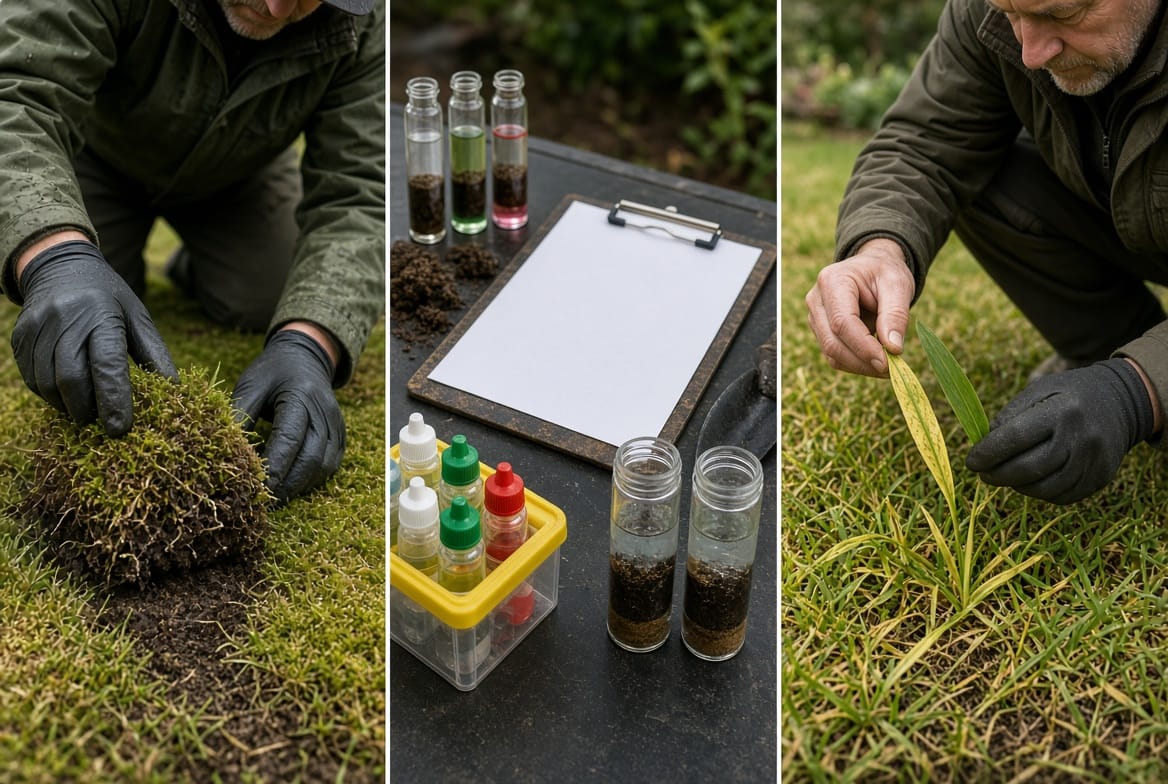
Home kits are useful for a quick snapshot. Common types include:
- Color-change liquid or powder kits
- Paper test strips
- Digital probe meters
For a more reliable home reading:
- Collect samples from several spots across the lawn, not just one bare patch.
- Remove thatch and surface debris. Sample the root zone, typically the top 3–4 inches.
- Mix the cores into one composite sample for an average reading, or test problem areas separately.
- Follow the kit instructions exactly—water volume, wait time, and lighting affect color kits.
- Record the result and the date. One test is a starting point, not a lifetime diagnosis.
Limitation: many inexpensive kits give a broad color range rather than a precise number. They can tell you “acidic” versus “alkaline,” but they rarely include lime or sulfur rate recommendations tailored to your soil type.
Professional Soil Testing
A professional lab or a trained lawn-care service tests pH along with buffer pH, organic matter, and often phosphorus, potassium, and micronutrients. Buffer pH is especially important because it estimates how much lime the soil will actually need, not just how acidic the water extract is.
Professional testing is the better choice when:
- The lawn has chronic color or thinning problems
- You plan a major renovation
- Previous lime or sulfur applications did not produce the expected change
- You want written rates instead of a guess
A quality test turns chemistry into a plan: how much product, what type, and when to retest.
How to Adjust Soil pH Safely
Once you know the number, correction is straightforward in principle and careful in practice. Raise pH with lime. Lower pH with sulfur (or, in some cases, other acidifying materials used at professional rates). Never apply either product without a test. Guessing can push pH past the target and create a new problem.
Raising pH with Lime
Agricultural lime (calcium carbonate) or dolomitic lime (calcium and magnesium carbonate) is the standard amendment for acidic lawns. Lime neutralizes acidity over weeks to months. It does not work overnight.
Practical guidelines:
- Use pelletized lime for easier, more even spreading on existing turf.
- Apply according to the soil-test rate, not a generic bag suggestion alone. Clay soils often need more lime than sandy soils to move the same pH distance.
- Water the lawn after application so granules begin to dissolve.
- Split large rates into two applications several months apart if the recommendation is high.
- Avoid mixing lime and high-nitrogen fertilizer in the same pass unless the product labels allow it.
Lime also supplies calcium (and magnesium if dolomitic). That secondary benefit supports cell walls and chlorophyll function, but the primary job remains pH correction.
Lowering pH with Sulfur
Elemental sulfur is the common choice for alkaline soils. Soil bacteria convert sulfur into sulfuric acid over time, gradually lowering pH. The process is slower than many homeowners expect and depends on temperature, moisture, and microbial activity.
Practical guidelines:
- Apply only the rate supported by a current test.
- Water in after spreading.
- Be patient. Meaningful change often takes a growing season or longer.
- Do not confuse elemental sulfur with sulfate fertilizers; they are not the same tool for long-term pH change.
- Re-test before repeating applications. Over-acidifying is as unhelpful as leaving the soil too alkaline.
In both directions, moderation is the professional approach. Small, measured corrections beat aggressive one-time dumps.
Signs Your Lawn Soil pH Is Off
Visual clues never replace a test, but they tell you when a test is overdue.
Common indicators include:
- Moss invasion — often associated with acidic, compacted, or poorly drained soil. Moss is a messenger, not the root cause by itself.
- Yellowing or chlorosis — especially interveinal yellowing on newer leaves, which can signal iron or manganese lockout in high-pH soil.
- Persistent pale color after nitrogen applications
- Thin turf that does not thicken with normal feeding
- Weeds that thrive in acidic conditions while grass struggles
- Uneven response across the same lawn, suggesting pH varies by zone
If you see moss in shade plus yellowing in sun, test both areas. Soil chemistry is rarely uniform from the front walk to the back fence.
How Often Should You Test Lawn Soil?
For an established lawn that looks acceptable, testing every two to three years is a sound rhythm. Test sooner if you:
- Renovate or install new sod or seed
- See sudden color or density changes
- Apply lime or sulfur and need to confirm the result
- Change irrigation sources (well water versus municipal water can differ in alkalinity)
Keep the reports. A single number is useful. A three-year trend is far more useful. It shows whether your program is holding the soil in the 6.0–7.0 window or slowly drifting.
Cultural Practices That Support Balanced pH
pH correction works best when the rest of the lawn system is healthy.
- Core aeration reduces compaction so lime or sulfur contacts more soil.
- Moderate nitrogen rates avoid excess acidity from some fertilizer sources.
- Proper mowing height keeps grass competitive against moss and weeds.
- Avoid overwatering, which can leach bases and influence surface pH over time.
- Handle thatch so amendments reach mineral soil rather than sitting in a spongy layer.
These practices do not replace lime or sulfur when the chemistry is wrong. They help the amendment do its job.
Common Mistakes to Avoid
Homeowners often make the same errors:
- Applying lime “because the neighbor did”
- Using a single probe reading from one wet spot as the whole-yard answer
- Expecting overnight color change after sulfur
- Treating yellowing with more iron products year after year without checking pH
- Skipping a follow-up test after a large amendment
Soil testing prevents those loops. It is inexpensive compared with years of products that never reach the roots.
A Reassuring Path to a Better Lawn
Soil pH is not mysterious once you measure it. It is a number you can manage. Most lawns respond when the root zone sits between 6.0 and 7.0, nutrients stay available, and cultural care stays consistent. You do not need to become a chemist. You need an accurate reading, a measured amendment if required, and the patience to let soil biology finish the work.
If the lawn looks tired despite regular care, start below the grass—not with another bag of the same fertilizer. Test first. Amend second. Recheck later. That sequence is how professional lawn programs stay efficient and how homeowners stop chasing symptoms.
Test Your Soil pH for a Better Lawn
A clear pH number is the fastest way to stop guessing. Whether you use a quality home kit for a first look or prefer a full professional analysis, the information pays for itself in better color, stronger roots, and smarter product use.
A trained technician can sample the lawn correctly, explain the results in plain language, and recommend the right lime or sulfur program for your soil—not a generic label rate. Test your soil pH for a better lawn, then give the grass the chemistry it can actually use.
Get a Better Lawn with Expert Soil Testing – Call Now