The Kitchen Sink Drain Basket: Cleaning and Replacing
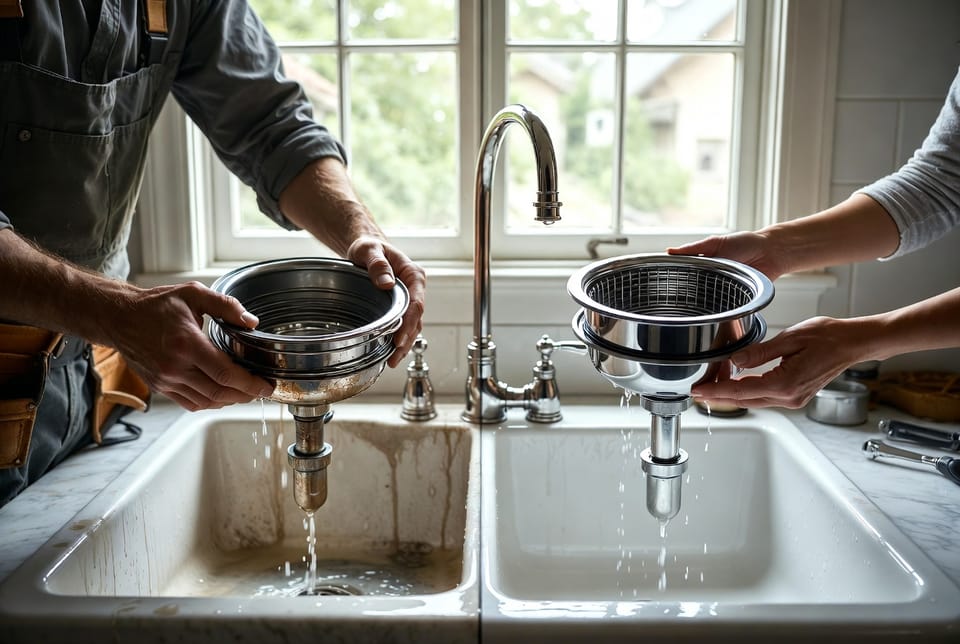
A properly functioning kitchen sink drain basket is one of the simplest yet most essential components of any home plumbing system. This unassuming strainer sits at the heart of daily kitchen activity, catching food particles while allowing water to flow freely into the drain line. When it begins to fail, even the most carefully maintained kitchen can quickly become a source of frustration, water damage, and unwanted odors. The good news is that cleaning and replacing a worn drain basket is a straightforward repair that most homeowners can complete with basic tools and a little patience.
Call Now for Fast Kitchen Drain Basket Repair
In the following guide, you will learn exactly what a drain basket is, how to recognize the clear signs of wear, and the precise steps required to remove the old unit, prepare the sink opening, and install a new one using plumber’s putty. By the end, you will feel confident tackling this common repair yourself—or know exactly when to call a professional.
What Exactly Is a Kitchen Sink Drain Basket?
The kitchen sink drain basket, often called a sink strainer or basket strainer, is the circular metal assembly that fits into the drain opening of your kitchen sink. Its primary job is twofold: it creates a watertight seal between the sink basin and the drainpipe below, and it features a removable basket or strainer cup that traps solid debris before it can enter the plumbing system.
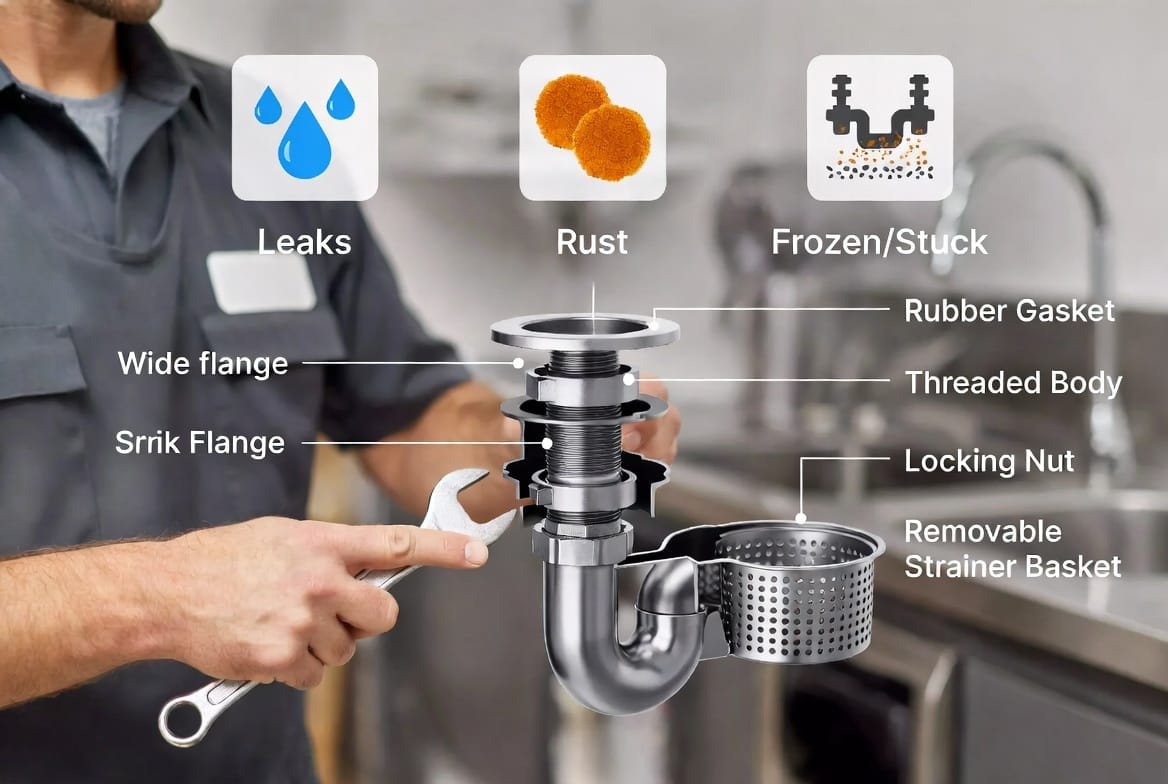
Most modern drain baskets are constructed from durable materials such as stainless steel, brass, or coated metal. They typically include:
- A wide flange that sits flush against the sink surface
- A threaded body that extends through the drain hole
- A locking nut or retainer ring beneath the sink
- A removable strainer basket that lifts out for easy cleaning
- A rubber or fiber gasket that helps form the seal
Without a properly seated and sealed drain basket, water would simply pour onto the cabinet floor every time the faucet runs. Over years of constant exposure to hot water, grease, acidic foods, and cleaning chemicals, even the highest-quality basket eventually shows wear. Understanding its role helps you appreciate why timely cleaning and replacing prevents larger plumbing problems down the line.
Regular maintenance of this small component protects the entire drainage system, reduces the risk of clogs, and keeps your kitchen looking and smelling fresh.
Recognizing the Signs of Wear
Ignoring early warning signs can turn a simple repair into a more extensive and costly project. Watch for these unmistakable indicators that your kitchen sink drain basket needs attention:
- Persistent leaking around the base of the strainer, especially when the sink is filled with water
- Visible rust or corrosion on the flange, basket, or locking nut
- Stuck or difficult operation of the strainer basket, making it hard to lift out or seat properly
- Slow drainage even after clearing the P-trap
- Unpleasant odors rising from the drain
- Water stains or soft wood inside the cabinet beneath the sink
Any one of these symptoms is reason enough to inspect the assembly closely. Leaks often start small and worsen over time as the seal degrades. Rust weakens the metal and can eventually cause the basket to crack. When the mechanism becomes stuck, food particles accumulate more quickly, accelerating the decline.
Addressing these issues promptly restores full functionality and prevents water damage to cabinetry and flooring.
Essential Tools and Materials for the Job
Before beginning any cleaning and replacing work, gather the following items so the process remains smooth and efficient:
- Adjustable wrench or basin wrench
- Channel-lock pliers
- Putty knife or flat-head screwdriver
- Fresh plumber’s putty (oil-based, non-hardening)
- Replacement drain basket assembly that matches your sink opening size (usually 3½ inches)
- Clean rags or paper towels
- Bucket or shallow pan to catch residual water
- Optional: penetrating oil for stubborn nuts and a flashlight for better visibility under the sink
Having everything ready minimizes interruptions and reduces the chance of leaving the sink unusable for longer than necessary. Choose a high-quality stainless-steel replacement for longevity, especially in households that use the sink heavily.
Step-by-Step Guide to Removing the Old Drain Basket
Begin by clearing the area under the sink and placing a bucket beneath the drain assembly to catch any residual water. Turn off the water supply if you feel more comfortable, although it is not strictly required for this particular repair.
- Remove the strainer basket from the top of the drain and set it aside.
- From underneath the sink, locate the large locking nut that secures the basket body.
- Use the basin wrench or channel-lock pliers to loosen the nut by turning it counterclockwise. Apply penetrating oil if the nut resists movement.
- Once the nut is free, carefully lower the entire assembly, including any gaskets or washers.
- From above the sink, gently lift out the old drain basket flange. If it is stuck, carefully work a putty knife around the edge to break the old seal without scratching the sink surface.
Take a moment to examine the removed parts. Note the condition of the old gaskets and the amount of corrosion present. This inspection reinforces why the replacement is necessary and helps you select the correct new components.
Thorough Cleaning of the Sink Opening
With the old basket removed, the drain opening must be completely clean before the new unit can form a reliable seal. Use the putty knife to scrape away every trace of old plumber’s putty, dried sealant, and mineral deposits. Wipe the metal or porcelain surface with a clean rag dampened with mild dish soap, then dry it thoroughly.
Pay special attention to the underside of the sink around the drain hole. Any remaining debris can prevent the new gasket from seating evenly and may lead to future leaks. A clean, dry surface is the foundation of a successful installation.
Applying Plumber’s Putty and Installing the New Drain Basket
Plumber’s putty remains the preferred sealing material for sink strainers because it stays soft and flexible, allowing for minor adjustments and providing a long-lasting watertight barrier.
- Roll a generous rope of fresh plumber’s putty between your palms until it is about the thickness of a pencil.
- Press the putty firmly around the underside of the new drain basket flange, forming a continuous ring that will contact the sink surface.
- Insert the new basket into the drain opening from above, pressing down evenly so excess putty squeezes out around the edges.
- From beneath the sink, slide the new rubber gasket and friction washer into place, then thread the locking nut onto the basket body.
- Hand-tighten the nut first, then use the wrench to secure it firmly—avoid overtightening, which can crack porcelain sinks or distort the flange.
- Wipe away the excess putty that has extruded around the flange with a clean cloth.
Once the nut is secure, reinstall the removable strainer basket and test the seal by filling the sink with a few inches of water. Check carefully underneath for any drips. If a small leak appears, slightly tighten the nut and retest. In most cases the seal holds perfectly on the first try.
Additional Tips for Long-Term Performance
After successful installation, a few simple habits will extend the life of your new kitchen sink drain basket:
- Empty the strainer basket after every use rather than allowing food scraps to sit overnight.
- Avoid pouring grease or oil down the drain; wipe pans with a paper towel first.
- Periodically clean the basket and surrounding area with a mild vinegar solution to prevent mineral buildup.
- Never force a stuck basket—lift it gently and clean the seating area if resistance develops.
These practices keep the mechanism operating smoothly and reduce the likelihood of premature wear.
When Professional Help Makes Sense
While the majority of cleaning and replacing projects are well within the capability of a careful homeowner, certain situations call for experienced assistance. If the locking nut is completely seized, if the sink material is delicate porcelain that risks cracking, or if you discover additional issues such as corroded drainpipes or cabinet water damage, it is wiser to contact a licensed plumber. Professional technicians arrive with specialized tools and the knowledge to handle unexpected complications quickly and safely.

The Lasting Benefits of a Fresh Drain Basket
Replacing a worn kitchen sink drain basket delivers immediate and lasting advantages. Water no longer seeps into cabinets, eliminating the risk of mold and structural damage. Drainage speed returns to normal, reducing standing water and associated odors. The sink surface looks cleaner and more polished, enhancing the overall appearance of the kitchen. Most importantly, you regain peace of mind knowing that a critical component of your home’s plumbing is once again performing at its best.
This simple repair protects your investment in both the sink and the surrounding cabinetry while restoring the convenience you expect from everyday kitchen use.
Final Encouragement and Next Steps
You now possess a complete understanding of the kitchen sink drain basket, the clear signs of wear that signal the need for action, and the exact sequence of steps required for successful cleaning and replacing. With the right tools, a tube of plumber’s putty, and careful attention to detail, most homeowners complete the job in under an hour.
If you prefer the assurance of professional craftsmanship or encounter any difficulty during the process, do not hesitate to reach out.
Replace a worn sink drain basket today. A fully functional drain basket is only a short conversation away, restoring reliability and protecting your home for years to come.
Call Today for Affordable Drain Basket Replacement