The Gas Water Heater Thermocouple: Why the Pilot Light Won't Stay Lit
A reliable supply of hot water is essential for daily comfort in any home. When the pilot light on your gas water heater repeatedly lights but refuses to stay lit, the entire system can shut down, leaving you without hot water at the most inconvenient times. This common issue almost always traces back to a single critical safety component: the thermocouple. Understanding how this small device functions, recognizing the clear signs of its failure, and knowing the precise steps for replacement can restore your system quickly and safely. In the sections that follow, you will learn exactly why the pilot light will not stay lit, how the thermocouple protects your home, and the professional-grade process for correcting the problem.
Restore Hot Water Fast – Call for Thermocouple Repair
Understanding the Thermocouple’s Critical Role
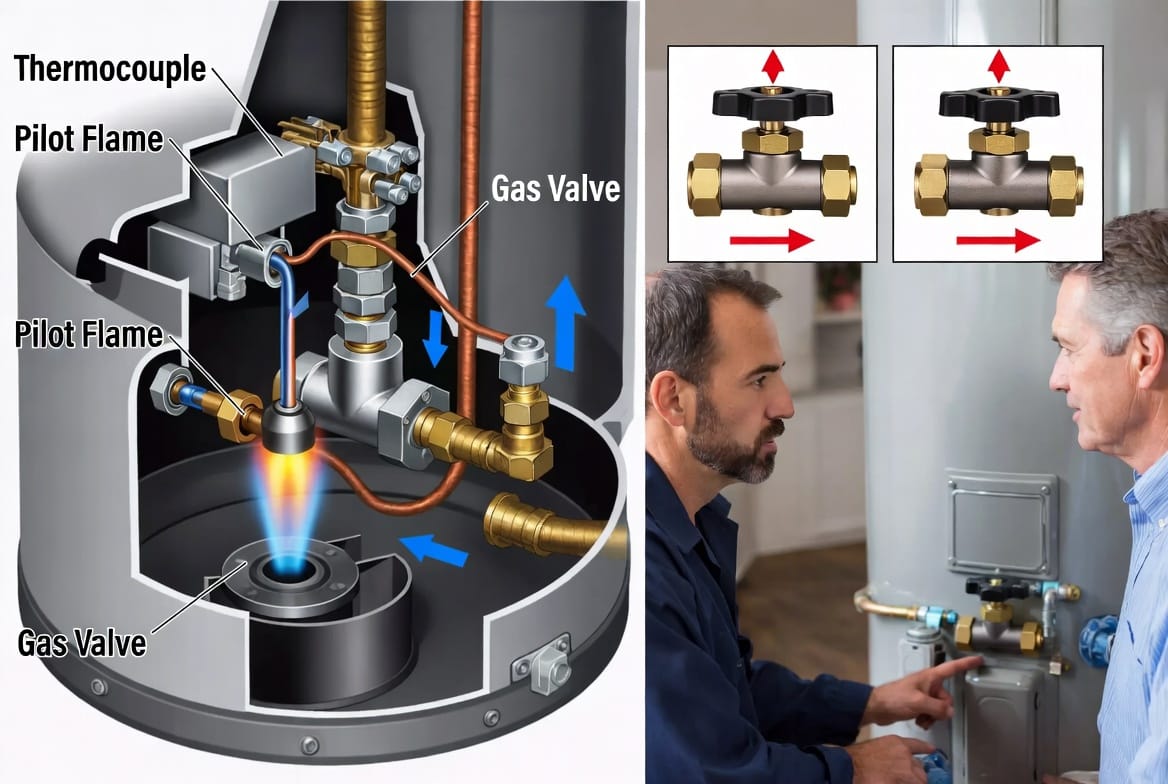
The thermocouple is a slender metal probe positioned directly in the path of the pilot flame. Its sole purpose is to sense the presence of that flame and keep the gas valve open. When the pilot burns steadily, heat generates a tiny electrical voltage—typically measured in millivolts—that travels through the thermocouple lead to the gas control valve. As long as the voltage remains above a minimum threshold, the valve stays open and allows gas to flow to both the pilot and the main burner.
The moment the pilot flame extinguishes, the thermocouple begins to cool within seconds. The voltage drops, and a spring-loaded mechanism inside the gas valve immediately closes, cutting off the gas supply. This rapid response prevents unburned gas from accumulating in the combustion chamber—an essential safety feature that has protected households for decades. Without a functioning thermocouple, the gas valve would remain open even after the flame went out, creating a dangerous situation. Therefore, when the pilot light will not stay lit, the thermocouple is usually the first component to examine.
Clear Signs That the Thermocouple Has Failed
Homeowners typically notice several consistent symptoms when the thermocouple begins to fail. The most unmistakable indicator is that the pilot light can be ignited by holding down the control knob, yet it extinguishes the instant the knob is released. This happens because the thermocouple is no longer generating enough voltage to keep the electromagnet inside the gas valve energized.
Additional signs include:
- Complete loss of hot water after the pilot has gone out
- Repeated need to relight the pilot throughout the day
- A weak or yellow pilot flame instead of a strong blue one
- Visible soot or corrosion around the thermocouple tip
- An error code or status light on electronic gas valves indicating pilot failure
These symptoms rarely appear in isolation. When the pilot lights but will not stay lit and hot water disappears, the thermocouple has almost certainly reached the end of its service life. Age, mineral buildup, physical damage from vibration, or simple metal fatigue are the most frequent causes. Replacing the component resolves the issue in the vast majority of cases and returns the water heater to reliable operation.
Why Thermocouples Fail and When Replacement Becomes Necessary
Although thermocouples are designed for longevity, they operate in a harsh environment of constant heat, moisture, and combustion byproducts. Over time the metal junction at the tip can degrade, reducing its ability to produce sufficient voltage. Dust, spider webs, or mineral deposits from hard water can also insulate the tip and prevent proper heat transfer. In some installations, the thermocouple may become bent or misaligned so that it no longer sits fully within the pilot flame.
Most manufacturers recommend inspection during routine maintenance, yet many homeowners only discover the problem after the pilot light has already failed. Waiting too long can leave a household without hot water for days. Fortunately, replacement is a straightforward repair when performed with the correct parts and careful attention to safety procedures. The cost of a new thermocouple is modest compared with the inconvenience of cold showers or the risk of continuing to operate a compromised safety system.
Tools and Materials Required for a Successful Replacement
Before beginning any work, gather the following items to ensure a smooth process:
- Exact replacement thermocouple matched to your water heater model
- Adjustable wrench or appropriate open-end wrenches
- Needle-nose pliers
- Soft wire brush or fine sandpaper
- Multimeter capable of measuring millivolts (optional but recommended)
- Flashlight or work light
- Manufacturer’s instruction manual for your specific unit
Always purchase an OEM or high-quality aftermarket thermocouple of the correct length and connection type. Using an incorrect part can result in poor flame sensing or an improper seal at the gas valve.
Step-by-Step Thermocouple Replacement Process
Safety is the highest priority. Begin by locating the gas shut-off valve on the supply line leading to the water heater and turning it fully clockwise to the closed position. Next, turn the gas control knob on the water heater itself to the “Off” position and allow the unit to cool for at least fifteen minutes. This waiting period eliminates residual heat that could cause burns.
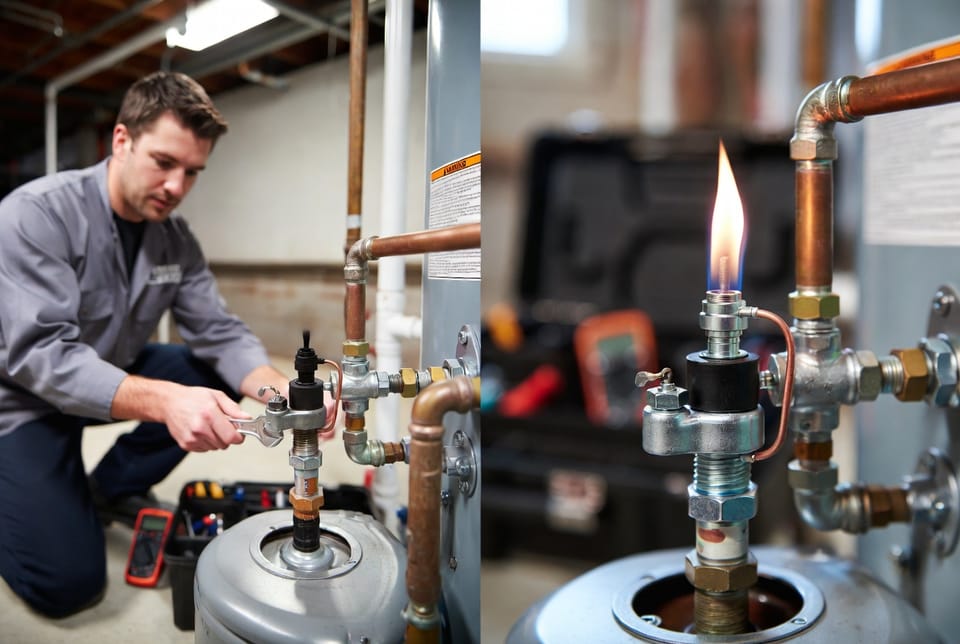
Once the area is cool, remove the outer access panel and the combustion chamber cover if present. You will now see the pilot assembly, the thermocouple, and the pilot tube. Using the appropriate wrench, carefully loosen the thermocouple fitting at the gas control valve. Unscrew the connection completely and gently pull the old thermocouple free from its mounting bracket near the pilot. Take note of the exact routing of the lead so the new unit can follow the same path.
Clean the mounting bracket and the area around the pilot orifice with a soft brush to remove any debris. Insert the new thermocouple tip into the bracket so that approximately one-half to three-quarters of an inch of the tip will sit in the center of the pilot flame. Route the lead exactly as the original was routed, avoiding sharp bends or contact with hot surfaces. Thread the fitting into the gas control valve by hand first to prevent cross-threading, then tighten securely with the wrench—snug but not overtightened.
Reinstall the combustion chamber cover and access panel. Open the gas supply valve slowly and check every connection for leaks using a soapy water solution. Bubbles indicate a leak that must be corrected before proceeding. Turn the gas control knob to the “Pilot” position, depress and hold the knob, and light the pilot according to the manufacturer’s instructions. Continue holding the knob for a full sixty seconds after the pilot lights. This allows the new thermocouple to heat fully and generate the required voltage. When you release the knob, the pilot should remain lit. If it does, turn the control to the “On” position and set the desired temperature. Within a short time the main burner should ignite and begin heating the water.
If the pilot still extinguishes, double-check the alignment of the thermocouple tip in the flame and verify that all connections are tight. In rare cases the gas control valve itself may also require attention, but a properly installed new thermocouple resolves the issue for the majority of homeowners.

Testing and Verifying Proper Operation
After the pilot remains lit, allow the water heater to run through a full heating cycle. Open a hot water faucet and confirm that temperature rises normally. Listen for the main burner to cycle on and off as expected. A quick voltage check with a multimeter across the thermocouple terminals while the pilot is burning can provide extra reassurance; a healthy reading typically falls between 20 and 30 millivolts. Any reading significantly lower suggests the need for further inspection.
Prevention Tips to Extend Thermocouple Life
Simple habits help avoid premature failure. Keep the area around the water heater free of dust and clutter so air can circulate freely. Schedule annual professional inspections that include cleaning the pilot assembly and checking thermocouple alignment. If your water is particularly hard, consider a whole-house softener to reduce mineral deposits on the tip. Avoid slamming access doors or allowing objects to strike the pilot assembly, as physical damage is a common cause of early failure.
When Professional Service Is the Smartest Choice
While many homeowners successfully replace a thermocouple themselves, certain situations call for expert assistance. If you smell gas at any point, if the water heater is located in a confined space with limited ventilation, or if the gas control valve shows signs of age or corrosion, contact a licensed technician immediately. Professional service guarantees that every safety interlock functions correctly and that the installation meets local codes.
Restoring Comfort and Safety with Confidence
A pilot light that will not stay lit is more than an inconvenience—it signals that a vital safety device has reached the end of its useful life. By understanding the thermocouple’s role in sensing flame and keeping the gas valve open, recognizing the classic symptoms, and following careful replacement steps, you can return reliable hot water to your home. The process is methodical, the parts are inexpensive, and the results are immediate.
When you prefer the peace of mind that comes with expert workmanship, or if the repair feels beyond your comfort level, help is only a phone call away. Fix your pilot light issue today. Skilled technicians arrive prepared with the correct parts, restore safe operation quickly, and leave your water heater ready to deliver consistent hot water for years to come.
Stop Pilot Light Problems – Call Experts Now