The Garbage Disposal Installation: Replacing an Old Unit
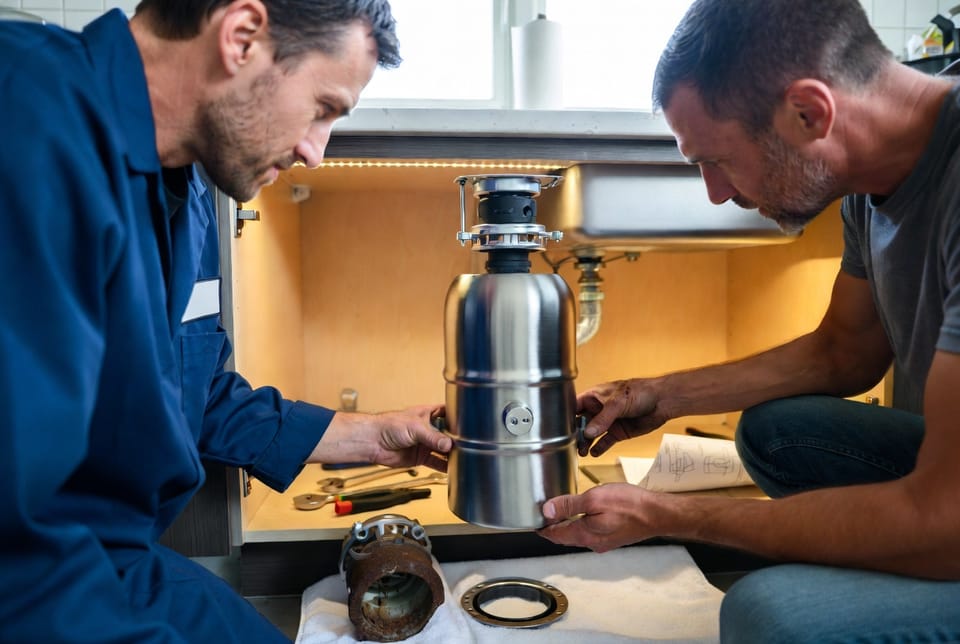
Replacing an aging garbage disposal is one of the most practical DIY upgrades a homeowner can complete. An old unit that hums weakly, leaks, or jams frequently not only frustrates daily kitchen routines but can also lead to costly water damage and unpleasant odors. By choosing a modern replacement and following a careful process, you restore quiet efficiency, improve grinding power, and protect your plumbing system for years ahead. This guide walks you through every stage of a complete garbage disposal installation, from understanding the two main types available to the precise sequence of removal and reinstallation, while highlighting essential safety precautions that keep the project smooth and risk-free.
Get Expert Garbage Disposal Installation – Call Now!
A well-executed replacement delivers immediate benefits. Food scraps disappear faster, drains stay clearer, and the kitchen feels fresher. Whether you are dealing with a unit that is more than ten years old or one that has begun to fail, the steps outlined here give you the confidence to handle the job yourself or decide when professional support is the wiser choice.
Understanding Garbage Disposal Types: Batch Feed vs. Continuous Feed
Before purchasing a new unit, it is important to understand the fundamental difference between the two primary designs: continuous feed and batch feed. Each style offers distinct advantages depending on your household habits and safety preferences.
Continuous feed models are the most common choice in North American kitchens. These units operate as long as the power switch remains on and water is running. You simply flip the wall switch, start a moderate flow of cold water, and feed food scraps into the chamber while the motor runs. The design allows continuous grinding, which makes quick work of larger volumes of waste during busy meal preparation. Most continuous-feed disposals feature a simple splash guard that keeps debris from flying upward, and they typically offer higher horsepower options for heavy-duty households.
Batch feed disposals work differently. Instead of a wall switch, these units require a special magnetic or mechanical stopper to be placed into the drain opening before the motor can start. You load a measured amount of food waste, insert the stopper, and only then does the unit activate. This design inherently reduces the risk of accidental activation or foreign objects entering the grinding chamber while the motor is spinning. Batch-feed models are often preferred by families with young children or by homeowners who value an extra layer of built-in safety.
When selecting between the two, consider how you use your kitchen. If you frequently process large quantities of vegetable peels, coffee grounds, and leftover scraps throughout the day, a continuous feed unit will feel more convenient. If safety and controlled operation rank higher on your list, a batch feed model provides peace of mind. Both types are available in a range of horsepower ratings—typically from ½ HP for light use to 1 HP or more for demanding households. Look for models with stainless-steel grinding components, sound-insulation technology, and corrosion-resistant chambers to maximize longevity.
Matching the new disposal to your existing sink opening and plumbing configuration is equally important. Most residential sinks use a standard 3½-inch drain opening, and the majority of modern units are designed to fit this size. Confirm the mounting style and electrical requirements before purchase so the installation proceeds without unexpected complications.
Preparing for a Successful DIY Upgrade
Gathering the right tools and materials ahead of time transforms a potentially messy project into an orderly process. You will need an adjustable wrench, channel-lock pliers, a flat-head and Phillips screwdriver, plumber’s putty or a new sink flange gasket, electrical wire nuts if hard-wired, a bucket and towels for residual water, and the manufacturer’s installation kit that comes with the new unit. Turn off the electrical circuit that powers the disposal at the breaker panel and verify that power is completely disconnected by testing the wall switch. Place a sturdy bucket beneath the unit to catch any remaining water when the drain lines are loosened.
Clear the area under the sink of cleaning supplies and stored items so you have full access and good lighting. Taking a few photographs of the existing plumbing connections before disconnection can serve as a helpful reference later. With preparation complete, you are ready to begin the physical replacement.
Safety Precautions Every Homeowner Must Follow
Working under a sink involves water, electricity, and sharp metal edges. Treating safety precautions as non-negotiable protects both you and your home. Always shut off power at the circuit breaker and confirm the absence of voltage before touching any wires. Never rely solely on the wall switch. Wear safety glasses to guard against debris or unexpected water spray, and use work gloves to protect your hands from sharp flanges and residual food particles.
Support the weight of the disposal throughout the removal process; older units can be heavier than expected and may drop suddenly once the mounting ring is released. Keep a bucket and absorbent towels ready to manage residual water. Avoid forcing any connection—cross-threading or overtightening can crack plastic components or create future leaks. If the existing electrical wiring shows signs of damage, fraying, or outdated connections, stop and consult a licensed electrician rather than attempting a temporary fix. Finally, never operate a newly installed disposal without a steady stream of cold water, as this protects the motor and grinding components from overheating.
These precautions are not obstacles; they are the foundation of a successful, worry-free installation. Following them carefully allows the rest of the project to proceed with confidence.
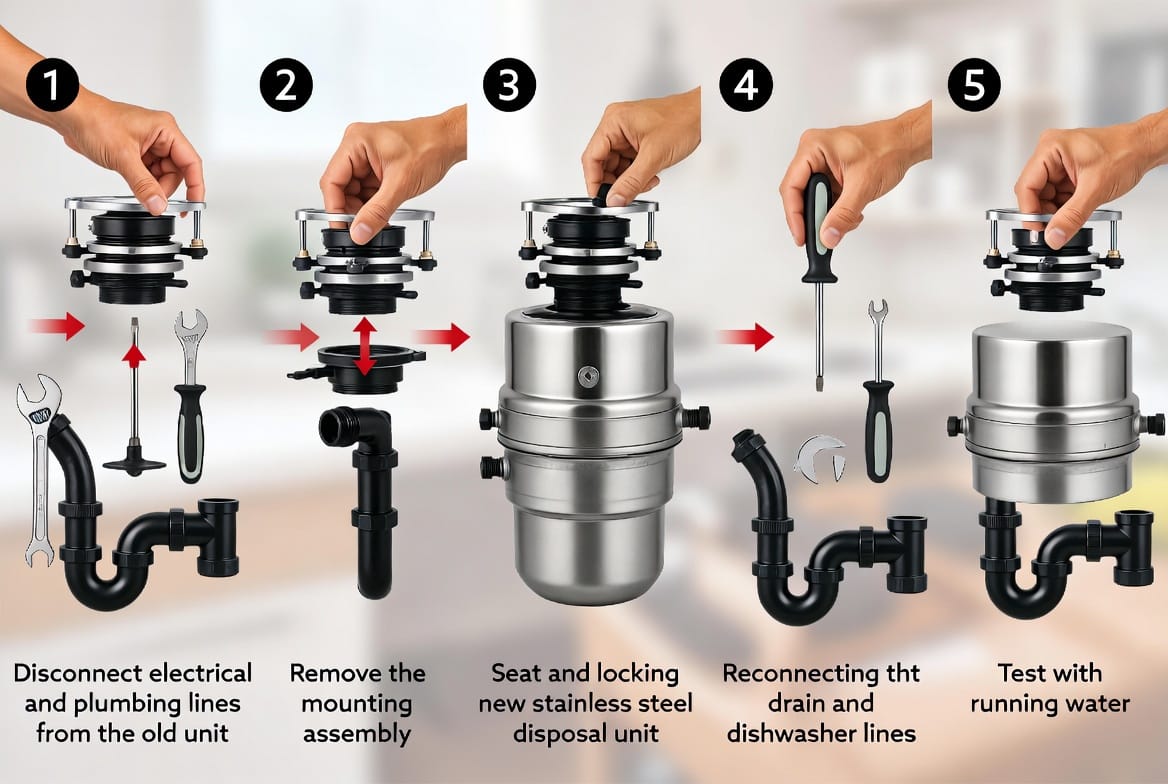
Step-by-Step Guide to Replacing Your Old Unit
The actual replacement process follows a logical sequence that minimizes disruption and ensures a secure fit. Work methodically and refer to the manufacturer’s instructions for model-specific details.
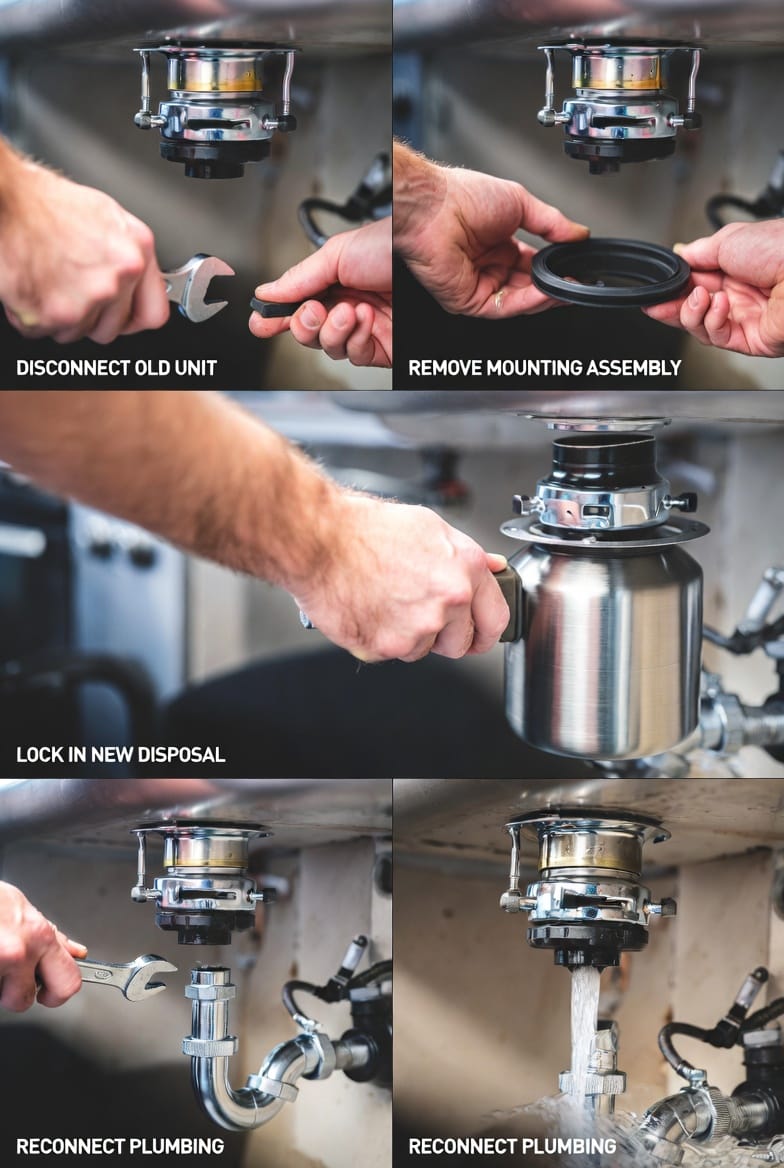
Disconnect the Old Disposal
Begin by confirming that electrical power is fully off. If the unit is hard-wired, carefully remove the electrical cover plate at the bottom of the disposal and disconnect the wires using wire nuts. For plug-in models, simply unplug the cord from the outlet under the sink. Next, place the bucket beneath the unit and loosen the slip-nut connections on the drain pipe and, if present, the dishwasher inlet hose. Allow any trapped water to drain completely. Once the plumbing is free, support the disposal with one hand while rotating the lower mounting ring counterclockwise (or following the release method specific to your existing assembly). The old unit should drop free. Set it aside on a protective surface.
Remove the Mounting Assembly
With the disposal removed, clean the underside of the sink thoroughly. Residual putty, mineral deposits, and old gasket material must be scraped away so the new flange seats evenly. If the existing sink flange is in good condition and compatible with the new unit, you may reuse it; otherwise, remove the old flange by loosening the mounting screws or snap ring from above and below the sink. Clean the sink opening carefully, then apply a fresh bead of plumber’s putty or install the new gasket supplied with your disposal. Position the new sink flange from above and secure the mounting assembly from below according to the manufacturer’s design—typically a series of screws, a snap ring, or a locking collar. Tighten evenly to create a watertight seal without warping the flange.
Install the New Disposal
Lift the new unit into place and align it with the mounting assembly. Most modern disposals use a quick-connect or twist-and-lock system that allows the unit to click securely into the mounting ring. Support the weight fully until the locking mechanism engages. Once seated, reconnect the electrical wiring: match black to black (hot), white to white (neutral), and green or bare copper to ground. Secure the connections with wire nuts and replace the electrical cover plate. For plug-in models, simply route the cord and plug it into the dedicated outlet.
Reconnect Plumbing and Test
Attach the drain pipe using the new or existing slip nuts and washers, ensuring a snug but not overtightened fit. If your dishwasher previously drained into the old disposal, remove the knockout plug on the new unit’s inlet and connect the dishwasher hose with a hose clamp. Double-check every connection for alignment. Restore electrical power at the breaker. Run a moderate stream of cold water into the sink and switch on the disposal for several seconds. Listen for smooth operation and inspect all joints for leaks. If any moisture appears, shut off the unit, tighten the relevant connection slightly, and retest. Once everything remains dry and the motor runs quietly, the installation is complete.
Avoiding Common Pitfalls During Installation
Even careful homeowners can encounter avoidable issues. One frequent mistake is neglecting to support the disposal’s weight while loosening the mounting ring, which can strain the sink or cause the unit to fall. Another is applying excessive force to plastic drain fittings, leading to cracks that only become apparent after the system is pressurized. Forgetting to remove the dishwasher knockout plug when reconnecting that line results in backed-up water. Skipping the cold-water flow during the initial test can leave residual debris in the chamber and create unnecessary strain on the motor. Taking a deliberate pace and double-checking each connection eliminates these risks.
Enjoying the Benefits of a Fresh Installation
Once the new unit is running smoothly, the difference is immediately noticeable. Grinding becomes quieter and more thorough. Food waste clears the chamber faster, reducing the chance of lingering odors. Modern motors and grinding components handle a wider variety of scraps with less effort, and improved seals help prevent the slow leaks that often develop in older units. Over time, a reliable disposal also reduces the volume of organic waste sent to landfills and keeps kitchen drains freer of buildup.
Regular maintenance further extends the life of your investment. Run cold water for several seconds after each use, occasionally grind a handful of ice cubes to clean the chamber, and avoid placing fibrous materials, grease, or non-food items into the unit. These simple habits keep performance high and protect the motor.
Knowing When Professional Help Makes Sense
While the process described above is within reach of many homeowners, certain situations call for experienced assistance. If the existing electrical wiring is outdated or the circuit lacks proper grounding, a licensed electrician should address the issue. Complicated sink configurations, unusual mounting systems, or persistent leaks after installation are also signals to seek professional support. A skilled technician can complete the work efficiently, ensure code compliance, and provide the reassurance that every connection is secure.
Replace your old disposal and restore quiet, dependable performance to your kitchen. Whether you complete the upgrade yourself or prefer expert hands, a modern unit delivers lasting convenience and peace of mind.
Call Now for Professional Disposal Replacement