The Window Weatherstrip Replacement: Stopping Drafts
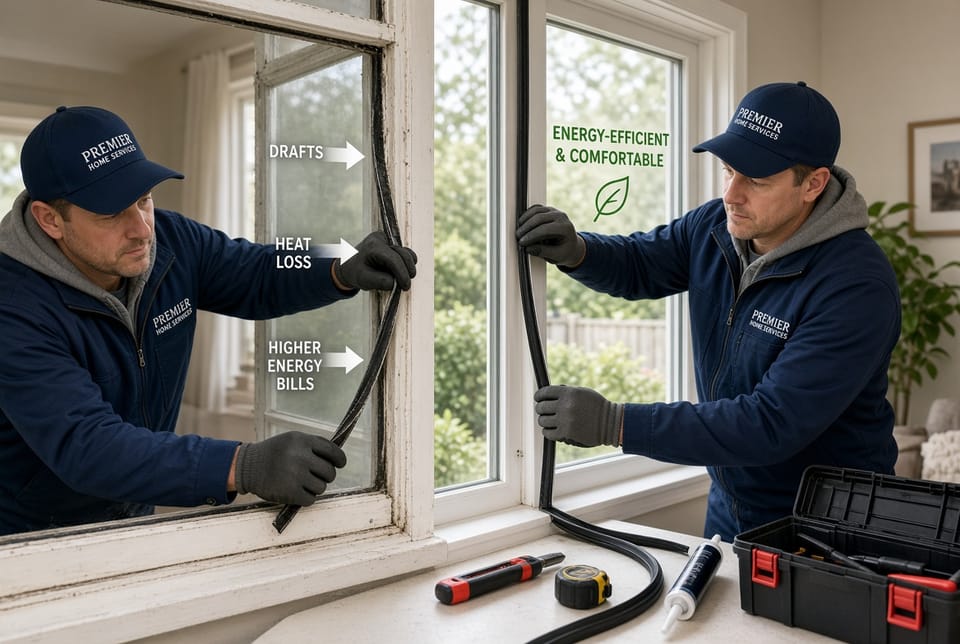
Drafts slipping through your windows can quietly undermine the comfort of your home and inflate your monthly energy costs. The solution often lies in a straightforward yet highly effective energy-saving repair known as window weatherstrip replacement. This process restores the protective barrier that keeps outdoor air where it belongs—outside—while locking conditioned air inside. By addressing worn seals promptly, homeowners gain greater control over indoor temperatures, reduce unnecessary strain on heating and cooling systems, and create a more consistent living environment year-round.
Call Today to Seal Drafts & Lower Energy Bills
Weatherstripping may appear modest, but its role in maintaining an efficient home envelope is substantial. When properly installed and maintained, it contributes directly to lower utility bills and improved indoor air quality. In the sections that follow, we examine exactly how weatherstripping functions, the clear indicators that replacement is needed, and the precise steps required to install new adhesive-backed strips with lasting results.
How Weatherstripping Works to Seal Gaps
At its core, weatherstripping creates a flexible, compressible seal between the movable parts of a window and the fixed frame. Windows must open and close smoothly, yet those same moving parts inevitably leave tiny gaps. Without a reliable seal, outdoor air infiltrates during cold weather and indoor air escapes during warm weather. The result is a constant exchange that forces heating and cooling equipment to work harder.
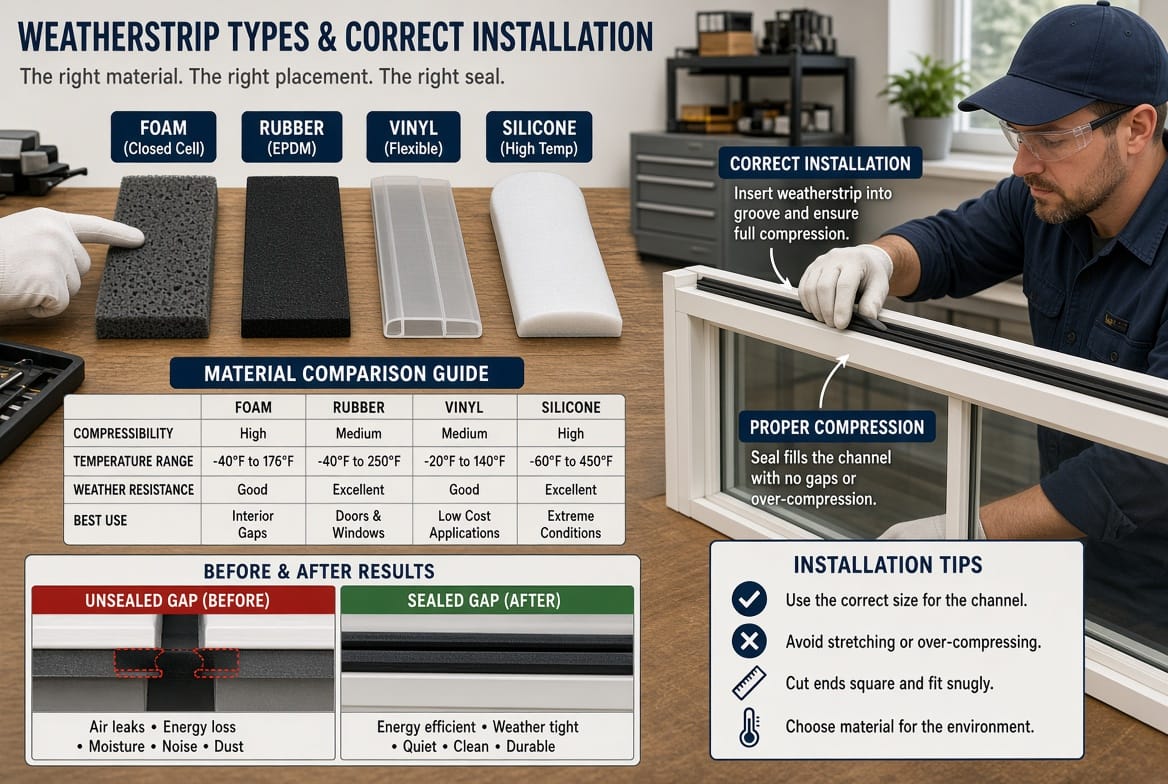
Modern adhesive-backed weatherstripping consists of durable materials such as foam, rubber, vinyl, or silicone bonded to a sticky backing. When the window closes, the strip compresses slightly, filling the gap and blocking airflow. This compression is engineered to remain effective through repeated opening and closing cycles. High-quality strips also resist ultraviolet light, moisture, and temperature extremes so they do not harden, crack, or lose adhesion prematurely.
The physics behind the seal is straightforward. Air naturally moves from high-pressure areas to low-pressure areas. In winter, warmer indoor air rises and creates slight negative pressure that draws cold air through any available opening. In summer the reverse occurs. A continuous, well-fitted weatherstrip interrupts that pressure-driven flow. The seal also reduces the infiltration of dust, pollen, and outdoor noise, adding secondary benefits beyond pure energy savings.
Proper installation ensures the strip remains in full contact along the entire perimeter of the sash or frame. Even a small break in the seal can allow measurable air leakage. That is why careful measurement and clean surface preparation matter so much during window weatherstrip replacement. When the job is completed correctly, the window operates normally while delivering a near-airtight barrier that supports overall home efficiency.
Many homeowners notice the difference immediately after replacement. Rooms that once felt chilly near the windows become more uniform in temperature. Thermostats require fewer adjustments, and the HVAC system cycles less frequently. Over time these small improvements compound into meaningful reductions in energy consumption.
Recognizing Signs That Weatherstripping Has Failed
Weatherstripping does not last forever. Exposure to sunlight, repeated compression, cleaning chemicals, and seasonal temperature swings gradually degrade the material. Identifying failure early prevents prolonged energy loss and discomfort.
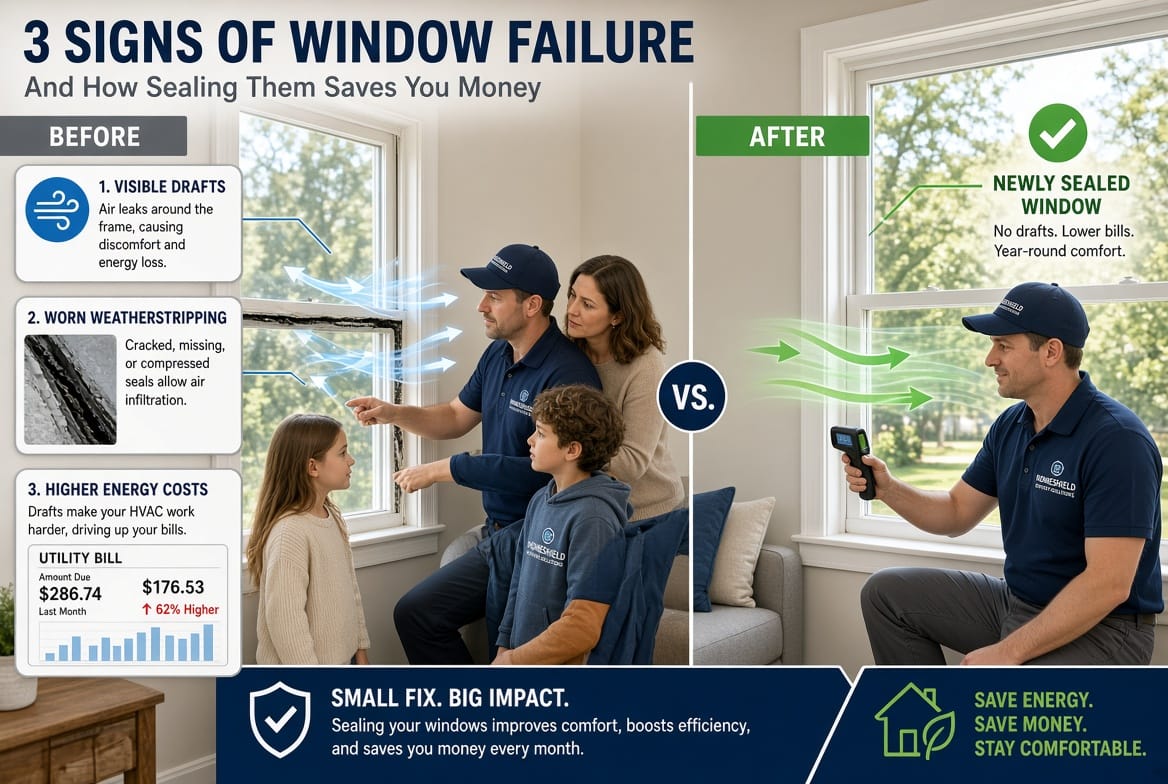
The most common and immediate sign is the presence of drafts. Stand near a closed window on a windy day or when outdoor temperatures differ sharply from indoor ones. If you feel a steady flow of air, the seal has been compromised. Moving your hand slowly around the perimeter often reveals the exact location of the leak.
Visible wear provides another clear indicator. Inspect the strip for cracks, flattening, crumbling, or sections that have pulled away from the frame. Foam that has compressed permanently and no longer springs back has lost its sealing ability. Rubber or vinyl that has become brittle or discolored is similarly ineffective. Gaps where the strip has detached create direct pathways for air movement.
A third reliable signal appears on utility bills. Unexplained increases in heating or cooling costs, especially during extreme weather months, frequently trace back to air leakage around windows. When multiple windows show similar wear, the cumulative effect on energy use becomes noticeable.
Additional clues include difficulty closing a window fully, rattling during wind events, or the accumulation of dust and debris along the sash edges. Condensation that forms more readily on the interior glass can also point to temperature differentials created by drafts.
Addressing these signs through timely window weatherstrip replacement restores performance before minor issues escalate. Ignoring them allows continuous energy waste and can contribute to secondary problems such as uneven room temperatures or increased humidity near the windows.
Preparing for a Successful Replacement
Before beginning the actual work, gather the necessary materials and prepare the workspace. Accurate preparation is the foundation of a durable repair. Measure the length of each side of the window sash or frame where the new strip will be applied. Add a small allowance for clean cuts and corners. Purchase high-quality adhesive-backed weatherstripping that matches the gap size and window style. Foam works well for larger or irregular gaps, while denser rubber or silicone provides longer service life in high-traffic windows.
Clean the surface thoroughly. Remove every trace of the old strip, residual adhesive, dirt, and grease. A mild solvent or adhesive remover followed by a wipe with isopropyl alcohol leaves a surface that promotes strong bonding. Allow the area to dry completely. Any moisture or residue will compromise adhesion and shorten the life of the new seal.
Choose a mild day for the project if possible. Extreme cold or heat can affect both the flexibility of the new material and the curing of the adhesive. Work on one window at a time so the home remains secure and weather-protected throughout the process.
Step-by-Step Guide to Replacing Weatherstripping
The replacement process itself follows a logical sequence that any careful homeowner can master. Begin by fully opening the window or removing the sash if the design allows safe access. Using a utility knife or plastic scraper, carefully lift and peel away the old weatherstripping. Work slowly to avoid damaging the underlying wood, vinyl, or metal surface. Once the bulk is removed, scrape residual adhesive until the channel or flat surface is smooth.
Measure and cut the new strip to exact length. For corners, miter the ends at forty-five degrees so they meet cleanly without overlapping or leaving gaps. Test-fit each piece before removing the protective backing from the adhesive. This dry run confirms that the strip will sit correctly and compress properly when the window closes.
Peel the backing and press the strip firmly into place, starting at one end and working steadily along the length. Apply even pressure to ensure full contact. Avoid stretching the material, as this can create thin spots that fail prematurely. At corners, butt the mitered ends tightly together. Some installers prefer a tiny dab of compatible sealant at the joints for extra security, though high-quality adhesive usually suffices.
Close and open the window several times to verify smooth operation and consistent contact. The strip should compress slightly without binding or preventing the latch from engaging. If the fit feels too tight, a thinner profile may be required. If air still passes, check for missed sections or incomplete adhesion.
Repeat the process for every side of the window that requires sealing. Many windows need weatherstripping on the sash edges, the frame stops, and sometimes the meeting rail. Completing the full perimeter maximizes the energy-saving benefit.
After installation, wipe away any fingerprints or excess material. Operate the window normally for a day or two and recheck the seal. Minor adjustments can still be made while the adhesive is curing.
Long-Term Benefits of Fresh Weatherstripping
A properly executed window weatherstrip replacement delivers measurable returns. Energy consumption for heating and cooling typically declines because the HVAC system no longer compensates for constant air leakage. Comfort improves as cold spots and hot spots near windows disappear. The home becomes quieter as outdoor noise is reduced. Indoor air stays cleaner because less dust and pollen enter through gaps.
The investment is modest compared with the ongoing cost of wasted energy. Many homeowners recover the material and time expense within a single heating or cooling season. Beyond the financial aspect, the repair supports broader sustainability goals by lowering the household’s overall energy demand.
Durability depends on material quality and installation care. Premium silicone or EPDM rubber strips often remain effective for many years when protected from direct abrasion. Periodic inspection—once or twice a year—allows early detection of any new wear so small touch-ups can be performed before drafts return.
Common Pitfalls and How to Avoid Them
Even careful work can encounter obstacles. Stretching the strip during application is a frequent error that leads to gaps later. Always press rather than pull. Leaving residual adhesive creates an uneven base that prevents full contact. Thorough cleaning eliminates this risk. Choosing a strip that is too thick can make the window difficult to close; selecting the correct profile based on measured gap size prevents binding.
Working in dusty or damp conditions weakens adhesion. Prepare a clean, dry surface every time. Ignoring manufacturer guidelines for temperature during installation can also reduce bond strength. Following the product instructions ensures optimal performance.
When windows are older or have irregular frames, professional assessment may reveal additional opportunities such as adjusting the sash or addressing frame movement. In those situations, combining weatherstrip replacement with minor hardware adjustments produces the best long-term results.
Maintaining Your New Seals for Lasting Performance
Once the new weatherstripping is in place, simple habits extend its service life. Avoid harsh chemical cleaners that can degrade the material. Use mild soap and water for routine window cleaning. Keep the tracks free of debris so the strip is not abraded during operation. During extreme weather, a quick visual check confirms that the seal remains continuous.
If a section eventually shows wear, replacement of only that portion is usually possible without disturbing the entire perimeter. Keeping a small supply of matching material on hand makes future touch-ups convenient.
When Professional Service Adds Value
While many homeowners successfully complete window weatherstrip replacement themselves, certain situations benefit from experienced technicians. Multi-story windows, complex casement or awning designs, or homes with numerous windows can make the project time-consuming. Professionals arrive with the correct materials, specialized tools, and the ability to evaluate related issues such as frame alignment or glazing condition in a single visit.
A professional service call also provides peace of mind through warranties on both materials and workmanship. For busy households or those preferring a turnkey solution, scheduling expert assistance ensures the job is completed efficiently and to a high standard.
Conclusion: Take Control of Drafts and Energy Use
Window weatherstrip replacement stands as one of the most accessible and effective energy-saving repairs available to homeowners. By sealing the gaps that allow air to escape or enter, fresh weatherstripping restores comfort, lowers utility costs, and protects the investment already made in heating and cooling equipment. The process—measure carefully, remove the old material completely, and install new adhesive-backed strip with attention to detail—delivers reliable results when followed methodically.
Do not allow drafts to continue draining energy and comfort from your home. Stop drafts with new weatherstripping.
Stop Drafts & Boost Comfort – Call Now!