The Window Solar Film: Installing DIY Privacy and Heat Reduction
Homeowners across the country face the same frustrating challenge every summer and winter: windows that let in too much heat, harsh glare, and unwanted visibility from outside. Traditional window replacements cost thousands and require major construction. A smarter, faster retrofit solution exists that transforms existing glass without removing a single pane. Window solar film is a thin, high-performance material applied directly to glass surfaces. It reduces heat transfer, blocks harmful ultraviolet rays, and adds daytime privacy while preserving natural light. This guide walks you through everything you need to know to complete a successful DIY installation that delivers professional results.
Call for Expert Privacy & Heat Control Installation
Window solar film works as an invisible shield. Once applied, it reflects or absorbs a significant portion of solar energy before it enters the room. The result is cooler interiors in summer, reduced fading of furniture and flooring, lower air-conditioning costs, and greater comfort. Because it is a true retrofit solution, the film installs over existing glass in homes, offices, and rental properties with minimal disruption. No special permits, no structural changes, and no lengthy construction timeline are required.
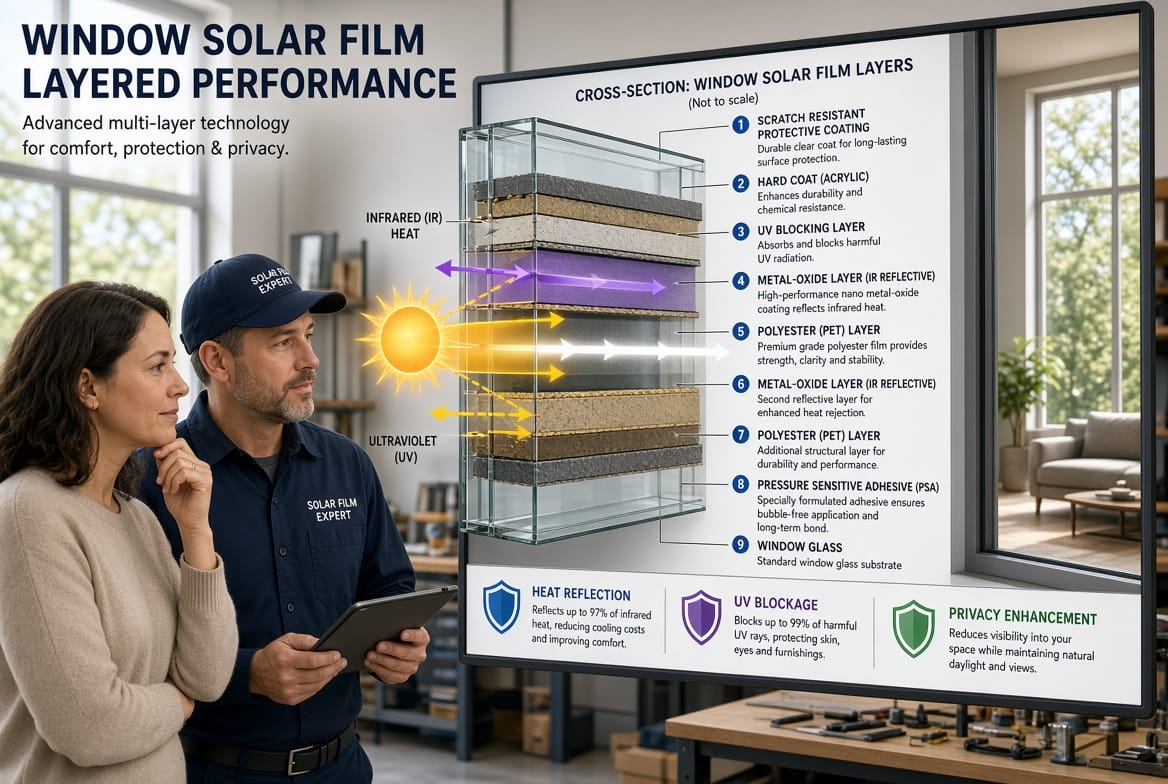
Understanding how the film performs begins with its basic construction. Multiple microscopic layers of polyester, metal oxides, or ceramic particles are laminated together. These layers interact with sunlight in precise ways. Some films reflect infrared heat outward. Others absorb and dissipate energy. All quality films include UV inhibitors that block up to 99 percent of damaging ultraviolet radiation. The finished product remains optically clear or lightly tinted depending on the type chosen, so views remain largely unobstructed while performance improves dramatically.
Three primary categories of window solar film dominate the market for residential DIY projects. Reflective films feature a metallic coating that bounces sunlight away from the glass. They deliver the strongest heat rejection and create a mirror-like appearance from the outside during daylight hours, which simultaneously enhances privacy. Clear films use advanced ceramic or nano-particle technology. They maintain nearly the original appearance of the glass while still cutting heat and UV transmission. These are ideal when preserving curb appeal or historic window character is important. Static cling films require no adhesive. They adhere through static electricity and can be removed or repositioned easily, making them perfect for renters or temporary applications. Each type offers distinct advantages, and selecting the right one depends on climate, window orientation, and personal priorities for appearance versus performance.
Preparing for installation starts with gathering the correct tools and materials. You will need the chosen solar film cut slightly larger than the glass area, a spray bottle filled with a mild soapy water solution, a quality rubber squeegee, a sharp utility knife with extra blades, a soft microfiber cloth, a measuring tape, and a straight edge or ruler. Optional but helpful items include a heat gun or hair dryer for edge finishing and a plastic scraper for stubborn residue removal. Working with a partner makes the process smoother, especially on larger panes, because one person can hold the film while the other sprays and positions it.
Surface preparation determines long-term success. Begin by thoroughly cleaning the glass on both sides if accessible, although most films install on the interior surface. Remove all dirt, grease, stickers, and old adhesive residue. Use a razor scraper carefully for stubborn spots, then wash with the soapy water mixture and dry completely with a lint-free cloth. Any remaining particles will create bubbles or imperfections under the film. Inspect the window frame and seals as well. Repair any gaps or damage before proceeding so the finished installation looks seamless and performs at its best.
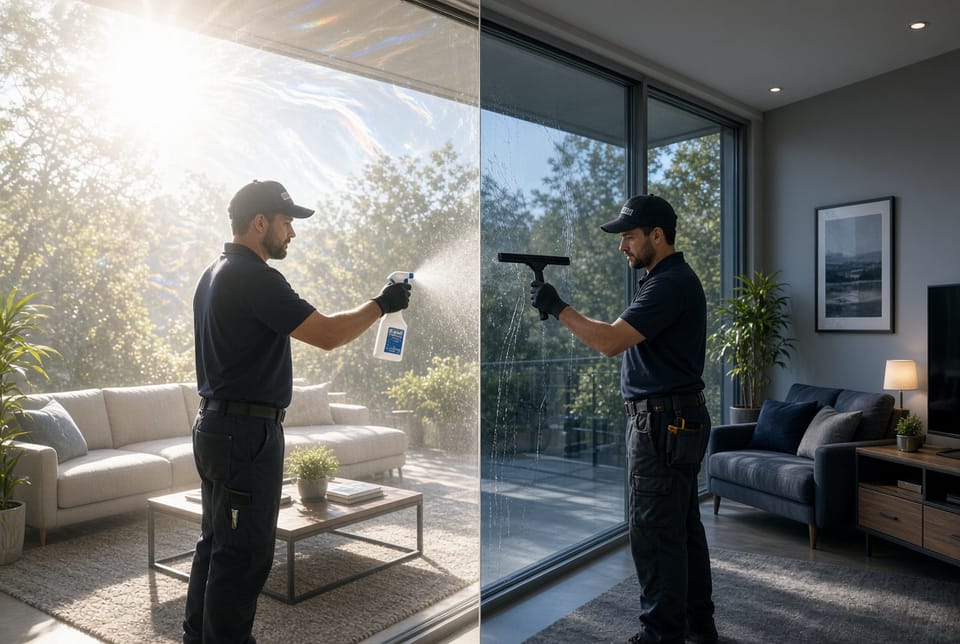
The actual application process follows a logical sequence that becomes intuitive after the first window. Measure the glass carefully and cut the film approximately one inch larger on all sides. This excess allows precise trimming later. Spray the entire glass surface generously with the soapy water solution. The liquid acts as a lubricant that lets the film slide into exact position and prevents premature sticking. Peel the protective liner from the adhesive side of the film, or simply position a static-cling version, and place the film against the wet glass. Use your hands to gently smooth it outward from the center, then take the squeegee and work systematically from the middle toward the edges. Overlap each pass slightly to push out water and air bubbles. Apply firm, even pressure without stretching the material.
Once the majority of moisture has been removed, trim the excess film with a sharp utility knife guided by a straight edge held against the window frame. Leave a tiny gap of about one-sixteenth of an inch from the frame to allow for thermal expansion and contraction. A final thorough squeegee pass removes any remaining moisture. Small residual bubbles usually disappear within a few days as the film fully cures and residual water evaporates. Avoid cleaning the newly installed film for at least seven days so the adhesive or static bond can set completely.
Several practical tips elevate results from acceptable to excellent. Always work in a dust-free environment and avoid installation on extremely hot or cold days when glass expansion or contraction can complicate adhesion. Start with smaller windows to build confidence before tackling large picture windows or sliding glass doors. Keep the spray bottle nearby and re-wet the surface as needed during positioning. For multi-pane windows or those with dividers, treat each section individually rather than attempting one continuous sheet. If a large bubble forms, carefully lift the nearest edge, re-spray, and re-squeegee. Patience during these adjustments prevents permanent flaws.
Homeowners sometimes encounter challenges that can be avoided with proper awareness. One common risk involves installing film on damaged or heavily scratched glass; the imperfections become more noticeable afterward. Another risk is applying film over windows that already have low-emissivity coatings without confirming compatibility, which can reduce performance or void warranties on certain factory treatments. Stretching the film during application creates wrinkles that never fully disappear. Using insufficient soapy water causes the film to grab too quickly and trap debris. Recognizing these potential issues in advance and following careful technique eliminates most problems.
Beyond the immediate installation, understanding the broader performance benefits reinforces why window solar film ranks among the most cost-effective home improvements. Heat reduction can lower interior temperatures by several degrees on sunny exposures, directly decreasing cooling system runtime and energy bills. UV protection safeguards hardwood floors, carpets, artwork, and upholstery from premature fading and degradation. Privacy gains appear automatically during daylight hours because the exterior side of reflective or tinted films becomes more opaque while interior visibility remains clear. Glare reduction improves comfort for television viewing, computer work, and reading near windows. In colder months, certain films also help retain interior heat by reflecting radiant energy back into the room, delivering year-round value.
Maintenance remains remarkably simple. Clean the film with the same mild soapy water solution used during installation and a soft cloth or squeegee. Avoid abrasive cleaners, ammonia-based products, or rough paper towels that can scratch the surface. Most quality films carry warranties ranging from five to fifteen years or longer when properly installed and maintained. Periodic inspection of edges ensures the bond remains secure, although modern adhesives and static-cling formulations prove highly durable under normal household conditions.
While the DIY approach suits the majority of residential windows, certain situations benefit from professional assistance. Extremely large or high commercial-style panes, historic windows with delicate muntins, or properties requiring specialized security or dual-reflective films may exceed typical homeowner tools and experience. In those cases, trained technicians complete the work efficiently and often provide lifetime labor guarantees. Even then, understanding the process outlined here allows informed conversations and better evaluation of quotes.
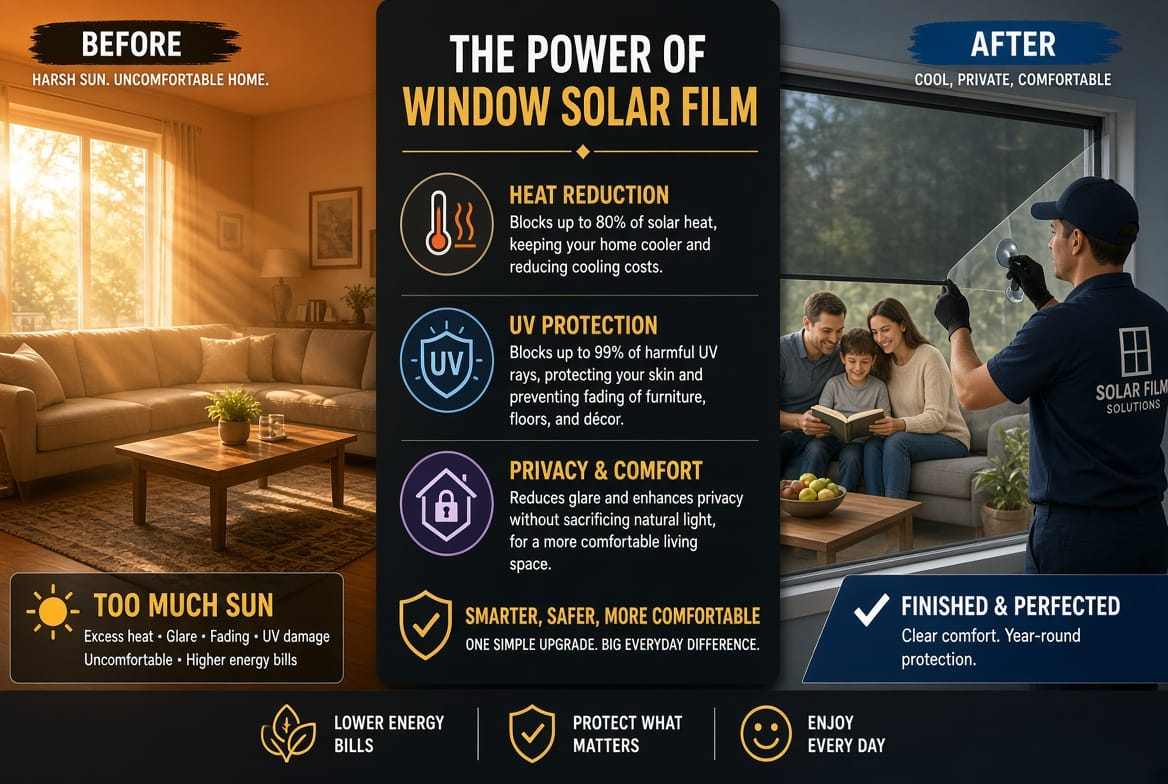
Selecting the appropriate film thickness and performance rating further customizes results. Films are measured by their total solar energy rejection percentage and visible light transmission. Higher rejection ratings deliver greater cooling but may darken the interior slightly. Balancing these factors according to room function—living areas versus bedrooms versus home offices—produces optimal comfort. South- and west-facing windows typically gain the most from higher-performance films, while north-facing glass may need only moderate UV protection.
Environmental considerations also favor solar film. By reducing reliance on air conditioning, the retrofit lowers household carbon emissions. The materials themselves are recyclable in many programs, and the long service life means fewer replacements compared with temporary window coverings. Combined with existing curtains or blinds, the film creates layered control that adapts to changing seasons and daily light conditions.
Homeowners who complete the project themselves often report a surprising sense of accomplishment along with measurable comfort improvements. The process teaches practical skills that transfer to other home maintenance tasks. Measuring, cutting, and applying materials accurately builds confidence for future upgrades. Documenting before-and-after temperatures or energy bills provides concrete proof of the investment’s return.
Safety remains straightforward. Keep utility knives pointed away from the body and store blades securely. Work from stable ladders or step stools when reaching upper portions of tall windows. Wear eye protection when scraping old residue. The soapy water solution is non-toxic, yet good ventilation helps during larger projects. Children and pets should stay clear of the work area until the film has cured and tools are put away.
Over time, the installed film becomes an integral part of the home’s performance envelope. Guests frequently comment on the comfortable interior climate without realizing the invisible technology responsible. Real-estate professionals note that energy-efficient upgrades such as solar film can enhance property appeal and support higher valuations in competitive markets. Renters appreciate the reversible nature of static-cling options that leave no residue upon move-out.
Advanced users sometimes combine different film types across a single property. Reflective film on west-facing glass maximizes afternoon heat rejection, while clear film on front elevations maintains curb appeal. Consistent color matching across visible elevations preserves architectural harmony. Manufacturers provide sample kits that allow accurate visualization under actual lighting conditions before committing to full rolls.
The economics prove compelling. Material costs for a typical home remain a fraction of full window replacement. Labor, when performed as a DIY project, adds only time rather than expense. Energy savings begin immediately and accumulate year after year. Many utility companies and local energy programs even offer rebates for qualifying solar control products, further improving the payback period.
Attention to detail during the final inspection ensures lasting satisfaction. View the finished windows from multiple angles and distances under both natural and artificial light. Confirm that edges sit neatly against frames and that no large bubbles or debris remain. Address minor imperfections promptly while the film is still adjustable. Once cured, the surface resists normal cleaning and everyday contact.
In summary, window solar film stands as one of the most accessible and effective retrofit solutions available for privacy and heat reduction. It addresses the core shortcomings of ordinary glass through a thin, high-tech layer that any careful homeowner can install. By choosing the correct type—whether reflective, clear, or static cling—preparing the glass meticulously, and following the soapy-water and squeegee technique, the results rival professional work. The benefits extend far beyond cooler rooms to include furniture protection, glare control, energy savings, and enhanced daytime privacy.
Reduce heat and glare with solar film. Transform your windows into high-performance assets that keep interiors comfortable and private year-round. For expert guidance, premium film selection, or professional installation of complementary window treatments. Experienced specialists stand ready to help you achieve the exact level of heat reduction, UV protection, and privacy your home deserves.
Transform Your Windows – Call for Solar Film Today!