The Window Sash Repair: Fixing Stuck or Rotted Wood Sashes
Wood window sashes form the heart of traditional architecture. They deliver character, ventilation control, and energy performance that modern replacements often struggle to match. When these sashes become stuck or develop rotted wood, many homeowners assume full replacement is the only solution. That assumption is rarely true. Thoughtful restoration repair can return even severely compromised sashes to reliable service while preserving the historic integrity and thermal benefits of original materials.
Fix Stuck or Rotted Sashes – Call for Expert Repair!
This guide walks through proven methods for freeing stuck sashes and rebuilding rotted sections. It balances clear DIY steps with honest guidance on when professional intervention delivers safer, longer-lasting results. Every technique prioritizes structural strength, weather resistance, and smooth operation so your restored windows continue protecting and enhancing your home for decades.
Why Wood Sash Restoration Matters
Original wood sashes were built from dense, slow-growth lumber that modern softwoods rarely equal. Properly maintained, they outperform many vinyl or aluminum units in durability and repairability. Paint buildup, moisture intrusion, and failed balances are the most common causes of failure. Addressing these issues early prevents secondary damage to frames, sills, and interior finishes.
Restoration also supports sustainability. Reusing existing material reduces landfill waste and avoids the embodied energy of manufacturing new windows. Homeowners who choose repair over replacement typically report improved comfort, lower long-term costs, and higher property appeal.
Recognizing the Warning Signs
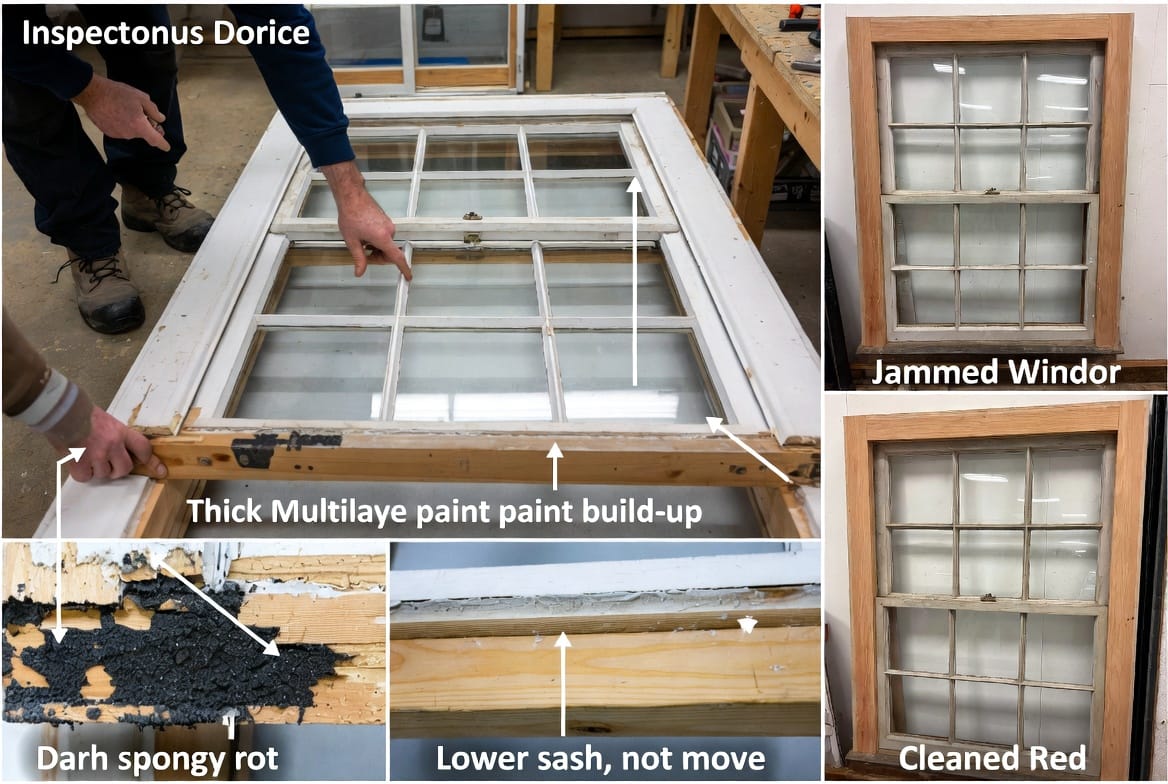
Early detection keeps repairs manageable. Watch for these clear indicators:
- Sashes that refuse to open or close without force
- Visible soft or spongy wood along the bottom rail or stile edges
- Heavy layers of paint sealing the sash to the frame
- Uneven movement or sudden drops when the sash is raised
- Musty odors or staining around the window opening
Ignoring these symptoms allows moisture to migrate deeper, accelerating decay and risking frame damage. Prompt action restores function and protects the surrounding structure.
Understanding Sash Components and Common Failure Points
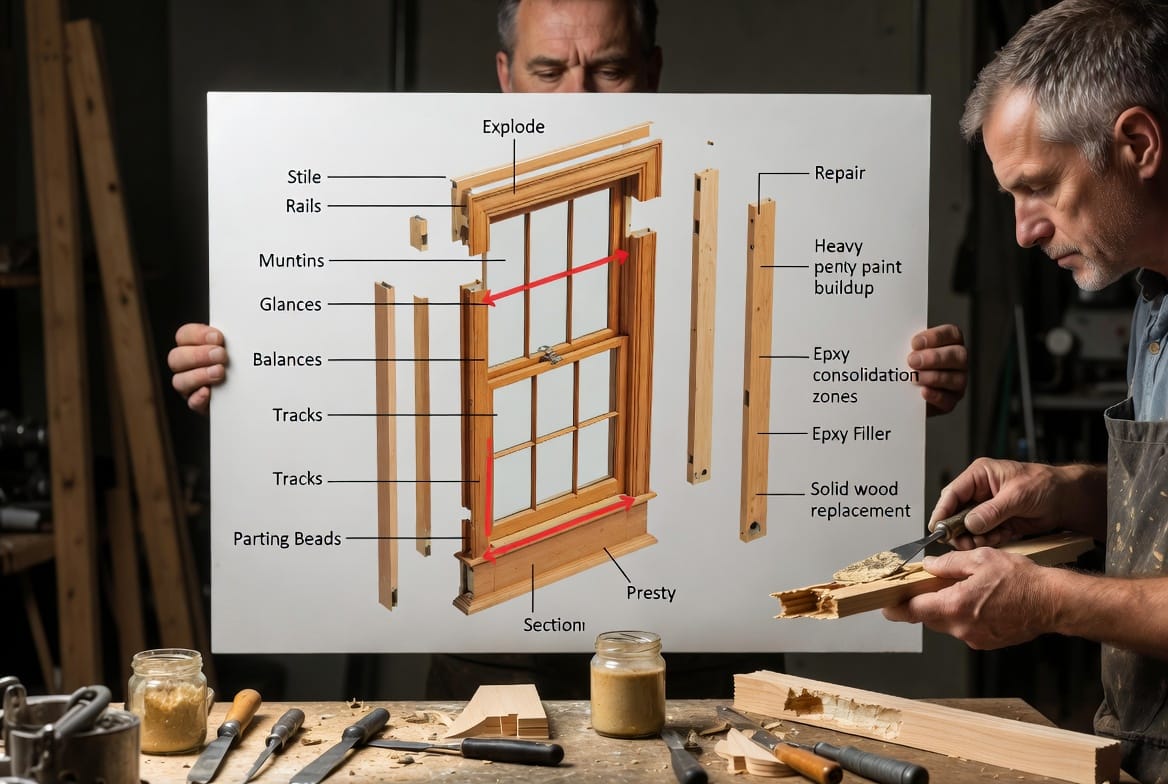
A traditional double-hung sash consists of vertical stiles, horizontal rails, muntins (if divided lights are present), glass, glazing compound, and the balance system—either weights and cords or modern spring balances. The lower rail and lower portions of the stiles endure the greatest exposure to weather and therefore suffer the highest incidence of rot. Tracks and parting beads accumulate paint that binds the sash. Cord or spring balances lose tension, causing the sash to stick or fall.
Knowing these elements helps target repairs efficiently. The following sections detail practical solutions for the two most frequent problems: stuck operation and wood decay.
Fixing Stuck Window Sashes
A stuck sash usually results from paint seal, dirt-filled tracks, or failed balances. The repair sequence follows a logical order: free the paint bond, clean and lubricate the tracks, then address the balance system if needed.
Removing Excess Paint
Begin by scoring the paint joint between sash and frame with a sharp utility knife. Work carefully around all four sides of both upper and lower sashes. Next, insert a thin putty knife or specialized sash tool into the scored line and gently rock it to break the seal. Avoid prying with excessive force; that can crack glass or split wood.
Once the sash moves slightly, raise and lower it repeatedly while scraping residual paint from the edges. A heat gun set on low can soften stubborn layers, but keep the nozzle moving to prevent scorching the wood. After freeing the sash, sand the edges lightly so they clear the frame by approximately 1/16 inch.
Cleaning and Lubricating the Tracks
Remove the sash completely if possible by releasing the balances or lifting it out of the frame. Vacuum accumulated debris from the tracks, then wipe with a damp cloth followed by a dry one. Apply a thin bead of silicone-based lubricant or specialized window-track spray along the entire length of the channels. Avoid petroleum-based products that attract dirt.
Reinstall the sash and test movement. Smooth travel at this stage often restores full function without further work.
Replacing Window Balances
If the sash still feels heavy or drops unexpectedly, the balances require attention. Older weight-and-cord systems need new cord or chain and correctly sized weights. Modern spiral or block-and-tackle spring balances are replaced as complete units. Measure the existing balance length and weight rating carefully before ordering replacements. Installation involves securing the balance to the jamb and attaching the sash shoe or pulley according to manufacturer instructions.
DIY suitability for stuck-sash repairs is high when the wood remains sound and the homeowner possesses basic tools and patience. Professional service becomes advisable when glass is cracked, the frame itself is distorted, or multiple sashes throughout the house exhibit the same problem. Specialists complete the work faster, guarantee smooth operation, and can adjust balances for perfect counterweight.
Repairing Rotted Wood Sashes
Wood rot occurs when moisture penetrates unprotected end grain or joints. The lower rail and stile bottoms are classic locations. Successful repair depends on removing all soft material and rebuilding strength with either epoxy consolidation or solid wood replacement.
Assessing the Extent of Damage
Probe the wood with an awl or screwdriver. Soft, fibrous material that yields easily must be removed. Sound wood surrounding the decay can often be retained. Mark the boundaries of the damage clearly.
Epoxy Repair Technique
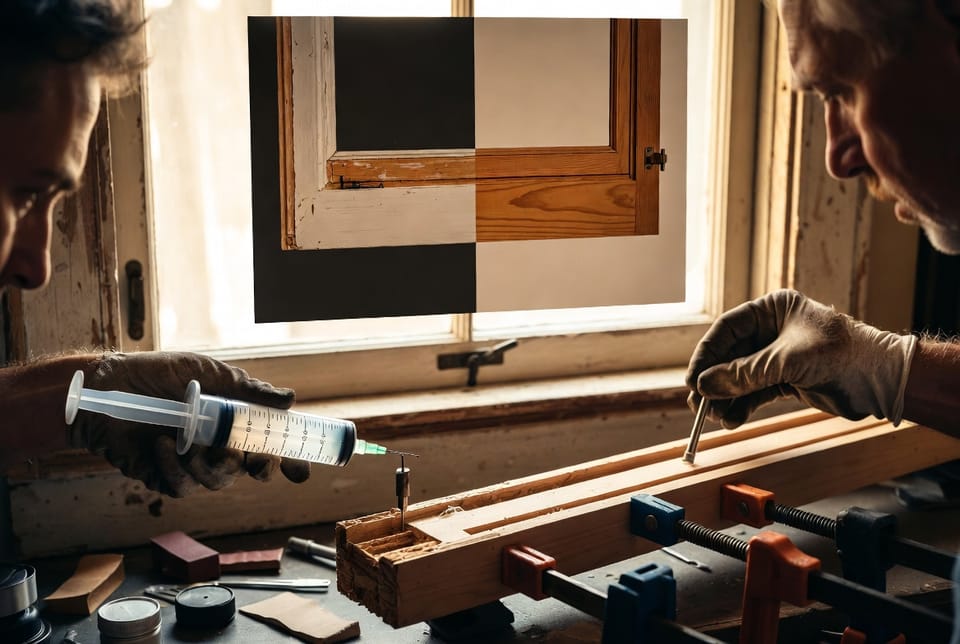
For moderate rot that has not compromised structural integrity, epoxy wood consolidant and filler provide an excellent solution. First, dig out every trace of soft wood until only firm material remains. Drill small holes into the surrounding sound wood if necessary to allow deeper penetration of liquid consolidant.
Apply the consolidant liberally and allow it to soak in thoroughly. Once cured, mix a two-part epoxy filler to a workable consistency and pack it into the voids, slightly overfilling. Shape the surface while still workable, then sand smooth after full cure. The repaired section accepts paint or stain identically to the original wood and resists future moisture intrusion far better than untreated lumber.
Epoxy repairs excel when the overall sash dimensions must remain exact and when the decay is localized. They are especially valuable on ornate or historic profiles that would be costly to reproduce.
Solid Wood Replacement
When rot has destroyed a large portion of a rail or stile, cutting out the damaged section and splicing in new wood yields the strongest result. Select matching species—typically pine, fir, or oak depending on the original—and mill the replacement piece to identical thickness and profile.
Cut the damaged area with clean, square shoulders. Dry-fit the new piece, then secure it with waterproof exterior adhesive and stainless-steel screws or dowels. Clamp firmly until the adhesive cures. Plane or sand the joint flush and restore any molded edges with appropriate router bits or hand tools.
This method restores full structural capacity and is preferred for load-bearing rails that support heavy glass.
DIY versus professional guidance for rot repair hinges on skill level and project scale. Homeowners comfortable with measuring, cutting, and mixing epoxy can handle small consolidations successfully. Larger replacements, especially those involving complex profiles or multiple sashes, benefit from professional expertise. Specialists possess specialized jigs, matching lumber stock, and the experience to maintain precise sash dimensions so the window continues to operate and weather-seal correctly.
Essential Tools and Materials
Gather these items before beginning:
- Utility knife and putty knives
- Heat gun (optional)
- Sandpaper and sanding block
- Silicone lubricant
- Epoxy consolidant and filler system
- Matching replacement lumber
- Waterproof exterior adhesive
- Clamps, chisels, and measuring tools
- Safety glasses and dust mask
Quality materials make a measurable difference. Choose exterior-grade epoxy formulated for wood and marine-grade adhesives rated for continuous outdoor exposure.
Step-by-Step Safety and Best Practices
Always work with the sash supported securely. Wear eye protection when scraping or sanding. Ensure adequate ventilation when using solvents or epoxy. Test the repaired sash thoroughly for smooth travel and weather tightness before final painting. Apply a high-quality primer and exterior paint system, paying special attention to end grain and joints to prevent future moisture entry.
Long-Term Maintenance After Repair
Restored sashes reward periodic care. Inspect annually for new paint cracks or soft spots. Keep tracks clean and lightly lubricated. Maintain a continuous paint film, especially on the exterior bottom rail. These simple habits extend the life of the repair and protect the surrounding structure.
When Professional Restoration Delivers Superior Results
While many stuck-sash and minor-rot repairs fall within capable DIY reach, certain situations favor trained specialists:
- Extensive rot affecting more than one-third of a rail or stile
- Historic windows requiring exact profile matching
- Multiple sashes needing simultaneous attention
- Homes where energy-efficiency upgrades or weather-stripping integration are desired
- Situations involving lead-based paint that requires certified handling
Professionals bring calibrated tools, stock of period-correct materials, and the ability to fine-tune balances for effortless operation. They also provide warranties that protect the investment.
The Lasting Value of Restored Wood Windows
A properly repaired wood sash operates smoothly, seals against weather, and retains the architectural character that defines many homes. The combination of epoxy technology and traditional woodworking techniques produces repairs that frequently outlast the surrounding frame. Homeowners gain improved comfort, reduced drafts, and the satisfaction of preserving original craftsmanship.
Whether you tackle a single stuck sash or restore an entire bank of historic windows, the process rewards careful attention to detail. Start with accurate assessment, choose the right repair method for the damage, and finish with thorough painting and lubrication. The result is a set of windows that function as intended while continuing to enhance the beauty and value of your home.
Restore old wood windows to their original performance and charm. For expert assessment and professional window sash repair.
Don’t Replace – Restore Your Windows! Call Now!