The Window Crank Operator: Replacing a Worn Gear
A properly functioning window crank operator is one of the most overlooked yet essential components in any home with casement or awning windows. When the internal gear wears down, the simple act of opening or closing a window can suddenly become frustrating, noisy, or even impossible. The good news is that replacing a worn gear inside the crank operator is a focused, highly effective repair that restores full control and extends the life of your windows for years. In this guide we walk through exactly how the mechanism works, the clearest signs that the gear has failed, and the precise steps required to remove the old operator, match the correct replacement, and install the new unit with confidence.
Fix Sloppy Cranks & Grinding Noise – Call Now!
How the Window Crank Operator Works
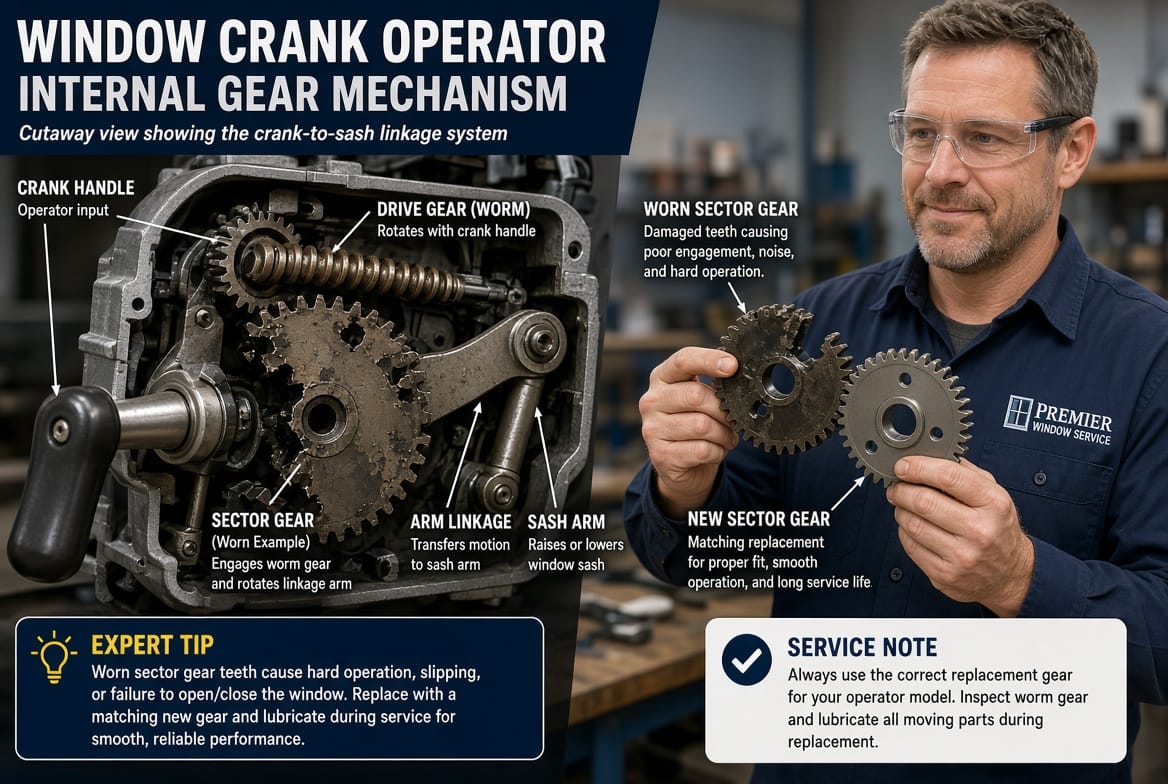
At the heart of every manual casement or awning window is a compact mechanical device known as the crank operator. This assembly converts the rotary motion of the handle into linear movement that pushes or pulls the window sash open and closed.
Inside the operator housing sits a precisely engineered gear system. When you turn the handle, a drive gear meshes with a sector gear or worm gear. That gearing multiplies your hand force and transfers it through an arm or linkage that is attached to the window sash. The result is smooth, controlled travel of the glass—whether you need a gentle crack for ventilation or a full 90-degree opening.
Because the gear teeth carry the entire load every time the window moves, they are subject to gradual wear. Dust, moisture, lack of lubrication, and simple age eventually flatten or chip the teeth. Once the gear can no longer maintain solid contact, the entire operator loses its mechanical advantage and the window stops responding properly.
Understanding this simple gear-driven relationship makes the repair process far less mysterious. You are not replacing an entire window; you are restoring the single critical part that translates human effort into sash movement.
Clear Signs That the Gear Has Failed
Recognizing failure early prevents unnecessary strain on the sash hinges and weather seals. Watch for these unmistakable symptoms:
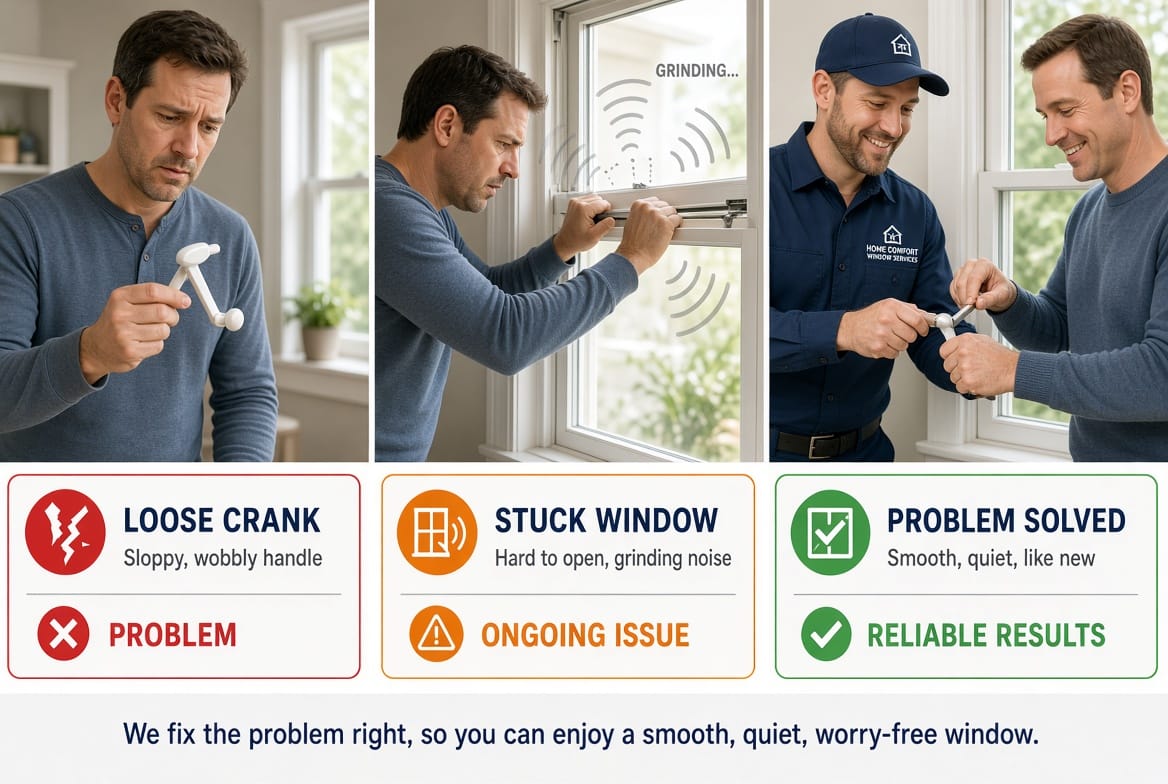
- Sloppy or loose handle feel – The crank spins freely with little or no resistance, indicating that the gear teeth no longer mesh tightly.
- Window that will not open or close fully – You turn the handle but the sash barely moves or stops halfway.
- Grinding, clicking, or stripping noise – Metal-on-metal sounds signal that the worn gear is slipping past its mating teeth.
- Handle that turns without moving the sash – Complete loss of drive means the gear has stripped beyond usable engagement.
- Visible play or wobble in the operator arm when the handle is stationary.
Any one of these signs is sufficient reason to schedule a replacement. Ignoring them often leads to additional damage: forced operation can bend the linkage, stress the hinges, or crack the glass.
Why Prompt Replacement Matters
A worn gear does more than inconvenience daily use. Continued operation with a damaged operator places uneven stress on the window frame and can compromise the weather-tight seal. Over time this leads to higher energy bills, drafts, and potential water intrusion. Replacing the worn gear (or the complete operator that houses it) is far more economical than addressing secondary damage later.
Modern replacement operators are manufactured to exacting tolerances and often incorporate improved materials—hardened steel or reinforced polymer gears—that outlast the original parts. When installed correctly, the new unit returns the window to factory-smooth performance and frequently improves ease of operation beyond the original feel.
Step-by-Step Replacement of the Worn Crank Operator
The repair itself is methodical and can be completed in under an hour once the correct part is on hand. Follow these precise stages.
1. Gather the Necessary Tools and Prepare the Area
You will need a Phillips screwdriver, flat-head screwdriver, putty knife or thin pry tool, needle-nose pliers, and a clean cloth. Place a drop cloth beneath the window to catch any small screws or debris. Open the window fully if possible; if the sash is stuck, support it safely so it cannot fall once the operator is detached.
2. Remove the Old Operator
Begin by unscrewing the handle. Most handles are secured by a single set screw located on the underside or side of the crank. Once the handle is off, locate the operator cover plate (often held by two or three screws) and remove it carefully.
Next, detach the operator arm from the sash. This is usually accomplished by sliding a retaining clip or removing a small pivot pin. Support the sash so it remains in position.
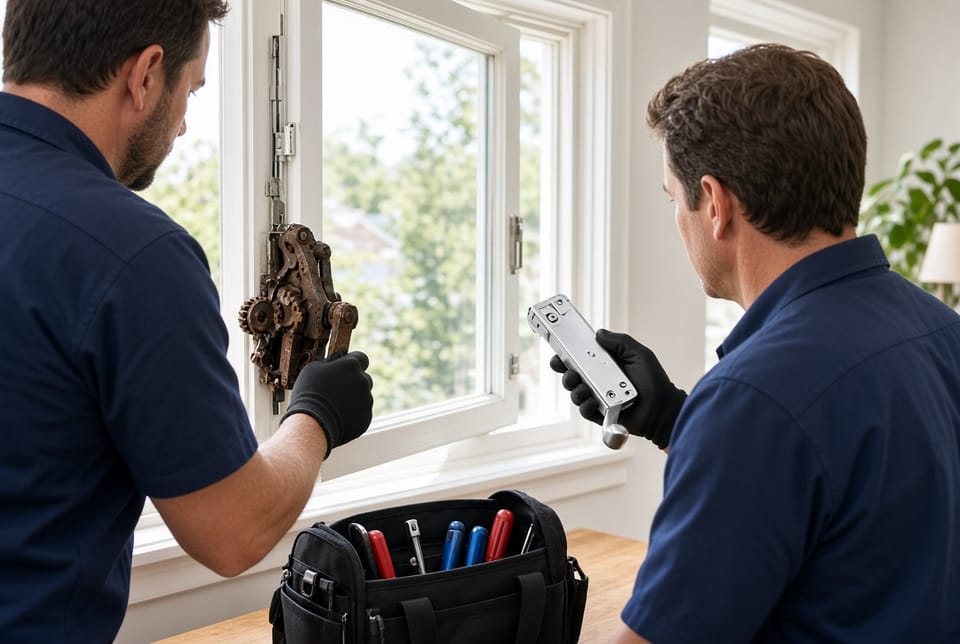
Finally, unscrew the operator body from the window sill or jamb. Lift the entire assembly free. You now have the worn unit in hand and can examine the gear teeth to confirm the failure.
3. Match the Exact Replacement
Not every crank operator is interchangeable. Key matching criteria include:
- Mounting hole pattern and overall footprint
- Arm length and offset
- Gear ratio and tooth profile
- Hand of operation (left-hand or right-hand)
- Finish and handle style if aesthetics matter
Bring the old unit or accurate measurements to a window-service professional. Matching the original geometry guarantees that the new gear will drive the sash through its full intended range without binding.
4. Install the New Operator
Position the new operator in the exact same location and secure it with the original or matching screws. Reattach the operator arm to the sash using the retaining clip or pin. Replace the cover plate and reinstall the handle, tightening the set screw firmly.
Test the motion slowly at first. The handle should turn smoothly with consistent resistance, and the sash should travel fully open and closed without hesitation or noise. A light application of silicone-based lubricant on the gear teeth (if accessible) and the arm pivot points completes the job.
5. Final Adjustments and Cleanup
Check the weatherstripping and sash alignment. If the window previously required force, the new operator may reveal that a hinge or track needs minor adjustment. Wipe away any metal filings or old grease, then dispose of the worn operator responsibly.
Common Pitfalls to Avoid
Even experienced homeowners can encounter a few traps:
- Installing a left-hand operator on a right-hand window (or vice versa) results in reversed motion.
- Over-tightening mounting screws can distort the housing and bind the gear.
- Forcing a partially engaged gear can strip the new teeth immediately.
- Neglecting to support the sash during removal risks glass damage or personal injury.
Working methodically and verifying each connection before the next step eliminates these risks.
Long-Term Care After Replacement
Once the new crank operator is in place, simple habits keep the gear healthy for decades:
- Operate the window at least once every few weeks to distribute lubricant.
- Keep the track and sill free of dirt and debris.
- Avoid hanging objects from the open sash that place extra load on the operator.
- Schedule a professional inspection every few years if the home is in a high-humidity or coastal environment.
These small actions protect the investment and ensure the window continues to open and close with effortless precision.
The Value of Professional Service
While the replacement process is straightforward for those comfortable with basic tools, many homeowners prefer the peace of mind that comes with professional installation. Trained technicians arrive with the correct matching operator already in hand, carry specialized tools for stubborn fasteners, and can address any related issues—hinge wear, seal compression, or frame alignment—during the same visit. The result is a complete, warranty-backed repair completed efficiently and correctly the first time.
A worn gear does not have to mean a permanently difficult window. By recognizing the symptoms early, understanding the simple gear-driven mechanism, and following a careful replacement sequence, you restore reliable operation and protect the larger investment of your windows.
Replace worn window operators today. Restore effortless control, eliminate frustrating noises, and protect your home’s comfort.
Get Professional Window Crank Replacement – Call Today