The Security System Outdoor Camera: Placement for Maximum Coverage
Proper outdoor camera placement stands as one of the most critical decisions you will make when installing a modern security system. Even the highest-resolution cameras deliver limited value if they face the wrong direction, sit at the wrong height, or leave critical areas unprotected. Strategic positioning transforms ordinary devices into a powerful, continuous shield that deters intruders, captures clear evidence, and gives homeowners genuine peace of mind.
Call Today for Expert Outdoor Camera Placement
When cameras are positioned correctly, they create overlapping fields of view that eliminate blind spots and provide comprehensive surveillance of every approach to your property. This article walks through the exact principles, heights, angles, and testing methods that professional installers use to achieve maximum coverage. Follow these guidelines and your outdoor cameras will work at peak effectiveness from day one.
Why Camera Placement Determines Overall Security Effectiveness
Many homeowners invest in quality equipment only to discover later that poor positioning reduced their system’s performance by half. Cameras pointed too high miss facial details. Units mounted too low become easy targets for vandalism. Lenses aimed directly into the sun produce washed-out footage at the most important times of day.
Correct placement solves these problems before they start. It ensures every doorway, driveway, window, and side path falls inside a monitored zone. It also reduces false alerts caused by passing traffic or moving tree branches. Most importantly, visible and well-placed cameras act as a strong visual deterrent. Potential intruders quickly recognize that the property is actively protected and choose easier targets elsewhere.
Authoritative studies of residential burglaries consistently show that homes with thoughtfully positioned outdoor cameras experience significantly fewer successful break-ins. The difference lies not in the brand of camera but in how carefully each unit is located and oriented.
Ideal Height: Mounting Cameras Between 8 and 10 Feet
The recommended mounting height for most outdoor security cameras falls between 8 and 10 feet above ground level. This range delivers several decisive advantages.
At this elevation the camera remains out of easy reach, making it difficult for someone to disable or cover the lens. At the same time the height stays low enough to capture clear facial features and clothing details of anyone approaching the property. Cameras placed higher than 10 feet often produce only top-of-head views that prove useless for identification. Units mounted lower than 8 feet become vulnerable to tampering and frequently suffer from excessive motion alerts caused by pets or children.
When selecting exact mounting points, measure carefully from finished grade. Account for landscaping that may grow taller over time and for snow accumulation in colder climates. Use sturdy outdoor-rated mounts designed for the wall or eave material of your home. Secure every fastener firmly so wind and weather cannot shift the angle after installation.
Prioritize Entry Points for Primary Coverage
Every exterior door, garage entrance, and ground-floor window represents a potential point of forced entry. These locations must receive first priority when planning outdoor camera placement.
Position at least one camera so its field of view directly covers the front door and the approach path leading to it. A second camera should monitor the rear or side door commonly used by family members. Garage doors and any basement bulkhead entrances also require dedicated coverage. Aim the lens slightly downward so it captures faces rather than just the top of a person’s head as they stand at the threshold.
For sliding glass doors or large picture windows, angle the camera to include both the glass surface and the immediate patio or walkway area. This dual coverage records anyone attempting to force the lock as well as anyone loitering nearby.
Use Corner Mounting to Expand Coverage Zones
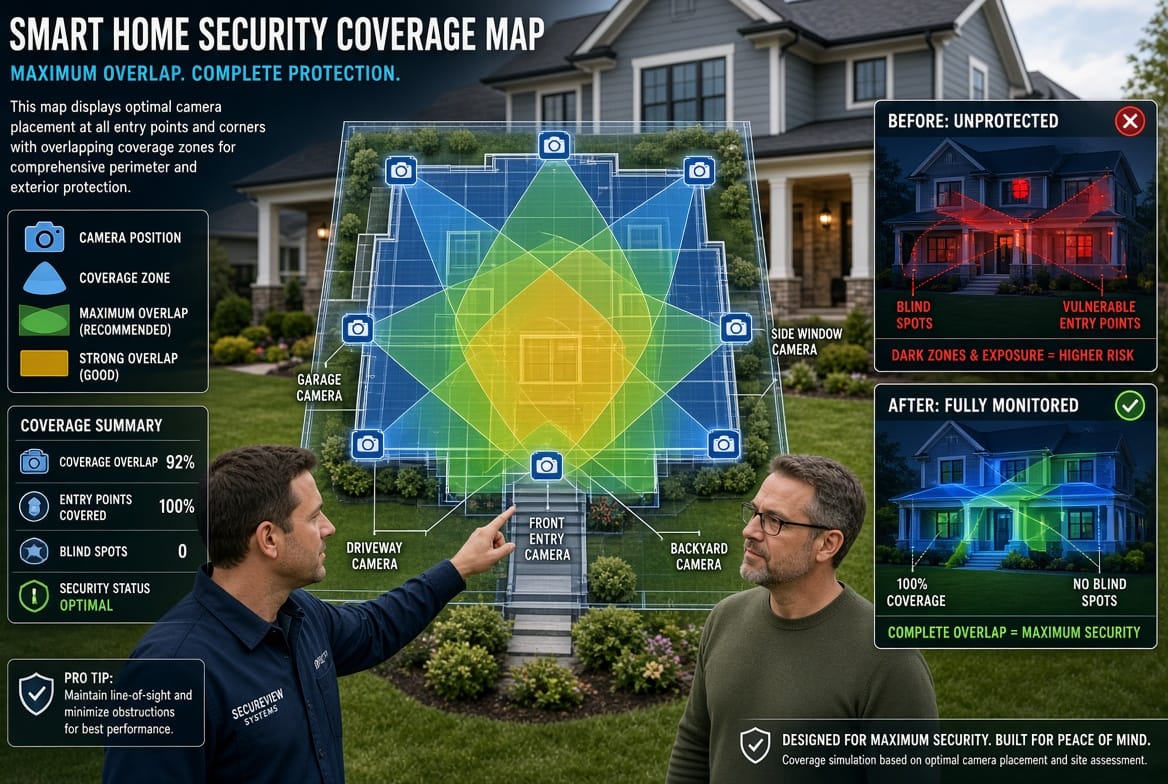
Corners of the house offer some of the most efficient mounting locations available. A camera placed at an exterior corner can often survey two full sides of the property at once. This single unit reduces the total number of cameras required while still delivering overlapping views that eliminate blind spots.
When mounting at a corner, orient the camera so its primary view sweeps along the longer wall while still capturing activity on the shorter adjacent wall. Many modern cameras include adjustable brackets that allow precise fine-tuning of both horizontal and vertical angles. Take advantage of these adjustments rather than settling for a fixed position.
Corner placement also improves the camera’s ability to detect motion across a broader area. Intruders attempting to stay close to the wall still enter the detection zone, and the overlapping coverage from neighboring cameras creates a continuous surveillance net.
Avoid Glare and Optimize Lighting Conditions
Glare remains one of the most common reasons outdoor cameras produce unusable footage. Direct sunlight, reflective surfaces, and poorly aimed infrared illuminators can wash out critical details exactly when they are needed most.
Never point a camera directly into the rising or setting sun. Instead, orient lenses so the sun remains behind or to the side of the camera throughout the day. In the northern hemisphere this often means facing cameras toward the north or carefully angling them east or west with partial shading from eaves.
Watch for reflective surfaces such as white walls, glass doors, or shiny vehicles parked nearby. These can bounce light back into the lens and create temporary whiteouts. Adjust the camera’s position a few inches left or right, or tilt it slightly, until the reflection disappears from the live view.
At night, infrared glare becomes the primary concern. Ensure the camera’s own IR LEDs do not bounce off nearby walls or objects and return into the lens. Many systems allow adjustment of IR intensity or provide separate external illuminators that can be positioned independently. Test night vision thoroughly after installation and make small corrections until facial features remain clearly visible at the expected range.
Identify and Eliminate Blind Spots
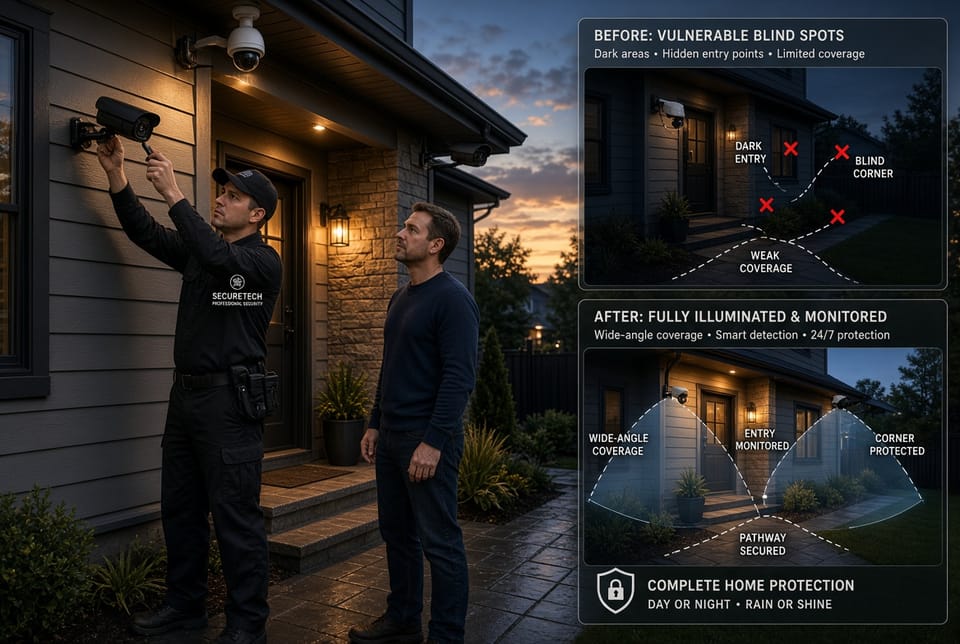
Even a well-intentioned layout can leave unexpected blind spots. These hidden zones often appear behind large bushes, under deep overhangs, beside detached garages, or along fence lines that block the camera’s view.
Walk the entire perimeter of the property during both daylight and nighttime hours while watching the live camera feeds on a phone or tablet. Note every area that remains outside all fields of view. Then either reposition an existing camera or add a dedicated unit to close the gap.
Pay special attention to the sides of the house that face less-traveled areas. Intruders frequently prefer these quieter approaches. Overlapping coverage from multiple cameras ensures that if one unit is temporarily blocked by weather or a moving object, another continues to record the same space.
Practical Tips for Testing Camera Angles
Installation is only complete after thorough testing. Use the following process to confirm every camera delivers the intended coverage:
- View the live feed from each camera at different times of day to check for glare and lighting changes.
- Walk slowly through every expected approach path while a second person monitors the video. Confirm faces remain identifiable.
- Simulate common activities such as carrying packages, walking pets, or exiting vehicles to verify motion detection zones.
- Review recorded clips after dark to ensure infrared performance meets expectations.
- Adjust height, tilt, or pan in small increments until the image meets professional standards.
- Document final positions with photos and notes so future maintenance remains straightforward.
Repeat the testing process after any landscaping changes or seasonal foliage growth. A camera that worked perfectly in winter may need a slight tilt adjustment once trees leaf out in spring.
Additional Best Practices for Long-Term Reliability
Choose weatherproof housings rated for the temperature extremes and precipitation levels common in your region. Keep camera lenses clean by scheduling quarterly inspections. Avoid mounting directly under roof edges where ice or heavy rain runoff can repeatedly strike the housing.
Whenever possible, power cameras with hardwired connections rather than relying solely on batteries. Hardwired systems maintain continuous operation and simplify firmware updates. If wireless cameras are necessary, position them within strong signal range of the base station and use outdoor-rated Ethernet or power-over-Ethernet solutions where feasible.
Integrate outdoor cameras with the rest of your security system so that motion events trigger simultaneous recording from multiple angles and send instant alerts to your phone. This layered approach multiplies the value of every properly placed unit.
Common Placement Mistakes to Avoid
Several recurring errors undermine otherwise solid installations. Cameras mounted only at the front of the house leave the rear and sides unprotected. Units aimed primarily at distant street traffic generate constant false alerts while missing activity closer to the home. Cameras placed behind dense shrubbery quickly become obstructed as plants grow. Finally, relying on a single wide-angle camera for an entire large property almost always creates multiple blind spots.
By following the height, entry-point, corner, and testing guidelines outlined above, you systematically eliminate these risks and build a resilient surveillance network.
The Lasting Benefits of Professional-Level Placement
When outdoor cameras occupy the correct positions, homeowners gain more than recorded video. They gain confidence that every exterior approach is monitored. They receive clearer evidence if an incident occurs. They enjoy fewer unnecessary notifications. And they create a visible security presence that discourages crime before it begins.
These benefits compound over years of reliable service. A system installed with careful attention to placement continues delivering strong performance long after the initial setup, requiring only occasional cleaning and minor seasonal adjustments.
Final Guidance for Optimal Security
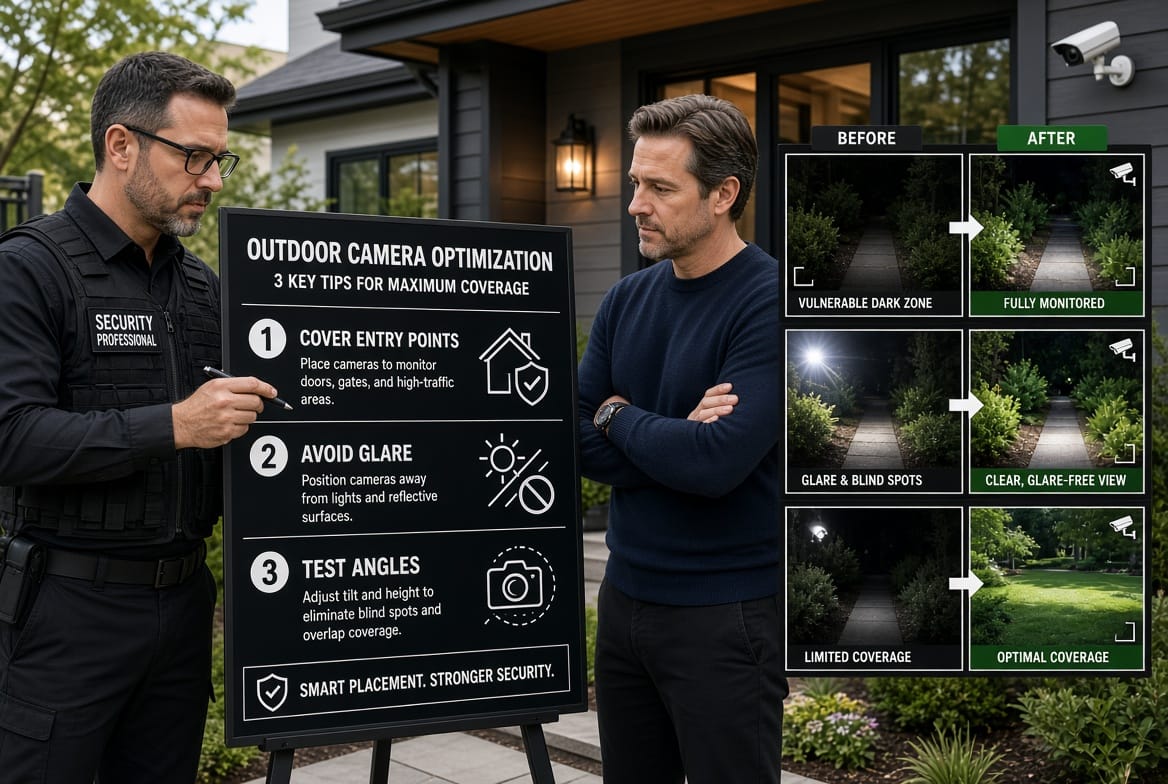
Place cameras for optimal security by mounting them between 8 and 10 feet high, focusing first on every entry point, using corners for expanded views, carefully avoiding glare, systematically eliminating blind spots, and thoroughly testing every angle. These straightforward yet precise steps convert standard outdoor cameras into a comprehensive protective network that works around the clock.
If you prefer expert assistance to achieve perfect positioning the first time, professional installation ensures every detail receives careful attention.
Secure Every Entry Point – Schedule Your Camera Setup