The Security System Camera Angles: Adjusting for Maximum Coverage
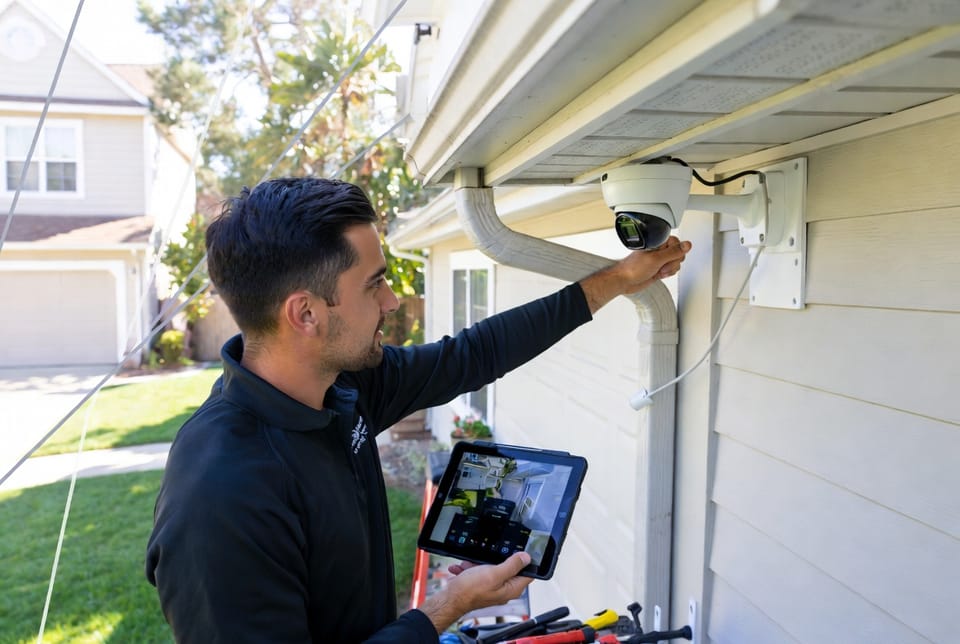
Proper security camera angles form the foundation of any effective home protection system. Even the most advanced cameras deliver limited value if their positioning leaves critical areas exposed. Adjusting angles thoughtfully minimizes blind spots, reduces glare, and ensures clear capture of faces and activity. This guide walks through practical placement strategies for both outdoor and indoor environments, helping homeowners achieve reliable, comprehensive surveillance without unnecessary complexity.
Get Expert Security Camera Installation & Angle Adjustment – Call Now
Strategic angle selection transforms a basic camera setup into a powerful deterrent and evidence-gathering tool. When cameras point correctly, they monitor entrances, pathways, and living spaces with precision. The process requires attention to height, tilt, and environmental factors rather than guesswork. Following proven techniques builds confidence that every important zone remains under watch.
Why Camera Angle Matters for Full Property Protection
Camera placement directly influences how much of a property stays visible. A camera mounted too high or aimed too broadly often creates gaps near ground level or along walls. Conversely, an overly narrow focus misses wider activity. The goal remains consistent: eliminate blind spots while maintaining useful detail across the field of view.
Many homeowners install cameras at convenient heights and assume the default angle works. In reality, small adjustments of just a few degrees can expand coverage dramatically. Outdoor cameras face weather and lighting variables, while indoor units contend with furniture, doorways, and artificial light. Understanding these differences allows precise tuning that maximizes every device’s potential.
Authoritative security practices emphasize testing angles after installation. Live-view monitoring on a phone or tablet reveals immediate results, making fine-tuning straightforward. This hands-on approach reassures users that their system performs as intended, day and night.
Minimizing Blind Spots with Careful Positioning
Blind spots represent the most common vulnerability in security setups. These unseen zones often appear near corners, under eaves, or along fence lines where a camera’s view simply stops. Reducing them begins with mapping the property’s high-traffic and high-risk areas first—front doors, side gates, rear patios, and garage entries.
Mount cameras at a height that balances reach and detail. Too low invites tampering; too high loses facial clarity. Once mounted, tilt the lens downward at a moderate angle so the lower edge of the frame captures the ground or floor just in front of the camera. This downward orientation covers the immediate approach path while still encompassing the broader scene.
For outdoor applications, position units to overlap slightly with neighboring cameras. Overlap creates redundancy so that if one view becomes obstructed by a vehicle or foliage, another still records the activity. Indoors, aim cameras toward doorways and hallways rather than centering them on open rooms alone. This placement catches movement as people enter or leave spaces.
Walk the property while reviewing the live feed. Note any dark corners or distant edges that fall outside the frame. Small horizontal pans or vertical tilts usually close those gaps quickly. Consistent review after seasonal changes—such as new landscaping growth—keeps coverage reliable year-round.
Avoiding Glare and Harsh Lighting Interference
Glare from direct sunlight, reflective surfaces, or nearby lights can wash out images and render footage unusable. Outdoor cameras face the greatest risk during sunrise and sunset when the sun sits low on the horizon. Indoor cameras encounter similar issues from windows or bright lamps.
Position outdoor units so the lens faces away from the primary path of the sun. North-facing walls in the Northern Hemisphere often provide steadier lighting throughout the day. When a southern exposure becomes necessary, add a modest downward tilt or install a small hood accessory to shade the lens. Avoid aiming cameras directly at glass doors or polished metal surfaces that bounce light back into the frame.
Indoors, keep cameras clear of windows that receive strong afternoon sun. Angle them slightly away from light sources so the brightest areas fall outside the main field of view. Many modern cameras include wide dynamic range technology that helps balance bright and dark zones, yet proper physical placement remains the first and most effective defense against glare.
Test angles at different times of day. Morning light behaves differently from evening light, and artificial lighting at night introduces its own challenges. Adjusting once under varied conditions ensures consistent performance around the clock.
Capturing Clear Facial Images: The Importance of Downward Angles
Identifying individuals requires more than simply recording movement. Cameras must capture faces with enough clarity for recognition. Mounting a camera too high and aiming it straight ahead often produces top-of-head views that prove useless for identification.
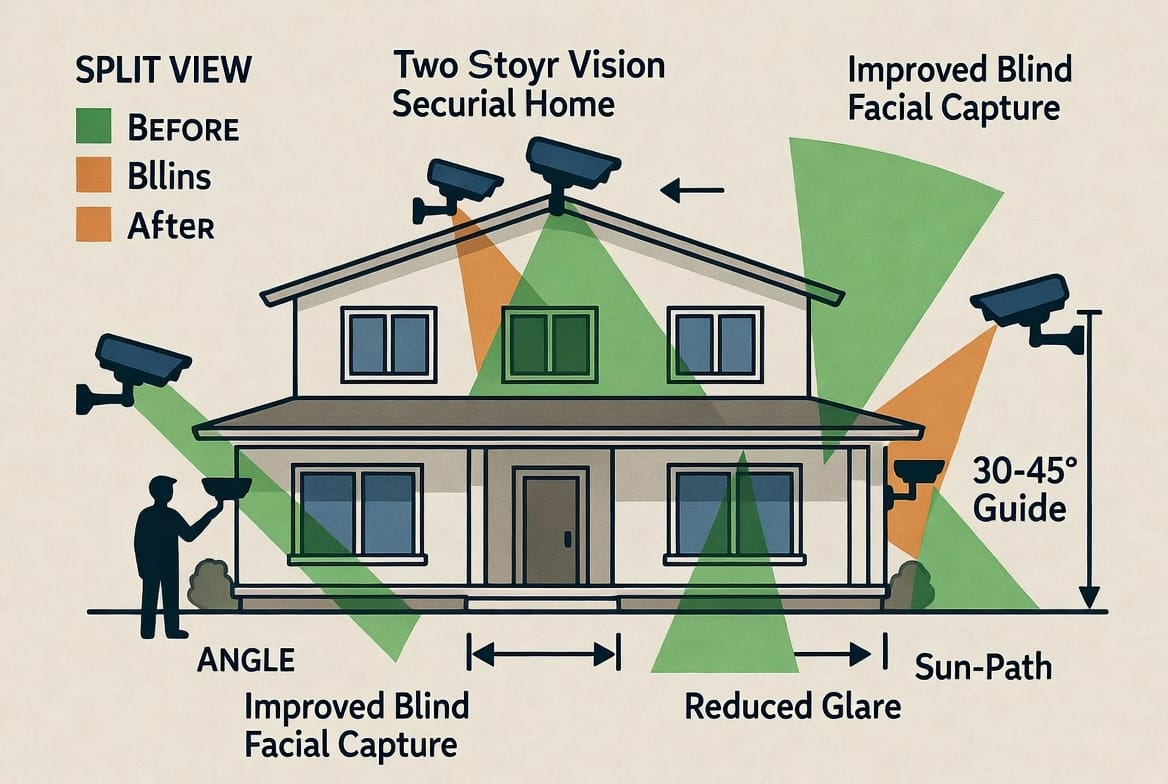
The solution lies in a controlled downward angle. Position the camera so it looks down at approximately 30 to 45 degrees. This tilt frames the face of a person standing at a typical doorway or pathway distance while still including surrounding context. The resulting image shows eyes, nose, and mouth rather than just a forehead or hat.
Height plays a supporting role. Install cameras roughly eight to ten feet above ground for outdoor entry points. This elevation discourages tampering yet keeps the downward angle effective. Indoors, ceiling or high-wall mounts work well when the same 30-to-45-degree principle applies. Avoid extreme angles that distort features or push subjects toward the edge of the frame.
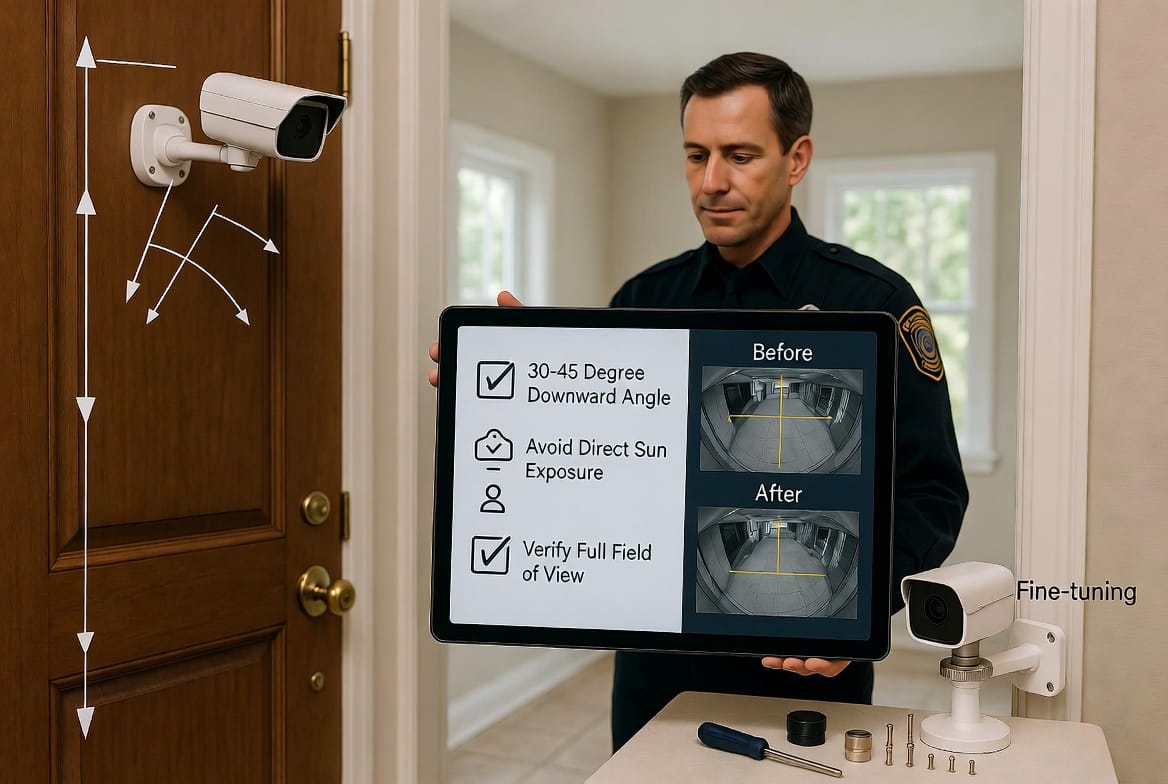
When adjusting, use the live feed to verify that a person of average height standing at the target location appears fully within the frame with the face clearly visible. Minor refinements of a few degrees often make the difference between usable identification footage and incomplete records.
Outdoor Camera Angle Strategies for Reliable Perimeter Coverage
Outdoor environments demand robust placement choices. Weather, wildlife, and landscape features all influence performance. Begin by selecting mounting locations that offer clear sight lines to primary access points. Under eaves or on solid wall surfaces usually provide stable, protected positions.
Aim cameras to cover the full width of driveways, walkways, and gates. A slight downward tilt keeps the near ground in view while the upper portion of the frame monitors approaching vehicles or pedestrians at greater distance. Avoid pointing lenses straight at the horizon; the resulting sky-heavy image wastes valuable resolution on empty space.
Consider seasonal foliage. Trees and shrubs that look sparse in winter may block views by summer. Choose angles that maintain visibility even after growth occurs, or plan periodic trimming. For properties with multiple levels or complex architecture, layer cameras so lower units handle close approaches and higher units oversee broader yards.
Nighttime performance improves when cameras avoid direct exposure to porch lights or streetlamps. Position units so artificial light sources sit outside or at the edge of the field of view. Many outdoor models include infrared illumination; correct angling ensures that illumination reaches the intended area without creating hot spots or shadows that hide faces.
Indoor Camera Angle Approaches for Everyday Monitoring
Indoor cameras serve different priorities—monitoring living spaces, detecting unexpected movement, and providing peace of mind when away from home. Placement focuses on natural traffic patterns rather than perimeter defense.
Mount units in corners of rooms to expand the field of view. A corner position often captures two walls and the central floor space simultaneously. Apply the same 30-to-45-degree downward angle used outdoors so that people walking through appear with recognizable faces rather than distorted overhead perspectives.
Doorways and hallways deserve special attention. Angle a camera to look down a hallway toward the main entrance so anyone entering the home appears clearly framed. In larger open-concept areas, multiple cameras with overlapping views prevent gaps behind furniture or kitchen islands.
Avoid aiming indoor cameras directly at televisions or computer screens that can cause secondary glare or privacy concerns. Instead, orient them toward activity zones while keeping sensitive personal spaces outside the primary frame when possible. Live testing while walking normal paths through the home quickly reveals whether the chosen angles deliver complete coverage.
Step-by-Step Adjustment Process for Lasting Results
Successful angle optimization follows a clear sequence. First, identify the priority zones that require monitoring. Second, mount the camera at an appropriate height using secure hardware. Third, set an initial downward tilt near the 30-to-45-degree range. Fourth, review the live feed and make incremental horizontal and vertical adjustments until blind spots disappear and faces register clearly.
Document the final settings with a quick photo or note for future reference. After severe weather or any physical disturbance, revisit the angles to confirm they remain correct. Many systems allow remote pan-and-tilt adjustments, yet physical mounting stability still determines long-term reliability.
When working with multiple cameras, coordinate their fields of view so that coverage flows continuously from one device to the next. This coordinated approach creates a seamless protective envelope around the property.
Common Mistakes and How to Correct Them Quickly
Several frequent errors undermine otherwise solid installations. Mounting cameras too high and aiming them nearly horizontally produces top-down views that miss facial detail. Correct this by lowering the tilt until faces fill a useful portion of the frame.
Pointing cameras into bright light sources creates persistent glare. Reposition or add shading to keep strong light outside the primary view. Leaving large gaps between camera coverage zones allows activity to slip through unnoticed. Introduce modest overlap so neighboring cameras share edge areas.
Ignoring seasonal changes leads to gradual loss of effectiveness. Schedule brief quarterly checks to confirm angles still perform as designed. Addressing these issues promptly restores full protection with minimal effort.
Building Long-Term Confidence Through Proper Maintenance
Once angles reach optimal settings, ongoing care preserves performance. Clean lenses periodically to remove dust, pollen, or water spots that degrade image quality. Verify that mounts remain tight after temperature swings or high winds. Review recorded footage occasionally to confirm that critical events continue to appear clearly framed.
These simple habits reinforce the value of the initial careful adjustment work. Homeowners gain lasting assurance that their security system remains ready to capture important details whenever needed.
Optimizing Coverage for Peace of Mind
Adjusting security camera angles for maximum coverage requires attention to downward tilt, environmental lighting, and overlapping fields of view. By minimizing blind spots, avoiding glare, and prioritizing clear facial capture through controlled 30-to-45-degree angles, any home gains stronger, more reliable protection. Outdoor and indoor strategies differ in emphasis yet share the same core principles of thoughtful placement and regular verification.
Take time to review each camera’s live feed, make precise adjustments, and confirm that every priority zone appears fully monitored. The result is a system that works quietly and effectively in the background, delivering clarity when it matters most.
Optimize your camera angles today. For professional camera installation and expert angle adjustment tailored to your property.
Professional Camera Placement for Zero Blind Spots – Call Now