The Laminate Flooring Installation: DIY vs. Professional
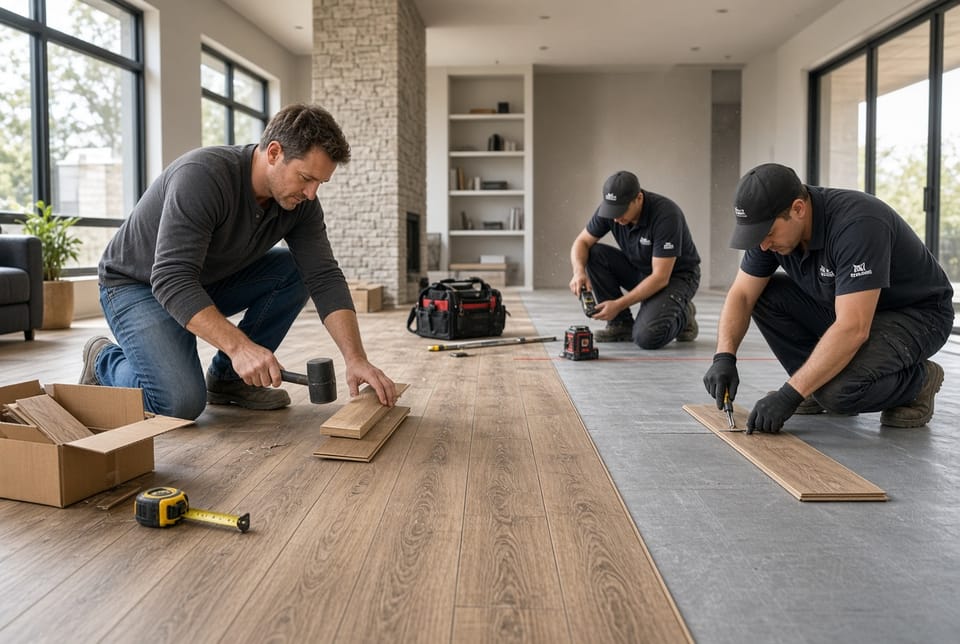
Choosing how to install laminate flooring is one of the most important decisions you will make during a home upgrade. The planks themselves are attractive, durable, and widely available, yet the finished result depends far more on how they are installed than on the brand name printed on the box. Homeowners today face a clear choice: tackle the project themselves using modern click-lock systems or hire experienced professionals who handle subfloor preparation, moisture control, and finishing details. This article walks through both options in depth so you can decide with confidence rather than guesswork.
Get Your Laminate Floor Installed Right – Call Today!
Laminate flooring has earned its popularity because it delivers the look of hardwood or stone at a fraction of the cost. Most products now use a floating-floor design that clicks together without glue or nails. That convenience has convinced many people that installation is simple. In reality, a successful installation still requires careful planning, the right tools, and an understanding of what can go wrong beneath the surface. The sections that follow explain the genuine advantages of the DIY route, the hidden demands that often surprise first-time installers, the measurable benefits of professional work, and the practical factors that should guide your final decision.
Understanding Modern Laminate Flooring
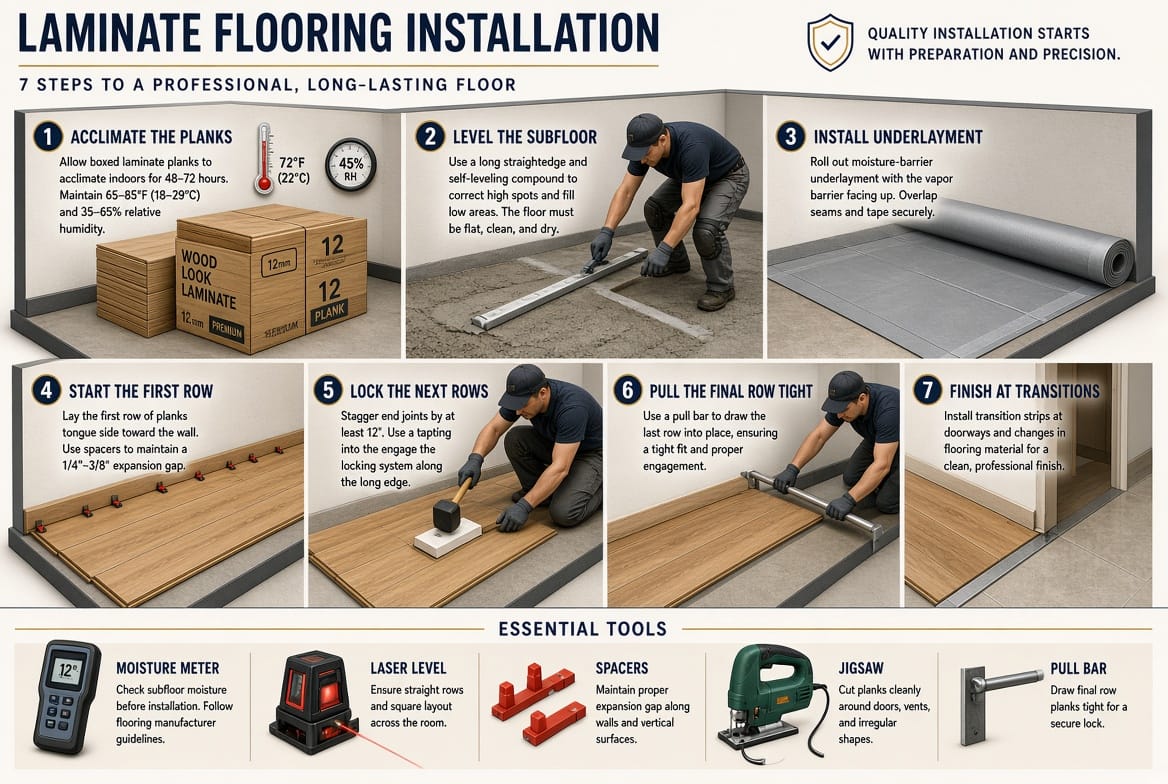
Today’s laminate consists of a high-density fiberboard core, a photographic wear layer that mimics wood or tile, and a clear protective overlay. Most boards feature click-lock or angle-and-tap edges that interlock tightly. Because the floor “floats,” it is not attached to the subfloor; instead it expands and contracts as a single unit. That movement is why installers leave an expansion gap of roughly ¼ to ⅜ inch around the entire perimeter. Ignore the gap and the floor can buckle when humidity changes.
The product is marketed as cost-effective and relatively easy, and those claims are true—provided the conditions underneath are correct. The subfloor must be clean, dry, and flat within manufacturer tolerances, typically no more than 3/16 inch variation over a 10-foot span. Moisture levels in both the subfloor and the planks themselves must stay inside specified ranges. These requirements sound technical, yet they determine whether the floor stays beautiful for fifteen years or develops gaps, squeaks, and peaking within the first season.
The Genuine Appeal of DIY Laminate Installation
Many homeowners choose the DIY path for three understandable reasons: lower immediate cost, scheduling flexibility, and the satisfaction of completing a visible home-improvement project.
- Click-lock technology has removed the need for messy adhesives in most rooms. Once the first row is straight, subsequent rows snap into place with a tapping block and mallet.
- Material costs stay modest. A mid-range laminate plus underlayment often runs far less than hardwood or tile, and you avoid paying hourly labor rates.
- The work can be done on evenings and weekends. You control the pace and can live around the project rather than vacating the house.
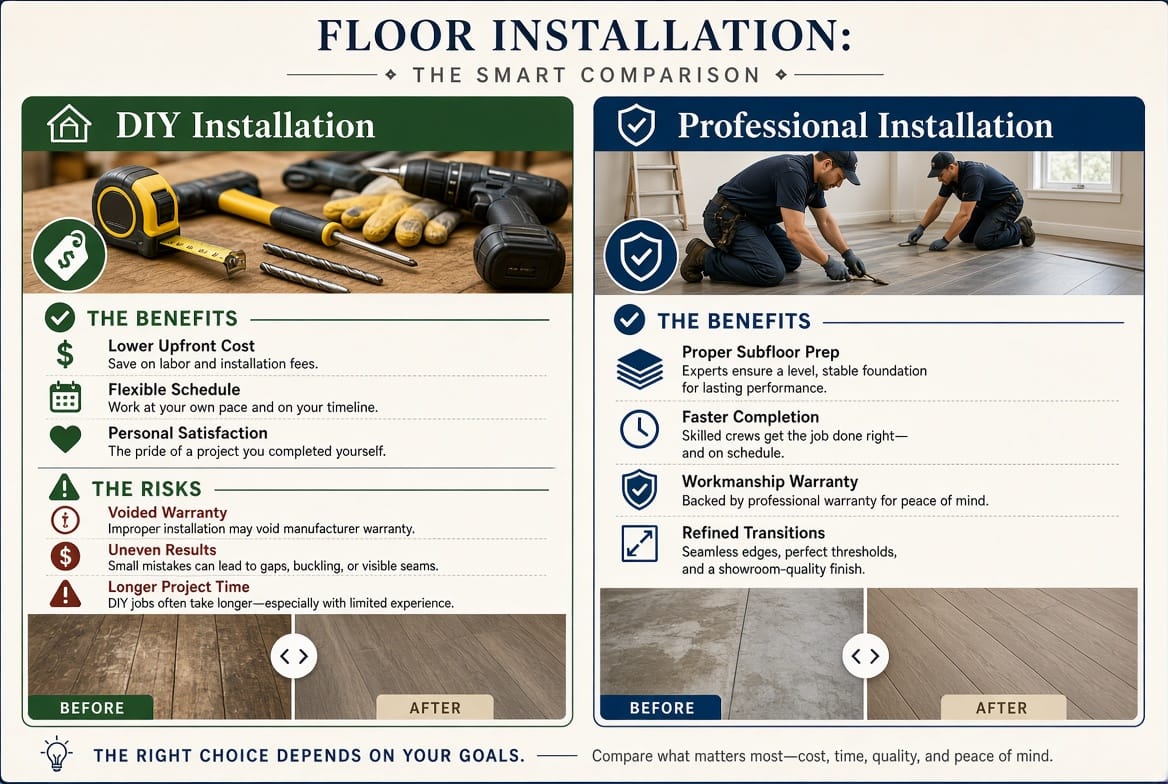
A well-prepared DIYer who measures twice, acclimates the boxes for 48–72 hours, and follows the manufacturer’s layout instructions can produce a floor that looks professional in simple, rectangular rooms. The process itself is straightforward once the first row is locked in and expansion spacers are in place.
That said, “easy” is a relative term. The physical work of cutting planks around door jambs, heating vents, and irregular walls still requires a quality circular saw or jigsaw, a pull bar for the last row, and patience. Mistakes in the first few rows multiply across the entire floor. A single misaligned starter row can force you to pull up dozens of planks later.
Hidden Challenges and Risks of the DIY Approach
The most common problems appear only after the furniture is back in place. An uneven subfloor that looked acceptable to the eye can cause planks to flex, producing hollow sounds and eventual joint failure. Excess moisture trapped beneath the floor leads to swelling of the core and irreversible damage. Many manufacturers void the product warranty if installation guidelines—especially those covering acclimation, underlayment type, and moisture testing—are not followed exactly.
Other frequent DIY pitfalls include:
- Inadequate underlayment or the wrong type for the specific product and subfloor.
- Forgetting to stagger end joints by the recommended distance, which creates a weak “H” pattern.
- Cutting too tightly against cabinets or walls and eliminating the required expansion space.
- Poor transitions at doorways that leave trip hazards or unsightly gaps.
- Working in a room whose temperature or humidity falls outside the recommended range during installation.
These issues are not theoretical. They are the reason some homeowners later pay professionals to remove and reinstall a floor that was only a few years old. The money saved on labor can disappear when the floor fails prematurely.
What Professional Installation Actually Delivers
Hiring a qualified crew changes the equation in several concrete ways. Professionals begin with a thorough evaluation of the existing floor. They test moisture content, check for levelness with a laser or long straightedge, and correct deficiencies before a single plank is opened. If the subfloor needs grinding, patching, or a new layer of plywood, they perform that work. They also select and install the precise underlayment and moisture barrier specified by the laminate manufacturer.
Speed is another advantage. A two-person team can typically complete a standard living-and-dining area in a single day once preparation is finished. That compressed timeline reduces disruption and the chance that temperature or humidity will shift mid-project.
Most important for many homeowners is the warranty. Many premium laminate brands require professional installation for the full labor-and-material warranty to remain valid. Even when the product warranty stays intact, a reputable installer usually provides their own workmanship guarantee covering issues such as gaps, peaking, or improper transitions. That extra layer of protection is difficult to obtain when you install the floor yourself.
Professionals also handle the details that consume the most time for amateurs: undercutting door jambs so planks slide underneath rather than leaving unsightly filler, creating custom cuts around pipes and vents, and installing coordinated reducers, T-moldings, and stair nosing that match the floor. The finished appearance is consistently tighter and more refined.
Key Factors That Should Guide Your Decision
No single answer fits every house. Consider the following points carefully before you buy materials or schedule a crew.
Condition of the existing subfloor. If the current surface is concrete with known moisture issues, an old wood floor with dips, or a mix of materials, professional preparation becomes almost essential. A DIYer can rent a moisture meter and a long level, yet correcting major irregularities often requires specialized compounds and experience.
Complexity of the space. A simple rectangle with few obstacles favors DIY. Rooms with multiple doorways, angles, built-in cabinets, or stairs raise the skill requirement sharply. Each extra cut increases the chance of waste and visible mistakes.
Your available time and physical stamina. Installing laminate is not heavy lifting in the traditional sense, yet it involves hours of kneeling, precise measuring, and repetitive tapping. Fatigue leads to errors late in the day.
Budget versus long-term value. Calculate the true cost of DIY: materials, underlayment, tools you may need to buy or rent, possible extra boxes for cutting mistakes, and the value of your time. Then compare that figure with written quotes from licensed installers. The difference is often smaller than expected once hidden expenses are included.
Warranty and resale considerations. If you plan to sell the home within a few years, documented professional installation and an intact manufacturer warranty can be assets. Buyers and inspectors notice poorly fitted transitions and hollow spots.
Climate and indoor environment. Homes in humid regions or those with basements and crawl spaces need extra attention to vapor barriers. Professionals routinely test and document these conditions.
Cost Considerations Beyond the Sticker Price
A realistic comparison must include more than the price per square foot of the planks. Underlayment, transition strips, moisture barriers, and possible subfloor repairs add to both approaches. Tool rental or purchase (saw, tapping block, spacers, moisture meter) is an extra DIY line item. Professionals fold those items into their quote and usually obtain materials at contractor pricing.
Labor rates vary by region, yet the time a crew saves often offsets part of the premium. More importantly, a floor that lasts its full expected life without repairs represents the lowest true cost. A DIY floor that develops problems after three or four years can cost more in the long run than paying for correct installation the first time.
Preparing for Either Path
Regardless of who performs the work, certain steps remain non-negotiable. Purchase 5–10 percent extra material to allow for cuts and future repairs. Store the unopened boxes in the installation room for the manufacturer-specified acclimation period. Remove baseboards or undercut them so the new floor can slide underneath. Decide in advance how you will treat doorways and stairs.
If you choose DIY, watch official manufacturer videos rather than generic online tutorials. Follow the exact underlayment recommendation. Use a quality moisture meter on both the subfloor and a sample plank. Work in the temperature and humidity range listed on the box.
If you hire professionals, ask for proof of insurance, manufacturer certification if available, and a written description of the preparation work included in the price. A detailed contract that specifies moisture testing, leveling, and transition details protects both parties.
Long-Term Performance and Maintenance
A correctly installed laminate floor is remarkably low-maintenance. Regular sweeping or vacuuming with a hard-floor attachment and occasional damp mopping with a manufacturer-approved cleaner keep it looking new. Avoid steam mops and standing water. Felt pads under furniture legs prevent scratches. These simple habits matter far more when the installation itself was done properly; an uneven or poorly locked floor will show wear sooner no matter how carefully you clean it.
Making the Choice That Fits Your Home
The decision ultimately rests on an honest assessment of your space, your skills, and your tolerance for risk. For a straightforward room with a sound, dry, level subfloor and a homeowner who enjoys detailed work, DIY laminate installation using a quality click-lock product can be both satisfying and economical. For anything more demanding—uneven floors, moisture concerns, complex layouts, or the desire for a transferable warranty—professional installation is the more reliable investment.
Either route can produce a beautiful, durable floor when executed correctly. The difference lies in how much hidden work occurs before the first plank is clicked into place and how much protection you receive afterward. Take the time to evaluate your specific conditions rather than relying on the marketing claim that laminate is “easy.” A few extra hours of planning now prevent years of disappointment later.
Install laminate flooring the right way. Whether you decide to handle the project yourself or prefer the security of experienced hands, the next step is a conversation about your rooms, your timeline, and your expectations.
Protect Your Flooring Warranty – Call for a Consultation