The Gutter Splash Block: Protecting Your Foundation
Your home’s gutter system does far more than keep rain off your roof. It is the first line of defense against one of the most expensive and hidden threats a house can face: water damage to the foundation. While most homeowners focus on the gutters and downspouts themselves, a simple, inexpensive accessory often determines whether that water actually leaves the property safely. That accessory is the gutter splash block.
Protect Your Foundation Today – Call Now
A properly placed splash block takes the concentrated flow coming out of a downspout and spreads it out while sending it several feet away from the house. When this small piece of concrete or plastic is missing, cracked, or positioned incorrectly, rainwater repeatedly soaks the soil right next to your foundation. Over time that moisture can lead to soil erosion, hydrostatic pressure, foundation cracks, settling, and a damp basement. The good news is that correcting the problem is straightforward and highly effective.
This article explains exactly what a splash block does, how far it should extend, the warning signs that you need one (or a better one), and why pairing it with professional gutter service gives your home the protection it deserves.
What a Splash Block Actually Does
A splash block is a sloped, durable pad—usually made of concrete, recycled plastic, or composite material—placed on the ground directly beneath a downspout outlet. Its job is simple but critical: it directs water away from the foundation.
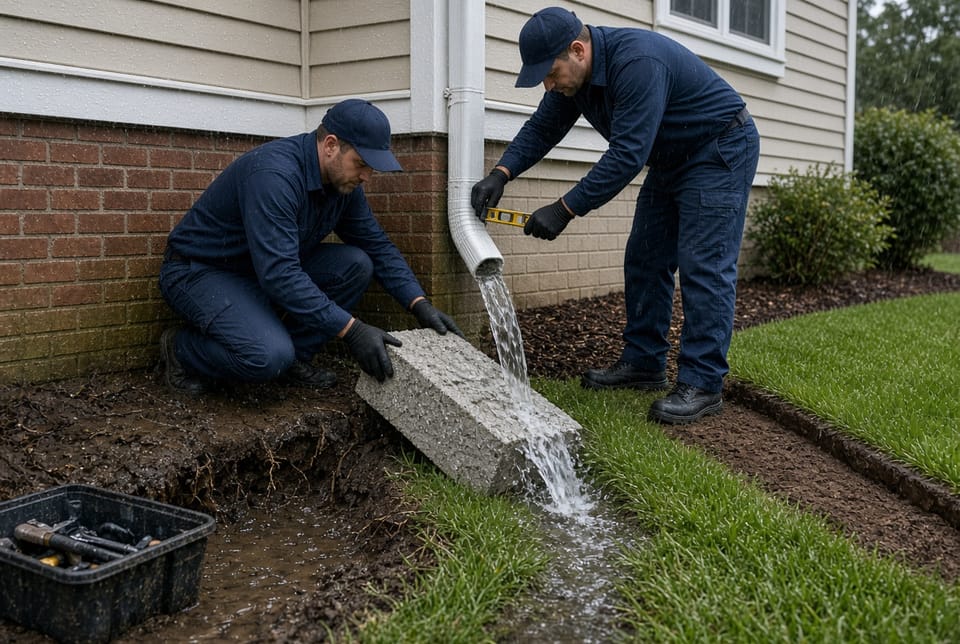
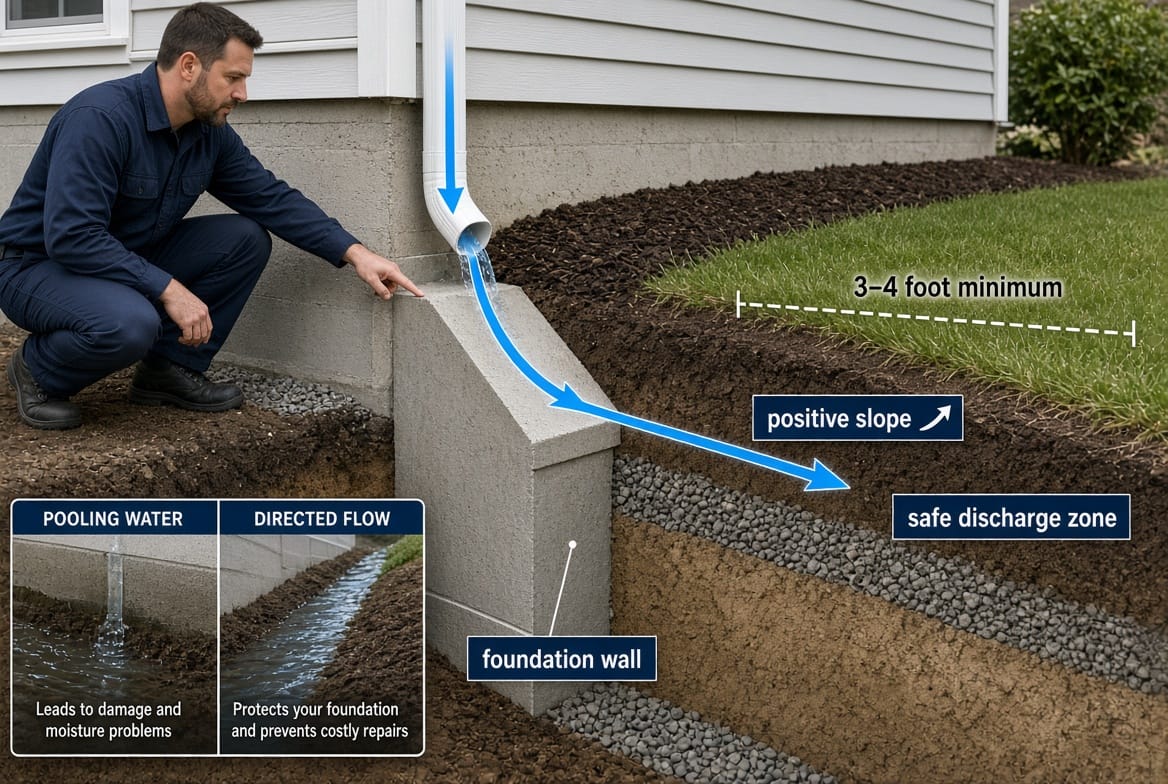
Without a splash block, water exits the downspout in a concentrated stream and immediately hits the soil. That force quickly carves a depression, allowing water to pool against the foundation wall. With a splash block in place, the water hits a hard, angled surface first. The block absorbs the impact, spreads the flow, and sends the water several feet outward onto the lawn or toward a drainage area.
Think of it as a miniature ramp that gives rainwater a running start in the right direction. The result is dramatically less saturation next to the house, reduced erosion of landscaping, and far lower risk of water finding its way into the basement or crawl space.
Key functions of a quality splash block include:
- Absorbing the force of water exiting the downspout
- Spreading the flow so it does not create a single erosion channel
- Creating a positive slope that moves water 3–4 feet or more from the foundation
- Protecting soil, mulch, and plantings immediately around the house
- Reducing the chance of water intrusion during heavy storms
Even the best gutter system can fail at the last six inches if the water is dumped against the foundation. The splash block completes the system.
Why Foundation Protection Matters So Much
Water is persistent. Once soil next to a foundation stays wet for days or weeks, several problems begin to develop.
Hydrostatic pressure builds as saturated soil pushes against basement walls. Over years this pressure can cause walls to bow or crack. Foundation settlement occurs when wet soil expands and then shrinks as it dries, causing the house to move unevenly. Surface water that finds a path through cracks or porous concrete can create a damp basement, musty odors, and conditions that encourage mold.
These issues are expensive to repair. A modest investment in splash blocks—and making sure they are installed correctly—prevents many of them. Homeowners who address downspout discharge early often avoid the far larger costs of foundation waterproofing or structural repairs later.
A splash block is not a luxury add-on. It is a basic, proven component of responsible water management around any home.
Proper Placement: The 3–4 Foot Rule
Correct placement is just as important as having a splash block at all. The most common recommendation from drainage professionals is that the splash block (or the combination of splash block plus downspout extension) should extend at least 3–4 feet away from the foundation.
Here is why that distance matters:
- The first 2–3 feet of soil next to the house is the most critical zone. Keeping it as dry as possible reduces pressure on the foundation.
- A 3–4 foot run gives water enough travel distance to soak into the lawn rather than immediately circling back.
- On sloped lots the extra length helps water continue moving downhill instead of pooling.
Best-practice placement guidelines:
- Position the splash block so the downspout outlet sits directly over the high end of the block.
- Ensure the block itself slopes downward and away from the house.
- Align the block with the natural grade of the yard whenever possible.
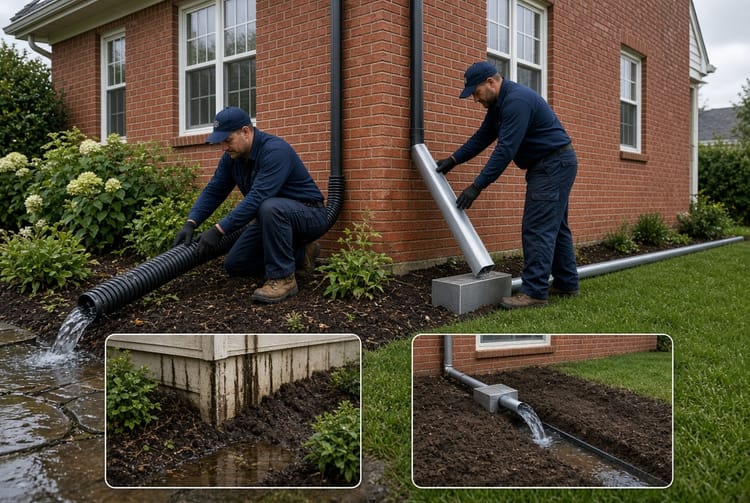
- On very flat lots, consider adding a short downspout extension that feeds onto a longer splash block or a buried drain line.
- Keep the discharge point at least 3–4 feet from the foundation wall and preferably farther if the lot allows.
Materials also affect performance. Concrete splash blocks are heavy, durable, and stay in place even in high winds. Plastic versions are lighter and easier to move for lawn care but can shift or crack in extreme temperatures. Many homeowners choose concrete for high-volume downspouts and plastic for secondary locations.
A splash block that is too short, sitting level instead of sloped, or pointed back toward the house defeats its own purpose. Proper positioning turns a simple accessory into reliable protection.
Signs You Need a Splash Block (or a Better One)
Many homes never received splash blocks when they were built, or the original blocks have cracked, sunk, or been removed during landscaping. Watch for these clear warning signs:
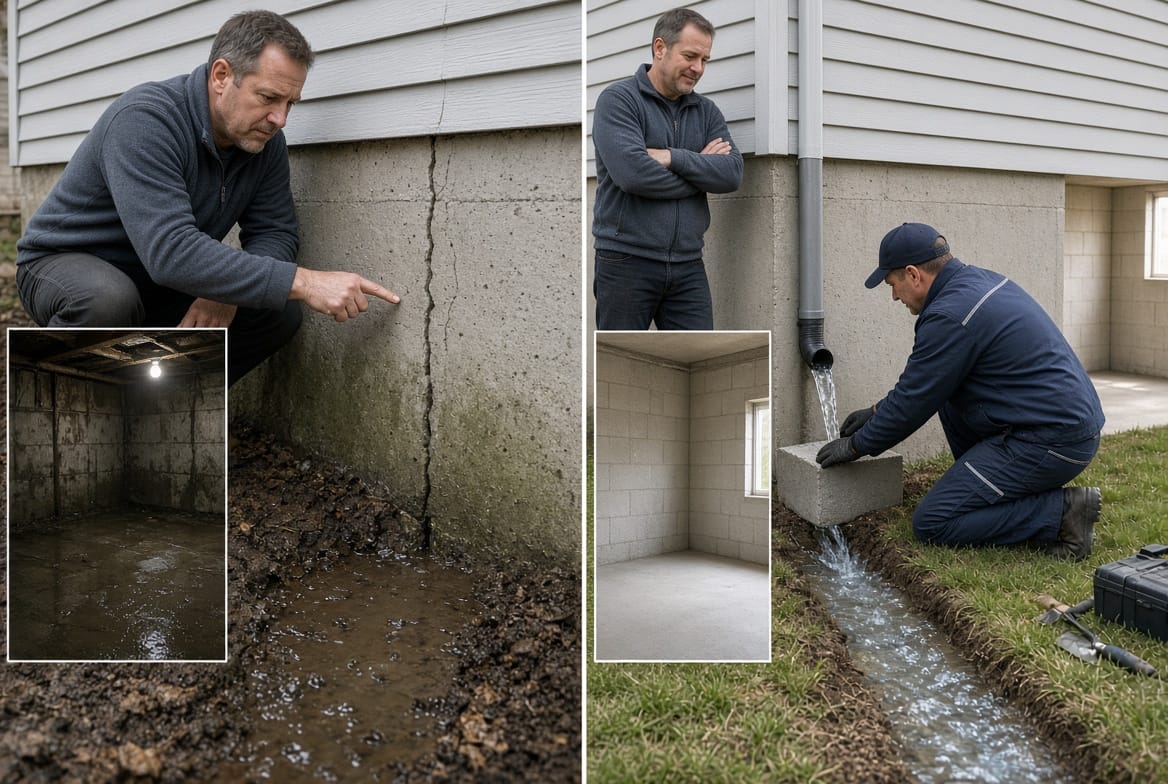
- Water pooling near the foundation after even moderate rain. Standing water within a few feet of the house is the most obvious indicator.
- Soil erosion or bare spots directly under downspouts. The force of falling water has washed away dirt and mulch.
- Foundation cracks that appear or widen, especially horizontal cracks or those near downspout locations.
- A damp basement or crawl space that smells musty after storms.
- Mulch, leaves, or debris consistently washed away from the base of the house.
- Downspouts that dump water onto a sidewalk, driveway, or patio that then sheets back toward the foundation.
- Visible staining or efflorescence (white mineral deposits) on the lower foundation wall.
If you notice any of these, the downspout discharge is not being managed correctly. Adding or replacing splash blocks is usually the fastest and least expensive first step.
Additional red flags include:
- Gutters overflowing because the system is clogged—excess water then cascades over the sides and still needs to be directed away.
- New landscaping that has buried or moved the original splash blocks.
- Settling of the ground that has caused an existing block to tilt backward toward the house.
Addressing these signs promptly keeps small drainage issues from becoming structural problems.
Installation and Maintenance Tips
Most splash blocks can be set in place in minutes, but a few details improve long-term performance.
Clear the area under the downspout of debris and level the soil so the block sits stably. Position the high end under the downspout opening and the low end pointing away from the house. Check the slope with a level or simply pour a bucket of water and watch the flow. The water should leave the block and continue moving outward, not pool on or behind it.
In winter, keep the area around splash blocks free of ice dams and heavy snow that could shift the block. In autumn, make sure falling leaves do not create a dam at the discharge end.
Inspect splash blocks at least twice a year—once in spring after the freeze-thaw cycle and once in fall before heavy rains. Look for cracks, shifting, or soil that has built up and reduced the effective slope. Replace damaged blocks promptly; a cracked block can actually concentrate water in the wrong place.
When gutters are cleaned, take a moment to confirm that each downspout still lines up with its splash block. A downspout that has been bumped or a block that has been kicked out of position during mowing can undo the entire benefit.
Common Mistakes That Reduce Effectiveness
Even well-intentioned homeowners sometimes undermine their splash blocks:
- Placing the block too close to the foundation so water still saturates the critical zone.
- Using a block that is too short for the volume of water coming from a large roof section.
- Allowing the block to settle until it no longer slopes away from the house.
- Directing water onto a neighboring property or toward a low spot that has no further drainage.
- Ignoring the splash block while focusing only on gutter guards or new downspouts.
Avoiding these errors is easy once you understand the 3–4 foot rule and the need for consistent slope.
The Role of Professional Gutter Service
While a splash block itself is simple, the surrounding gutter system is not. Clogged gutters, improperly pitched sections, or downspouts that are too few or too small can overwhelm even a perfectly placed splash block. A professional inspection evaluates the entire system—gutters, hangers, downspouts, and discharge—and recommends the right combination of splash blocks, extensions, or underground drains.
Technicians can also advise on material choice, color matching to existing landscaping, and solutions for difficult lots with poor natural grade. Combining splash-block installation with a full gutter cleaning and tune-up gives the home the most reliable protection.
Protect Your Foundation Starting Today
A gutter splash block is one of the simplest, most cost-effective ways to keep water from attacking your foundation. By directing downspout flow at least 3–4 feet away from the house, it reduces erosion, hydrostatic pressure, and the risk of cracks and basement moisture. Watch for pooling water, foundation cracks, and dampness—these are clear signals that action is needed.
Do not wait for a major storm to reveal a problem that could have been prevented with a modest accessory. Protect your foundation with splash blocks installed correctly as part of a complete gutter system.
A trained technician can inspect your downspouts, recommend the right splash blocks, and make sure water leaves your property safely. Your foundation—and your peace of mind—will thank you.
Direct Water Away – Schedule Gutter Service