The Gutter Elbow Replacement: Fixing Downspout Direction and Flow
When heavy rain pounds your roof, every component of your gutter system must work in perfect harmony. Among the most critical yet often overlooked parts is the downspout elbow — the angled connector that directs water from the vertical downspout to the ground or drainage area. A failing gutter elbow can silently undermine your entire gutter system, sending water straight toward your foundation instead of safely away from it.
Restore Proper Downspout Flow – Call for Gutter Repair Today
At first glance, a gutter elbow may seem like a minor fitting. In reality, it is the precise pivot point that controls downspout direction and flow. When it becomes damaged or disconnected, the consequences escalate quickly: soil erosion, basement flooding, and costly structural repairs. The good news? Gutter elbow replacement is a straightforward, highly effective fix that restores proper water management in just a few hours.
This comprehensive guide walks you through everything you need to know about downspout elbow issues, from root causes to professional-grade replacement steps. Whether you’re a homeowner noticing early warning signs or planning preventive maintenance, you’ll finish this article confident that your home’s drainage system can be brought back to peak performance.
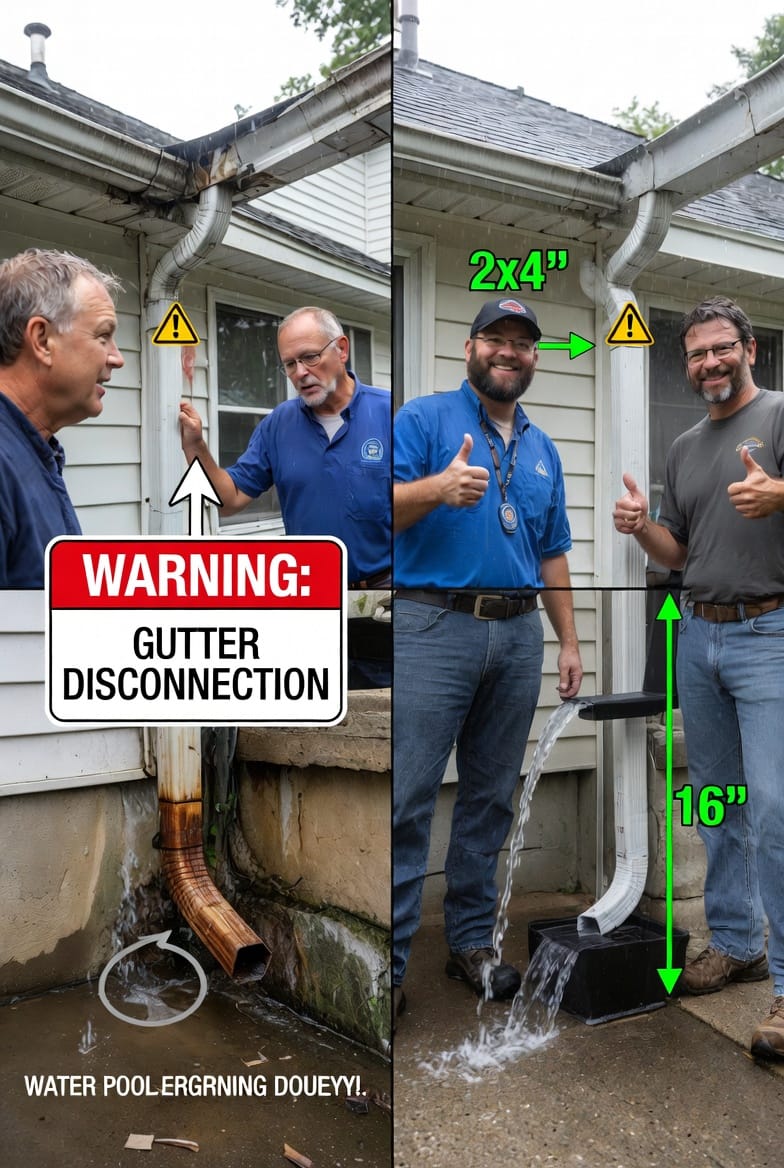
Why the Gutter Elbow Matters More Than You Think
The downspout elbow is the engineered bend that changes water’s vertical path into a controlled horizontal or angled discharge. Without it functioning correctly, water exits the downspout at the wrong angle, often pooling against the foundation wall. Over time, this repeated exposure compromises your home’s structural integrity.
Proper elbow function ensures water is channeled at least 3–5 feet away from the foundation — the gold standard recommended by building engineers. When that direction is lost, even moderate rainfall can create significant problems. Homeowners who invest in timely gutter elbow replacement prevent thousands in future water-damage claims and enjoy peace of mind during every storm.
Common Causes of Downspout Elbow Damage and Disconnection
Downspout elbows endure constant stress from the elements. Understanding the primary culprits helps you act before small issues become major headaches.
- Weather extremes: Freeze-thaw cycles in colder climates expand and contract metal elbows, leading to cracks and joint failure.
- Debris impact: Falling branches, hail, or heavy leaf buildup exert pressure that bends or dislodges elbows over time.
- Corrosion and age: Galvanized or aluminum elbows naturally oxidize after 10–15 years, weakening the metal and causing leaks at the seams.
- Improper original installation: Elbows secured with insufficient screws or mismatched sizes loosen under water weight.
- Animal interference: Squirrels, birds, or raccoons sometimes chew or push fittings out of alignment while seeking shelter.
Each of these factors disrupts downspout direction and flow, transforming a reliable drainage system into a liability. The earlier you identify damage, the simpler and less expensive the gutter elbow replacement becomes.
Recognizing the Warning Signs Before Damage Escalates
Catching downspout elbow problems early is the key to avoiding expensive foundation repairs. Look for these clear indicators during routine home inspections:
- Water consistently discharging directly at the foundation line instead of several feet away
- Visible cracks, rust spots, or separation at the elbow joints
- Downspout sections hanging loose or swaying in moderate wind
- Persistent dampness or pooling near the home’s base after rain
- Unusual splashing sounds or water overflow from the gutter system
If you notice any of these signs, do not delay. Continuing to ignore a compromised elbow allows water to erode soil, seep into basements, and even promote mold growth inside your walls. Prompt gutter elbow replacement stops the cycle and safeguards your largest investment.
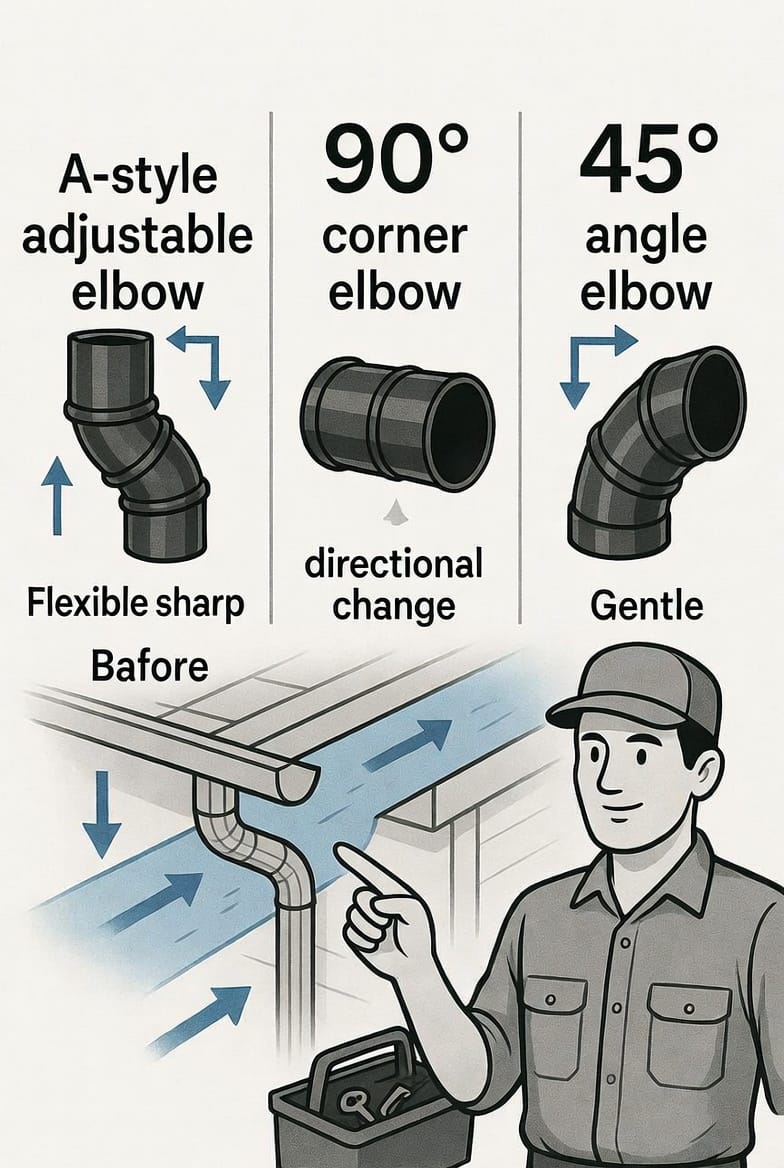
Understanding the Different Types of Downspout Elbows
Not all elbows are created equal. Selecting the right style during gutter elbow replacement ensures long-term performance and seamless integration with your existing system.
- A-style adjustable elbows offer maximum flexibility. Their two-piece design lets you fine-tune the exact angle needed for unique home layouts.
- 90° corner elbows deliver a sharp directional change, ideal when downspouts must turn abruptly around architectural features.
- 45° angle elbows provide a gentler curve, reducing water velocity and minimizing splash-back in high-volume areas.
Each type serves a specific purpose. A knowledgeable technician evaluates your roofline, downspout placement, and local rainfall patterns before recommending the optimal solution. Using the wrong elbow can actually worsen flow issues — another reason professional assessment is invaluable.
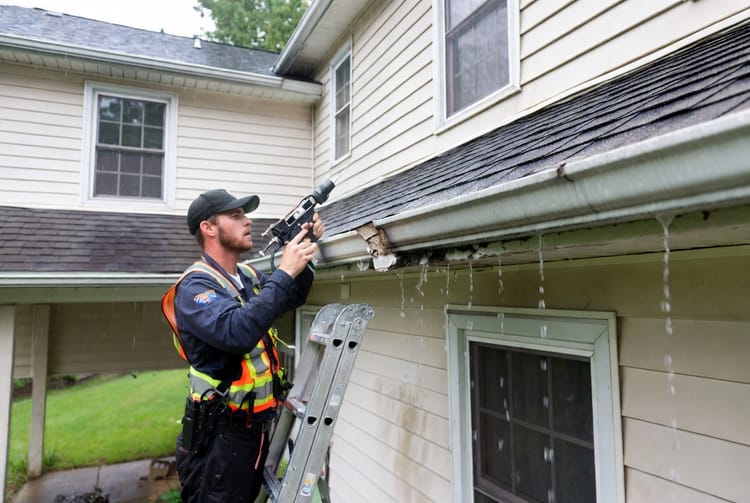
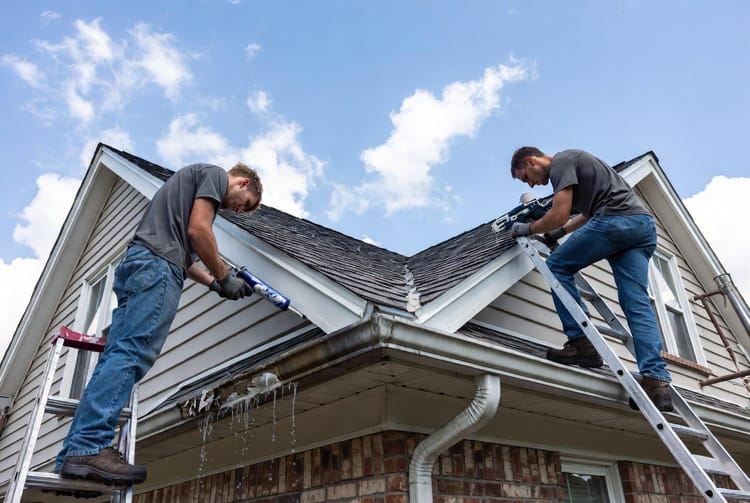
Step-by-Step Professional Gutter Elbow Replacement Process
Replacing a downspout elbow follows a proven sequence that guarantees a watertight, durable result. Here’s exactly how experts approach the job:
- Safety first — Secure ladders on stable ground and wear protective gloves and eyewear.
- Assess and remove the old elbow — Gently detach the damaged section using a screwdriver or drill, taking care not to bend the downspout itself.
- Clean and prepare the joint areas — Remove rust, old sealant, and debris to create a pristine bonding surface.
- Select and test-fit the new elbow — Choose the correct size and angle, then dry-fit to confirm perfect alignment.
- Apply high-quality sealant — Use exterior-grade silicone or butyl tape at both connection points for a weatherproof seal.
- Secure with corrosion-resistant screws — Fasten every joint with at least two stainless-steel sheet-metal screws per side.
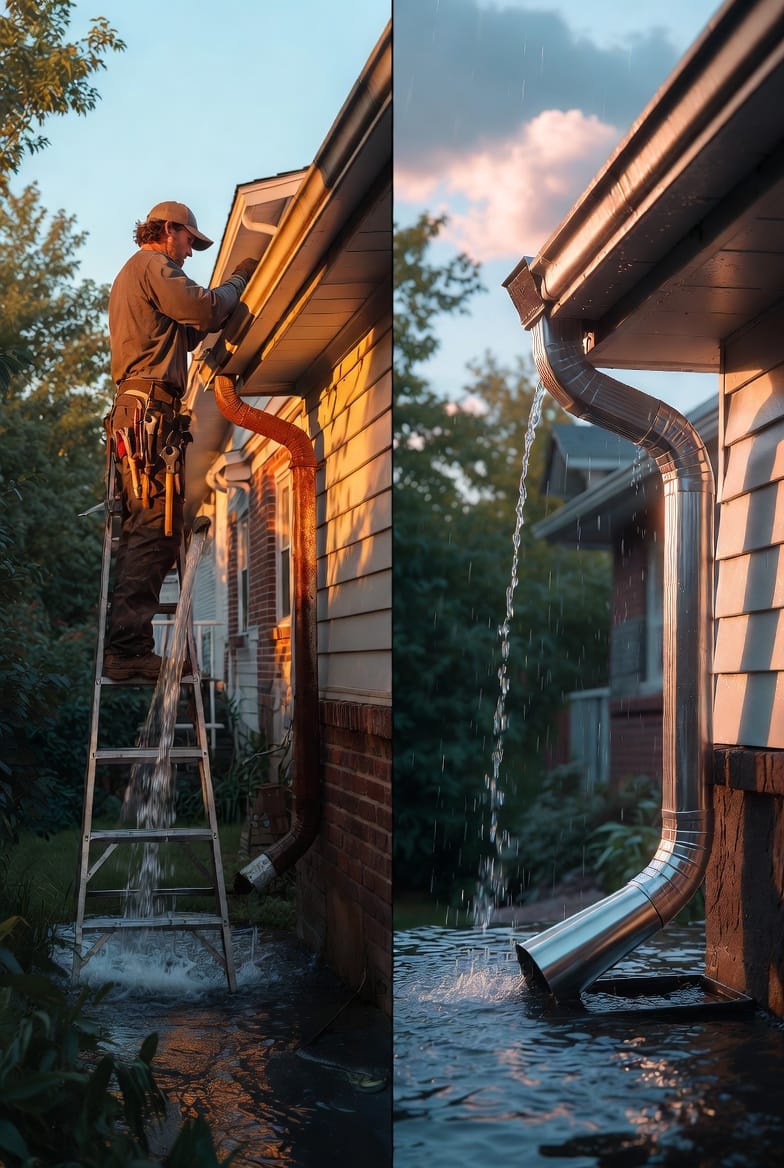
- Test the flow — Pour several gallons of water through the gutter system and verify that downspout direction now directs water safely away from the foundation.
- Final inspection — Check for leaks, ensure the elbow is plumb, and clean up any debris.
This methodical approach typically takes 30–60 minutes per downspout. Homeowners attempting DIY replacement often overlook critical sealing steps, leading to repeated failures within a single season.
Tools and Materials Required for Successful Replacement
Professional-grade gutter elbow replacement requires more than just a new elbow. Essential items include:
- Cordless drill with appropriate bits
- Screwdriver set and sheet-metal screws
- Heavy-duty ladder and stabilizer
- Exterior-grade sealant and caulking gun
- Measuring tape and level
- Safety harness for elevated work
- Replacement elbows matching your downspout size and material
Using substandard materials may save a few dollars today but will cost far more in future repairs. Investing in quality components during gutter elbow replacement delivers decades of reliable service.
When DIY Is Not Enough — Trust the Professionals
While some minor fixes can be handled by confident homeowners, downspout elbow work performed at height carries real safety risks. Professional teams bring years of experience, specialized equipment, and the ability to spot related issues such as gutter sagging or hidden corrosion that a casual inspection might miss.
Expert technicians also guarantee their work, providing written warranties that protect your investment long after the job is complete. When you choose professional gutter elbow replacement, you eliminate guesswork and gain the reassurance that every connection is engineered for maximum durability.
Long-Term Benefits of Proper Downspout Direction and Flow
A correctly installed gutter elbow does far more than simply move water. It:
- Prevents foundation erosion and costly structural repairs
- Reduces basement moisture and mold risk
- Extends the overall lifespan of your entire gutter system
- Enhances curb appeal by eliminating unsightly water stains
- Lowers insurance premiums by demonstrating proactive home maintenance
Homeowners who address downspout elbow issues promptly report drier yards, healthier landscaping, and complete confidence during heavy rain events.
Preventive Maintenance Keeps Elbows Working Year After Year
Prevention is always more economical than repair. Incorporate these habits into your seasonal routine:
- Inspect all elbows twice yearly, especially after storms
- Clear debris from gutters and downspouts before hurricane or winter seasons
- Apply fresh sealant to joints every three to five years
- Consider installing gutter guards to reduce debris accumulation
- Schedule professional gutter system evaluations every two years
These simple steps dramatically reduce the likelihood of future gutter elbow replacement needs.
Direct Water Where It Belongs
Your home deserves a gutter system that performs flawlessly in every season. When downspout elbows fail, they don’t just create a small inconvenience — they threaten the very foundation that supports everything you’ve built.
Don’t wait for water damage to appear. Restore proper downspout direction and flow today with expert gutter elbow replacement performed by seasoned professionals who understand every nuance of residential drainage systems.
Our team is ready to inspect your gutters, recommend the precise elbow solution for your home, and complete the work quickly and cleanly. Take the first step toward lasting protection — your foundation will thank you.
Direct Water Where It Belongs – Call for Downspout Repair Today