The Gutter Downspout Crimp Tool: Making Custom Connections
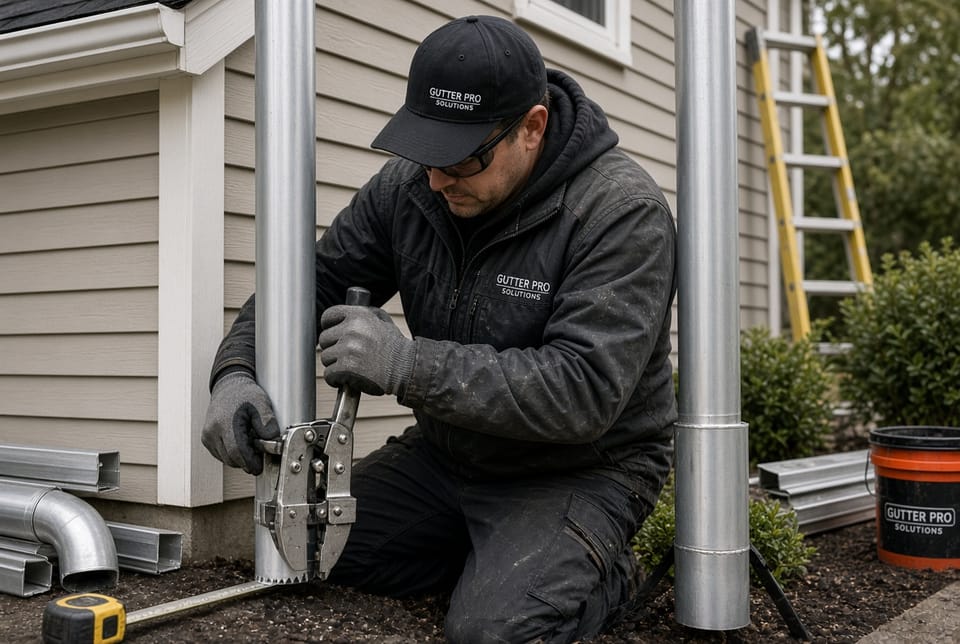
Every homeowner eventually faces the challenge of directing rainwater safely away from the foundation. When downspout sections need to join, the difference between a permanent, leak-free system and a temporary fix often comes down to one specialized hand tool: the gutter downspout crimp tool. This compact yet powerful device transforms ordinary straight pipe ends into perfectly tapered connections that slide together with precision. In the following guide we explore exactly what the tool does, why it remains indispensable for both professionals and serious do-it-yourselfers, and how to use it correctly so every joint looks factory-finished and performs for decades.
Call for Fast, Professional Downspout Custom Fits
Understanding the Purpose of a Downspout Crimp Tool
A standard downspout arrives as a rectangular or round tube with identical dimensions at both ends. Sliding one section into another without modification creates a loose, unreliable fit that relies on screws, rivets, or sealant to stay in place. Over time those fasteners can loosen, rust, or pull free under the weight of flowing water and seasonal expansion. The downspout crimp tool solves this problem by systematically reducing the diameter of one end, forming a gentle taper that nests snugly inside the receiving pipe.
The tool itself consists of a pair of hardened steel jaws mounted on a sturdy handle. When the operator squeezes the handles, the jaws press controlled indentations along all four sides (or around the circumference on round pipe). Each crimp slightly collapses the metal inward, creating a stepped reduction that measures approximately one-quarter to three-eighths of an inch smaller than the original size. The result is a male end that inserts smoothly into an unmodified female end, producing a friction-fit joint strong enough to hold under normal water flow without additional hardware.
Because the taper is gradual rather than abrupt, water moves through the joint without turbulence or restriction. This smooth internal path is one reason professional installers prefer crimped connections over screw-fastened ones whenever possible.
Why Custom Crimped Connections Outperform Traditional Methods
Several practical advantages make the gutter downspout crimp tool the preferred choice for creating custom fits.
- True custom sizing – Every downspout run is slightly different. Off-the-shelf elbows and extensions rarely match exact lengths or angles. By crimping on site, the installer can cut a section to the precise measurement needed and form a perfect mating end in seconds.
- No screws required – Eliminating fasteners removes potential leak points and corrosion sites. The joint relies on metal-to-metal contact rather than mechanical anchors that can work loose.
- Clean, professional appearance – Visible screw heads and sealant smears disappear. From the curb the entire downspout looks continuous and intentional.
- Faster installation – A skilled user can prepare and join two sections in under a minute, dramatically reducing labor time on multi-story or complex roof lines.
- Improved longevity – Because the metal is only reshaped rather than punctured, the structural integrity of the pipe remains intact. Thermal expansion and contraction occur uniformly without stress concentrations around fastener holes.
- Compatibility with multiple materials – The same tool works on aluminum, galvanized steel, and copper downspouts, allowing consistent technique across different architectural styles.
These benefits combine to produce a system that not only functions better but also adds measurable value to the property through superior curb appeal and reduced future maintenance.
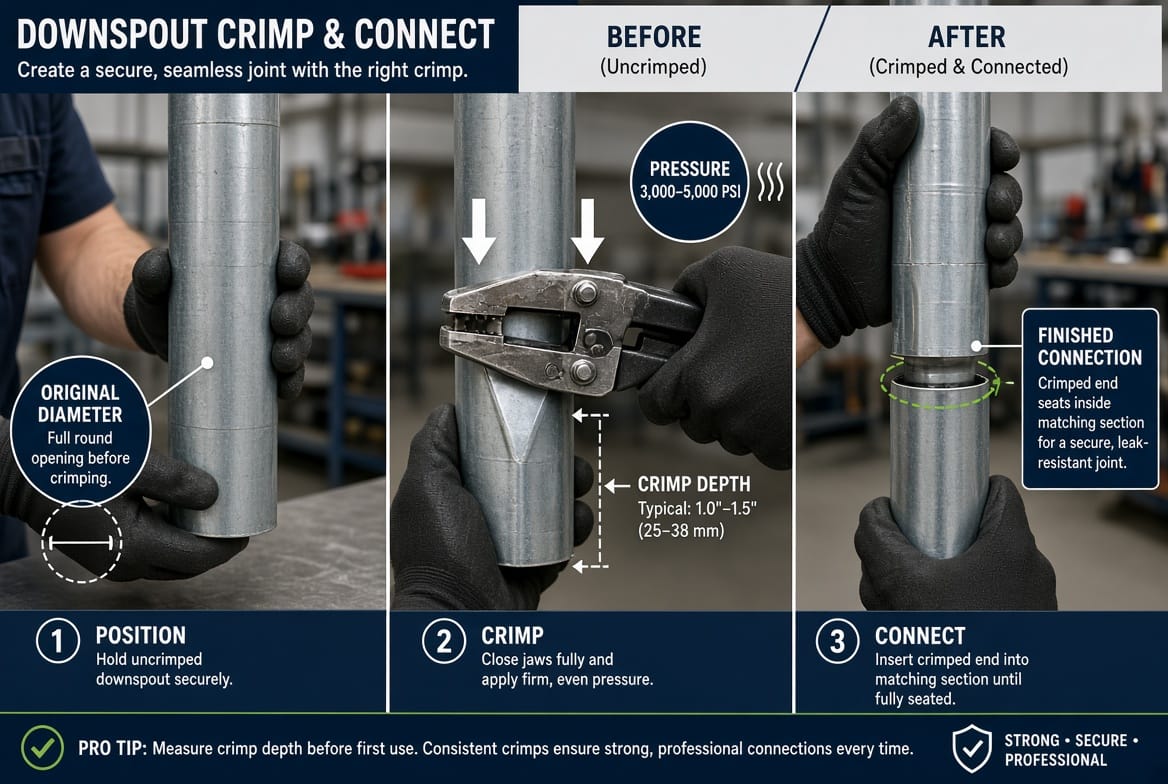
Step-by-Step Guide to Using the Downspout Crimp Tool
Mastering the tool requires only a few deliberate motions and careful attention to alignment. Follow this sequence for consistent, professional results every time.
- Measure and cut accurately
Determine the exact length required for the run. Use a fine-tooth hacksaw or aviation snips to make a square cut. Deburr the cut edge with a file so no sharp projections interfere with the tool jaws. - Mark the crimp zone
Place a light pencil line approximately one and one-half inches from the cut end. This zone will receive the series of crimps and ensures the taper begins far enough from the edge to maintain strength. - Position the tool
Open the jaws fully and slide the downspout end into the tool so the jaws rest just beyond the marked line. Align the tool so each jaw contacts the flat faces of a rectangular pipe (or is centered on a round pipe). - Apply the first set of crimps
Squeeze the handles firmly and evenly until the jaws close completely. Release and rotate the pipe ninety degrees. Repeat the squeeze. Continue rotating and crimping until all four sides (or the full circumference) have received one indentation. The pipe end should now show a slight reduction. - Deepen the taper if needed
For a tighter fit, move the tool slightly farther toward the open end and repeat the four-side sequence. Two or three progressive passes usually create the ideal taper without over-compressing the metal. - Test the fit
Insert the newly crimped end into the receiving section. It should slide in with moderate hand pressure and stop when the taper seats fully. If the fit feels loose, add one more light pass of crimps. If it is too tight, gently open the end with a pair of pliers or the back of the tool. - Secure and seal (optional)
Although screws are unnecessary for structural holding power, many installers still apply a thin bead of exterior-grade sealant around the joint for extra weather protection in extreme climates. The sealant remains hidden once the sections are joined.
Practice on scrap pieces until the motion becomes automatic. Within a short time the entire process feels as natural as using a pair of ordinary pliers.
Common Mistakes and How to Avoid Them
Even experienced users occasionally encounter issues. Awareness of these pitfalls keeps every joint reliable.
- Uneven pressure – Squeezing harder on one side than the other produces a lopsided taper that binds or leaks. Always apply equal force and check alignment before each squeeze.
- Over-crimping – Excessive reduction makes insertion difficult and can weaken the metal. Stop when the end seats with firm hand pressure.
- Skipping the deburr step – Sharp edges catch on the tool jaws and create irregular crimps. A quick file pass eliminates the problem.
- Working on dirty or painted surfaces – Debris between the jaws and the metal can leave marks or reduce grip. Wipe the pipe end clean before starting.
- Ignoring material thickness – Heavier-gauge steel requires more force and sometimes an extra pass compared with lightweight aluminum. Adjust technique accordingly.
By treating each of these points as a deliberate checklist item, the finished connection remains both strong and attractive.
Expanding the Tool’s Role Across an Entire Gutter System
While the primary purpose is joining straight sections, creative use of the downspout crimp tool extends far beyond simple splices. Installers routinely form custom offsets, create temporary test fittings during layout, and even repair damaged factory ends on existing downspouts. When a run must negotiate an unexpected architectural feature—such as a protruding window sill or decorative column—the ability to fabricate an exact-length piece on the spot prevents costly special orders and delays.
In multi-story applications the tool proves especially valuable. Upper sections can be crimped and lowered into place, then locked into lower sections without the need for scaffolding adjustments or extra fasteners that would otherwise be difficult to reach. The same principle applies when replacing only a damaged middle section: both ends of the new piece receive carefully matched tapers so the repair disappears into the continuous line.
Homeowners who maintain their own systems also benefit. A single affordable crimp tool stored in the garage allows quick seasonal adjustments—shortening a section after landscaping changes or lengthening a run after adding a rain barrel—without calling for service each time.
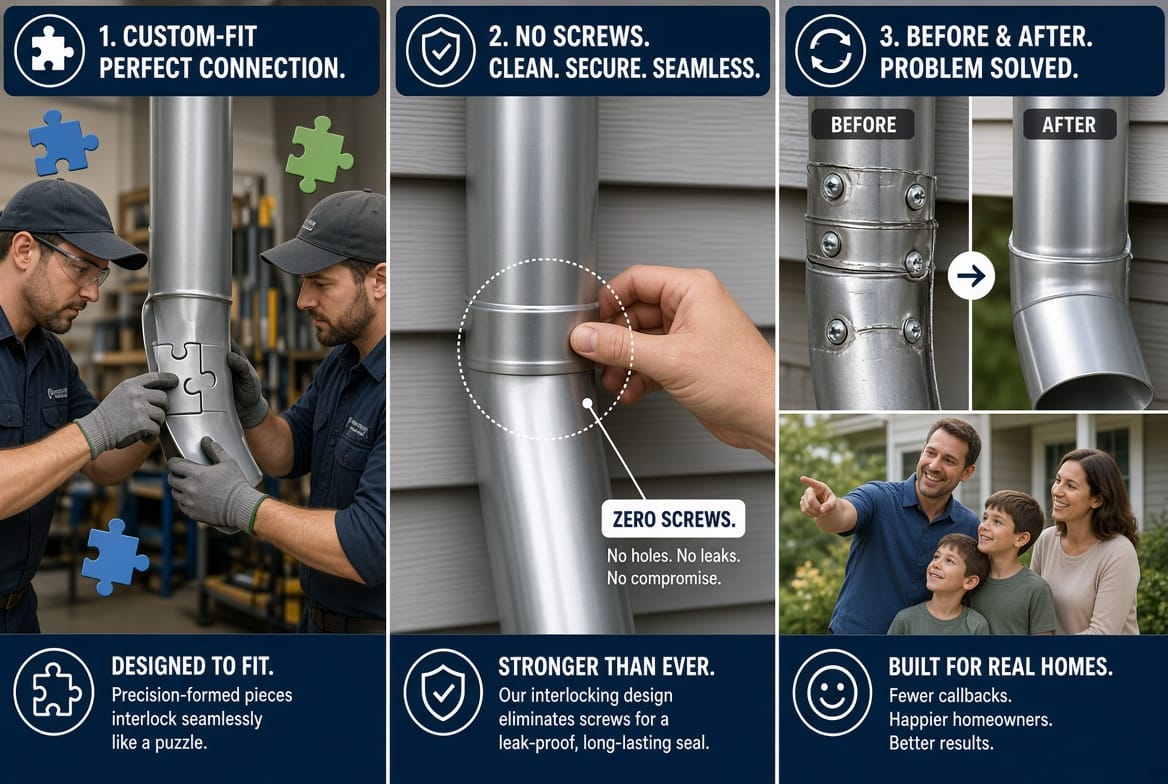
Long-Term Value and Peace of Mind
Investing a few minutes to form each joint correctly pays dividends for years. Water is directed efficiently away from the foundation, reducing the risk of basement seepage, soil erosion, and exterior staining. The absence of protruding fasteners means fewer places for leaves and debris to catch, which in turn lowers the frequency of clogs. When the entire system is inspected during annual maintenance, crimped joints rarely require attention, freeing time and budget for other priorities.
From an aesthetic standpoint the continuous, uninterrupted lines of a fully crimped downspout system complement modern and traditional architecture alike. Real-estate professionals often note that clean, well-executed exterior details contribute to stronger first impressions and can support higher listing prices.
When Professional Expertise Makes the Difference
Although the downspout crimp tool is straightforward to operate, complex roof geometries, multi-story heights, and historic materials sometimes call for experienced hands. Certified gutter technicians bring not only the correct tools but also the judgment to choose the ideal taper depth for each material and the safety protocols required for elevated work. They can also integrate the downspout system with underground drainage, rain-harvesting setups, or decorative leader heads that elevate the overall design.
If your project involves extensive runs, unusual angles, or simply the desire for a lifetime installation performed to the highest standard, professional service remains the most efficient path. A single call ensures every connection is custom-fitted, every joint is watertight, and every detail reflects meticulous craftsmanship.
Final Thoughts on Mastering Custom Connections
The gutter downspout crimp tool stands as a quiet hero in the world of exterior water management. By converting ordinary pipe ends into precision-engineered tapers, it delivers custom fits that require no screws, present a clean finished appearance, and perform reliably through seasons of heavy rain and freeze-thaw cycles. Whether you are a homeowner refining a single run or a contractor completing an entire multi-home development, understanding and applying this tool elevates the quality of every installation.
Take the time to practice the simple sequence of measuring, positioning, and progressive crimping. Respect the material, avoid the common pitfalls, and the results will speak for themselves in both function and beauty. When the scope of the work exceeds comfortable DIY limits, remember that expert assistance is only a phone call away.
Expert Gutter Downspout Crimping Service – Call Today