The Garage Door Sensor: Why It's Blinking and How to Fix It
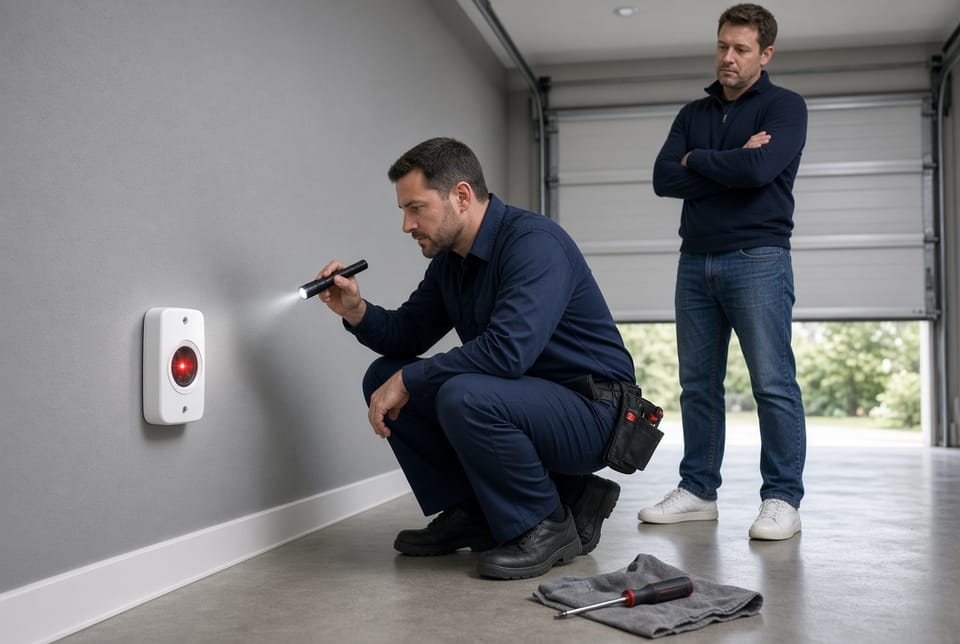
A blinking garage door sensor light is one of the most frequent reasons a garage door opener refuses to close. The safety sensors, also called photo-eye sensors, sit a few inches above the floor on both sides of the door opening. They create an invisible infrared beam. When that beam is broken or the sensors cannot communicate, the opener’s logic board stops the door from closing and often flashes a warning light on one or both sensors.
Stop the Blinking Light – Call for Sensor Service
This protective feature exists for good reason. A closing garage door is heavy and powerful. Without working sensors the door could strike a person, pet, or object. The blinking light is the system’s way of telling you the safety circuit is incomplete. Most of the time the problem is simple to correct. This guide explains the three primary causes—misalignment, obstruction, and faulty wiring—and walks you through reliable troubleshooting and repair steps so you can restore normal operation safely.
How Garage Door Safety Sensors Work
Each sensor has a small LED. On a typical system one sensor is the sending unit and the other is the receiving unit. When they are properly aligned and the path is clear, both LEDs usually glow steady. A blinking LED on the receiving sensor (or sometimes both) signals that the infrared beam is not being received correctly. Some openers also flash a corresponding diagnostic light on the motor unit itself.
The sensors are wired back to the opener. Low-voltage wires carry both power and the signal. Any interruption in alignment, cleanliness, or electrical connection triggers the safety lockout. Understanding this simple circuit helps you diagnose the issue without guesswork.
Why the Sensor Light Blinks: The Three Main Causes
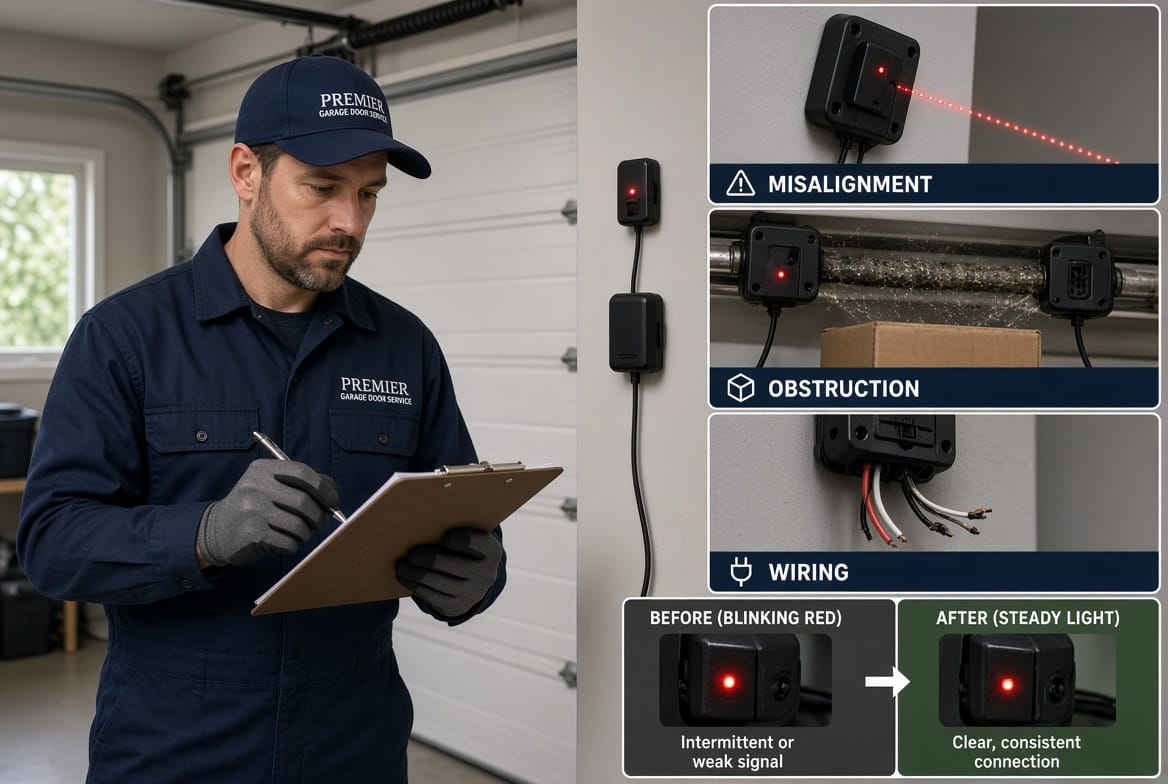
Misalignment
Sensors must face each other squarely. Even a few degrees of tilt or a slight height difference can break the beam. Vibration from the door cycling, accidental bumps from stored items, or settling of the garage floor over time can shift one or both brackets. When the beam misses the receiving lens, the LED blinks.
Obstruction
Anything that blocks or scatters the infrared beam will cause blinking. Common culprits include dirt, dust, cobwebs, leaves, toys, boxes, or even a build-up of grease on the lens. Outdoor-facing garages can collect pollen or road film. A thin film is often enough to weaken the signal.
Faulty Wiring
The thin wires that run from the sensors to the opener can become damaged, loose, or corroded. Staples that were driven too tightly, rodents chewing insulation, or a wire that has pulled free from a terminal all interrupt the circuit. A broken or shorted wire produces the same blinking symptom as a physical blockage.
Other less common factors include direct sunlight hitting the receiving lens at certain times of day, a failing sensor circuit board, or low voltage from a deteriorating opener transformer. These are rarer than the three primary causes listed above.
Step-by-Step Troubleshooting and Repair
Follow these steps in order. Most blinking-sensor problems are resolved in the first few minutes.
- Disconnect power only if you will be handling wires. For alignment and cleaning you can leave the opener plugged in so you can watch the LEDs change in real time.
- Inspect the path between the sensors. Remove any objects, sweep the floor, and look for hanging items that might swing into the beam.
- Clean both lenses. Use a soft, dry microfiber cloth. If the lenses are greasy, slightly dampen the cloth with water only. Avoid glass cleaner or solvents that can leave residue or damage plastic.
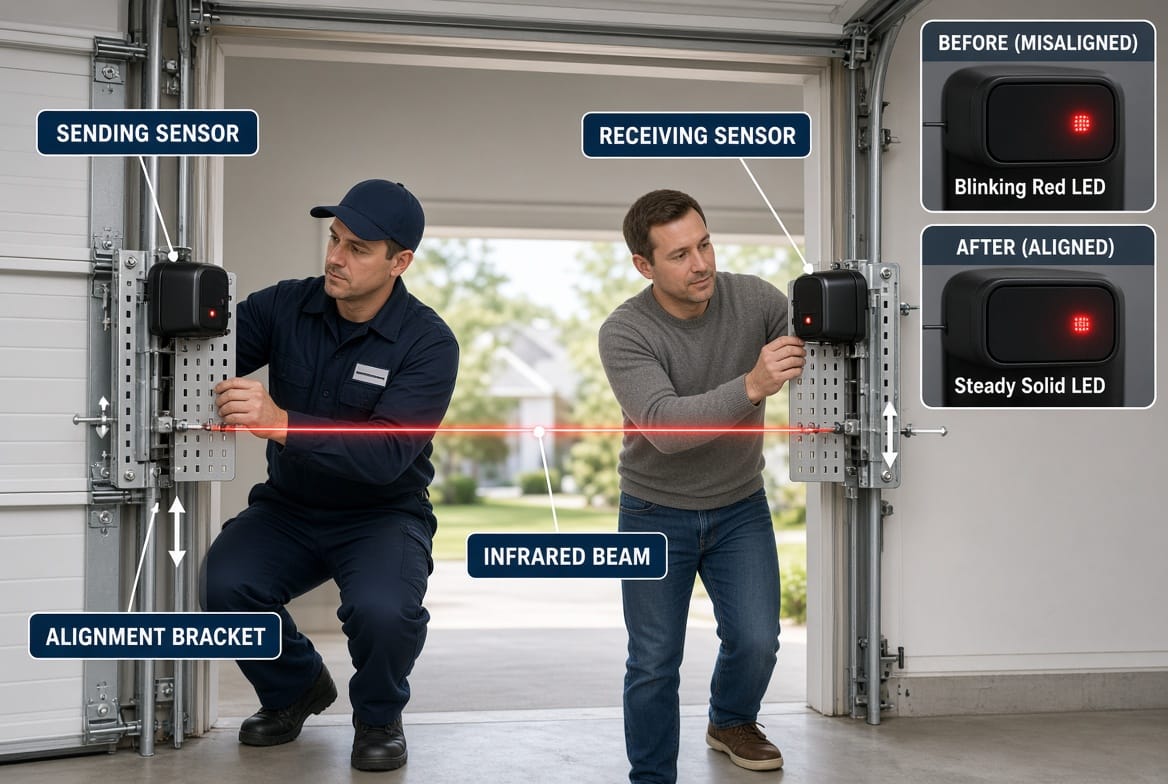
- Check physical alignment. Stand at one sensor and look across to the other. The two units should be at the same height and pointed directly at each other. Most brackets have slotted holes that allow small up-down and side-to-side movement. Loosen the wing nut or screw just enough to adjust, then retighten.
- Watch the LEDs while you adjust. The blinking light typically becomes steady once the beam is captured. Make tiny movements; over-correction is common.
- Examine the wiring. Follow each wire from the sensor back to the opener. Look for pinched sections, cuts, or loose connections at the terminals. Gently tug the wires at the sensor and at the opener to confirm they are secure.
- Test the door. After any adjustment, stand clear and use the wall button or remote to close the door. The door should travel fully downward. If it reverses, repeat the alignment check.
- Perform the safety-reverse test. Place a 2x4 board flat on the floor in the door’s path. The door must reverse upon contact. This confirms the sensors and the force settings are both working.
If the LED still blinks after cleaning and alignment, the wiring or the sensor itself may be at fault. At that point a professional inspection is the safest next step.
Detailed Alignment Technique
Proper alignment is more than pointing the sensors at each other. The infrared beam has a limited acceptance angle. Even when the units look straight, a small twist in the bracket can keep the beam from landing on the receiving photodiode.
Loosen the mounting screws just enough so the sensor can pivot. Have a helper watch the receiving LED while you make incremental changes. Once the light stays on steadily, tighten the hardware firmly but do not overtighten and crack the plastic housing. Some installers place a small mark on the wall or bracket after successful alignment so future checks are faster.
Sunlight can occasionally overwhelm the receiving sensor in the late afternoon. If the problem appears only at certain hours, a simple shade or a slight downward tilt of the receiving unit often solves it.
Wiring Inspection and Simple Repairs
Low-voltage sensor wires are usually white and black or white and striped. They connect to the same terminals on both the sensors and the opener. A loose screw terminal is the most frequent electrical cause of blinking.
Turn the opener off at the wall switch or unplug it before touching terminals. Remove each wire, inspect the copper for corrosion or breakage, then re-secure. If a section of wire is damaged, splice in a new length using wire nuts or a proper low-voltage connector. Never use electrical tape alone for a lasting repair.
If both sensors have power (you can usually see a faint glow or feel warmth) yet the beam still fails, the internal electronics of one sensor may have failed. Replacement sensors are inexpensive and usually plug-and-play with the existing wiring.
Prevention and Ongoing Maintenance
A few minutes of care each season prevents most blinking-light episodes.
- Wipe the lenses every three months.
- Keep the area around the sensors clear of stored items.
- Check alignment after any heavy use or if the door has been bumped.
- Listen for unusual vibration that might loosen brackets.
- Replace weather-worn sensor covers if they become cracked or cloudy.
These simple habits keep the safety system reliable and reduce unexpected service calls.
Safety Considerations You Should Never Ignore
A garage door that will not close is inconvenient. A garage door that closes without working sensors is dangerous. Never bypass the sensors by taping them or disconnecting the wires. Doing so disables the primary safety feature and creates a serious risk of injury. If you cannot restore the beam after following the steps above, stop and call a trained technician.
Children and pets should be kept away from the door while you work. Always stand to the side when testing the door’s travel.
When Professional Service Is the Right Choice
Most homeowners can correct alignment and cleaning issues themselves. Persistent blinking after those steps, damaged wiring inside the wall, or a sensor that has failed internally are best handled by a technician who carries the correct replacement parts and diagnostic tools. A professional can also verify that the opener’s logic board and force settings are within specification.
Regular professional maintenance once a year also includes lubrication of moving parts, inspection of cables and springs, and a full safety-system test. Combining that visit with a sensor check keeps the entire door operating smoothly.
A blinking garage door sensor is almost always a solvable problem. Start with the simple visual and cleaning steps, move to alignment, then inspect the wiring. In the majority of cases the LED returns to a steady glow and the door closes normally again. When the issue is beyond a straightforward adjustment, timely professional help protects both your family and your equipment.
Fix your blinking garage door sensors.
Get Expert Garage Door Sensor Repair – Call Now!