The Garage Door Opener Wall Button: Replacing a Faulty Control
A reliable garage door opener wall button is one of the simplest yet most essential components of any modern garage system. Mounted at a convenient height inside the garage, this modest control panel allows homeowners to raise or lower the door with a single press. When it works correctly, the process feels effortless. When it fails, however, daily routines can quickly become frustrating. The good news is that replacing a faulty control is one of the most straightforward common repairs a homeowner can perform. In the following guide we explore exactly why these buttons fail, the clear warning signs to watch for, and the precise steps required for a clean, permanent replacement.
Fix Intermittent Garage Door Issues Fast – Call for Expert Help!
Understanding the Role of the Wall Button
The wall button serves as the primary hardwired interface between you and the garage door opener motor. Unlike remote transmitters that rely on radio signals and batteries, the wall-mounted unit connects directly to the opener via a pair of low-voltage wires. This direct connection delivers consistent performance and remains functional even when remote batteries die or wireless interference occurs. Because it is used multiple times every day, the button experiences repeated mechanical stress. Over months and years that stress eventually leads to failure—yet the repair itself remains remarkably simple.
Why Garage Door Wall Buttons Fail
Two primary causes account for the majority of failures: worn contacts and moisture. Understanding these factors helps homeowners both diagnose the problem accurately and prevent future issues.
Worn contacts develop through ordinary use. Each time the button is pressed, a small metal or carbon contact closes an electrical circuit. After thousands of cycles the contact surface gradually erodes, oxidizes, or becomes pitted. The result is an inconsistent electrical path. Sometimes the circuit completes; other times it does not. This progressive degradation is the single most common reason a once-reliable button begins to behave unpredictably.
Moisture is the second major culprit. Garages are rarely climate-controlled environments. Seasonal humidity, rain blown through an open door, condensation forming on cold walls, or even minor leaks from an overhead roof can introduce water vapor or actual droplets into the button housing. Once moisture reaches the internal contacts it accelerates corrosion, creates intermittent short circuits, or causes complete open-circuit failure. Buttons installed on exterior walls or near exterior doors face higher risk, yet even interior units can suffer if the garage remains damp for extended periods.
Additional contributing factors occasionally appear. Dust and debris accumulate inside the housing and interfere with contact closure. Physical impact—such as accidental bumps from ladders, bicycles, or stored items—can crack the plastic casing or misalign internal components. Age itself plays a role; after ten or fifteen years the spring mechanism that returns the button to its resting position may lose tension, leaving the switch partially engaged or unresponsive.
Recognizing these root causes allows a homeowner to approach the repair with confidence rather than uncertainty. The solution is rarely complex electronics; it is almost always a simple mechanical or environmental issue that a new button resolves completely.
Clear Signs That the Wall Button Needs Replacement
Identifying a failing unit early prevents inconvenience and eliminates the temptation to rely solely on remote transmitters. The most frequent symptoms appear in a predictable pattern.
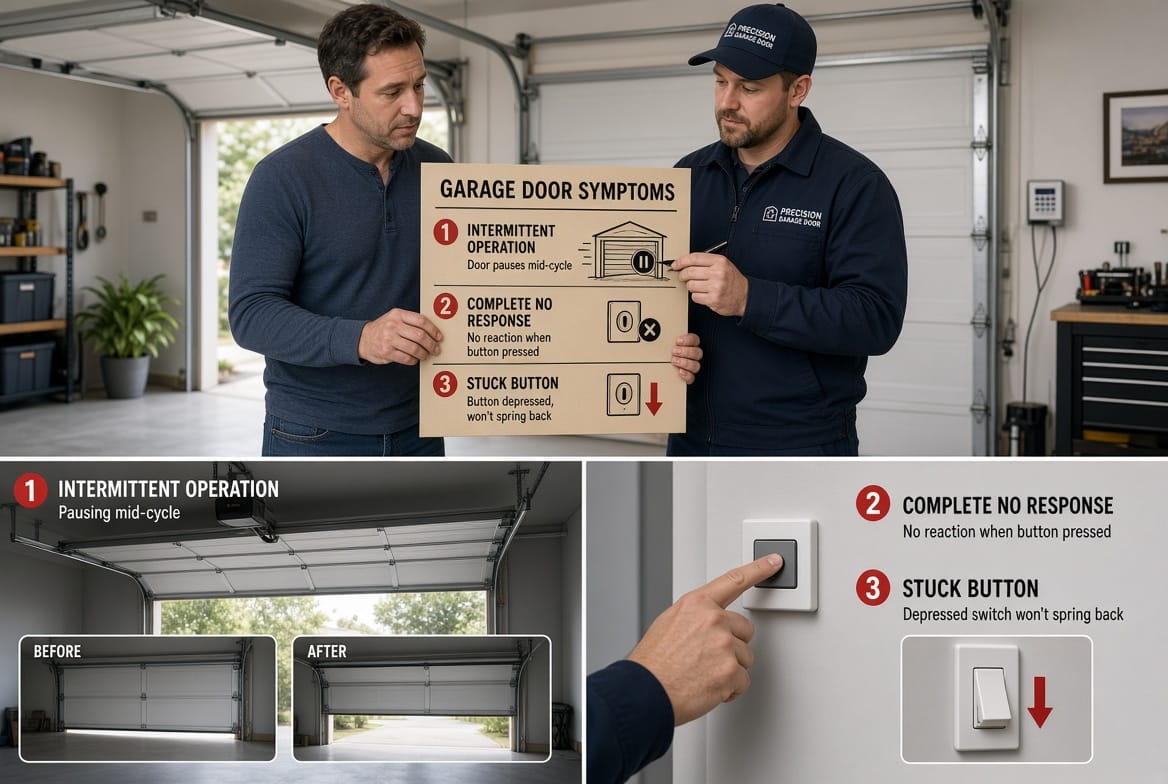
- Intermittent operation is usually the first noticeable clue. The door responds to some presses but ignores others. You may need to press the button two or three times before the opener activates. This behavior points directly to worn contacts that only make reliable connection under specific pressure or angle.
- No response at all represents a more advanced stage of failure. Pressing the button produces neither sound nor movement from the opener. Before assuming the motor itself has failed, always test the wall button, because a complete open circuit in the control is far more common—and far less expensive—than motor replacement.
- A stuck button occurs when the mechanical return spring weakens or debris lodges inside the housing. The button remains depressed after release, causing the opener to reverse direction or refuse to operate until the stuck contact is freed. In some cases the door may cycle continuously until power is disconnected.
Other secondary indicators include a button that feels mushy or loose under the finger, visible cracks in the plastic faceplate, or discoloration caused by heat or moisture. Any combination of these symptoms signals that replacement is the practical next step.
Preparing for a Successful Replacement
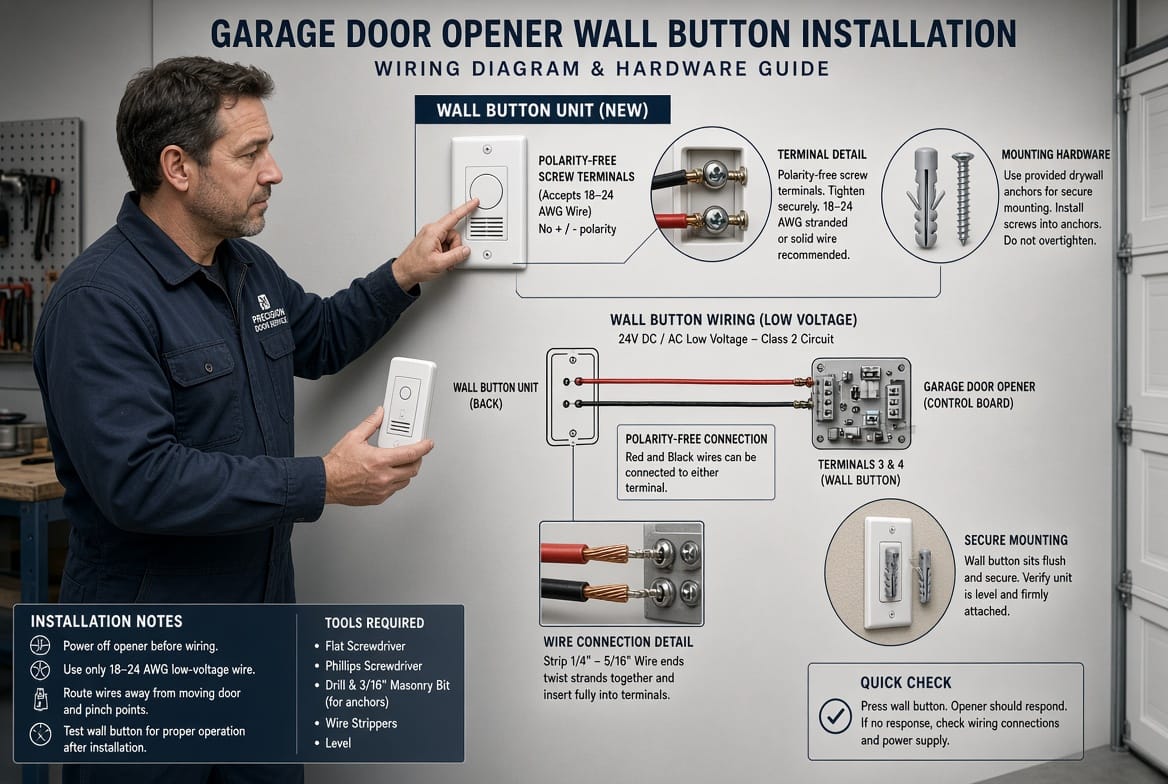
Before beginning the physical work, gather a few basic tools and observe essential safety practices. You will need a flat-head or Phillips screwdriver (depending on the mounting screws), a new compatible wall button, and optionally a pair of needle-nose pliers for handling wire ends. Most modern openers use a universal two-wire button that requires no programming or special pairing.
Safety comes first. Locate the main power switch or unplug the garage door opener from its outlet. Although the wall button circuit operates at low voltage—typically 24 volts or less—disconnecting power eliminates any remote chance of unexpected door movement. Confirm that the door is fully closed and that no one stands in its path. If the garage shares a wall with living space, notify household members that the door will be temporarily out of service.
Compatibility is straightforward. Measure the existing button’s footprint and note whether it uses screw terminals or quick-connect tabs. Nearly all current models accept any standard two-wire wall control; the new unit simply inherits the same pair of wires. Keep the original packaging or model number of the opener nearby in case the retailer asks for confirmation, yet in practice the vast majority of replacements are universal.
Step-by-Step Replacement Process
The actual swap takes only a few minutes once preparation is complete. Follow these clear stages for a professional result.
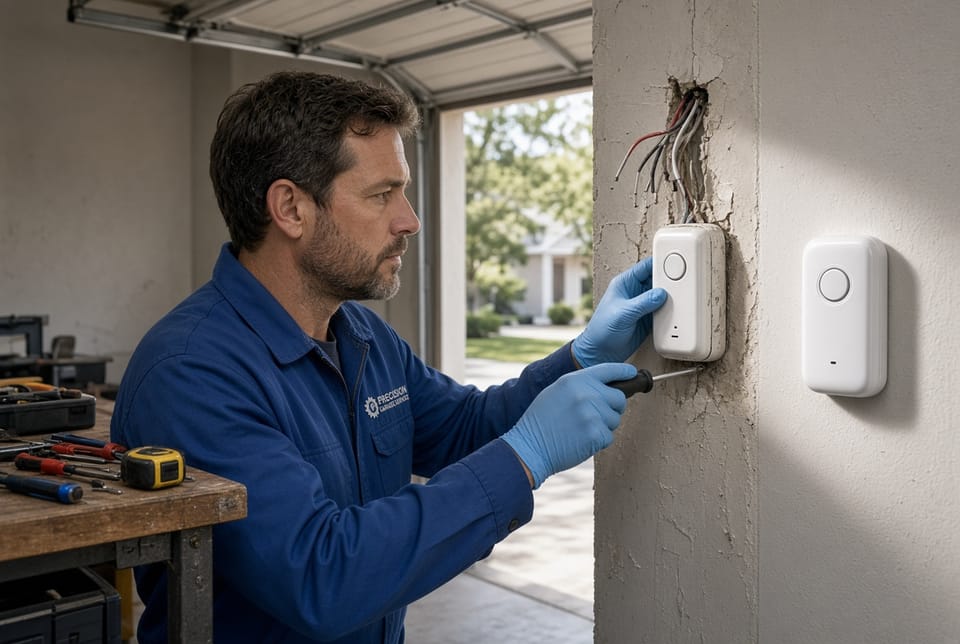
First, remove the old button. Most units are held by two screws located at the top and bottom of the faceplate. Loosen the screws just enough to free the housing; it is rarely necessary to remove them completely. Gently pull the button away from the wall to expose the two wires attached to the rear terminals. Note the orientation of the wires—although polarity is almost never critical for these low-voltage circuits, matching the original positions provides extra assurance.
Next, disconnect the wires. Depending on the terminal style, either loosen the screws that clamp the wire ends or press a release tab to free the conductors. Straighten any bent wire ends and inspect them for corrosion. If the copper appears dark or green, trim a short length with wire cutters and strip fresh insulation to reveal clean metal.
Install the new button by reversing the removal sequence. Attach the two wires to the corresponding terminals on the replacement unit. Tighten the screws firmly but avoid overtightening that could sever the conductors. Position the new housing against the wall, aligning it with the existing screw holes or drywall anchors. Drive the mounting screws until the button sits flush and secure. A slight wiggle test confirms that the unit will not loosen under normal use.
Restore power to the opener and test the new control immediately. Press the button once; the door should respond smoothly in either direction. Cycle the door several times to verify consistent operation. If the opener includes an illuminated button or a lock feature, confirm that those functions also work as expected. The entire process—from power disconnection to final testing—rarely exceeds fifteen minutes for an average homeowner.
Additional Tips for Long-Term Reliability
A few simple habits extend the life of the new wall button significantly. Wipe the faceplate periodically with a dry cloth to remove dust that could migrate inside the housing. Avoid spraying cleaners or lubricants directly onto the button; moisture and residue accelerate contact wear. If the garage experiences high humidity, consider a small dehumidifier or improved ventilation to reduce condensation risk. Finally, resist the urge to press the button repeatedly in rapid succession during testing; each cycle contributes to contact wear, so deliberate single presses are preferable.
Should the new button fail to operate after installation, double-check the wire connections and confirm that the opener itself still responds to a remote transmitter. In the rare event that the motor remains silent, the issue may lie elsewhere in the system—safety sensors, limit switches, or the logic board—and professional diagnosis becomes appropriate.
When Professional Assistance Adds Value
Although the replacement is designed for straightforward homeowner execution, certain situations favor calling an experienced technician. If the wall shows water damage, if the wiring appears frayed or aluminum rather than copper, or if multiple garage door components have begun failing simultaneously, a trained service professional can inspect the entire system efficiently. Likewise, multi-door installations or commercial-grade openers sometimes use specialized controls that benefit from expert handling.
The Lasting Benefits of a Fresh Wall Control
Replacing a faulty control restores more than mechanical function; it returns peace of mind. Homeowners regain the convenience of a single, reliable press that works every time. Guests and family members no longer struggle with unpredictable operation. The garage once again feels like a seamless extension of the home rather than a source of minor daily irritation. Because the repair itself is inexpensive and quick, postponing it offers little advantage.
In addition, a properly functioning wall button supports the overall safety features of modern openers. When the control circuit is clean and consistent, automatic reverse mechanisms and obstruction sensors operate as designed. A compromised button can sometimes mask other developing issues, so addressing it promptly keeps the entire system in optimal condition.
Conclusion and Next Steps
A garage door opener wall button that suffers from worn contacts, moisture intrusion, or simple mechanical wear need not disrupt household routines for long. The signs—intermittent operation, complete no response, or a stuck button—are easy to recognize, and the replacement process itself is a simple two-wire swap that most homeowners complete successfully on the first attempt. With basic tools, a few minutes of careful work, and attention to safety, the new control delivers years of dependable service.
Call Now for Quick Garage Door Opener Button Replacement