The Garage Door Opener Chain Drive: Lubrication and Maintenance
A properly functioning garage door opener chain drive is the quiet workhorse that keeps your daily routine seamless. When this critical component receives consistent care, the entire system operates with the smooth precision homeowners expect. Neglect, however, quickly turns everyday convenience into frustration. This comprehensive guide walks you through every essential aspect of chain drive maintenance, focusing exclusively on cleaning, lubrication with white lithium grease, recognizing early signs of wear, and knowing precisely when to adjust or replace the chain. Follow these authoritative steps and you will protect your investment, extend equipment life, and enjoy years of dependable service.
Expert Garage Door Chain Lubrication – Call Today!
Understanding the Chain Drive System
The chain drive remains one of the most popular and durable mechanisms found in residential garage door openers. A continuous metal chain loops around a drive sprocket and a stationary idler, converting the motor’s rotational power into linear motion that raises and lowers the door. Because the chain is constantly under tension and exposed to dust, temperature swings, and occasional moisture, it demands regular attention. Proper lubrication and maintenance prevent metal-on-metal friction that generates noise, accelerates wear, and eventually leads to costly failures.
Homeowners who treat the chain as a “set-it-and-forget-it” part often discover the consequences only after the door begins to behave unpredictably. By contrast, those who schedule simple upkeep enjoy quieter operation, smoother travel, and the reassurance that their opener will perform reliably through every season.
Why Regular Maintenance Matters
Routine care of the garage door opener chain drive delivers multiple tangible benefits. First, it dramatically reduces operational noise that can disturb household members or neighbors. Second, it preserves the motor by eliminating the extra strain caused by a dry or dirty chain. Third, it protects the door’s balance and the safety sensors that rely on consistent travel speed. Finally, consistent maintenance postpones the need for full chain replacement, saving both time and money.
Authoritative technicians emphasize that a few minutes of attention every six months is far more effective than waiting for symptoms to appear. The process is straightforward, requires only basic tools, and can be performed safely by most homeowners who follow clear guidelines.
Essential Tools and Materials
Before beginning any work, gather the following items:
- Soft-bristle brush or clean lint-free cloths
- Mild degreaser or specialized chain cleaner
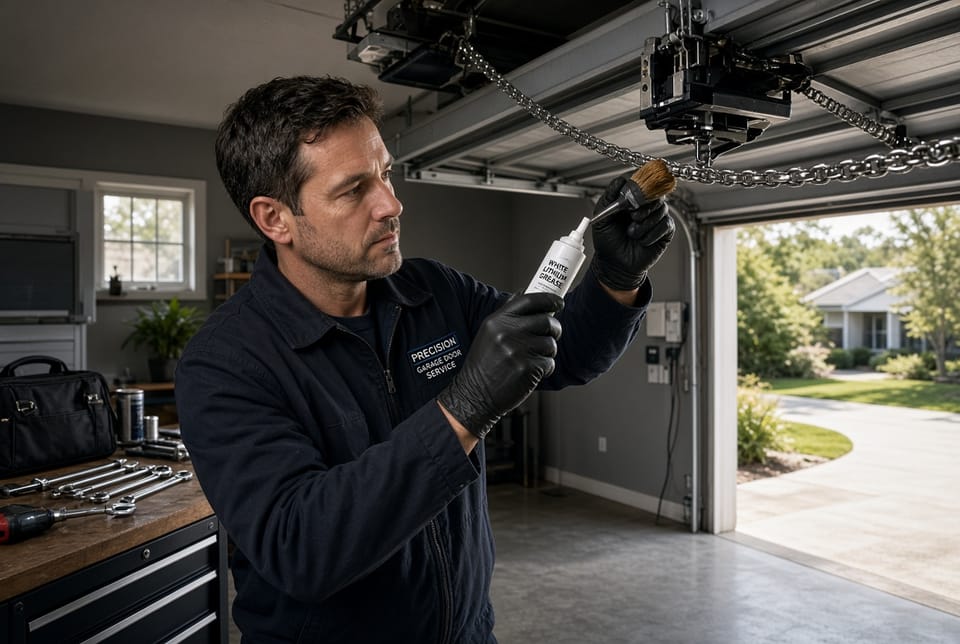
- High-quality white lithium grease formulated for garage door applications
- Adjustable wrench or socket set for tension adjustments
- Safety glasses and work gloves
- Step ladder rated for household use
- Owner’s manual for your specific opener model
Using the correct white lithium grease is non-negotiable. Ordinary household oils attract dirt and can drip onto the door panels or floor. White lithium grease stays in place, resists moisture, and provides long-lasting protection under the heavy loads typical of a garage door system.
Step-by-Step Cleaning Process
Cleaning removes the abrasive mixture of dust, old lubricant, and metal particles that accumulate on the chain. Begin by disconnecting the opener from electrical power or engaging the emergency release to prevent accidental activation. Raise the door fully and secure it with locking pliers or a sturdy prop if necessary.
Using a soft brush, gently sweep the entire length of the chain, paying special attention to the links and the sprocket teeth. Follow with a clean cloth dampened with a mild degreaser to lift stubborn residue. Avoid harsh solvents that can damage plastic components or strip protective coatings. Once the chain is free of debris, wipe it thoroughly dry. A clean surface allows the new lubricant to adhere properly and deliver maximum protection.
This cleaning stage alone often restores quieter performance and reveals any early signs of stretch or corrosion that might otherwise go unnoticed.
Proper Lubrication with White Lithium Grease
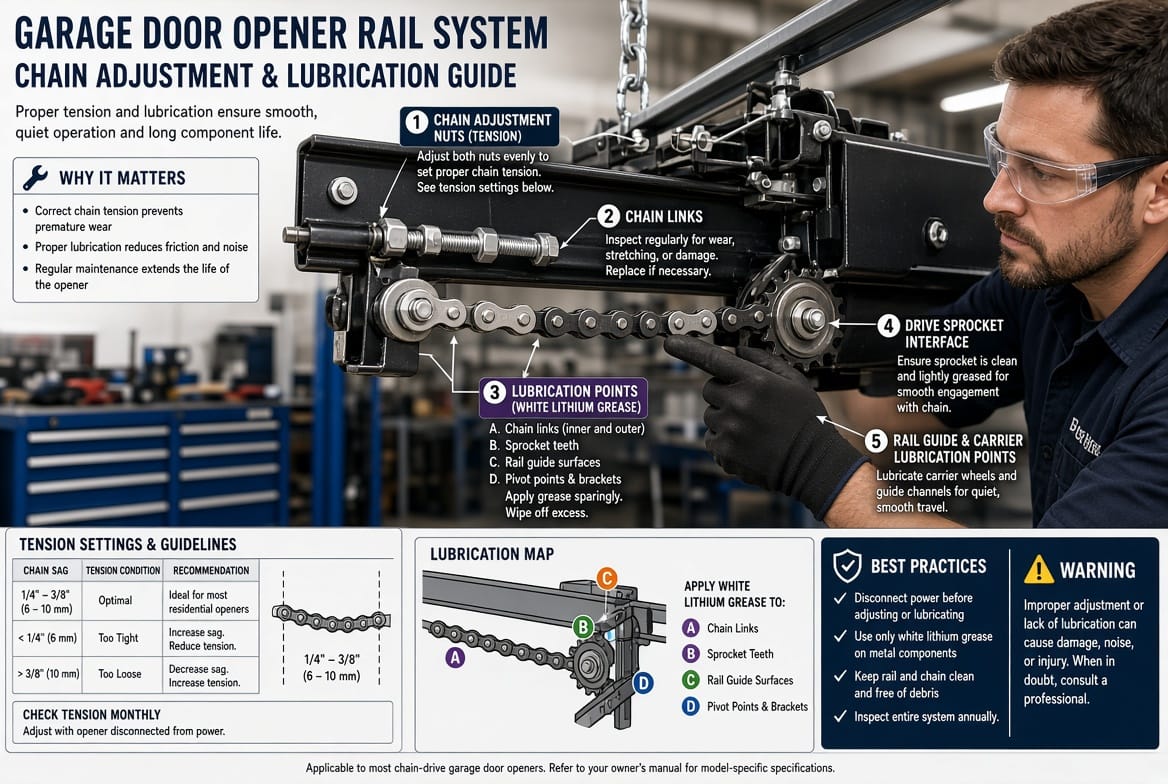
After the chain is clean and dry, apply white lithium grease sparingly yet thoroughly. Work the grease into each link while manually cycling the chain a short distance. Focus on the points where the chain contacts the drive and idler sprockets. A thin, even coating is ideal; excess grease only attracts more dirt.
Many professional technicians recommend lubricating the chain every six months in moderate climates and every three to four months in dusty or coastal environments. Always consult the manufacturer’s recommendations for your specific model, as some openers have unique requirements. Consistent use of the correct lubricant keeps friction low, prevents premature wear, and maintains the quiet operation that modern households demand.
Recognizing Signs of Wear
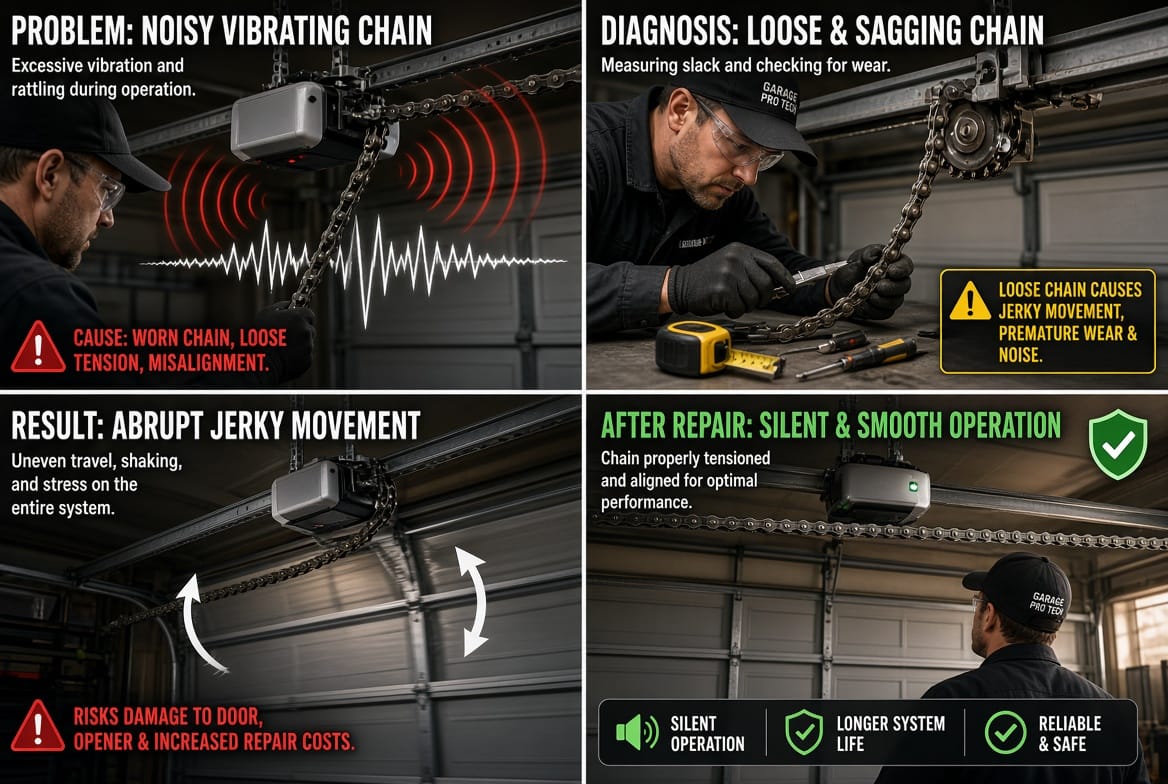
Even with diligent care, chains eventually show age. Early detection allows simple corrections rather than emergency repairs. Watch for these three primary indicators:
- Noisy operation: A once-quiet opener that suddenly produces grinding, rattling, or squealing sounds usually signals insufficient lubrication or accumulated debris. In more advanced cases the noise indicates stretched links or worn sprocket teeth.
- Loose chain: Visible sagging between the rail supports or excessive play when the door is stationary points to elongation. A properly tensioned chain should display only a slight, even droop.
- Jerky movement: The door travels in hesitant, uneven steps rather than a continuous smooth motion. This symptom often results from binding links, improper tension, or localized dry spots.
Any one of these signs of wear warrants immediate inspection. Addressing them promptly restores smooth function and prevents secondary damage to the motor, trolley, or door hardware.
When and How to Adjust the Chain
Adjustment restores proper tension and eliminates the slack that produces noise and uneven travel. Most chain-drive openers feature an adjustment nut or bolt near the motor unit or along the rail. Refer to the owner’s manual for the exact location and recommended procedure.
With power disconnected, loosen the locking mechanism, then turn the adjustment nut in small increments while checking the chain’s sag. Ideal tension allows roughly one-quarter to one-half inch of vertical movement at the midpoint of the longest unsupported span. Over-tightening places excessive strain on the motor and bearings; under-tightening permits the chain to jump the sprocket. After adjustment, cycle the door several times to confirm smooth, quiet travel, then re-secure the locking hardware.
If the chain has stretched beyond the range of the adjustment mechanism, replacement becomes the only reliable solution.
Knowing When Replacement Is Necessary
Chains do not last forever. Manufacturers typically rate quality chains for 10,000 to 15,000 cycles under normal residential use. Visible indicators that replacement is required include:
- Links that no longer mesh cleanly with the sprocket
- Noticeable elongation that cannot be corrected by adjustment
- Cracked, rusted, or deformed individual links
- Persistent noise or jerkiness after thorough cleaning, lubrication, and tensioning
Replacing a chain is a more involved task than routine maintenance. It requires matching the exact pitch and length specified by the opener manufacturer, careful removal of the old chain, and precise installation of the new one. Many homeowners prefer to entrust this work to trained technicians who possess the proper tools and experience to complete the job safely and correctly the first time.
Safety Considerations During Maintenance
Always prioritize safety. Disconnect power before touching any moving parts. Never stand directly under a raised door while performing adjustments. Wear eye protection when cleaning or applying grease. If the door feels unusually heavy or unbalanced, stop immediately and call a professional; an improperly balanced door can cause serious injury.
Children and pets should remain clear of the work area. After any maintenance, test the automatic reverse and photo-eye safety systems to confirm they function correctly.
Seasonal Maintenance Schedule
Create a simple calendar reminder:
- Spring: Full cleaning and lubrication after winter’s temperature extremes
- Summer: Quick visual inspection for dust buildup
- Fall: Second lubrication before colder weather arrives
- Winter: Monitor for unusual noise caused by contraction of metal components
In regions with high humidity or salt air, increase the frequency of cleaning to prevent corrosion. Consistent adherence to this schedule keeps the garage door opener chain drive performing at peak efficiency year after year.
Professional Service Versus DIY
While many maintenance tasks are well within the capability of a careful homeowner, certain situations call for expert intervention. Persistent noise after lubrication, inability to achieve proper tension, visible damage to the chain or sprockets, or any uncertainty about the procedure are all valid reasons to schedule professional service. Certified technicians arrive with specialized diagnostic equipment, genuine replacement parts, and the experience to identify related issues that might otherwise be overlooked.
Long-Term Benefits of Diligent Care
Homeowners who invest a modest amount of time in chain drive maintenance enjoy quieter mornings, smoother evening returns, and the confidence that their garage door will open and close reliably every single day. Proper care also preserves the value of the opener itself, often extending its useful life well beyond the manufacturer’s warranty period. In addition, a well-maintained system places less stress on the door springs, tracks, and rollers, further reducing overall repair costs.
Common Mistakes to Avoid
Even well-intentioned efforts can introduce problems if certain pitfalls are not avoided:
- Using the wrong lubricant that drips or attracts dirt
- Over-lubricating and creating a sticky mess
- Ignoring the manufacturer’s tension specifications
- Attempting adjustments while the door is under load
- Neglecting to test safety features after service
Steering clear of these errors ensures that every maintenance session produces lasting improvement rather than new complications.
Final Recommendations for Smooth Operation
The garage door opener chain drive rewards consistent, informed care with years of dependable, quiet service. Clean the chain thoroughly, lubricate exclusively with high-quality white lithium grease, monitor closely for the classic signs of wear—noisy, loose, or jerky operation—and adjust or replace the chain at the first indication that tension or integrity has been compromised. These straightforward practices form the foundation of reliable performance.
Maintain your chain drive for smooth operation. Experienced technicians stand ready to restore your system to peak condition, ensuring every opening and closing remains effortless and secure.
Restore Quiet Garage Door Performance – Call Today!