The Freezer Door Gasket: Replacing a Worn Seal
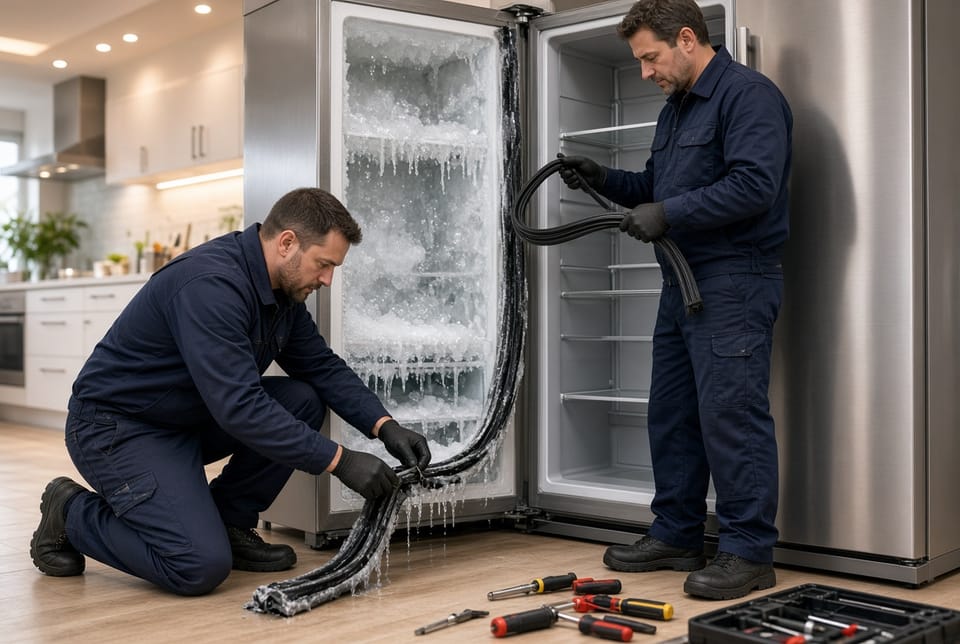
A freezer that no longer stays consistently cold or that constantly accumulates frost buildup is often suffering from one surprisingly simple problem: a worn door gasket. This flexible rubber seal that runs around the entire perimeter of the freezer door is the only barrier keeping warm, moist kitchen air from entering the cold interior. When the gasket loses its shape, develops cracks, or flattens, that barrier fails. The result is wasted energy, higher utility bills, and food that suffers from freezer burn. The good news is that replacing a worn freezer door gasket is one of the most straightforward appliance repairs a homeowner or technician can perform. This guide walks you through every aspect of the issue and the repair so you can restore a tight seal and enjoy reliable, efficient cooling once again.
Save on Energy Bills – Replace Your Worn Freezer Seal Now
Understanding the Role of the Freezer Door Gasket
The gasket is a magnetic rubber extrusion designed to compress slightly when the door closes, creating an airtight and watertight barrier. Modern gaskets contain a flexible magnet that pulls the door firmly against the cabinet. Over years of opening and closing, exposure to temperature extremes, and occasional cleaning with harsh chemicals, the rubber hardens, loses elasticity, and develops flat spots or hairline cracks. Once that happens, even a tiny gap allows room-temperature air to infiltrate.
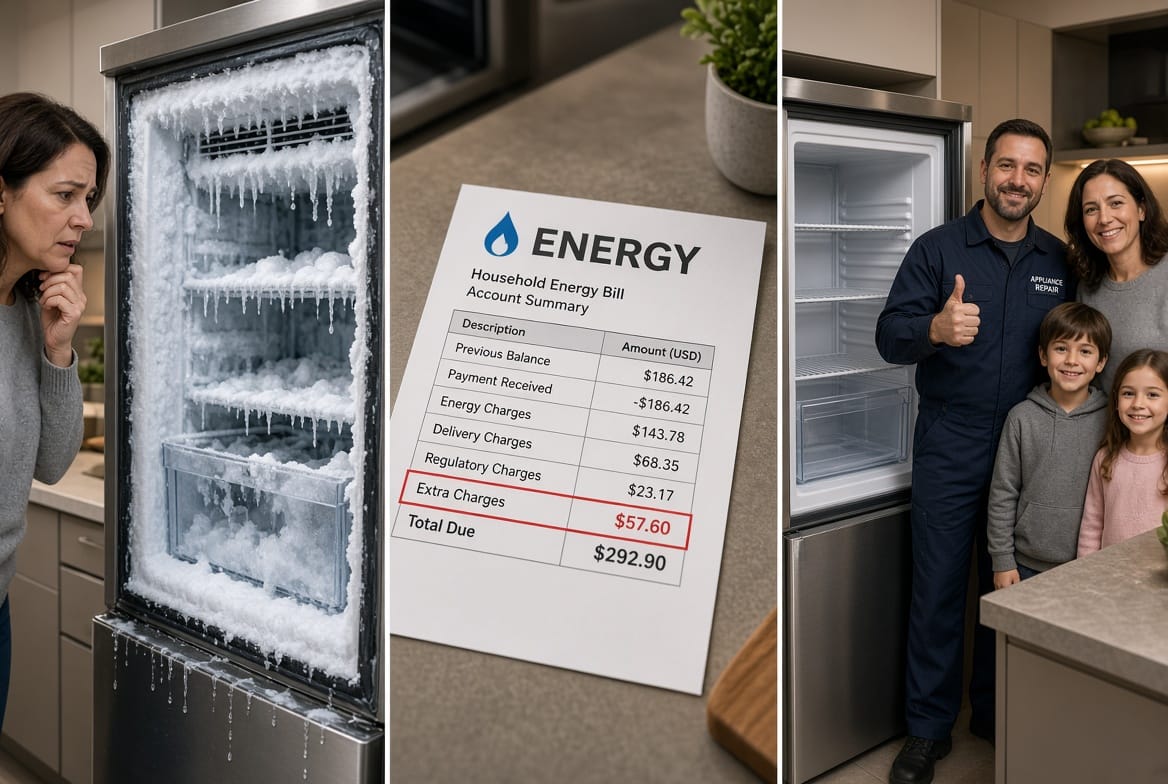
That incoming air carries moisture. When the moisture hits the sub-zero surfaces inside the freezer, it instantly freezes into frost and ice. The compressor then runs longer and more frequently to compensate for the extra heat load. Over time the extra runtime shortens the life of the compressor and drives up energy bills. A properly functioning gasket prevents all of these problems with almost no moving parts and no electricity of its own.
How a Worn Gasket Creates Frost Buildup and Higher Energy Costs
Warm air leaking past a damaged gasket does more than just raise the interior temperature. It introduces humidity that condenses and freezes on evaporator coils, walls, and food packages. The frost acts as an insulator, forcing the refrigeration system to work even harder. Homeowners typically notice the first signs as a thin layer of ice on the back wall or around the door opening. Left uncorrected, the ice grows into thick frost buildup that must be defrosted manually.
The energy penalty is measurable. Studies of household refrigerators and freezers show that a leaking door seal can increase electricity consumption by 15 to 30 percent. In a typical American household that extra usage translates into tens of dollars per year on the utility bill—money that disappears simply because a $20–$40 rubber part has worn out. Replacing the gasket restores the original efficiency and often pays for itself within a single season.
Additional hidden costs appear in food quality. Moisture that enters the cabinet causes freezer burn on meats, ice cream, and vegetables. Packages stick together, labels become unreadable, and the overall storage capacity shrinks as ice occupies space that should hold food. A new gasket eliminates these secondary problems at the same time it stops the energy waste.
Recognizing the Warning Signs of a Worn Seal
Catching a failing gasket early prevents the worst of the frost and the highest energy costs. Look for these clear indicators:
- Visible cracks, splits, or tears along the rubber surface, especially at the corners where the gasket bends.
- Flat spots or areas that no longer spring back when pressed with a finger; the rubber feels hard and lifeless.
- Persistent condensation or water droplets on the exterior of the door or on the floor in front of the freezer.
- Uneven frost or ice forming only on one side of the interior or around the door frame.
- The door no longer “grabs” when closed and can be opened with almost no resistance.
- An unexpected jump in monthly electricity usage with no change in household habits.
Any one of these signs is reason enough to inspect the gasket closely. If two or more appear together, replacement should be scheduled promptly.
Gathering the Right Replacement Gasket
Before beginning work, obtain the exact gasket that matches the freezer model. Most manufacturers stamp the model and serial numbers inside the freezer compartment or on a plate behind the kick plate. Use those numbers to order an OEM or high-quality aftermarket gasket. Generic “universal” gaskets rarely fit the channel correctly and will not provide a reliable seal.
While waiting for the part, gather a few simple tools: a plastic putty knife or gasket removal tool, a soft cloth, mild dish soap, and a hair dryer or heat gun set to low. These items make removal and installation far easier and reduce the chance of damaging the door or the new gasket.
Step-by-Step Guide to Removing the Old Gasket
Unplug the freezer or turn off the circuit breaker for safety. Open the door fully and support it so it cannot swing unexpectedly. Starting at a top corner, gently pry the old gasket out of its retaining channel with the plastic tool. Work slowly around the entire perimeter; most gaskets simply pull free once the first section is lifted. Avoid metal screwdrivers that can scratch the painted or stainless surface.
After the old gasket is completely removed, wipe the channel clean of dirt, old adhesive residue, and any remaining frost. A clean channel is essential for the new gasket to seat evenly. If stubborn ice remains, allow the freezer to sit open for a few minutes or use a hair dryer on low heat to melt it safely.
Installing the New Gasket Correctly
Lay the new gasket in a warm room for 30–60 minutes so it becomes more pliable. Beginning again at a top corner, press the dart or barb of the gasket firmly into the channel. Work your way around the door, keeping even tension so the gasket does not stretch or bunch. Corners require extra attention; press them in last so the rubber can relax into the tight radius.
Once the gasket is fully seated, close the door and inspect the alignment. The gasket should make continuous contact all the way around with no visible gaps. If a section looks loose, reopen the door and press that area deeper into the channel. Some technicians warm the gasket lightly with a hair dryer after installation; the heat helps the rubber conform perfectly to the door frame.
The Dollar-Bill Test: Confirming a Perfect Seal
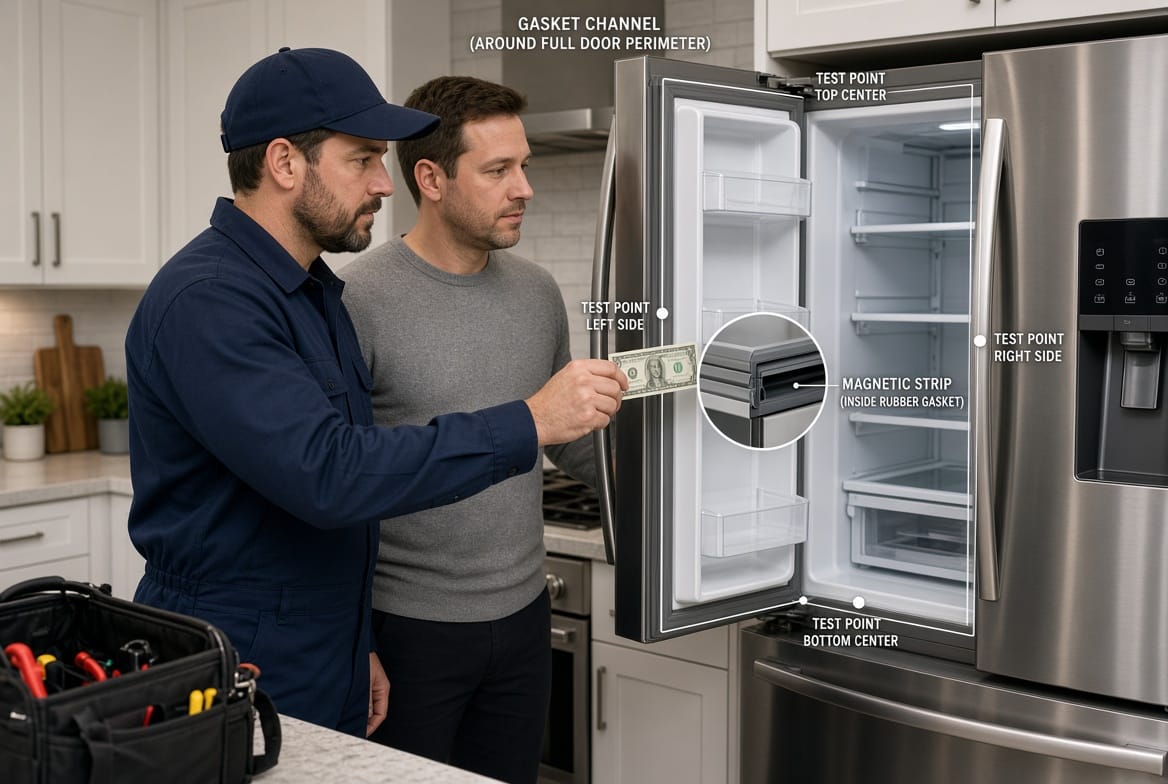
The simplest and most reliable way to verify the new gasket is the dollar bill test. Close the freezer door on a dollar bill so that half the bill is inside and half remains outside. Attempt to pull the bill straight out. A properly sealed gasket will grip the bill firmly; you should feel noticeable resistance. Repeat the test at several points around the door—top, bottom, and both sides. If the bill slides out easily at any location, that section of gasket needs additional seating or may indicate a slightly warped door that requires professional adjustment.
Common Mistakes to Avoid During Replacement
Even a simple repair can go wrong if rushed. Never force a gasket that does not match the channel profile; it will leak immediately. Avoid using petroleum-based lubricants on the rubber; they cause premature deterioration. Do not slam the door repeatedly after installation—the gasket needs a few hours to take its final shape. Finally, resist the temptation to stretch the gasket to make it “fit”; stretching creates thin spots that fail quickly.
Long-Term Benefits of a Tight Seal
Once the new gasket is in place and verified, the freezer returns to its designed efficiency. Frost accumulation stops, the compressor cycles less often, and the interior temperature remains stable. Food stays fresher longer, ice-cream textures remain creamy, and the appliance itself enjoys a longer service life. The modest cost of the gasket and a short afternoon of work produce years of reliable, economical operation.
Routine maintenance keeps the new seal in good condition. Wipe the gasket monthly with a damp cloth and mild soap. Avoid abrasive cleaners. Check the dollar-bill grip twice a year so any future wear is caught early. These small habits protect the investment and prevent the cycle of frost and high bills from starting again.
When Professional Help Makes Sense
Most gasket replacements are well within the ability of a careful homeowner. However, if the door itself is warped, the cabinet is out of square, or the freezer is a built-in model with limited access, calling a trained technician is the wiser choice. Professionals carry the exact tools and replacement parts and can diagnose related issues such as a failing door switch or a clogged drain that may have contributed to the original gasket damage.
A tight seal saves energy, protects food, and extends the life of the appliance. If you prefer to leave the work to experts or if you encounter any difficulty during the replacement, professional service is only a phone call away.
Call Now to Fix Cracks, Flat Spots & Leaking Gaskets