The Flooded Insulation: When to Remove and Replace
Water damage rarely stays on the surface. After a burst pipe, roof leak, appliance failure, or flooding event, moisture quickly migrates into wall cavities, ceilings, and attics where insulation sits quietly doing its job—until it becomes part of the problem. Wet insulation is one of the most commonly overlooked yet critically important issues in water damage restoration. Leaving it in place after it has been saturated is not a waiting game. It is a decision that reduces energy efficiency, traps moisture against wood and drywall, and creates the perfect environment for mold growth.
Call Now for Fast Wet Insulation Removal
This article explains the critical step that must happen after insulation gets wet: complete removal followed by structural drying and proper replacement. Homeowners and property managers who understand why wet insulation fails and how it must be handled can protect both the building and the people who live or work inside it.
Why Wet Insulation Must Be Removed
Insulation works by trapping still air. That trapped air is what creates its R-value—the measure of resistance to heat flow. When insulation becomes wet, several things happen at once.
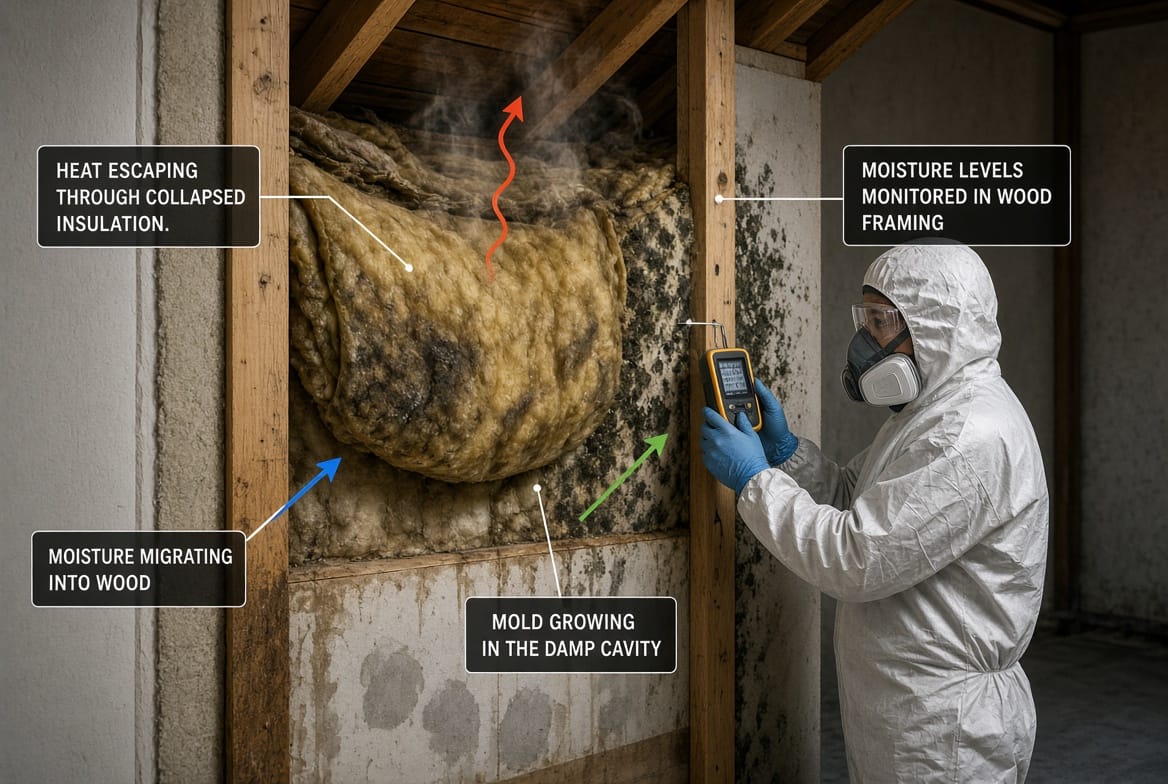
Water is an excellent conductor of heat. Once fibers or cellulose particles are saturated, the insulating air pockets collapse. The material compresses under its own weight plus the weight of the water. The result is a dramatic drop in thermal performance. What was once an effective barrier against heat loss in winter or heat gain in summer now behaves more like a thermal bridge. Energy bills rise. Comfort drops. Condensation risk on interior surfaces can actually increase because the temperature of the building envelope is no longer properly controlled.
The second problem is moisture storage. Most common insulation types—fiberglass batts, blown-in fiberglass, and especially cellulose—are hygroscopic or at least highly absorbent. They hold water against the wood framing, subfloor, or drywall they touch. Wood that remains above 16–19% moisture content for an extended period begins to lose strength and becomes vulnerable to decay fungi. Drywall paper facings stay damp. The entire assembly stays wet far longer than surface materials that can be dried with air movement.
The third and most urgent issue is biological growth. Warm, dark, damp insulation that stays above 60% relative humidity provides an ideal food source and environment for mold. Mold colonies can become established in as little as 24 to 48 hours under the right conditions. Once established inside wall or attic cavities, mold spores circulate through the living space every time the HVAC system runs or a door opens. Occupants may experience increased allergy symptoms, respiratory irritation, or more serious health effects depending on the species and individual sensitivity.
These three failures—lost R-value, trapped moisture, and mold promotion—are why industry water-damage standards treat wet porous insulation as a material that must be removed rather than dried in place in the majority of cases.
Signs That Insulation Has Been Compromised
Not every water event looks dramatic from the living room. Insulation can be soaked while the finished surfaces still appear only slightly stained. Watch for:
- Visible water staining on ceilings or upper walls after a roof leak or overflowing fixture
- Musty odors that persist after the obvious water has been extracted
- Higher-than-normal indoor humidity or condensation on windows
- Unexplained increases in heating or cooling costs following a leak
- Soft or discolored drywall that feels cool to the touch
- Attic inspections revealing compressed, darkened, or sagging insulation
Any of these signs after a water incident should trigger a professional moisture inspection that includes the insulation layer, not just the visible surfaces.
The Critical Restoration Sequence
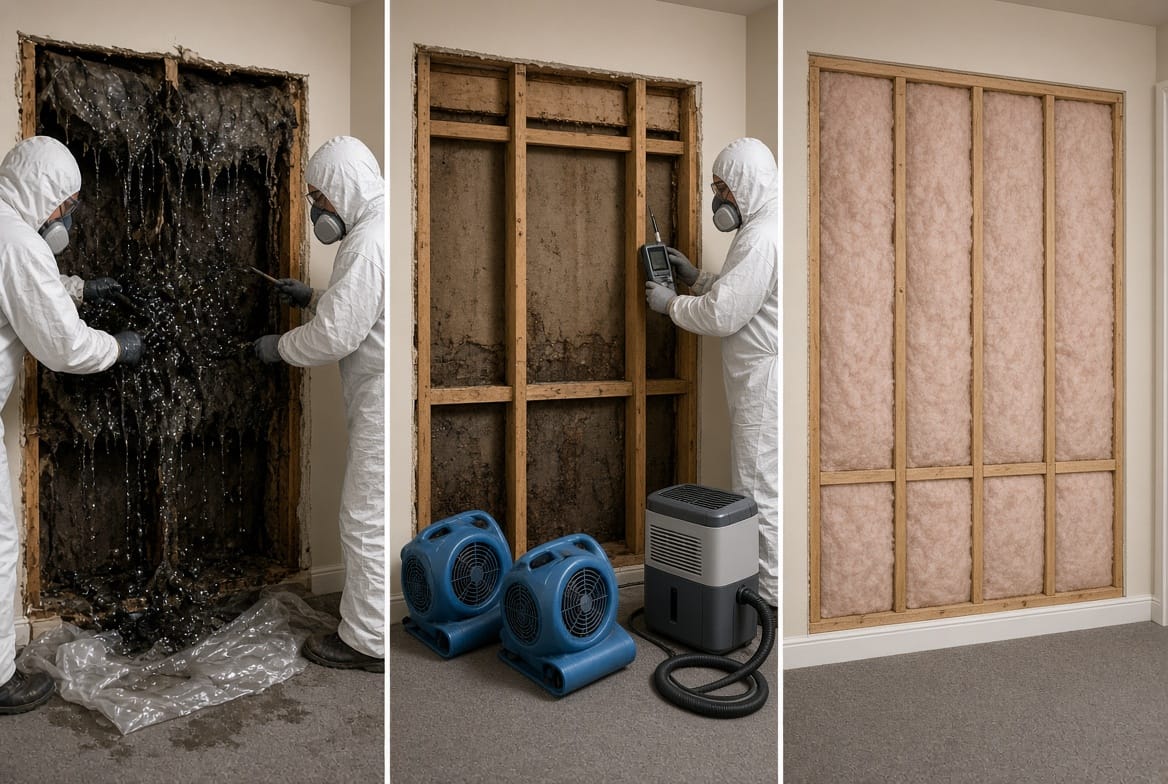
Successful recovery follows a clear three-part process: remove the wet material, dry the structure to a safe moisture content, and install new insulation. Skipping or rushing any part of this sequence leaves residual risk.
Step 1: Complete Removal of Wet Insulation
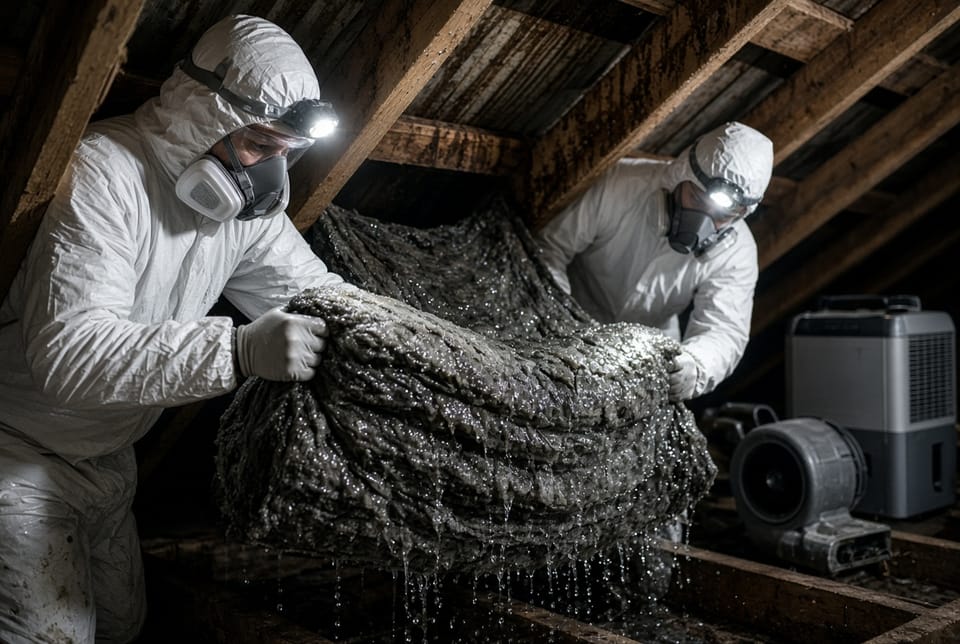
Technicians first contain the work area to limit the spread of spores and debris. Personal protective equipment is required because disturbing wet insulation can aerosolize mold and fine particles. Wet batts or blown-in material is pulled, bagged, and removed from the property. In wall cavities this often means opening drywall in a controlled manner so the insulation can be extracted without unnecessary demolition. Attic work requires careful handling so that wet material does not fall through ceilings into finished rooms.
All wet insulation must come out. Partial removal leaves pockets that continue to hold moisture and support growth. The goal is a clean, accessible cavity or attic floor ready for drying.
Step 2: Structural Drying
Once the insulation is gone, the wood, masonry, or other structural materials can finally dry. Industrial air movers create evaporation. Refrigerant or desiccant dehumidifiers pull moisture from the air so evaporation can continue. Moisture meters and thermal imaging confirm that framing has reached acceptable levels (typically below 16% for wood in most climates) before any new materials are installed.
This drying phase is not optional. Installing new insulation over still-damp wood simply restarts the cycle. Professionals document moisture readings so there is a clear record that the structure was ready.
Step 3: Installation of New Insulation
After the assembly is dry and any necessary antimicrobial treatment or repairs are complete, new insulation is installed to the correct R-value for the climate zone and building code. Options include unfaced or faced fiberglass batts, blown-in fiberglass or cellulose (with proper vapor considerations), or spray-applied products where appropriate. The new material is installed without compression, with proper coverage at edges and around penetrations, and with attention to air-sealing details that improve overall performance.
The finished result restores thermal comfort, energy efficiency, and a dry, mold-resistant building envelope.
Consequences of Leaving Wet Insulation in Place
Delaying removal creates compounding problems. Energy loss continues every day the compromised insulation remains. Moisture that cannot escape leads to hidden rot in floor joists, wall studs, or roof sheathing—repairs that cost far more than timely insulation replacement. Mold that colonizes the material can spread into adjacent drywall, carpeting, or HVAC systems, turning a localized water event into a whole-house indoor-air-quality issue.
Insurance claims can also become more complicated when secondary damage from mold or decay is documented weeks or months later. Most policies expect prompt mitigation. Documented professional removal, drying, and replacement demonstrates that the property owner acted reasonably.
Professional Restoration Versus Incomplete DIY Attempts
Homeowners sometimes attempt to pull wet insulation themselves. While the impulse is understandable, several risks arise. Disturbed mold can be inhaled. Incomplete removal leaves wet pockets. Household fans rarely dry hidden framing to the required moisture content. New insulation installed too soon traps remaining dampness. Professionals follow established water-damage protocols, use commercial drying equipment, and carry the insurance and training needed for safe, verifiable results.
Prevention and Long-Term Protection
The best insulation is dry insulation. Address roof, plumbing, and appliance issues promptly. Maintain gutters and grading so water moves away from the foundation. After any significant water event, request a moisture inspection that includes attic and wall cavities rather than assuming surface drying is sufficient. Consider upgrading to insulation types and installation methods that include better moisture management when replacement is already required.
Regular HVAC filter changes and humidity control also reduce the chance that minor leaks become major mold events.
Conclusion: Act While the Problem Is Still Contained
Wet insulation is not a cosmetic issue. It is a performance failure and a moisture-and-mold risk that grows more expensive the longer it is ignored. The critical step is straightforward: remove the saturated material, dry the structure completely, and replace with new insulation installed to current standards. When this sequence is followed promptly, the home returns to a dry, efficient, and healthy condition.
Remove wet insulation quickly. Delayed action allows mold and hidden damage to take hold. Trained crews can assess moisture levels, extract compromised insulation, dry the building assembly, and restore proper thermal protection so your property is safe and comfortable again.
Don’t Leave Wet Insulation in Place – Call Now