The Ceiling Water Damage: Repair and Repaint
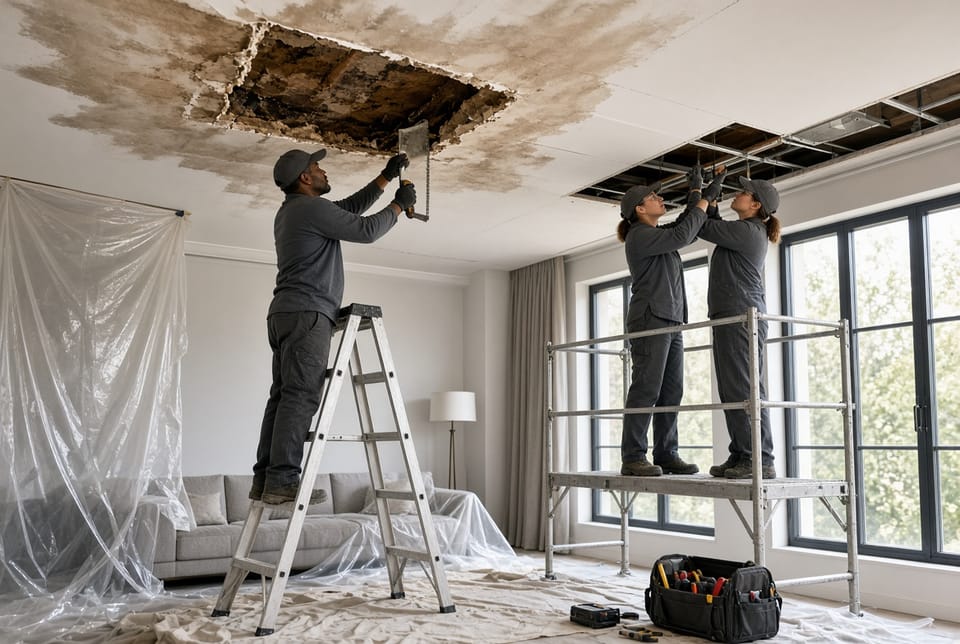
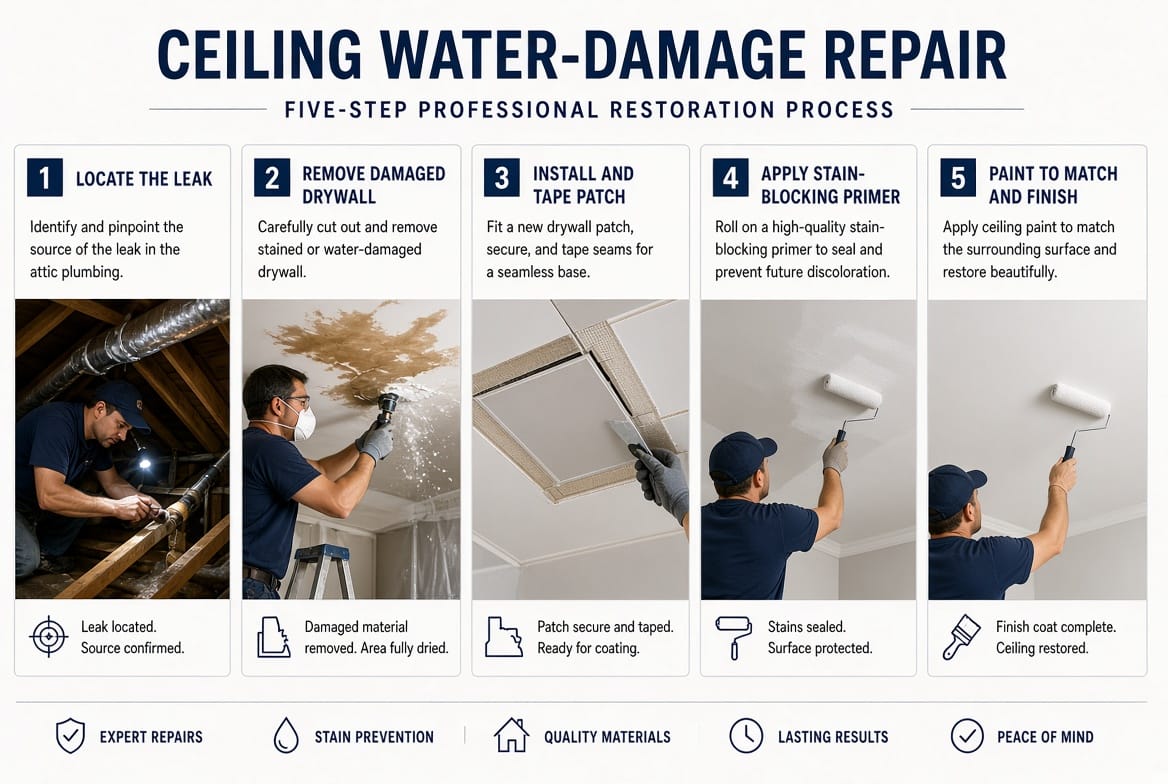
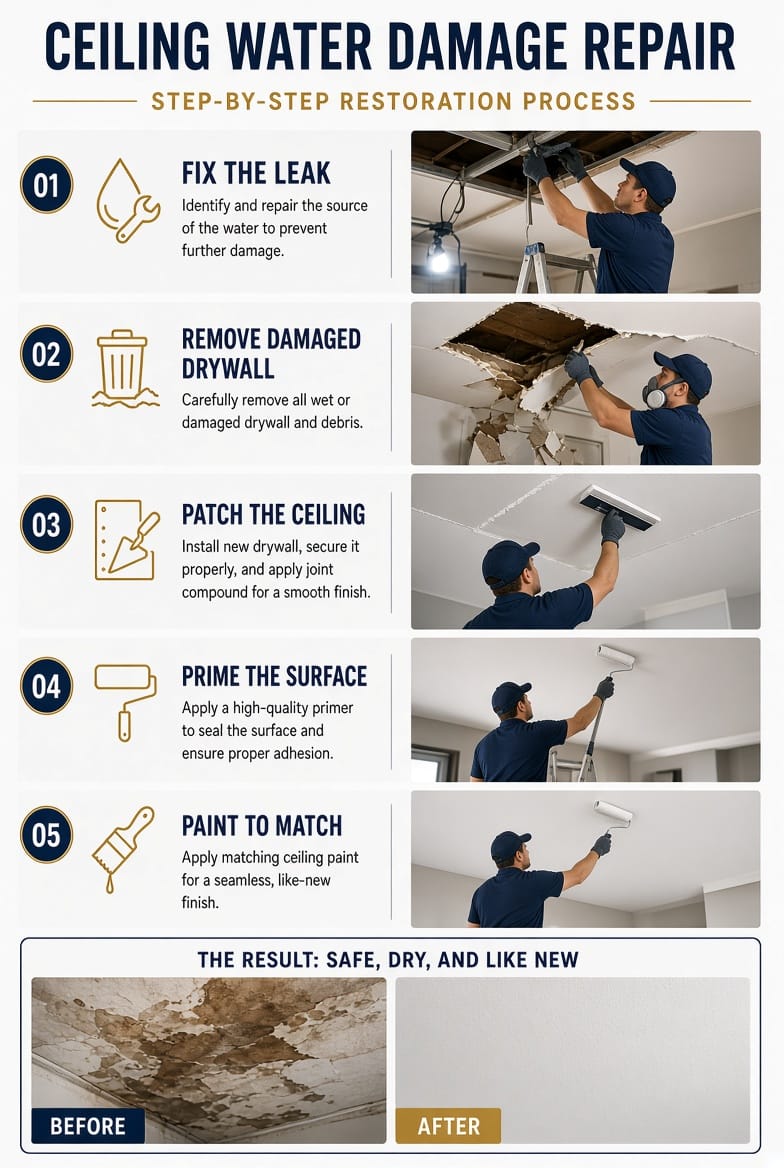
A water stain on the ceiling is rarely just a cosmetic issue. It is usually the first visible sign of an active or recent leak that has already soaked drywall, insulation, and sometimes framing. Left unaddressed, ceiling water damage can lead to mold growth, peeling paint, sagging material, and compromised structural integrity. The good news is that many cases follow a straightforward, common repair sequence: find and stop the leak, remove the damaged drywall, patch the opening, prime with a stain-blocking product, and repaint to match. This guide explains that process in professional detail so you can decide what you can handle safely and when you should call for expert restoration.
Stop the Leak & Restore Your Ceiling – Call Now
Acting promptly protects both your home and your health. Water that sits in ceiling cavities creates the perfect environment for hidden mold and wood rot. A calm, methodical approach—combined with the right materials—restores appearance and prevents the problem from returning.
Why Ceiling Water Stains Appear and Why They Matter
Ceiling stains typically show as yellowish, brown, or gray rings or irregular blotches. Common sources include a roof leak, a plumbing line in the floor above, an overflowing tub or toilet, HVAC condensation, or ice-dam backup in colder climates. Water travels along joists and pipes before it finally drips through the lowest point of the drywall, so the stain you see is often not directly under the actual leak.
Risks of delay include:
- Rapid mold growth in damp drywall and insulation
- Softened or sagging ceiling material that can collapse
- Electrical hazards if water reaches light fixtures or wiring
- Higher repair costs once rot or widespread contamination sets in
- Persistent odor and indoor-air-quality problems
Treating only the stain without stopping the water source guarantees the problem will reappear. The repair must begin with the leak itself.
Step 1: Find and Fix the Leak First
Never patch or paint until the water source is identified and repaired. Start by inspecting the rooms or attic space directly above the stain. Look for dripping pipes, wet insulation, roof-sheathing stains, or failed flashing. A moisture meter helps confirm whether the area is still wet.
If the leak is from plumbing, shut off the water supply to that fixture or the house if necessary and call a plumber. Roof leaks usually require a qualified roofer. HVAC condensate lines can often be cleared, but hidden duct issues may need a technician. Once the source is stopped, give the ceiling cavity time to dry. Use fans, a dehumidifier, and, if possible, increased ventilation. Complete drying can take several days depending on humidity and the amount of water involved.
Skipping this step is the most common reason repairs fail. Fresh joint compound and paint applied over a still-wet or still-leaking area will bubble, stain through, or fall off.
Assessing the Damage and Preparing the Work Area
After the leak is fixed and the area has dried, examine the stained drywall. Press gently; if it feels soft, spongy, or crumbles, it must be removed. Water-damaged drywall loses strength and often harbors mold even when the surface looks only discolored.
Protect the room below: cover furniture and floors with plastic sheeting, turn off power to any fixtures in the damaged ceiling, and wear appropriate personal protective equipment (gloves, eye protection, and an N95-style respirator). Older homes may contain asbestos in joint compound or popcorn texture; if the house was built before the 1980s, consider professional testing before cutting.
Mark a square or rectangle that extends several inches beyond the visible stain. Water wicks farther than the discoloration you see, so removing extra material prevents leaving hidden wet or contaminated edges.
Step 2: Remove the Damaged Drywall
Cut along your marked lines with a drywall saw or oscillating tool. Support the piece as you cut so it does not fall unexpectedly. Once the section is out, inspect the cavity: check insulation (replace any that is wet or moldy), look at the wood joists for staining or softness, and confirm wiring and pipes are intact and dry.
Vacuum loose debris and wipe remaining surfaces. If you see extensive mold, widespread rot, or insulation that cannot be easily replaced, stop and contact restoration professionals. Small, contained repairs can proceed; large or hidden damage should not be handled as a weekend project.
Step 3: Patch the Opening
Measure the opening and cut a new piece of drywall of the same thickness. Fasten it to the joists with drywall screws, keeping screws slightly recessed. Cover the seams with paper or fiberglass mesh tape. Apply a first coat of joint compound, feathering it several inches beyond the tape. Let it dry completely, then apply a second (and often a third) thinner coat, sanding lightly between coats with fine-grit sandpaper.
The goal is a flush, invisible transition. Take time on the feathering; rushed compound work shows as ridges after painting. For textured ceilings, match the existing pattern with a spray texture or knockdown technique after the compound has cured.
Step 4: Prime with a Stain-Blocking Primer
Ordinary paint will not hide water stains. Tannins and mineral residues in the drywall continue to bleed through unless sealed. Apply a high-quality stain-blocking primer specifically formulated for water damage. These primers lock in discoloration and also improve adhesion of the finish paint.
Use a brush for edges and a roller for the field. Allow the primer to dry according to the manufacturer’s instructions—usually a few hours. In stubborn cases a second coat of primer may be needed. Proper priming is what separates a lasting repair from a stain that reappears weeks later.
Step 5: Paint to Match the Existing Ceiling
Once the primer is dry and the surface is smooth, apply ceiling paint that matches the surrounding color and sheen. Most ceilings use a flat or matte finish because it hides minor imperfections. Cut in around fixtures and walls first, then roll the main area with a thick-nap roller designed for ceilings.
Two coats are typically required for even coverage. Maintain a wet edge to avoid lap marks. After the final coat dries, reinstall any light fixtures or vents and inspect the result in both daylight and artificial light.
Tools and Materials for a Standard Repair
A typical small-to-medium ceiling patch requires:
- Moisture meter and flashlight
- Drywall saw, utility knife, and screw gun
- Replacement drywall, screws, tape, and joint compound
- Sanding sponge or pole sander
- Stain-blocking primer and matching ceiling paint
- Drop cloths, plastic sheeting, and PPE
- Ladder or scaffolding rated for the height
Having everything on hand before you start keeps the project moving and reduces the chance of leaving an open ceiling overnight.
When to Call a Professional Instead of Doing It Yourself
Many homeowners can complete a modest patch after the leak has been professionally stopped. You should call restoration specialists when any of the following apply:
- The damaged area is larger than a few square feet
- You cannot locate or cannot safely access the leak
- Mold is visible or the smell of mildew is strong
- The ceiling is sagging or joists feel soft
- Water reached electrical components
- The home is older and may contain hazardous materials
- You need documentation for an insurance claim
- The ceiling is high, vaulted, or otherwise difficult to reach safely
Professionals bring industrial drying equipment, containment protocols, and experience matching textures and paints so the repair disappears. They also address hidden moisture that a surface-level DIY effort can miss.
Repair ceiling water damage properly. Incomplete work often costs more in the long run because the stain returns or mold spreads. Licensed restoration teams stop the source, dry the structure, replace only what is necessary, and finish the surface so it looks and performs like new.
Preventing Future Ceiling Water Damage
After the repair, stay alert for early warning signs: new discoloration, peeling paint, or a musty odor. Maintain gutters, inspect the roof annually, watch for dripping faucets or sweating pipes, and keep indoor humidity in a moderate range. Quick attention to small plumbing or roof issues prevents the next stain from ever appearing.
A well-executed repair restores both the look and the integrity of your ceiling. Follow the sequence—stop the water, remove what is damaged, patch correctly, prime thoroughly, and paint carefully—and the result will last. When the scope exceeds a straightforward patch or when health and safety questions arise, professional help is the most reliable path.
Repair ceiling water damage properly.
Get Your Water-Stained Ceiling Fixed Fast – Call Today