The Flooded Hardwood Floor Drying: Kiln Drying vs. Air Drying
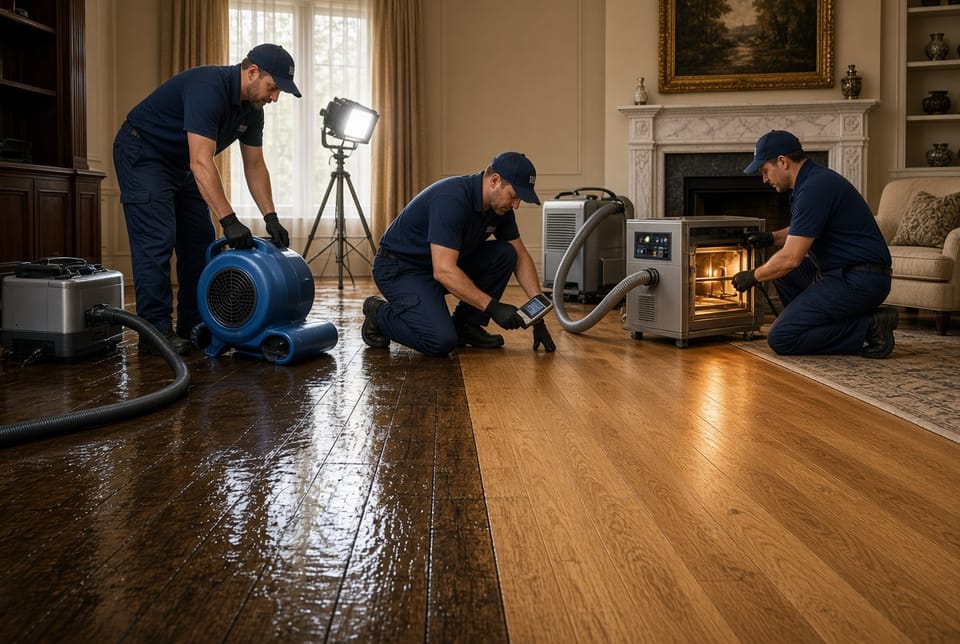
When water invades a home, hardwood floors often suffer some of the most visible and costly damage. Standing water, high humidity, and prolonged moisture exposure can cause cupping, crowning, buckling, and even mold growth that threatens both the appearance and structural integrity of the wood. The good news is that many flooded hardwood floors can be saved when the correct drying method is chosen quickly and executed by trained professionals.
Get Expert Kiln vs. Air Drying Advice – Call Now
Two primary approaches dominate professional water damage restoration for hardwood: air drying and kiln drying. Each method has distinct advantages, limitations, costs, and ideal use cases. Understanding the differences allows homeowners to make informed decisions that protect their investment and restore their floors to pre-loss condition.
Understanding How Water Damages Hardwood Floors
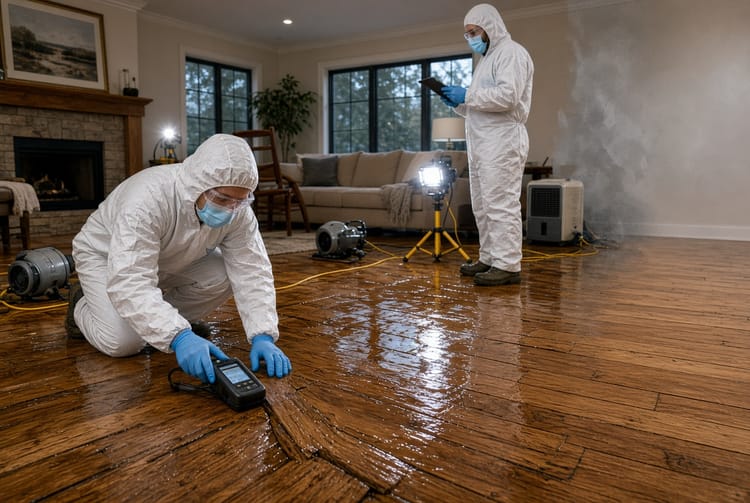
Hardwood is a hygroscopic material. It naturally absorbs and releases moisture in response to its environment. When a flood, burst pipe, or appliance leak saturates the boards, the wood fibers swell unevenly. The top surface often dries faster than the underside, creating the familiar cupped appearance. If moisture remains trapped, delamination (in engineered floors), loose nails, and hidden microbial growth can develop within days.
The critical measurement is moisture content. Healthy finished hardwood typically registers between 6 % and 9 %. After flooding, readings frequently exceed 20 % and can climb higher in severe cases. Restoration success depends on returning the wood to its original moisture range uniformly and without introducing new stresses.
Immediate Actions After Hardwood Floor Flooding
Speed matters. The first 24–48 hours determine whether a floor can be salvaged in place or must be removed.
- Extract standing water with professional-grade pumps and wet vacuums.
- Remove area rugs, furniture, and baseboards to improve airflow.
- Document moisture readings in multiple locations and depths.
- Begin controlled drying immediately to halt further swelling.
Delaying these steps dramatically increases the likelihood that kiln drying or even full replacement will become necessary.
Air Drying Hardwood Floors: The Slower, Budget-Friendly Option
Air drying relies on a combination of natural evaporation and mechanical assistance. Technicians place high-velocity air movers across the floor surface and deploy commercial dehumidifiers to lower ambient humidity. In some cases, boards are carefully lifted or tented to allow air circulation underneath.
The process is straightforward and requires less specialized equipment than kiln drying. Because the wood remains in its installed position (or is stacked loosely on site), labor costs stay relatively modest. Homeowners often appreciate the lower upfront expense.
However, air drying is inherently slow. Depending on the species, thickness, and severity of saturation, it can take two to six weeks—or longer—to reach acceptable moisture levels. During this extended period the floor remains vulnerable to secondary damage. Uneven drying can lock in cupping that later requires aggressive sanding. If indoor humidity cannot be tightly controlled, mold may colonize the underside of the boards or the subfloor.
Air drying works best under these conditions:
- The flood was relatively shallow and short-lived.
- Moisture readings are only moderately elevated.
- The homeowner can tolerate a longer restoration timeline.
- Budget constraints make the more intensive method impractical.
- The wood is a stable, solid species rather than a sensitive engineered product.
When these factors align, air drying remains a viable, cost-effective solution that many restoration companies still recommend.
Kiln Drying Hardwood Floors: Faster and More Controlled
Kiln drying applies precisely regulated heat and humidity inside a specialized chamber or portable on-site unit. In most cases the damaged boards are carefully removed, sticker-stacked, and placed inside the kiln. Temperature and airflow are adjusted according to wood species and initial moisture content so that drying occurs uniformly from the core outward.
The controlled environment dramatically shortens the timeline. What might take weeks with air drying can often be accomplished in several days to a little over a week. Because the process is engineered rather than left to ambient conditions, the risk of new warping or residual moisture pockets drops significantly. Once the boards reach the target moisture content they can be reinstalled, sanded, and refinished with greater confidence that the floor will remain stable.
The trade-off is cost. Kiln equipment, additional labor for removal and reinstallation, and transportation (if an off-site kiln is used) raise the price. Not every restoration firm maintains kiln capacity, so availability can also affect scheduling.
Kiln drying becomes the preferred choice when:
- Moisture content is extremely high or the flood lasted many hours.
- The floor is a high-value or historically significant hardwood.
- The homeowner needs the space returned to service quickly.
- Previous air drying attempts have failed or produced uneven results.
- There is a documented risk of hidden mold or subfloor damage.
In these situations the extra investment frequently prevents far more expensive replacement later.

Direct Comparison of Drying Methods
Both techniques aim for the same result—stable, dry wood—but they achieve it through different physics and logistics.
Air drying allows the wood to lose moisture at a pace closer to natural conditions. This gentler approach can reduce the chance of case-hardening (a dry outer shell trapping wet interior wood). Yet the lack of precise control means results vary with weather, HVAC performance, and technician skill.
Kiln drying overrides ambient variables. Sensors inside the chamber continuously adjust temperature and relative humidity, producing a predictable moisture gradient. The method is especially effective for thicker planks or dense species such as oak and maple that resist rapid surface evaporation.
A practical rule of thumb used by restoration professionals is this: if the floor can be brought below 15 % moisture content within ten days using air movers and dehumidifiers, air drying is usually sufficient. If readings remain stubbornly high or the wood shows advanced cupping, moving to a kiln is the safer course.
Cost, Time, and Risk Considerations
Cost is rarely the only factor, but it is an important one. Air drying typically represents the lower end of the pricing spectrum because it uses equipment already standard on most water-damage jobs. Kiln drying adds specialized machinery and extra handling, so the invoice is higher. Homeowners should request a detailed scope that itemizes extraction, drying days, board removal (if needed), and refinishing so they can compare true value rather than headline price.
Time pressure often decides the method. A family living in a hotel or a business that cannot remain closed for weeks may find the faster kiln option more economical when lost-use costs are included. Conversely, a vacant investment property can often wait for slower air drying.
Risks differ as well. Prolonged air drying increases the window for mold infestation and permanent deformation. Overly aggressive kiln schedules, if not monitored by experienced operators, can cause checking or excessive shrinkage. Both methods therefore require certified technicians who understand wood science and carry appropriate moisture-mapping tools.

Selecting the Right Method for Your Floor
No single answer fits every loss. A qualified restoration company will perform a thorough assessment that includes:
- Species and construction type (solid vs. engineered).
- Duration and source of the water (clean, gray, or black water).
- Current moisture readings at multiple depths.
- Presence of insulation, radiant heat, or finished basements that complicate drying.
- Homeowner timeline and budget priorities.
From that data the team recommends either continued air drying, transition to kiln drying, or, in the most severe cases, selective replacement of irreparable boards. The goal is always the least invasive method that still guarantees a stable, healthy floor.
Post-Drying Restoration Steps
Once target moisture content is confirmed and remains stable for several days, the floor can be prepared for refinishing. Light sanding removes any residual cupping or surface staining. New stain and multiple coats of durable finish restore both beauty and protection. In some projects a moisture barrier or improved ventilation is added beneath the floor to reduce future risk.
Homeowners should request a written moisture-content report and photographs taken at each stage. These documents prove the work was completed to industry standards and can be valuable for insurance claims.
Preventing Future Water Damage to Hardwood
While no floor is completely immune, several practices lower the odds of another flood event:
- Install leak-detection sensors near appliances and water heaters.
- Maintain proper grading and gutter systems around the foundation.
- Keep indoor humidity between 30 % and 50 % year-round.
- Address small leaks immediately rather than waiting for visible damage.
These habits, combined with a trusted restoration partner, give hardwood floors the best chance of lasting decades.
Choosing between air drying and kiln drying is not a decision homeowners should make alone. The wrong choice can lock in permanent damage or waste money on unnecessary procedures. Professional evaluation removes the guesswork and protects both the floor and the household budget.
Choose the right drying method. Experienced technicians can assess your flooded hardwood floor, explain the most effective approach, and begin the drying process before further harm occurs. Prompt action today can save the floor you love.
Fast Hardwood Floor Drying Assessment – Call Today