The Dishwasher Detergent Dispenser: Cleaning and Replacing
A properly working dishwasher detergent dispenser is the quiet hero behind every sparkling load of dishes. When this small but critical component fails, even the most advanced dishwasher leaves behind food particles, cloudy glassware, and frustrating residue. Homeowners often notice the problem only after multiple disappointing cycles. Understanding why the detergent dispenser stops working, recognizing the early warning signs, and knowing exactly how to clean or replace it can save time, money, and the stress of constantly rewashing dishes by hand.
Call Now for Fast Dishwasher Dispenser Cleaning & Repair
This comprehensive guide walks you through every aspect of dishwasher detergent dispenser care. You will learn the most common reasons dispensers fail, the clear symptoms that signal trouble, step-by-step cleaning methods using everyday household products, and a complete replacement process when cleaning is no longer enough. By the end, you will feel confident restoring your appliance to peak performance—or knowing when it is time to call a trusted professional.
Why Dishwasher Detergent Dispensers Fail
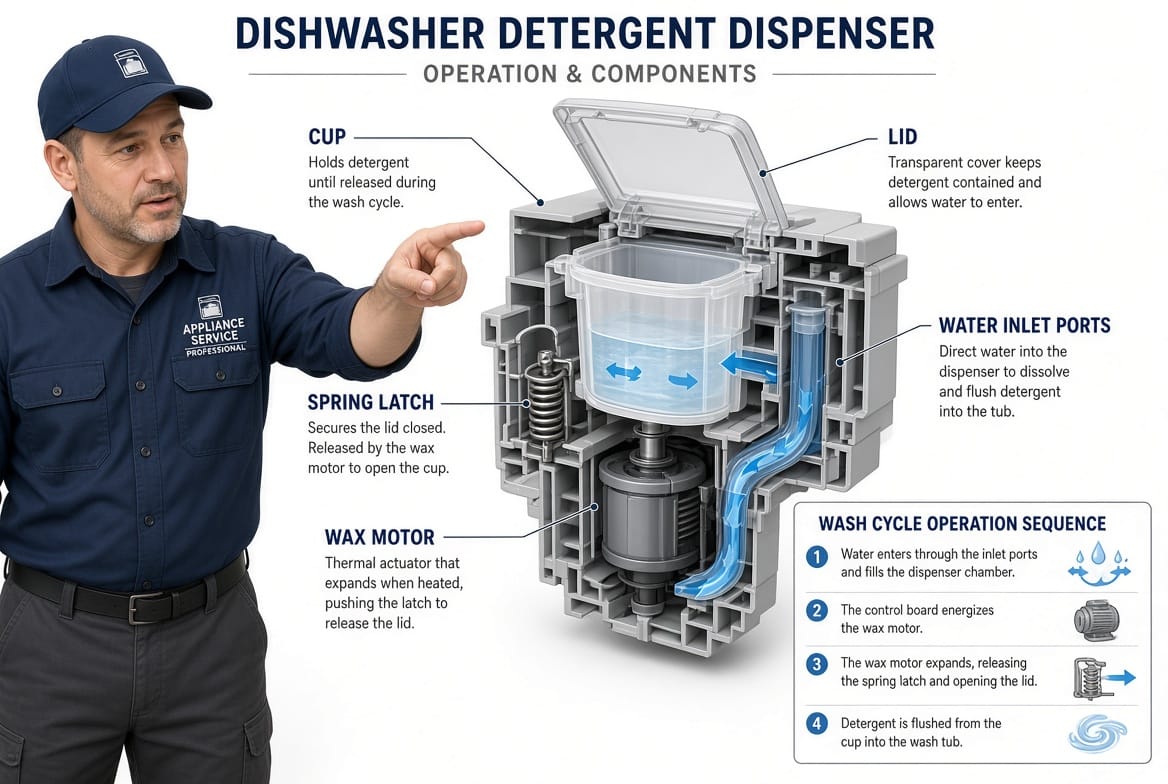
The detergent dispenser is designed to release detergent at the precise moment during the wash cycle when water temperature and spray pressure are optimal. Two primary issues cause the majority of failures: clogging and a broken mechanism.
Clogging develops gradually. Hard-water minerals, dried detergent residue, and food particles combine to form a sticky film inside the dispenser cup and along the door seal. Over time this film hardens, preventing the cup door from opening fully or at all. In areas with high mineral content in the water supply, the problem accelerates. Even liquid or gel detergents can leave behind sticky deposits if the dispenser is not rinsed regularly.
A broken mechanism is usually mechanical or electrical. Most modern dispensers rely on a wax motor, solenoid, or spring-loaded latch that receives a signal from the control board at the correct point in the cycle. Heat, constant moisture, and repeated opening and closing wear these parts. The wax motor can lose its ability to expand and push the door open. Springs can lose tension. Plastic hinges or latches can crack from temperature extremes. When any of these components fail, the dispenser door stays closed and the detergent never reaches the wash water.
Additional contributing factors include using the wrong detergent type, overfilling the cup, or running the dishwasher without a rinse aid. These practices increase the likelihood of residue buildup and place extra stress on the opening mechanism. Recognizing that both clogging and broken mechanisms are common—and fixable—helps homeowners approach the issue with calm confidence rather than frustration.
Clear Signs Your Detergent Dispenser Needs Attention
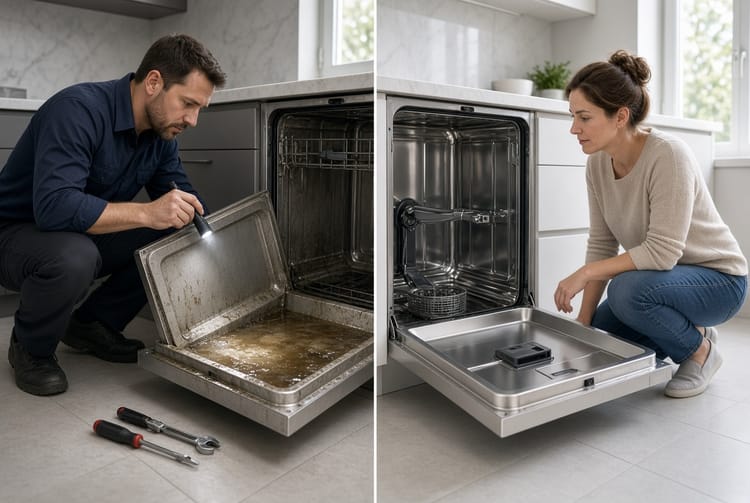
Early detection prevents small problems from becoming major repairs. The most obvious and frequent sign is detergent left in the cup after the cycle finishes. If you open the door and still see dry powder, gel, or tablet sitting untouched inside the dispenser, the door never opened or opened too late.
Poor cleaning performance follows quickly. Dishes emerge with visible food particles, greasy film, or cloudy spots even though you used the correct amount of detergent. Glassware may look dull, and plastic containers often retain an oily residue. These results occur because the wash water never received the full detergent dose at the right time.
Visible residue around the dispenser itself is another reliable indicator. White or gray crust along the cup edges, sticky residue on the door seal, or a partially open cup that will not close smoothly all point to buildup or mechanical trouble. In some cases you may hear unusual clicking or grinding noises during the cycle as the mechanism struggles to release the door.
If multiple symptoms appear together—detergent left behind, poor cleaning results, and visible residue—the dispenser almost certainly requires immediate attention. Addressing the issue promptly restores cleaning power and protects the rest of the dishwasher from secondary problems caused by incomplete wash cycles.
Step-by-Step Guide to Cleaning the Detergent Dispenser
Cleaning is the first and most effective solution for the majority of clogged dispensers. The process is straightforward, requires only common household items, and can be completed in under thirty minutes.
Begin by ensuring the dishwasher is completely empty and disconnected from power for safety. Open the door and locate the detergent dispenser, usually mounted on the inner door panel. Most models feature a small cup with a hinged lid.
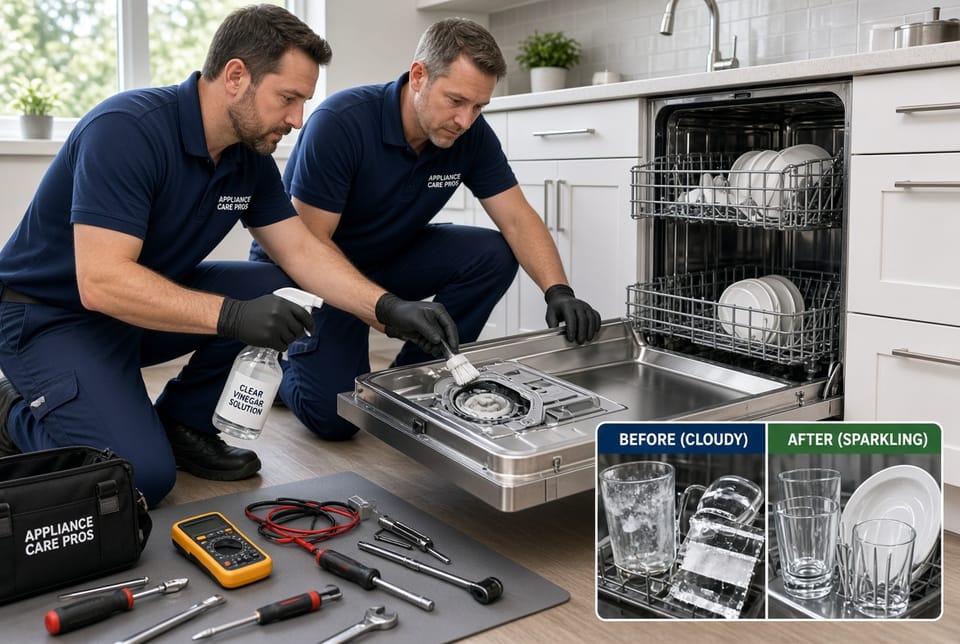
Prepare a cleaning solution of equal parts white vinegar and warm water. Vinegar’s mild acidity dissolves mineral deposits and dried detergent without damaging plastic or rubber components. For heavier buildup, a commercial dishwasher descaler or citric-acid-based cleaner works exceptionally well. Avoid harsh abrasives or bleach, which can scratch surfaces or leave harmful residues.
Dip a soft nylon brush or old toothbrush into the solution and gently scrub every surface of the cup, the lid, the hinge, and the surrounding door area. Pay special attention to the small holes or slots that allow water to enter the cup during the cycle; these often become blocked first. Wipe away loosened residue with a microfiber cloth dampened in the same solution.
For stubborn deposits, soak a cloth in undiluted vinegar, place it over the dispenser, and close the door for fifteen to twenty minutes. The prolonged contact softens hardened material so it lifts away easily. After scrubbing, rinse the entire area thoroughly with clean water to remove any remaining vinegar or descaler.
Once clean, operate an empty rinse cycle using only a cup of vinegar placed in the bottom of the dishwasher. This final step removes any residual cleaner and helps flush the spray arms. After the cycle finishes, inspect the dispenser again. The cup should open and close smoothly, and no detergent residue should remain from previous loads.
Regular monthly cleaning with vinegar prevents most clogging issues and keeps the mechanism operating freely. Many homeowners find that this simple maintenance habit eliminates the need for more extensive repairs for years.
When and How to Replace the Detergent Dispenser
If thorough cleaning does not restore proper function, the mechanism itself is likely damaged and replacement becomes necessary. Fortunately, the detergent dispenser is a modular part on nearly every major brand, and most homeowners with basic tools can complete the job.
First confirm that the control board is sending the correct signal. Run a diagnostic cycle if your model offers one, or listen carefully during a normal wash for the distinct click that should occur when the dispenser opens. Absence of that sound usually indicates a failed wax motor or solenoid.
Purchase a genuine or high-quality compatible replacement dispenser that matches your dishwasher’s exact model number. Using the wrong part can lead to poor fit, incomplete detergent release, or even water leaks. Keep the old unit until the new one is installed and tested.
To replace the part, again disconnect power and water supply. Open the dishwasher door and remove any screws securing the inner door panel. Carefully separate the panel to expose the back of the dispenser. Disconnect the wire harness attached to the wax motor or solenoid—usually a simple plug-in connector. Unscrew the mounting screws or release the locking tabs that hold the dispenser in place. Some models require gentle prying with a plastic tool to free the unit without cracking the surrounding plastic.
Transfer any reusable seals or gaskets from the old dispenser to the new one if they are still in good condition. Position the replacement unit, secure it with the original screws or clips, reconnect the wiring, and reassemble the door panel. Restore power and run a short test cycle with a small amount of detergent. Observe that the dispenser door opens fully at the correct moment and that no water leaks appear around the mounting area.
Replacement typically takes forty-five to ninety minutes depending on model complexity. If you encounter resistance removing the old unit, discover damaged wiring, or feel uncertain at any step, professional service is the safer and faster route. Attempting a forced repair can create additional problems that cost more to correct later.
Preventive Habits That Keep the Dispenser Working Longer
Simple daily and weekly habits dramatically reduce the chance of future clogging or mechanical failure. Always use detergent formulated specifically for automatic dishwashers; hand-washing liquids create excessive suds and sticky residue. Measure detergent carefully—overfilling forces excess product into the mechanism and accelerates buildup.
Add rinse aid regularly. It not only improves drying but also helps keep the dispenser surfaces smoother and less prone to mineral adhesion. Run the dishwasher with full loads whenever possible; short, lightly loaded cycles can leave detergent sitting longer in the cup and increase drying residue.
Once a month, wipe the dispenser cup with a vinegar-dampened cloth even if no visible problems exist. This quick action prevents the slow accumulation that eventually causes complete blockage. In hard-water regions, consider installing a whole-house water softener or using a dishwasher-specific descaling product every three to six months.
These low-effort practices protect both the detergent dispenser and the entire appliance, ensuring consistent cleaning performance and extending the machine’s overall lifespan.
The Real Cost of Ignoring a Faulty Dispenser
Leaving a malfunctioning dispenser unaddressed creates a cascade of secondary issues. Incomplete detergent release forces the dishwasher to work harder, increasing energy and water consumption. Persistent food residue can clog the filter and spray arms, leading to more expensive repairs. Over time, cloudy glassware and stained plastics become permanent, requiring replacement of dishware itself.
More importantly, the inconvenience of constantly hand-washing dishes or running multiple cycles erodes the convenience that made the dishwasher valuable in the first place. Addressing the problem promptly—whether through cleaning or replacement—restores efficiency, protects your investment, and returns the simple pleasure of opening the door to find truly clean dishes.
Professional Help When You Need It
While many cleaning and replacement tasks are within reach of a careful homeowner, certain situations call for experienced technicians. Complex electronic controls, integrated water valves, or warranty considerations often make professional service the smarter choice. A qualified technician arrives with the correct parts, specialized tools, and the knowledge to diagnose related issues that might otherwise be overlooked.
If cleaning does not resolve the problem, if the dispenser mechanism appears damaged, or if you simply prefer the peace of mind that comes with expert workmanship, professional assistance is readily available.

Clean the dispenser for clean dishes. When the problem exceeds simple maintenance or when you want guaranteed results. Experienced technicians stand ready to restore your dishwasher quickly and correctly so every load leaves your kitchen sparkling.
Call Today & Fix Your Detergent Dispenser the Right Way