The Dental Crown Preparation: What to Expect
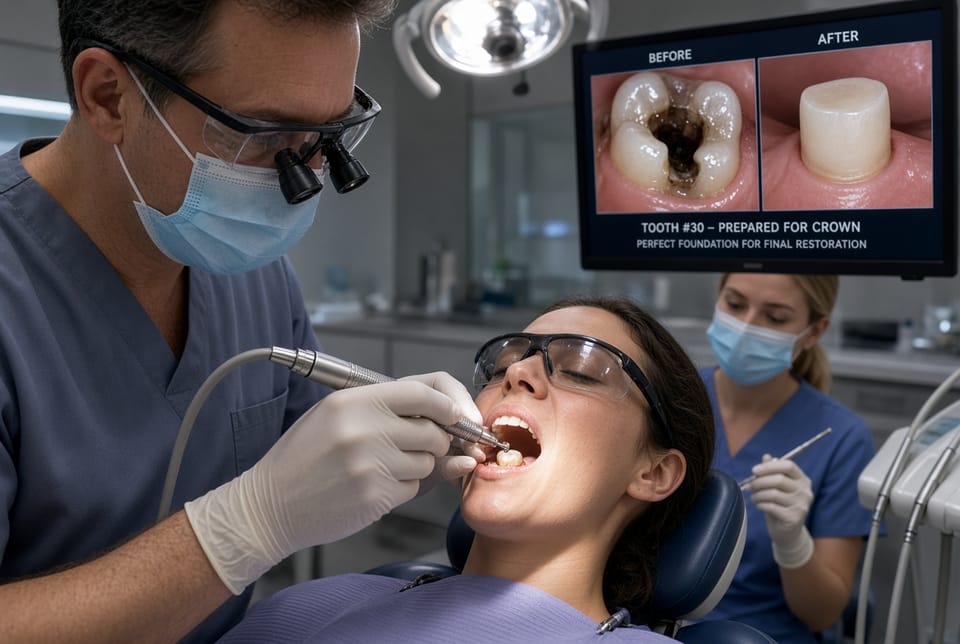
When a tooth has been weakened by decay, fracture, or a large filling, a dental crown often becomes the most reliable way to restore its strength, function, and appearance. The process begins with dental crown preparation, a carefully planned procedure that reshapes the natural tooth so a custom-made restoration can fit securely. Understanding exactly what happens during this appointment and in the days that follow can turn uncertainty into confidence. This guide walks you through every stage in clear, practical detail so you know precisely what to expect and how to care for yourself along the way.
Call Now for Expert Insulation & Sealing Service
A dental crown is a tooth-shaped cap that covers the entire visible portion of a damaged tooth above the gum line. Once cemented in place, it protects the remaining tooth structure, restores chewing ability, and can improve appearance. Preparation is the critical first step that makes a perfect fit possible. Your dentist removes a precise amount of enamel and dentin, creates the ideal shape, and records the details needed for a laboratory or in-office milling machine to fabricate the final crown. The goal is always the same: a restoration that feels natural, functions reliably, and lasts for many years with proper care.
Why Crown Preparation Matters
Teeth that need crowns have usually lost significant structure. Leaving them unprotected risks further fracture or infection. By carefully reducing and contouring the tooth, the dentist creates space for the crown material while preserving as much healthy tooth as possible. Modern techniques and materials allow for conservative preparation in many cases, meaning less reduction than older methods required. The result is a strong foundation that supports the new crown without unnecessary removal of tooth structure.
Patients often feel anxious before the appointment, yet the procedure itself is typically straightforward and well-tolerated. Local anesthesia keeps you comfortable, and most people report only mild pressure rather than pain. Knowing the sequence of events helps you stay relaxed and cooperative, which in turn allows the dentist to work more efficiently and accurately.
What Happens During the Crown Preparation Appointment
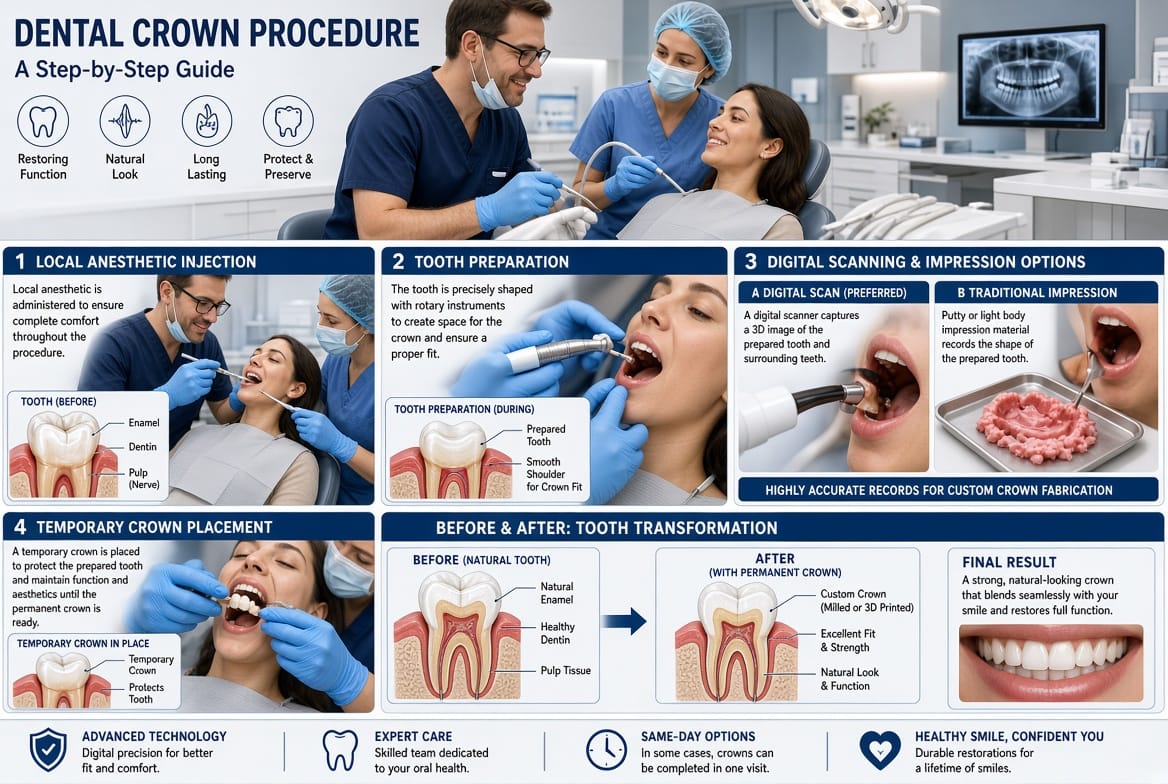
The preparation visit usually lasts between 60 and 90 minutes, depending on the complexity of the case and whether additional procedures such as a core buildup are needed. Here is a clear breakdown of each phase.
Local Anesthetic – Complete Numbing for Comfort
The appointment begins with local anesthetic. Your dentist applies a topical numbing gel to the gum tissue around the tooth, then administers a precise injection of anesthetic. Within a few minutes the area becomes fully numb. You may feel a brief pinch or pressure during the injection, but once the anesthetic takes effect you should feel nothing more than vibration or mild pressure throughout the rest of the procedure. The numbing typically lasts two to four hours, giving you a comfortable window both during and after the appointment. If you have any history of difficulty getting numb or anxiety about injections, mention it in advance so the team can adjust the approach or offer additional relaxation options.
Shaping the Tooth – Creating the Ideal Foundation
Once the tooth is completely numb, the dentist begins shaping the tooth. Using high-speed and low-speed handpieces along with fine diamond burs, the dentist carefully reduces the biting surface and sides of the tooth by a specific amount—usually between 1 and 2 millimeters, depending on the crown material chosen. The goal is to create a smooth, slightly tapered form with defined margins just above or at the gum line. This shape allows the future crown to seat fully and seal tightly against the remaining tooth, preventing bacteria from entering underneath.
Throughout this stage the dentist continually checks the amount of reduction with specialized gauges and may take intermediate impressions or digital scans to verify accuracy. Water spray keeps the tooth cool and removes debris, while a high-volume suction system keeps the field clear. You will hear the sound of the handpiece and feel vibration, but no pain. If the tooth has extensive decay or an old filling, the dentist removes all compromised material first and may place a core buildup—a strong filling material that rebuilds missing structure—before final shaping. This step ensures the crown has a solid base to rest on.
Impressions or Digital Scans – Capturing Exact Details
After the tooth has been fully prepared, the dentist records its precise shape and the relationship to neighboring teeth. Traditional impressions involve placing a soft, putty-like material in a tray that is seated over the prepared tooth and surrounding teeth for a few minutes until it sets. The material is then removed, creating an exact three-dimensional mold. Many offices now use digital scanning instead: a small wand captures thousands of images that a computer stitches into a highly accurate 3-D model. Both methods achieve excellent results; digital scanning is often faster and more comfortable for patients who dislike the feeling of impression material.
The dentist also selects a shade that matches your natural teeth so the final crown blends seamlessly. Shade matching is done under controlled lighting and may involve holding color tabs next to your teeth while you and the dental team review options together. Once the records are complete, they are sent to a dental laboratory or processed in-office if same-day technology is available.
Placement of the Temporary Crown – Protection Until the Final Restoration
Because the permanent crown is custom-fabricated and usually requires one to two weeks, a temporary crown is placed immediately. The temporary is made from a tooth-colored acrylic or composite material that is shaped chairside or pre-formed and adjusted to fit. It is cemented with a temporary cement that holds securely yet allows easy removal at the next visit. The temporary protects the prepared tooth from temperature changes, bacteria, and shifting of adjacent teeth. It also maintains your bite and appearance so you can continue normal activities with confidence.
Before you leave, the dentist checks the temporary for proper fit, bite, and comfort. You receive clear instructions on how to care for it, and any questions are answered thoroughly. The entire sequence—from numbing through temporary placement—is designed to be efficient and predictable.
What to Expect Between Appointments
After the preparation visit you will wear the temporary crown for approximately one to two weeks while the permanent restoration is being made. This interim period is generally comfortable, yet a few normal sensations and simple care steps are important to understand.
Sensitivity and Mild Discomfort
It is common to experience sensitivity to temperature, especially cold, for the first few days. The prepared tooth has less insulating enamel, so hot or cold liquids may cause a brief sharp feeling. This usually diminishes as the temporary seal settles and the nerve calms. Over-the-counter pain relievers such as ibuprofen or acetaminophen can help if needed. Avoid extremely hot or cold foods during the first 48 hours. If sensitivity increases rather than decreases, or if you notice throbbing pain, contact the office promptly so the team can evaluate the temporary or the underlying tooth.
Mild soreness in the gum tissue around the prepared tooth is also normal and typically resolves within a day or two. Rinsing gently with warm salt water can soothe the area. The temporary cement is designed to be kind to the soft tissues, yet careful oral hygiene remains essential.
Caring for Your Temporary Crown
The temporary crown is strong enough for normal function but not as durable as the permanent version. Follow these practical guidelines:
- Chew on the opposite side whenever possible, especially during the first few days.
- Avoid sticky foods such as caramel, taffy, or chewing gum that could pull the temporary off.
- Skip hard foods like nuts, hard candy, or ice that might crack the temporary material.
- Brush gently around the temporary with a soft toothbrush, paying special attention to the gum line.
- Floss carefully by sliding the floss out sideways rather than lifting upward, which could dislodge the temporary.
- If the temporary comes off, contact the office right away. Keep the temporary safe and bring it with you; in most cases it can be recemented quickly.
Maintaining good oral hygiene during this period protects both the prepared tooth and the surrounding gums. Plaque buildup under or around the temporary can lead to inflammation that complicates final cementation. A clean environment ensures the permanent crown seats perfectly and the soft tissues remain healthy.
Bite and Speech Adjustments
Your bite may feel slightly different with the temporary in place. The temporary is contoured to be close to the final shape, yet minor adjustments are sometimes needed. If you notice that one area feels high when you close your teeth, call the office; a quick polish can restore comfort. Speech is rarely affected, but if a front tooth has been prepared you might notice a brief adjustment period as your tongue adapts to the new contour. This almost always resolves within a day or two.
Diet and Lifestyle Tips for Comfort
Soft foods are easiest for the first 24–48 hours. Yogurt, scrambled eggs, pasta, soup, and well-cooked vegetables keep nutrition high while minimizing stress on the temporary. Stay hydrated and continue any prescribed medications as directed. Most patients return to work or normal activities the same day. If your job involves heavy speaking or public interaction and a front tooth was prepared, you may prefer to schedule the appointment later in the day so any residual numbness has worn off.
The Final Appointment – Cementing the Permanent Crown
When the permanent crown arrives, a second, usually shorter visit completes the process. The temporary is gently removed, the prepared tooth is cleaned, and the new crown is tried in for fit, color, and bite. Once you and the dentist are satisfied, the crown is permanently cemented. Excess cement is cleaned away, the bite is refined if needed, and you leave with a fully restored tooth. Modern cements create an exceptionally strong bond, and most crowns feel completely natural within a few days.
Long-Term Benefits and Realistic Expectations
A well-prepared and properly cemented crown can last 10–15 years or longer with good oral hygiene and regular dental visits. It restores chewing efficiency, protects the remaining tooth structure, and can dramatically improve the appearance of a discolored or misshapen tooth. Risks are minimal when the procedure is performed by an experienced clinician, yet it is important to understand them. Rare complications include the need for root canal treatment if the nerve becomes irritated, temporary sensitivity that persists longer than expected, or the possibility that the temporary may loosen. All of these are manageable when addressed promptly.
The key to success lies in precise preparation, accurate records, high-quality materials, and diligent home care. Patients who follow post-operative instructions and maintain excellent oral hygiene enjoy the greatest longevity from their restorations.
Preparing Mentally and Practically for Your Visit
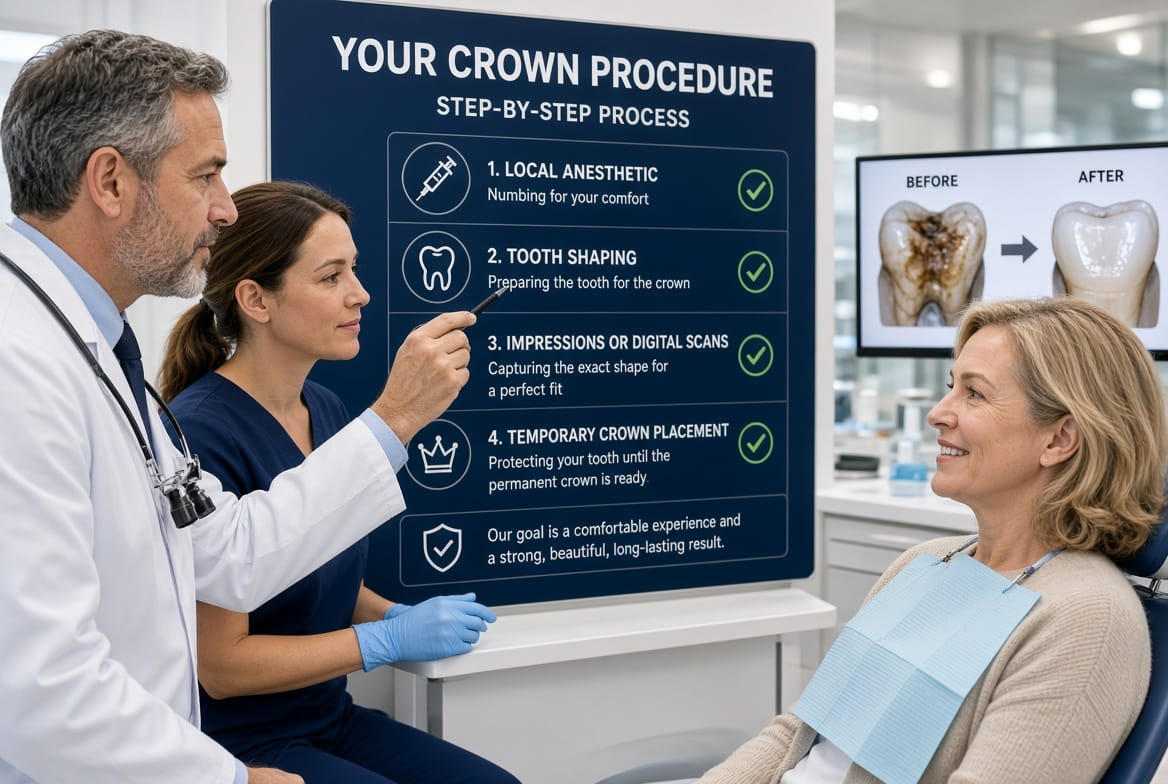
Arrive a few minutes early so any remaining paperwork can be completed without rush. Wear comfortable clothing and consider bringing headphones if you like to listen to music or a podcast during the procedure. Communicate openly with the dental team about any concerns; they are accustomed to helping patients feel at ease. If you have a preference for the type of temporary material or shade considerations, discuss them at the beginning of the appointment.
Most patients leave the preparation visit pleasantly surprised by how smooth the experience was. The combination of effective anesthesia, modern instruments, and a clear plan makes the process efficient and predictable. By the time the permanent crown is placed, many people report that the restored tooth feels better than the original damaged one.
Maintaining Your New Crown for Years to Come
Once the permanent crown is in place, treat it like a natural tooth. Brush twice daily with a soft toothbrush and fluoride toothpaste, floss daily, and keep regular check-up and cleaning appointments. Avoid using the crowned tooth to open packages or bite extremely hard objects. Night-time grinding or clenching can shorten the lifespan of any restoration, so if you notice wear facets or jaw discomfort, ask about a protective night guard.
With these simple habits, your investment in a dental crown continues to deliver reliable function and aesthetics for many years. The preparation stage is the foundation of that long-term success. When performed with care and precision, it sets the stage for a restoration you can trust every time you smile, speak, or enjoy a meal.
Get a Crown with Confidence
Knowing what to expect during dental crown preparation removes the mystery and replaces it with clarity. From the moment the local anesthetic takes effect through the careful shaping, accurate impressions, and protective temporary crown, every step is designed for your comfort and the long-term health of your tooth. Sensitivity and simple care routines between appointments are temporary and manageable. The permanent crown that follows restores strength, function, and appearance so you can move forward without worry.
If you have a tooth that needs the protection and durability of a crown, there is no better time to take the next step. Schedule a consultation today and experience the difference that precise, patient-focused care can make.
Call Now to Start Your Dental Crown Journey