The Concrete Storage Shed Slab: Foundation Requirements for Outdoor Buildings

Selecting the right concrete storage shed slab is one of the most important decisions when installing an outdoor building. A properly engineered foundation protects your investment, prevents structural issues, and ensures your shed remains level and secure for decades.
Get a Strong Shed Foundation Today – Call Now!
Whether you're storing garden tools, equipment, or seasonal items, the concrete slab serves as the critical base that supports the entire structure. This comprehensive guide covers everything you need to know about shed foundation requirements, from thickness specifications to reinforcement techniques and site preparation best practices.
Why a Strong Concrete Slab Foundation Matters for Your Shed
A quality concrete shed foundation does more than provide a flat surface. It distributes weight evenly, resists ground movement, and protects against moisture damage. Without it, sheds can shift, crack, or deteriorate prematurely due to soil settlement or water exposure.
Key benefits of a professional concrete storage shed slab include:
- Enhanced structural stability
- Protection from ground moisture and pests
- Improved load-bearing capacity for heavier storage needs
- Longer lifespan for your outdoor building
- Better resale value of your property
Investing in proper foundation work gives you peace of mind knowing your shed will withstand weather challenges and daily use.
Determining the Right Slab Thickness
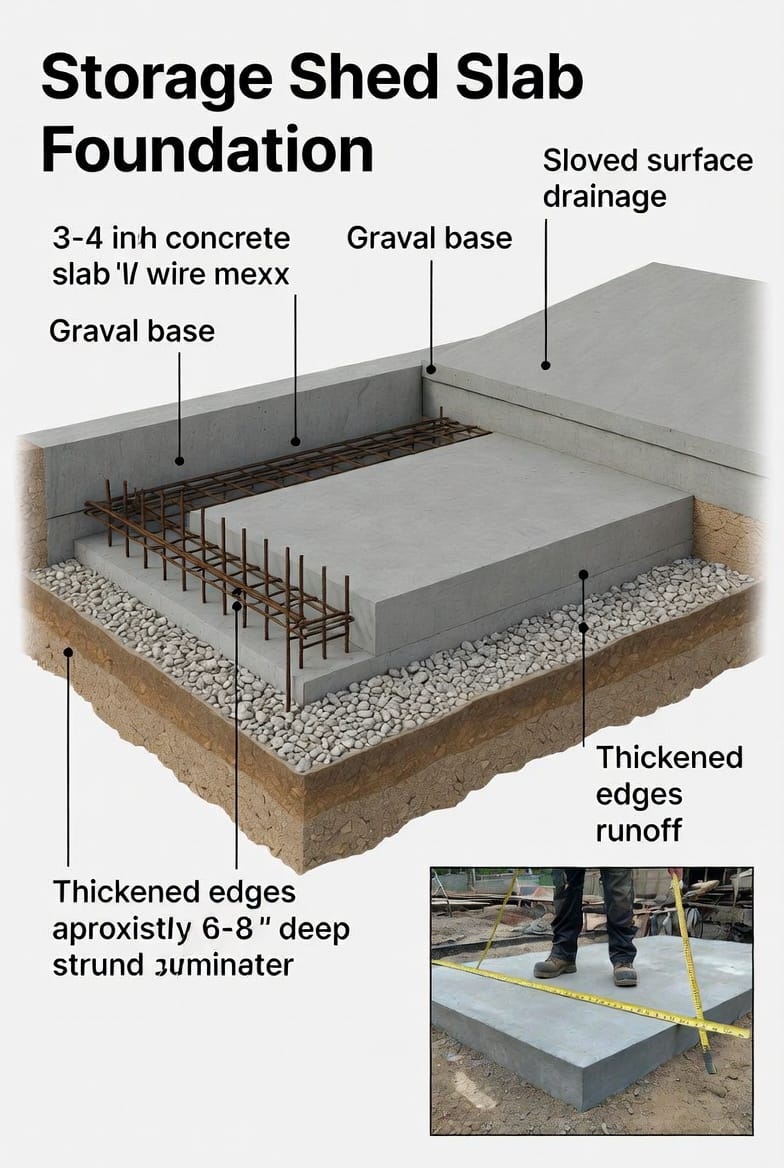
For most residential storage sheds, experts recommend a concrete slab thickness of 3 to 4 inches. This range provides sufficient strength for typical loads while remaining cost-effective.
- 3-inch slabs: Suitable for smaller, lighter sheds under 8x10 feet used primarily for light storage.
- 4-inch slabs: Preferred for standard to larger sheds, offering better support for tools, equipment, and occasional heavier items.
Heavy-duty applications may require even thicker slabs or additional reinforcement. Always consider the total weight your shed will carry, including shelves, workbenches, and stored materials.
Reinforcement Techniques for Maximum Strength
No concrete storage shed slab is complete without proper reinforcement. This critical step prevents cracking and extends the foundation's lifespan.
Primary reinforcement options include:
- Wire mesh: 6x6-inch welded wire fabric placed in the middle of the slab depth
- Rebar grid: #4 rebar on 12- to 18-inch centers for larger or heavier structures
- Fiber additives: Synthetic or steel fibers mixed directly into the concrete for added crack resistance
Proper placement of reinforcement is essential. It should sit approximately 1.5 to 2 inches above the gravel base to maximize effectiveness.
Edge Thickening for Heavy Sheds
Edge thickening becomes particularly important for larger or heavily loaded sheds. The perimeter of the slab should be thickened to 6-8 inches to better handle concentrated loads from shed walls and roof weight.
This technique creates a stronger "footing" effect around the edges while maintaining a standard 3-4 inch thickness in the center. It significantly reduces the risk of edge cracking and settlement over time.
Proper Drainage and Site Preparation
Effective drainage is non-negotiable for any outdoor concrete slab. The finished surface should slope away from the shed at approximately 1/4 inch per foot to direct water away from the structure.
Essential site preparation steps:
- Remove all vegetation and organic material
- Excavate to proper depth accounting for gravel base
- Ensure the subgrade is well-compacted
- Install a vapor barrier when required by local codes
Poor drainage leads to water pooling, which can erode the base and cause premature foundation failure.
The Role of a Quality Gravel Base
A compacted gravel base (typically 4-6 inches of crushed stone) serves multiple purposes:
- Provides excellent drainage
- Creates a stable working surface for pouring
- Helps prevent frost heave in colder climates
- Distributes loads more evenly
Proper compaction using a plate compactor is crucial. Loose gravel will lead to settlement and cracking later.
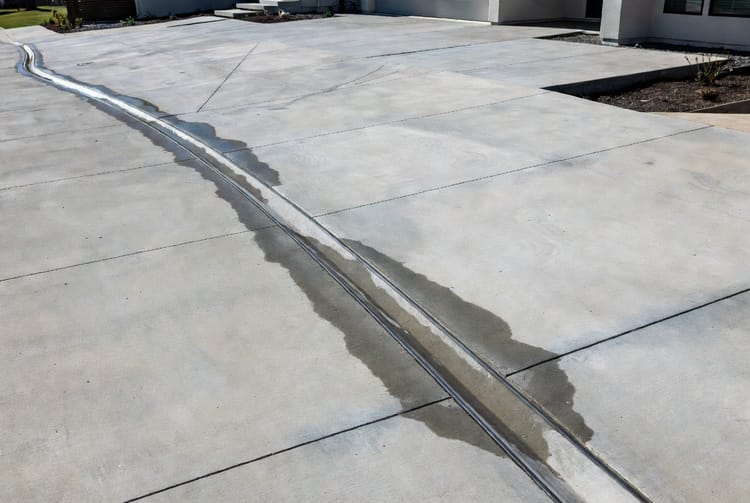
Control Joints: Preventing Unwanted Cracks
Control joints are intentional weak points cut into the concrete to control where cracking occurs. For shed slabs, place joints every 8-10 feet in both directions.
These grooves, cut to 1/4 of the slab depth, allow the concrete to expand and contract naturally with temperature changes without developing random, unsightly cracks.
Securing Your Shed with Anchor Bolts
Anchor bolts embedded in the wet concrete provide the strongest connection between your shed and the foundation.
- Use 1/2-inch diameter bolts
- Space them every 4-6 feet around the perimeter
- Embed them at least 6 inches into the concrete
- Allow proper thread exposure above the slab surface
This method ensures your shed remains securely fastened even during high winds or seismic activity.
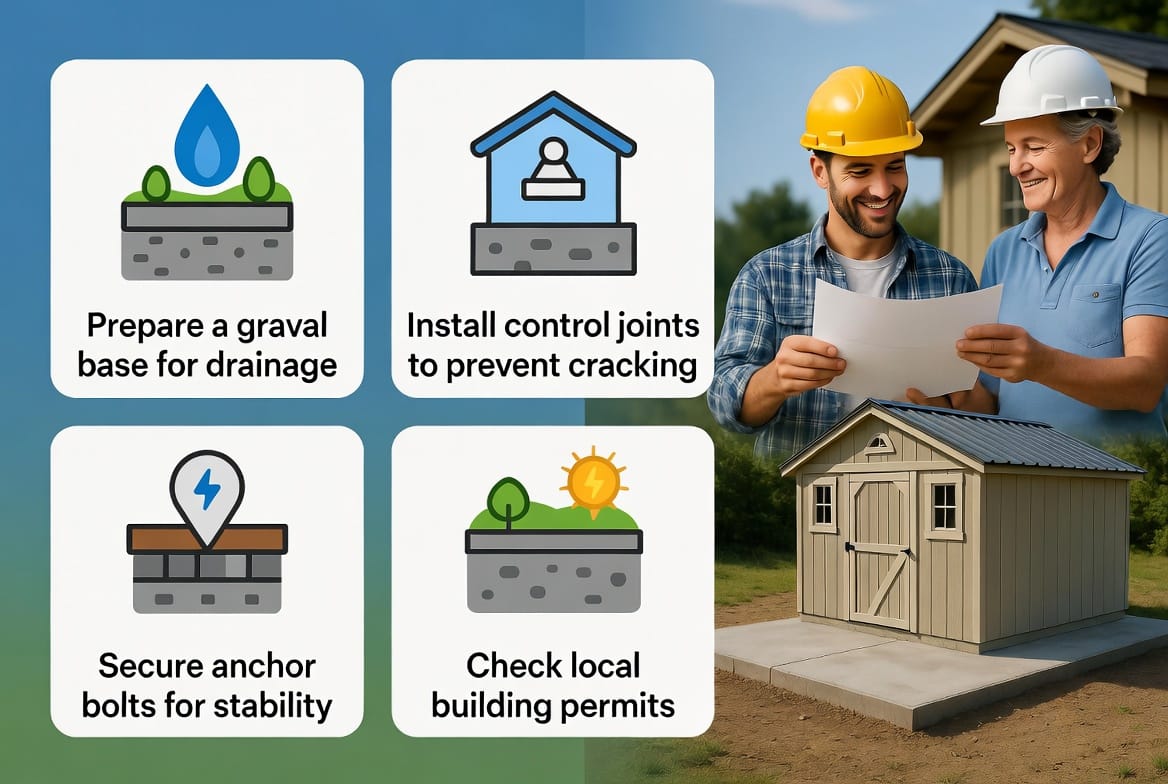
Local Permits and Building Codes
Always check local building codes before starting your project. Many municipalities require permits for concrete slabs, especially those supporting structures over a certain size.
A qualified contractor can help navigate these requirements, ensuring your concrete storage shed slab meets all safety and engineering standards. Compliance protects you from future legal or insurance complications.
Step-by-Step Process for Pouring a Shed Foundation
- Planning and Layout: Mark the exact shed dimensions with stakes and string lines
- Excavation: Dig to required depth plus gravel base allowance
- Base Installation: Add and compact gravel layers
- Form Construction: Build sturdy wooden forms with proper leveling
- Reinforcement Placement: Install wire mesh or rebar
- Concrete Pour: Order quality ready-mix concrete and pour continuously
- Finishing: Screed, float, and edge the surface professionally
- Curing: Protect the slab and maintain proper moisture for 7+ days
Professional execution at each stage ensures optimal results.
Common Mistakes to Avoid
- Insufficient slab thickness for the shed size
- Poor site drainage planning
- Inadequate reinforcement placement
- Skipping proper gravel base compaction
- Rushing the curing process
- Ignoring local frost line requirements
Avoiding these pitfalls saves time, money, and frustration down the road.
Long-Term Maintenance for Your Concrete Slab
Once installed, your concrete storage shed slab requires minimal maintenance. Periodic cleaning, sealing every 3-5 years, and prompt crack repair will keep it in excellent condition.
Monitor for signs of settlement or water pooling and address issues quickly to maintain structural integrity.
Choosing Professional Installation
While DIY projects have their place, foundation work benefits greatly from professional expertise. Experienced contractors understand soil conditions, local climate challenges, and best practices for creating durable shed foundations.
They bring proper equipment, quality materials, and the knowledge needed to deliver exceptional results that homeowners can trust for years.
Conclusion: Building on Solid Ground
A well-constructed concrete storage shed slab forms the reliable foundation your outdoor building deserves. By following proper thickness guidelines, incorporating reinforcement, ensuring excellent drainage, and addressing all key details, you create a stable platform that will support your storage needs for decades.
A good slab keeps your shed stable and secure.
For expert advice on shed foundations and professional installation services. We're here to help you build with confidence on a foundation you can trust.
Expert Concrete Shed Slab Installation – Call Now!