The Concrete Step Repair: Fixing Chipped Edges
Chipped edges on concrete steps are one of the most common—and most overlooked—problems homeowners face. A small nick on the nosing quickly becomes a trip hazard, a water-entry point, and an eyesore that makes the entire entrance look neglected. The good news is that most chipped concrete steps can be restored with a focused, methodical repair rather than a full replacement. This guide walks through the proven process—clean, apply bonding agent, patch with concrete repair mix, shape, and cure—and explains clearly when a repair is enough and when replacement is the safer, smarter choice.
Restore Safe, Sharp Concrete Steps – Call Now
Why Chipped Step Edges Matter
Concrete steps endure constant traffic, freeze-thaw cycles, de-icing salts, and impact from deliveries or furniture. The leading edge, or nosing, takes the brunt of that abuse. Once the edge chips, two things happen quickly:
- The exposed aggregate and broken surface collect water.
- That water freezes, expands, and pries off more concrete.
What started as a cosmetic flaw becomes a structural and safety issue. A rounded or missing nosing changes the effective tread depth and creates an irregular landing point for the foot. For older adults, children, and guests unfamiliar with the stairs, that irregularity is a genuine fall risk.
Repairing the chip early stops the cycle, restores a crisp walking edge, and protects the rest of the step from further deterioration. Done correctly, the patched area can last many years and blend with the original concrete.
Assessing the Damage: Repair or Replace?
Not every chip belongs in the “patch it” category. A careful look at the step tells you which path to take.
Repair is usually appropriate when:
- The chip is limited to the nosing or a small corner.
- The remaining concrete is sound—no deep cracks running through the tread or riser.
- The step still feels solid underfoot with no hollow sound when tapped.
- The damage does not extend under the tread into the supporting structure.
Replacement should be considered when:
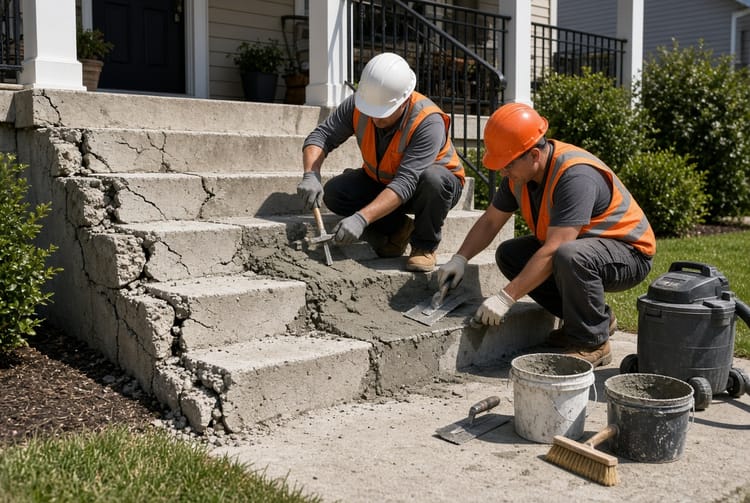
- Multiple steps show widespread crumbling or large missing sections.
- Cracks run from the chip down the riser or across the tread.
- The steps have settled, tilted, or separated from the landing.
- Previous patches have already failed.
- The original mix was poor and the entire flight is scaling or spalling.
If you are unsure, a professional inspection is inexpensive compared with the cost of a failed DIY patch or an injury. When the concrete itself is still competent, a well-executed concrete step repair restores both function and appearance at a fraction of the cost of tearing out and pouring new steps.
Tools and Materials You Will Need
Gather everything before you start. Working with a wet mix on a vertical edge leaves little time to hunt for a missing tool.
Essential materials
- Concrete cleaner or mild detergent and a stiff brush
- Concrete bonding agent (liquid latex or acrylic type formulated for vertical surfaces)
- Pre-mixed concrete repair mix or polymer-modified patching compound rated for exterior steps
- Clean water (measured, not guessed)
- Form board or reusable edge form if the nosing must be rebuilt to full profile
- Release agent or plastic sheeting for the form
Tools
- Wire brush, chisel, and hammer for removing loose material
- Shop vacuum or compressed air
- Margin trowel, pointing trowel, and wood or magnesium float
- Mixing bucket, drill with paddle, or mixing hoe
- Spray bottle for misting during cure
- Safety glasses, gloves, and knee pads
Choose a repair product labeled for vertical and overhead use if the chip is on the face of the riser as well as the nosing. Standard sack concrete is too coarse and shrinks too much for this job.
Safety First
Work on a dry day with temperatures between 50 °F and 80 °F if possible. Wear eye protection when chipping loose concrete. Keep the work area clear so no one walks on wet patch material. If the steps are the only entrance, plan a temporary alternate route or schedule the work when traffic is light.
Step-by-Step Repair Process
The sequence is simple, but each stage must be done thoroughly. Skipping preparation is the most common reason patches fail.
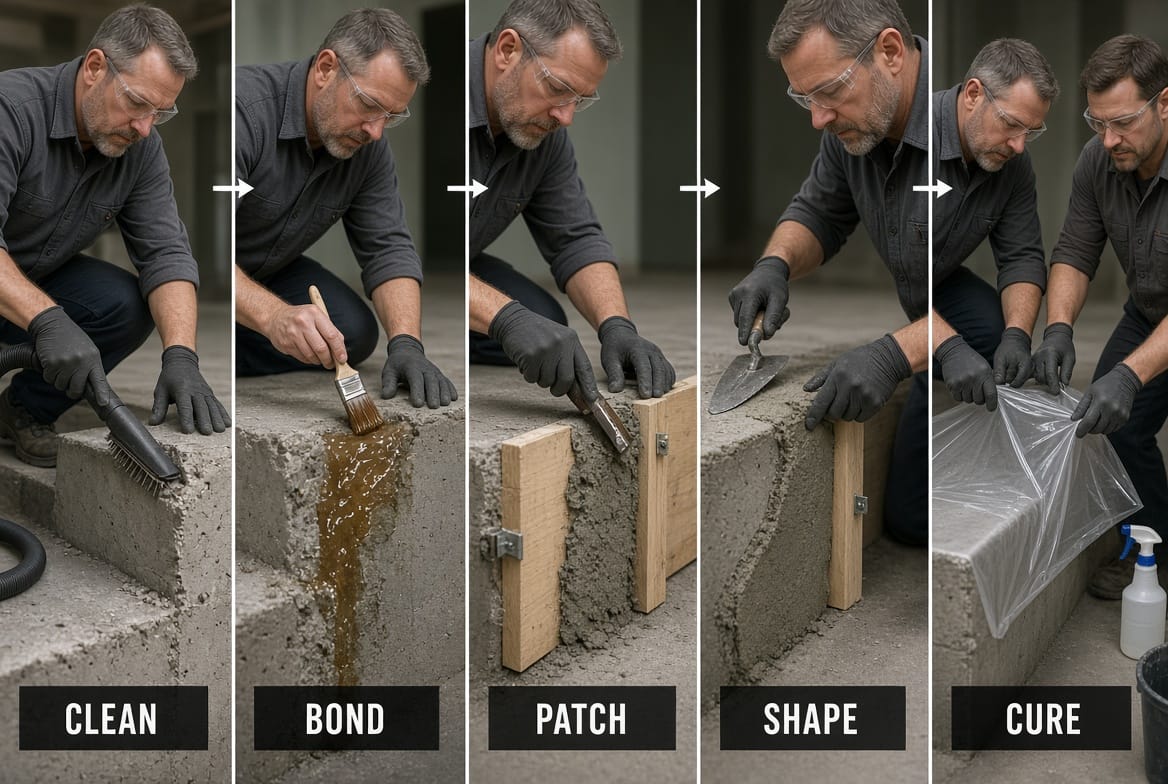
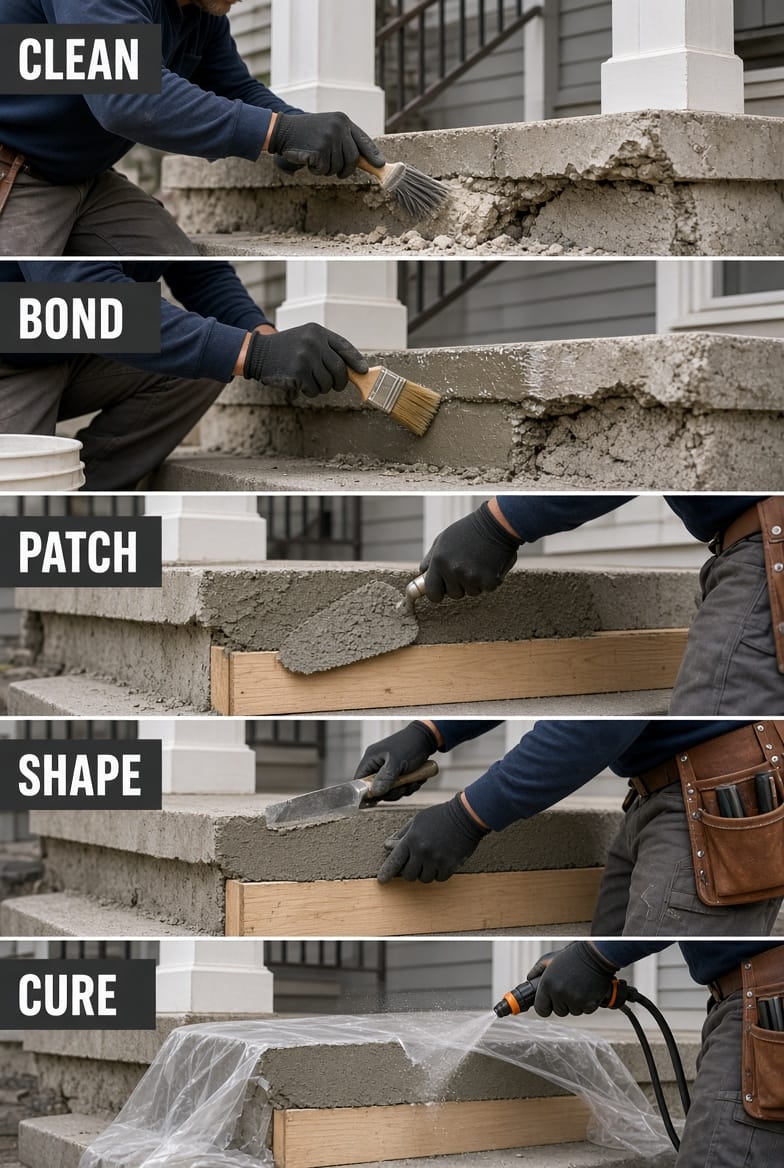
1. Clean the Damaged Area
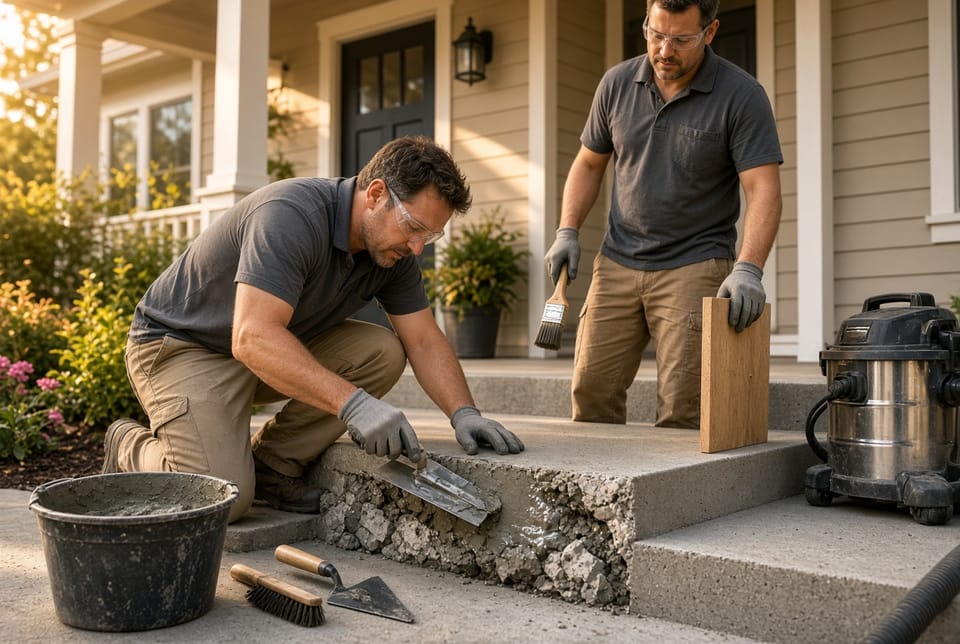
Remove every piece of loose or unsound concrete. Use a hammer and cold chisel to undercut the edges of the chip slightly so the new material has a mechanical key. Wire-brush the surface until only hard, clean concrete remains. Vacuum or blow out dust. Wash with a concrete cleaner if oil, paint, or efflorescence is present, then rinse and allow the area to dry to a damp, not dripping, condition. A clean, slightly rough surface is what the bonding agent and patch need to grip.
2. Apply Bonding Agent
Brush or roll a thin, even coat of bonding agent onto the prepared concrete. Do not let it puddle or dry to a hard film. Most products work best when the patch is applied while the bonding agent is still tacky. This chemical bridge is what prevents the new material from simply sitting on top of the old concrete and later popping off. Follow the manufacturer’s open time exactly.
3. Patch with Concrete Repair Mix
Mix the repair compound to a stiff, peanut-butter consistency—wet enough to pack tightly but dry enough to stay in place on a vertical edge. Over-watering is a frequent mistake that leads to shrinkage cracks and a weak surface. Pack the mix firmly into the void with a trowel, working from the back of the cavity forward so no air pockets remain. Overfill slightly; you will strike it off later.
If the nosing is completely missing, set a form board at the correct projection and height, braced so it cannot shift. Coat the form with a release agent so it does not bond to the fresh patch.
4. Shape the Edge
Once the material has begun to firm (usually 15–45 minutes depending on temperature and mix), strike off the excess and recreate the original profile. Use the trowel to match the existing nosing radius or square edge. A wood float can produce a slightly textured surface that blends with broom-finished treads. Keep the new edge slightly proud of the surrounding concrete; you can dress it after initial set. The goal is a continuous walking line that feels the same underfoot as the undamaged steps.
5. Cure the Repair
Curing is not optional. Concrete gains strength through hydration, not drying. Mist the patch lightly, cover with plastic sheeting, or apply a curing compound according to the product instructions. Protect the area from foot traffic, rain, and freezing for the time specified—often 24 to 72 hours for light use and longer for full strength. Rapid drying in sun or wind produces a weak, dusty surface that will chip again.
Common Mistakes That Cause Patches to Fail
Even a good mix will fail if the basics are ignored.
- Leaving dust or loose particles in the cavity.
- Applying patch to a bone-dry or soaking-wet surface.
- Mixing too wet so the material slumps and shrinks.
- Skipping the bonding agent.
- Walking on the repair too soon.
- Failing to protect the patch from rain or frost during the first day.
A patch that looks perfect on day one but crumbles six months later almost always traces back to one of these errors.
After the Repair: Maintenance and Longevity
Once cured, treat the repaired steps like any other exterior concrete. Sweep regularly. Avoid metal snow shovels that can nick the new edge. Use a concrete-safe de-icer rather than rock salt if possible. A breathable penetrating sealer applied after the patch has fully cured (usually 28 days) adds an extra layer of protection against water and freeze-thaw damage.
Inspect the steps each spring. Catching a new hairline chip early keeps the repair small and inexpensive.
When Professional Help Makes Sense
Homeowners comfortable with masonry work can handle a single small chip. Larger missing sections, multiple steps, or any doubt about the soundness of the remaining concrete are better left to a crew that does this work daily. Professionals bring the right mix designs, forming systems, and curing practices, and they stand behind the result. They can also evaluate whether hidden issues—poor drainage, settlement, or inadequate original thickness—need attention at the same time.
The Payoff: Safety, Appearance, and Value
A crisp, level nosing does more than look tidy. It restores the designed tread depth, gives the foot a predictable landing, and removes a common trip point. Water no longer sits in a broken edge and works its way into the step. The entrance looks cared-for instead of worn. For a relatively modest investment of time and material, the repair protects both the people who use the stairs and the concrete itself.
Ignoring chips is the expensive option. What begins as a two-hour patch can become a full flight replacement if freeze-thaw and traffic are allowed to continue the damage.
Final Thoughts
Fix chipped steps for safety and appearance. The process—clean the unsound concrete, apply a proper bonding agent, pack a quality repair mix, shape the nosing to match the original profile, and cure it correctly—is straightforward when each step is respected. Most localized chips do not require demolition. They require attention.
If the damage is more extensive than a single edge, if you are uncertain about the condition of the remaining concrete, or if you simply want the job done once and done right, professional concrete repair is the reliable next step.
A short conversation can confirm whether a targeted patch will solve the problem or whether a broader evaluation is needed. Safe, sharp-edged steps are one of the simplest upgrades a home can receive—and one of the most important.
Repair Chipped Edges Before They Spread – Call Now