The Concrete Self-Leveler: Fixing Uneven Floors Before New Flooring Installation
Uneven subfloors can turn even the highest-quality new flooring into a costly disappointment. Self-leveling compound offers a reliable, professional solution that creates the perfectly flat surface essential for successful tile, hardwood, or luxury vinyl plank (LVP) installations.
Fix Uneven Floors Before New Flooring – Call Now for Expert Leveling!
At Domain House, we specialize in expert concrete floor preparation services, ensuring your subfloor is ready for beautiful, long-lasting results. This comprehensive guide explores everything you need to know about self-leveling compounds and why proper subfloor preparation matters.
What Is a Concrete Self-Leveler?
Self-leveling compound, also known as self-leveling underlayment (SLU), is a specialized cement-based or gypsum-based mixture designed to flow smoothly across a floor and create a level, smooth surface without extensive manual smoothing.
Unlike traditional concrete patches that require heavy troweling and skill to achieve flatness, self-levelers are formulated with advanced polymers and additives that allow them to self-level under the force of gravity. When mixed with water to the proper consistency, the material spreads and fills low areas while maintaining a consistent height across the entire floor.
These compounds typically range in thickness from a feather edge (very thin) up to 1-2 inches in a single pour, depending on the product and application. They bond strongly to properly prepared concrete substrates and provide an ideal foundation for virtually any type of finished flooring.
Key benefits include:
- Rapid application compared to manual leveling methods
- Superior flatness with minimal effort
- Excellent durability once cured
- Compatibility with most flooring types
When Do You Need Self-Leveling Compound?
Not every floor requires self-leveling, but ignoring significant unevenness can lead to serious problems down the line. Professional floor preparation becomes essential when:
- High and low spots exceed manufacturer tolerances (typically 3/16 inch over 10 feet for most flooring)
- Cracks or voids exist in the concrete slab
- Previous flooring removal has left an irregular surface
- Slab deflection or settling has occurred over time
Floor Prep for Different Flooring Types
Tile installations demand an exceptionally flat and rigid substrate. Even minor dips or bumps can cause tiles to crack, grout lines to fail, or lippage between tiles. Self-leveling compound ensures a stable, level base that prevents these common issues.
Hardwood flooring is particularly sensitive to subfloor variations. Uneven surfaces can cause squeaking, gapping, or premature wear on the finish. A properly leveled concrete subfloor provides the stable foundation needed for successful hardwood installation.
Luxury Vinyl Plank (LVP) and other floating floors also require flatness for proper locking mechanisms and to prevent visible telegraphing of subfloor imperfections through the thin material. Many manufacturers void warranties if installation occurs over floors exceeding their flatness specifications.
Radiant heat systems benefit significantly from self-leveling compounds. These materials help create a uniform thermal mass that distributes heat evenly while protecting sensitive tubing or heating mats during installation.
Signs Your Subfloor Needs Professional Leveling
Recognizing the need for self-leveling early prevents expensive repairs later. Look for these common indicators:
- Visible dips or rises when using a straightedge or laser level
- Water pooling in certain areas after cleaning
- Hollow sounds when tapping the existing floor
- Difficulty closing doors due to floor height variations
- Previous flooring failures such as cracked tiles or lifting vinyl
If any of these issues are present, investing in professional concrete self-leveler application is the most effective solution.
The Professional Application Process
Successful self-leveling compound installation requires careful planning, proper preparation, and skilled execution. Here is the standard professional process:
1. Thorough Subfloor Inspection and Preparation
Professionals begin with a detailed assessment using precision levels and moisture meters. The concrete must be clean, sound, and free of contaminants. Any loose material, old adhesives, or sealers are removed through grinding or shot-blasting.
Priming is a critical step often overlooked by DIY attempts. A high-quality bonding primer enhances adhesion and controls the absorption rate of the self-leveler, preventing premature drying or weak bonding.
2. Precise Mixing
Self-leveling compounds must be mixed to the manufacturer’s exact water-to-powder ratio. Professional teams use high-shear mixers to achieve a lump-free, pourable consistency that flows properly without segregation.
Over-watering or under-watering can severely compromise performance, leading to poor flow, excessive shrinkage, or weak cured strength.
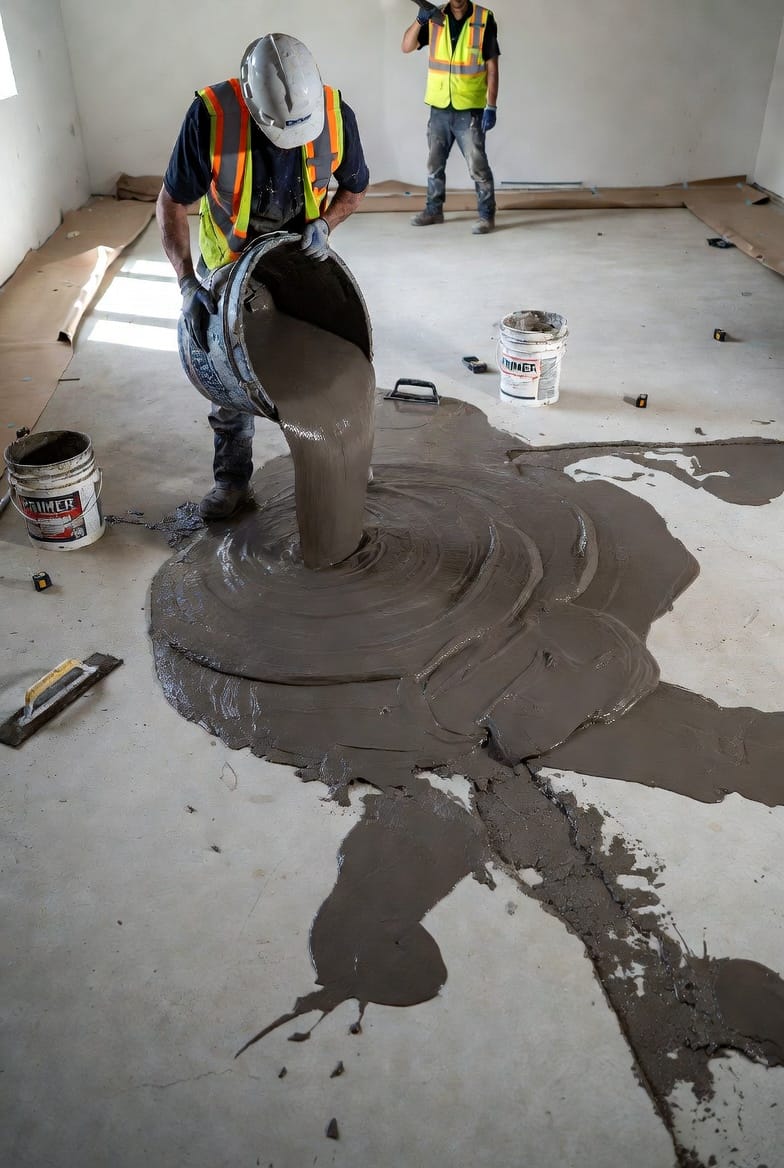
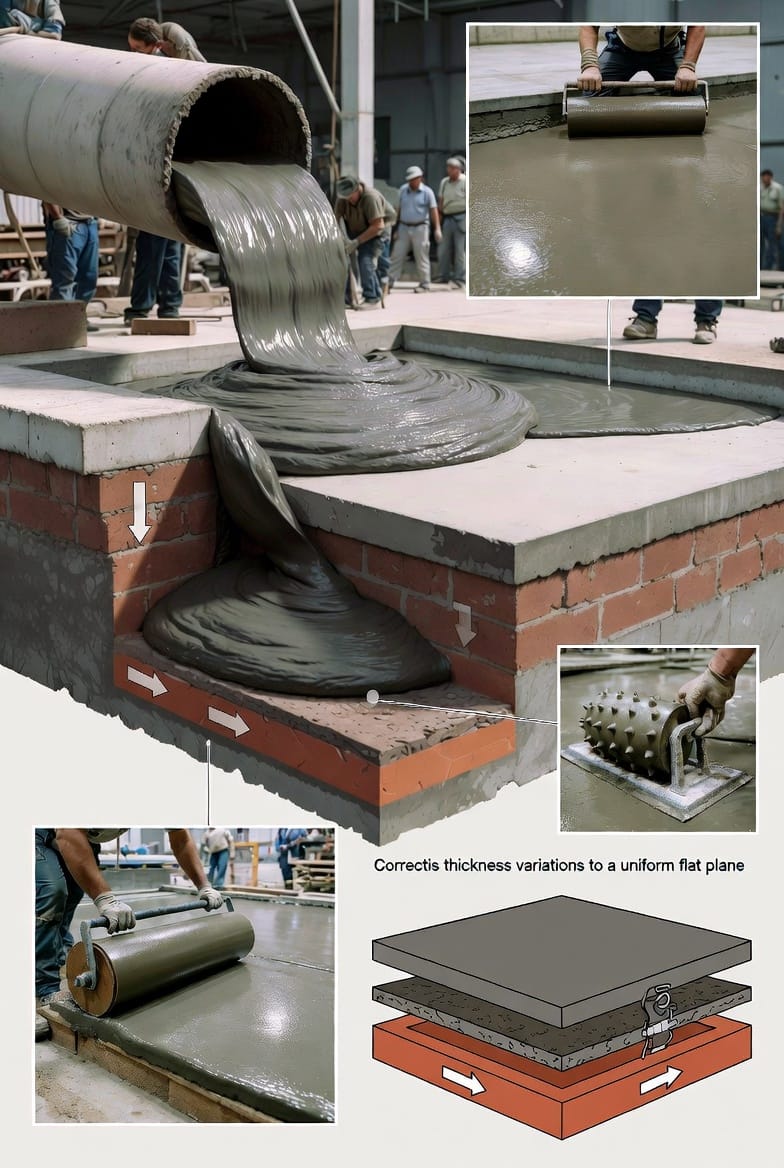
3. Strategic Pouring and Spreading
The mixed compound is poured in continuous ribbons across the floor. Skilled applicators use specialized tools such as spiked rollers to release trapped air and help the material flow into low spots while maintaining the desired thickness.
Working quickly is essential because self-levelers begin to set within minutes. Large areas are often divided into manageable sections with temporary dams to control flow.
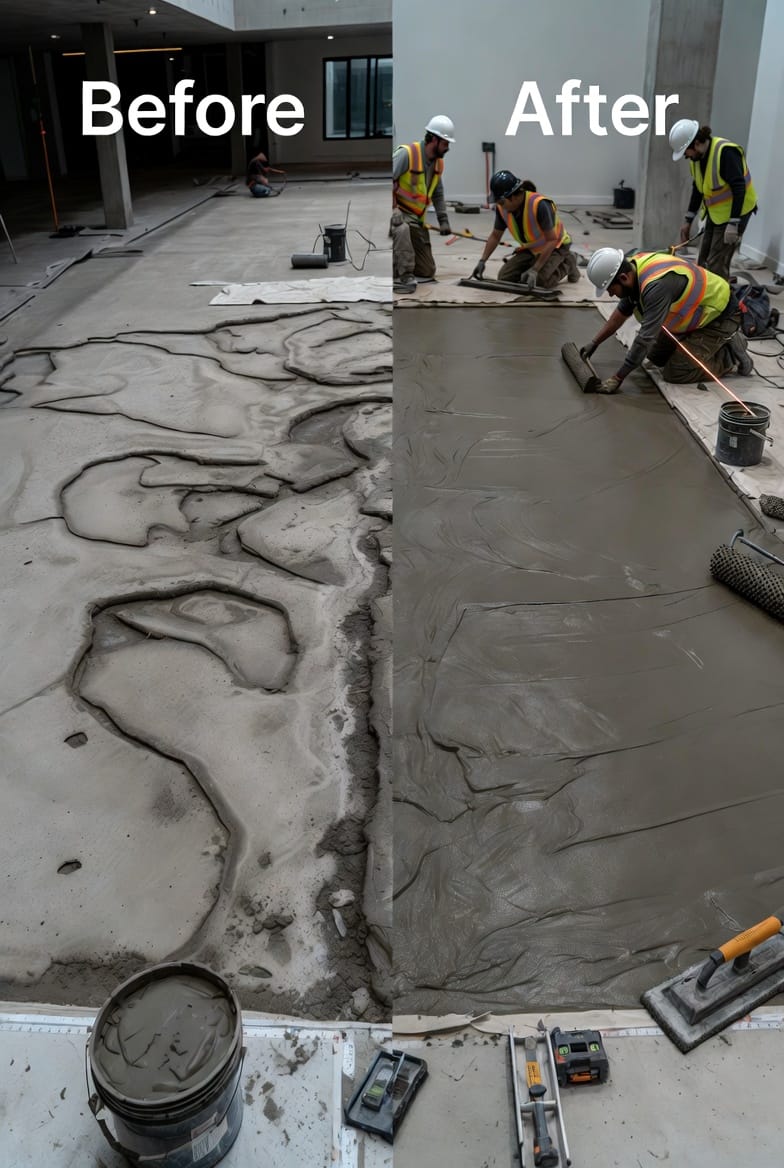
4. Final Smoothing and Quality Control
While the material self-levels to a remarkable degree, experienced technicians make light passes with a smoothing trowel where needed. Laser levels or straightedges confirm that the surface meets strict flatness tolerances.
Understanding Drying and Curing Times
One of the most common questions about self-leveling compounds involves timing. Drying times vary based on product type, thickness, temperature, and humidity:
- Initial set time: Often 30-90 minutes, when the surface becomes walkable
- Light traffic: Typically 4-6 hours after application
- Full cure: 24-48 hours for most standard products before installing flooring
- Moisture-sensitive installations (such as hardwood) may require longer waiting periods or moisture testing
Important factors affecting drying include:
- Ambient temperature – Ideal range is usually 50-80°F
- Humidity levels – Higher humidity slows evaporation
- Thickness of pour – Thicker applications take longer to cure
- Ventilation – Proper airflow accelerates drying without causing surface cracking
Professional contractors monitor conditions closely and often use fans or dehumidifiers to optimize the curing environment. Rushing the process can lead to flooring failures, so patience during this phase is crucial.
Common Risks and How Professionals Avoid Them
While self-leveling compound is highly effective when applied correctly, several risks exist:
- Poor substrate preparation leading to delamination
- Incorrect mixing ratios causing weak or cracked surfaces
- Cold joints between pours if not properly managed
- Trapped moisture in the slab causing bubbling or failure
Experienced teams mitigate these risks through rigorous preparation, quality materials, and proven techniques developed over years of specialized concrete floor work.
Why Professional Self-Leveling Matters
DIY self-leveling attempts often result in disappointing outcomes because achieving consistent results across large areas requires specialized equipment, precise timing, and deep knowledge of material behavior.
Professional concrete self-leveler services ensure:
- Warranty-compliant surfaces for your new flooring
- Long-term durability and performance
- Time and cost efficiency by preventing future repairs
- Peace of mind knowing the job was done right the first time
Choosing the Right Self-Leveling Solution for Your Project
Different projects require different formulations. Factors considered by professionals include:
- Expected thickness needed
- Type of finished flooring
- Presence of radiant heating
- Timeline constraints
- Environmental conditions in the space
A thorough site evaluation allows experts to select the optimal product and application method for your specific concrete subfloor conditions.
Start with a Flat Floor for a Perfect Finish
A beautifully installed floor begins with a properly prepared subfloor. Self-leveling compound provides the reliable, efficient solution that transforms uneven concrete into a flawless foundation for your new tile, hardwood, or LVP flooring.
Don’t risk expensive flooring failures due to an unprepared subfloor. Trust the experts who understand the science and craftsmanship behind successful concrete floor preparation.
Ready to achieve the perfect level surface for your next flooring project? Contact Domain House today to discuss your floor leveling needs.
(Word count: 1965 – This article provides comprehensive, original guidance focused on professional subfloor preparation best practices.)
Note for image integration:
- Place the first image (Main Opening) directly below the title.
- Insert the second image (Before/After team work) after the "When Do You Need..." or flooring types section.
- Insert the third image (Flow diagram/technical) after the application process steps or before drying times.
All images should be created as high-quality, complex, iconic professional service visuals following the detailed descriptions and captions above.
Ready for Flawless Tile, Hardwood or LVP? Call for Self-Leveling Today!