The Concrete Edging: Defining Flower Beds and Walkways
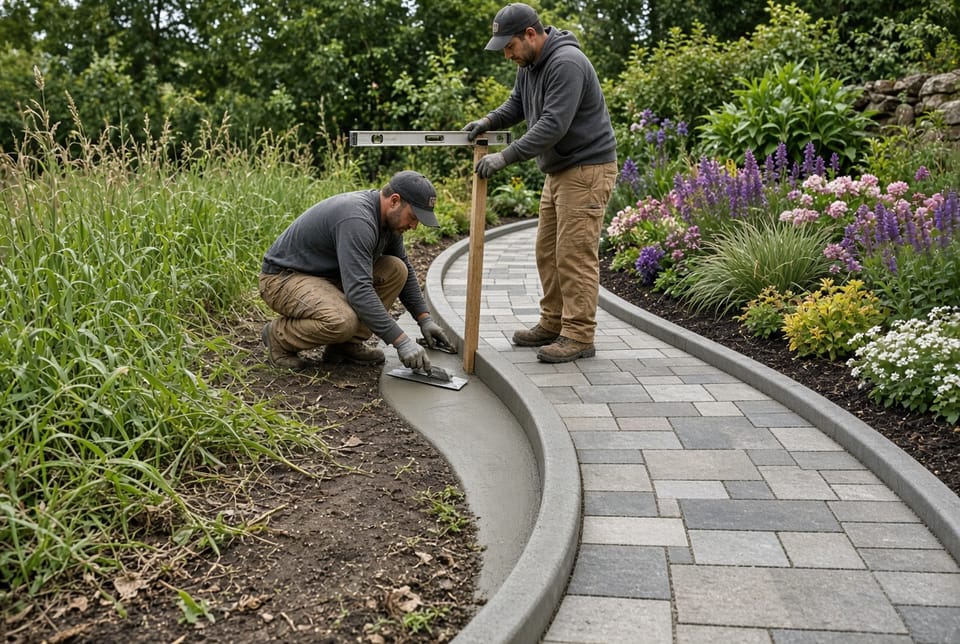
Concrete edging stands as one of the most effective tools in professional landscape design for creating order, beauty, and long-term structure. When flower beds meet lawns or walkways cut through planted areas, the transition zone often becomes the weakest visual and functional point. Soil migrates, grass invades, mulch washes away, and the entire composition begins to look unfinished. Concrete edging solves this by forming a permanent, custom-shaped barrier that holds everything in place while adding architectural interest.
Call Now for Professional Concrete Edging
Unlike temporary plastic strips or loose brick that shift with frost and foot traffic, properly installed concrete creates a monolithic line that stays exactly where it is placed. Homeowners and designers choose it because it delivers both immediate visual impact and decades of reliable performance. This article explains how concrete edging produces clean garden borders, walks through the full installation sequence of forming, pouring, and finishing, and reviews the three primary design approaches: curved, straight, and stamped. The goal is practical knowledge that helps you plan a project with confidence.
The Essential Role of Edging in Modern Landscape Design
Every successful landscape relies on clear spatial definition. Beds need to feel intentional rather than accidental. Walkways need protection from soil splash and plant overgrowth. Without a physical separator, even the most carefully chosen plants lose their impact as edges blur. Concrete edging supplies that separator in a material that can be shaped to the exact geometry of the site.
In contemporary design, the edge itself often becomes a design element rather than a hidden necessity. A low, smooth concrete line can echo the architecture of the house. A taller, textured edge can act as a subtle retaining wall for raised beds. Because concrete can be colored, textured, or left natural, it integrates with stone, brick, wood, or metal without competing. The result is a cohesive outdoor room rather than a collection of separate features.
Professionals specify concrete when the project demands permanence. Seasonal freeze-thaw cycles, heavy rain, and regular mowing all test lesser materials. Concrete, when mixed and placed correctly, resists these forces. That reliability lets designers focus on plant selection and hardscape composition instead of constant edge repair.
Benefits of Choosing Concrete for Garden and Walkway Borders
- Exceptional durability that withstands weather, mower impact, and soil pressure for 20–40 years or more when installed to professional standards.
- Minimal ongoing maintenance compared with wood that rots, metal that rusts, or plastic that becomes brittle and lifts.
- Complete design flexibility in shape, height, width, color, and surface texture.
- Weed and grass barrier that reduces the need for chemical treatments or constant hand weeding along borders.
- Improved drainage control by directing water away from beds or toward designated collection points.
- Increased property value through a polished, finished appearance that photographs well and appeals to buyers.
- Cost efficiency over time because replacement cycles are far longer than those of competing edging products.
These advantages appear only when the work follows correct procedures. Shortcuts in forming or curing produce the very problems concrete is meant to prevent. That is why experienced installation remains the critical variable.
How Concrete Edging Creates Clean, Professional Garden Borders
The visual power of concrete edging comes from its ability to draw a single, continuous line. That line separates turf from planting soil with surgical precision. Mulch stays inside the bed. Grass stays on the lawn side. The contrast makes both areas look more intentional and better maintained.
On walkways the same principle applies. Concrete edging keeps gravel or pavers from migrating outward and prevents soil from washing onto the walking surface after rain. The edge also provides a clean mowing strip, allowing a lawn mower wheel to ride the concrete without scalping the grass or damaging plants.
Because the material can be formed to any radius, designers avoid the stiff, rectangular look that cheaper edging often produces. Gentle curves follow natural planting drifts. Tight radii wrap around specimen trees or water features. Straight runs align with architectural axes. In every case the finished edge reads as part of the original design rather than an afterthought.
Color and texture further refine the effect. Integral pigments can match existing concrete patios or contrast with them for emphasis. A light broom finish sheds water while remaining slip-resistant. A smooth trowel finish creates a more formal appearance. These choices let the edging recede or step forward according to the overall composition.
The Professional Installation Process for Concrete Edging
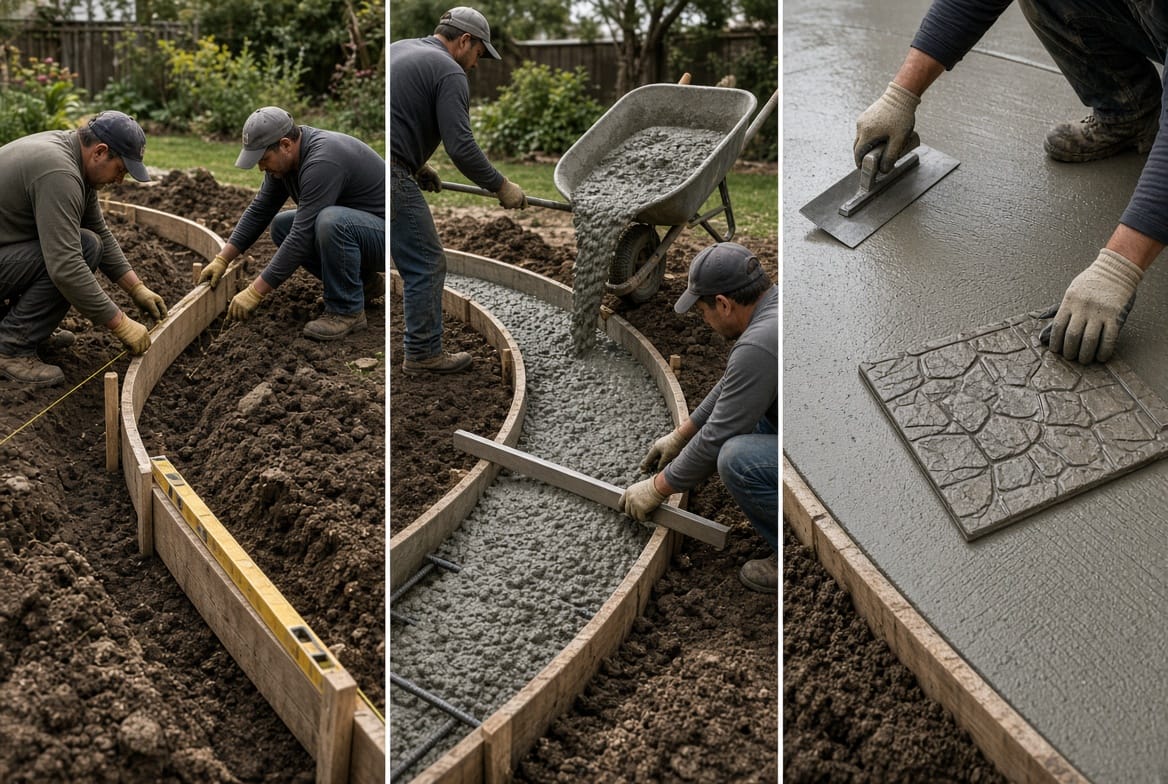
Successful concrete edging begins long before any mix arrives on site. The sequence—forming, pouring, and finishing—must be executed in order and with attention to soil, weather, and intended use.
Preparing the Site and Forming the Edge
The first task is layout. Designers or installers mark the exact path with spray paint or string, confirming curves and intersections on the ground. Next comes excavation. A trench is dug to the planned depth, typically four to eight inches depending on soil type and whether the edge will also retain soil. The trench bottom is compacted and, in poor soils, a thin gravel base may be added for drainage and stability.
Forms come next. Lumber or specialized metal edging forms are set to the desired height and alignment. Stakes hold them rigid. For curves, thinner flexible boards or laminated strips are used so the radius stays true. Forms must be level or follow a planned slope so water does not pond against the finished edge. Any gap or bulge in the forms will appear in the concrete, so this stage rewards patience.
Reinforcement is often placed at this point. A single run of rebar or fiber mesh helps control shrinkage cracking, especially on longer runs or in freeze-thaw climates. Control joints are planned every four to eight feet so any movement occurs at predetermined locations rather than randomly across the surface.
Mixing and Pouring the Concrete
Concrete for edging is usually a relatively stiff mix so it holds shape against the forms. Ready-mix trucks or on-site mixers deliver material with the specified slump and strength, commonly 3,000–4,000 psi. Color, if desired, is added at the plant or in the mixer so it is uniform throughout the pour.
The crew places the concrete in the forms, taking care not to overwork it. A vibrator or tapping of the forms removes air pockets. Excess material is struck off with a screed board so the top surface sits at the planned elevation. At this stage the concrete is still plastic and can be shaped, but time is limited. Weather conditions—temperature, wind, and humidity—dictate how quickly the crew must move.
Finishing Techniques for a Lasting Look
Finishing begins as soon as the surface water sheen disappears. A magnesium float levels high spots and brings cream to the surface. For a smooth look, steel trowels follow. For traction and a more natural appearance, a broom is dragged across the surface. Stamped patterns, discussed later, are applied while the concrete is still impressionable.
Edges are tooled to a consistent radius so they resist chipping. Control joints are tooled or saw-cut at the planned intervals. Once finishing is complete, a curing compound or wet burlap is applied to keep moisture in the slab during the critical first days. Proper curing is essential; rapid drying produces surface weakness and increases the chance of plastic shrinkage cracks.
The forms stay in place until the concrete reaches sufficient strength, usually 24–48 hours. After stripping, the soil is backfilled and compacted on both sides so the new edge is fully supported.
Exploring Design Options: Curved, Straight, and Stamped Concrete Edging
The three most requested styles—curved, straight, and stamped—cover nearly every landscape situation. Each can be combined on the same property when the design calls for variety.
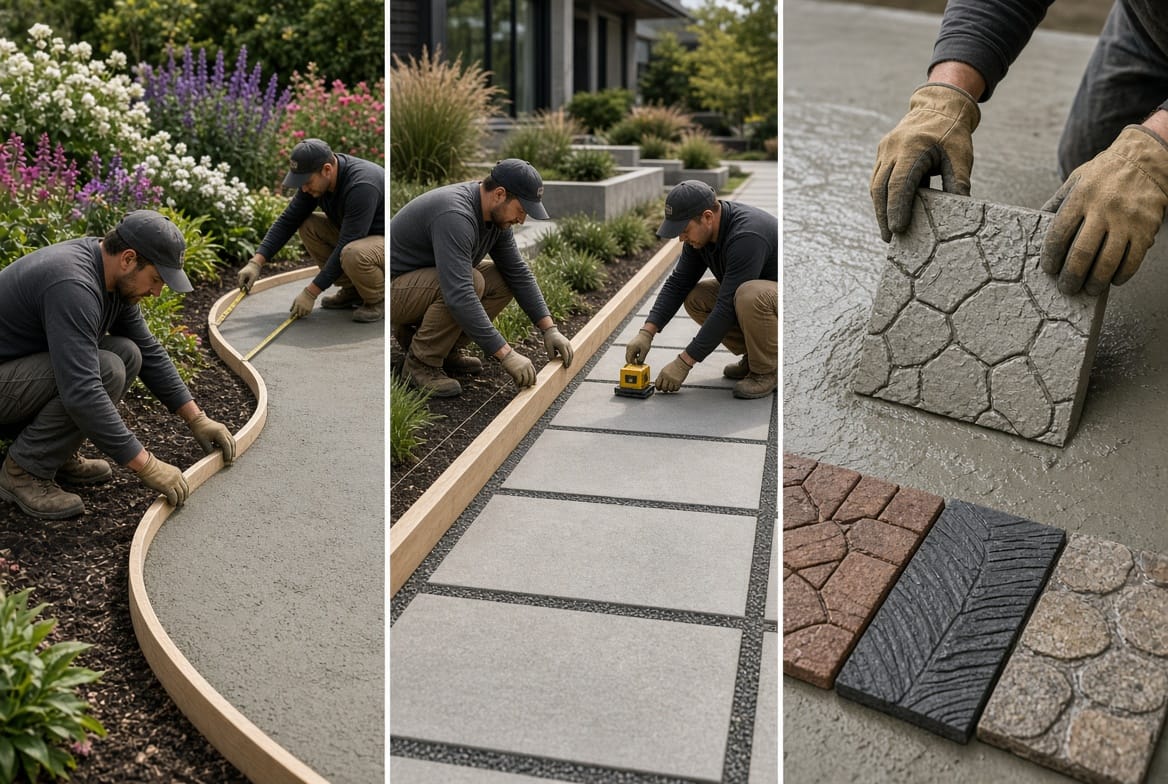
Curved edging follows the organic lines of planting beds and naturalistic gardens. It softens the transition between lawn and flowers and works especially well around trees, boulders, or water features. Achieving a fair curve requires skilled forming; any flat spot or kink becomes permanent. Once poured, the flowing line feels effortless and high-end.
Straight edging delivers a crisp, contemporary or formal look. It aligns with building walls, fences, and geometric walkways. Because the lines are simple, any deviation in level or alignment is immediately visible, so forming and finishing must be exact. Straight runs also simplify mowing and snow removal.
Stamped edging adds surface pattern and texture. Common motifs include running-bond brick, random flagstone, wood plank, and cobblestone. The stamp is pressed into the still-plastic concrete, then released and moved along the run. Color hardeners or release agents enhance the illusion of masonry. Stamped edges are popular when the designer wants the border to relate to an existing patio or to introduce visual richness without additional materials.
All three styles accept integral color, acid stain, or later topical sealers. Height can vary from a flush mowing strip to a six-inch raised profile that doubles as a low seat wall. Width is typically four to six inches but can be increased for structural needs.
Additional Considerations for Successful Concrete Edging Projects
Soil type influences both excavation and reinforcement decisions. Sandy soils drain well but may need extra compaction. Clay soils hold water and can heave; a gravel base and good surface drainage become more important. In every case the finished grade should slope slightly away from structures and toward collection points so water does not stand against the concrete.
Climate affects mix design and joint spacing. Freeze-thaw regions benefit from air-entrained concrete and closer control joints. Hot, dry climates require faster placement and more aggressive curing protection to prevent surface crazing.
Integration with other hardscapes matters. The new edge should meet existing patios or walks at a consistent height and joint. Expansion material is placed where concrete meets buildings or other slabs so differential movement does not cause spalling.
Utilities must be located before digging. Irrigation lines, low-voltage lighting, and drainage pipes often run exactly where an edge is planned. Adjusting the layout or sleeving pipes during forming prevents later conflicts.
Maintenance Tips to Keep Your Concrete Edging Looking New
Once cured, concrete edging needs little attention. An annual inspection for settlement or joint deterioration is usually sufficient. Keep soil and mulch from burying the top of the edge so water can shed. A mild concrete cleaner removes dirt and algae without damaging the surface. If a sealer was applied, reapplication every two to four years restores water repellency and color depth.
Avoid de-icing salts on new concrete during the first winter; they can increase surface scaling. After the first year, most quality mixes tolerate normal winter treatments. Small chips can be repaired with a matching patch compound if they occur from impact.
These simple habits preserve both appearance and function. The edge that looked sharp on installation day will continue to define the garden for many seasons.
Why Professional Installation Makes All the Difference
The difference between a concrete edge that lasts and one that cracks, settles, or looks uneven almost always traces back to installation quality. Correct trench depth, rigid forms, proper mix, timely finishing, and adequate curing cannot be rushed. Experienced crews bring the right tools, understand local soil and weather, and know how to sequence the work so each step supports the next.
Homeowners who attempt the project themselves often underestimate the physical demand and the narrow window for finishing. The result can be wavy lines, honeycombed surfaces, or premature cracking—the very issues that undermine the clean look concrete is meant to provide. Hiring qualified landscape concrete specialists removes those risks and delivers the finished product the design intended.
Define your garden with concrete edging.
Transform Your Yard with Concrete Edging – Call Now