The Ceiling Fan Installation: Wiring for New Construction vs. Retrofit
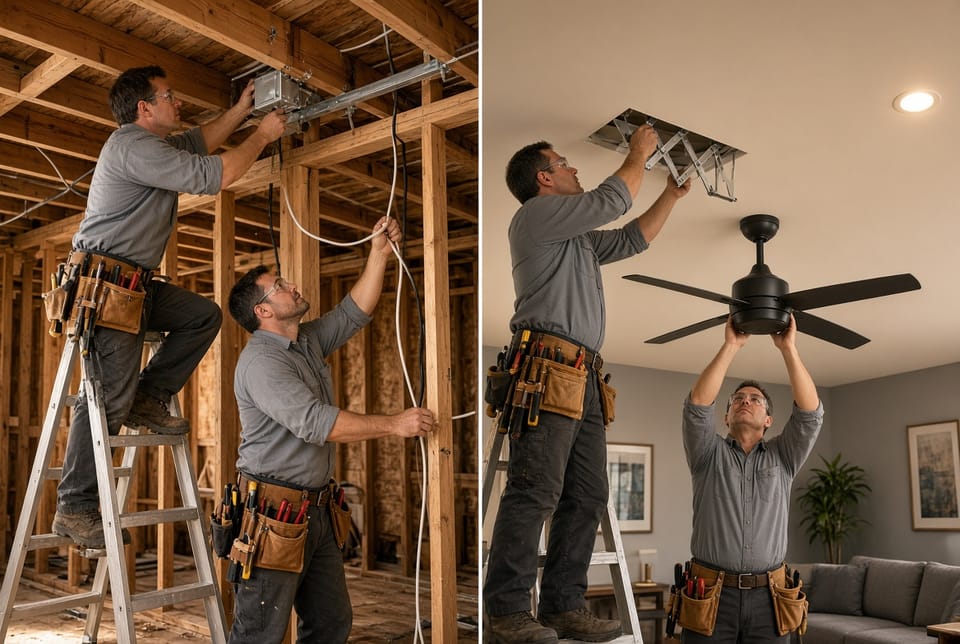
Installing a ceiling fan is one of the most effective ways to improve comfort, air circulation, and energy efficiency in any home. Yet the process is never identical from one project to the next. The difference between new construction and a retrofit installation is substantial. One occurs while the house is still open framing; the other takes place after drywall, paint, and finished ceilings are already in place. Understanding those differences protects both the structure and the people living in it.
Call Now for Expert Insulation & Sealing Service
This guide explains the wiring and mounting distinctions in clear, practical terms. It walks through each method step by step, highlights the critical safety points, and shows why professional execution remains the most reliable path. When fans are installed correctly, they operate quietly for years. When they are not, the risks include structural failure, electrical shock, overheating, and fire hazard.
Why the Installation Method Matters
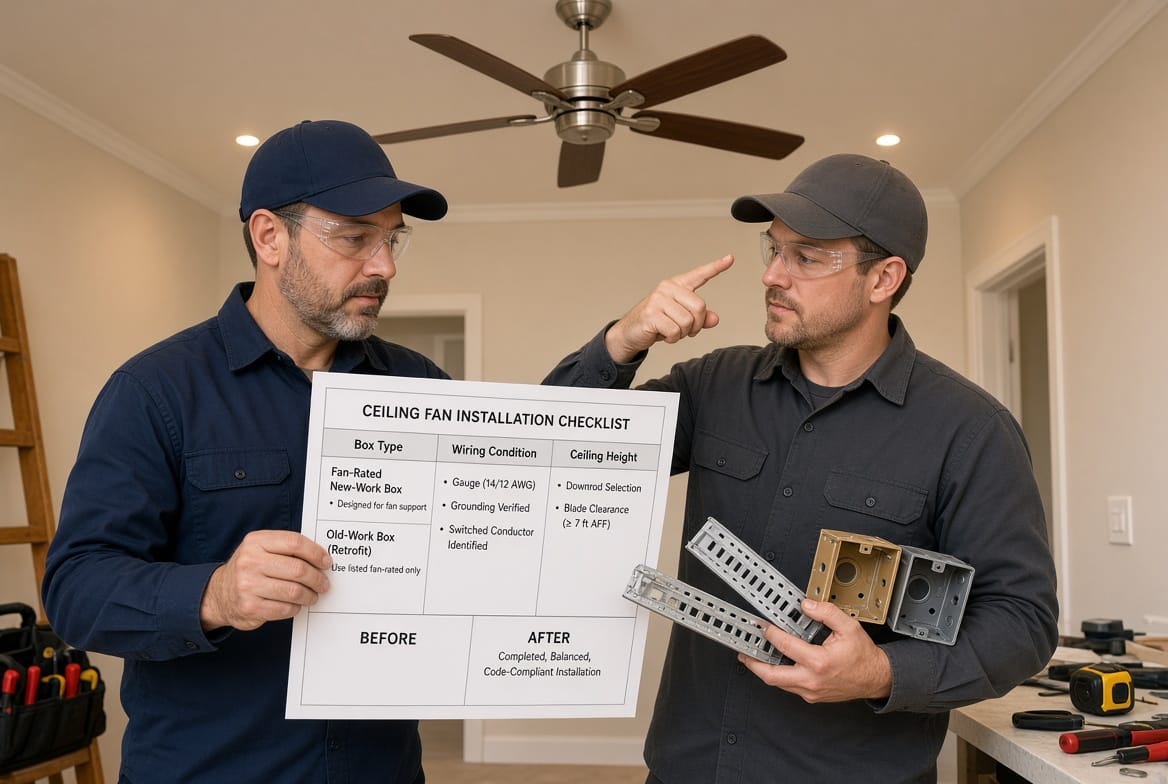
A ceiling fan is heavier and produces more vibration than a standard light fixture. Building codes therefore require a fan-rated electrical box capable of supporting the weight and motion. The box must also be securely anchored to the building structure. In new construction that anchoring is straightforward. In a retrofit it requires specialized hardware and extra care.
Homeowners often assume existing wiring is automatically suitable. That assumption is frequently incorrect. Older circuits may lack proper grounding, may be undersized, or may not include a dedicated switch. Professionals evaluate every one of those factors before a single wire is connected.
The goal is always the same: a fan that is safe, code-compliant, and balanced. Reaching that goal simply follows two different roads.
New Construction Ceiling Fan Installation
New construction offers the greatest flexibility. Walls and ceilings are open, so electricians can place wiring exactly where it is needed and attach support hardware directly to the framing.
Planning and Circuit Design
Before any cable is pulled, the electrician confirms the fan location, ceiling height, and intended control method. High ceilings usually require a downrod so the fan blades sit at the proper height for effective air movement. The circuit is planned to handle the combined load of the fan motor and any light kit. In most modern homes this is a 15- or 20-amp circuit using 14-gauge or 12-gauge NM-B cable.
Wiring Before Drywall
With joists exposed, the electrician runs cable from the switch location to the ceiling box position. The cable is stapled securely according to code and left with sufficient slack for later connections. Because there is no finished surface, there is no need to fish wire through insulation or around obstacles. Grounding conductors are bonded at every box, creating a continuous safety path.
Secure Mounting of the Fan-Rated Box
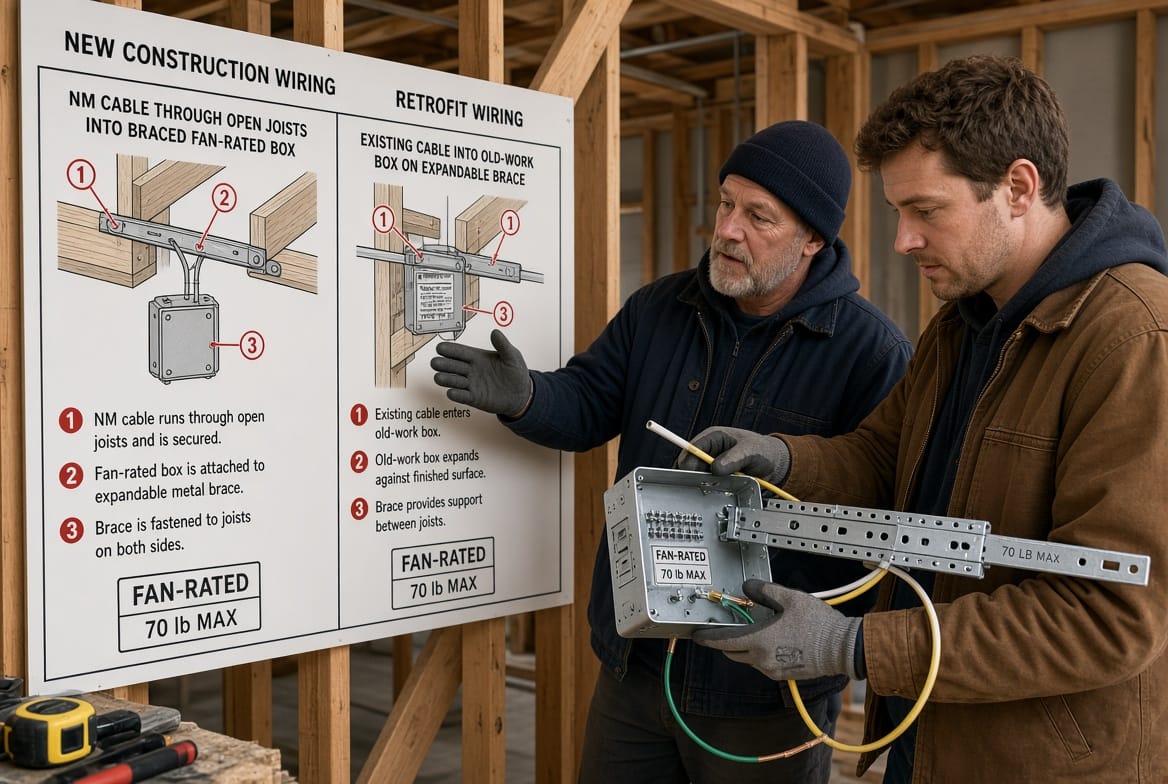
A standard plastic or thin-metal box is never acceptable. A listed fan-rated box is fastened either directly to a joist or to an adjustable metal brace that spans between joists. The brace is tightened until it cannot shift. This rigid connection prevents the fan from wobbling or pulling free over time. Once the box is in place, the drywall crew can cut a clean opening around it.
Step-by-Step New Construction Process
- Confirm final fan location and ceiling height with the builder and homeowner.
- Install an adjustable joist brace or attach the box directly to solid framing.
- Mount the listed fan-rated ceiling box and secure all fasteners.
- Pull NM-B cable from the switch and, if required, from the panel.
- Make up grounds and leave conductors ready for the fan.
- After drywall, paint, and trim are complete, install the fan canopy, motor, blades, and light kit according to manufacturer instructions.
- Test operation, balance the blades, and verify all connections are tight.
Because the structure is still accessible, every component can be inspected and adjusted before the ceiling is closed. The result is a clean, strong installation that rarely needs future modification.
Retrofit Ceiling Fan Installation
A retrofit occurs in a finished home. Drywall is already up, furniture may be in the room, and the existing electrical box was probably designed only for a lightweight light fixture. The work is therefore more constrained and requires specialized products.
Assessing Existing Conditions
The first task is to shut off power at the breaker and verify it is dead with a tester. The existing fixture is removed and the box inspected. Many older boxes are not fan-rated and cannot support the extra weight. Wiring is examined for proper gauge, grounding, and the presence of a switched hot conductor. Ceiling structure is probed to locate joists. If the existing box sits between joists with no solid backing, additional support is mandatory.
Old-Work Boxes and Support Systems
When the original box is inadequate, it is replaced with a listed old-work fan box or a pancake-style fan box if a joist is nearby. In most cases an expandable metal brace is inserted through the opening, locked against the joists, and used to carry the new box. These braces are engineered specifically for retrofit work and restore the structural integrity that new construction enjoys from the start.
Existing cable is reused only when it meets current standards. If the cable is ungrounded or undersized, new cable must be fished from the switch or panel—an operation that demands patience and the right tools.
Step-by-Step Retrofit Process
- Turn off the correct circuit and confirm zero voltage.
- Remove the old fixture and evaluate the box, wiring, and framing.
- Cut or enlarge the opening only as much as needed for the new hardware.
- Insert and lock an expandable fan brace between joists.
- Attach the listed old-work fan-rated box to the brace.
- Make wiring connections with approved connectors, ensuring a solid ground.
- Mount the fan, install the downrod if required by ceiling height, and attach blades.
- Restore power, test all functions, and check for vibration or unusual noise.
- Patch and paint the ceiling as needed so the finished look is seamless.
The extra steps exist because the building is already closed. Every action must protect the finished surfaces while still delivering the same strength and safety as a new-construction job.
Key Differences at a Glance
- Access: New construction works with open framing; retrofit works through a finished ceiling.
- Box type: New work uses boxes designed to be nailed or screwed to framing; retrofit uses old-work or brace-supported boxes.
- Wiring: New construction runs fresh cable in the most direct path; retrofit uses or extends existing cable and may require fishing.
- Time and disruption: New construction is faster and cleaner; retrofit takes longer and produces some dust and patching.
- Structural security: Both methods can be equally strong when the correct listed hardware is used.
Ceiling height influences both approaches. A fan mounted too close to the ceiling loses efficiency; a fan mounted too low becomes a safety concern. Professionals calculate the proper downrod length before any hardware is ordered.
Safety Considerations That Apply to Both Methods
Regardless of construction stage, certain rules never change. Power must be verified off. All connections must be made inside a listed box. The fan must be grounded. Blades must be balanced after installation. The supporting box must carry the weight rating printed on the fan carton.
Common risks include using a non-fan-rated box, omitting the brace in a retrofit, connecting aluminum and copper improperly, or ignoring manufacturer torque specifications on mounting screws. Each of those errors can lead to a fan that loosens over time or a circuit that overheats.
Licensed electricians carry the testers, torque tools, and code knowledge needed to avoid those outcomes. They also pull any required permits and schedule inspections, giving the homeowner documented proof that the work meets current standards.
The Value of Professional Installation
A well-installed ceiling fan lowers cooling costs, reduces hot spots, and adds a finished look to any room. The difference between a fan that quietly does its job for fifteen years and one that becomes a maintenance problem is almost always the quality of the original wiring and mounting.
New construction gives the electrician every advantage. Retrofit work demands extra skill and the right hardware. In both cases the principles remain identical: use listed materials, follow the manufacturer’s instructions, and never compromise on structural support.
Homeowners who want the peace of mind that comes with a correctly installed fan can schedule service at any stage of a project—during framing or years after the house is finished. Install fans safely in any home.
Call Now for Safe Retrofit Ceiling Fan Installation