The Angle Stop Valve: Why You Need to Know Where It Is and How to Test It
In the quiet corners of your home, a small but mighty component stands guard against unexpected water chaos. The angle stop valve – also known as a shut-off valve – is that unassuming hero tucked beneath your sinks and behind your toilets. Yet many homeowners overlook it until an emergency strikes. Knowing exactly where your angle stop valves are and how to test them annually could save you thousands in water damage, mold remediation, and insurance headaches.
Protect Your Home from Water Damage – Call Now!
At first glance, these compact valves seem insignificant. But when a pipe bursts, a faucet cracks, or a toilet supply line fails, the angle stop valve becomes your first line of defense. It allows you to instantly isolate water flow to a single fixture without shutting down your entire home’s supply. The reassuring truth is this: regular testing keeps these valves reliable and ready. In this comprehensive guide, we’ll walk you through everything you need to know – from identification to proper exercise techniques – so you can face any plumbing surprise with confidence and peace of mind.
What Exactly Is an Angle Stop Valve?
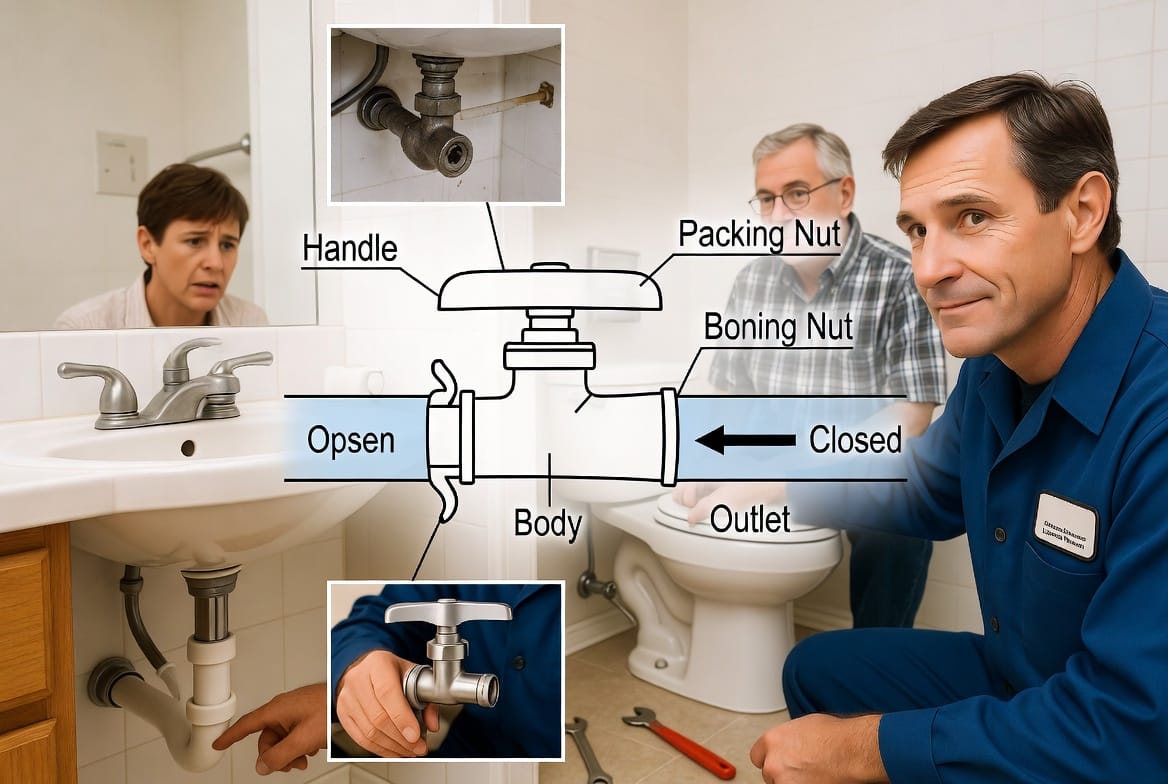
An angle stop valve is a specialized shut-off valve designed to control water flow to individual fixtures such as sinks, toilets, dishwashers, or refrigerators with ice makers. Installed at a 90-degree angle where the water supply line meets the fixture, these valves typically feature a small lever or handle that turns just a quarter turn to open or close.
Most modern homes use quarter-turn ball valves made from durable brass or stainless steel with ceramic discs inside. Older homes may still have compression-style valves with rubber washers. Both types serve the same critical purpose: stopping water instantly at the source. You’ll usually find one under every sink (hot and cold lines), behind every toilet, and sometimes near other appliances.
These valves earn their “angle stop” name from their right-angle design, which saves space in tight cabinet areas. They connect to the main water line via flexible supply hoses, making installation straightforward yet powerful in emergencies. Understanding your angle stop valve locations empowers you to act fast – no frantic searching while water floods your floors.
Why does this matter for every homeowner? In a true plumbing crisis, every second counts. A functioning angle stop valve can prevent minor leaks from becoming major disasters. Regular awareness of these valves transforms you from a worried homeowner into a prepared one.
The Hidden Risk: Why Angle Stop Valves Seize Up Over Time
Here’s the reality that catches most people off guard: angle stop valves that sit unused for months or years often seize in the open position. Mineral deposits from hard water, corrosion, and simple lack of movement cause the internal parts to stick. When you need them most – during a sudden leak or burst – they refuse to close.
Imagine this scenario: a supply line under your bathroom sink suddenly ruptures at 2 a.m. Water sprays everywhere. You race to the angle stop valve, but it won’t budge. Panic sets in as you fumble for the main water shut-off, which may be buried in a basement or crawl space. Valuable minutes pass. Damage mounts.
This isn’t rare. Plumbing professionals see it daily. Without yearly exercise, these valves lose their smooth operation. The good news? Prevention is simple, effective, and completely within your control. Annual testing keeps the internal mechanisms free, ensuring they perform flawlessly when emergencies arise.
Bold warning: Ignoring this small maintenance step can lead to extensive water damage, costly repairs, and even health risks from mold growth. Yet a few minutes of proactive care delivers years of protection and reassurance.
Why Yearly Testing Is Non-Negotiable for Home Safety
Testing your angle stop valves once a year isn’t just recommended – it’s essential maintenance that every responsible homeowner should adopt. These valves work silently behind the scenes until called into action. Without regular use, they forget how to move.
Yearly testing serves three key purposes. First, it keeps the internal components lubricated and free of buildup. Second, it lets you spot early warning signs like stiffness or drips before they become failures. Third, it builds your confidence so you can respond calmly during an actual crisis.
Think of it like exercising a muscle. The more you use it properly, the stronger and more reliable it becomes. Homeowners who test annually report far fewer emergency plumbing calls and enjoy greater peace of mind knowing their shut-off system is battle-ready.
This simple habit also protects your investment. Water damage claims average thousands of dollars, and many insurance policies require evidence of regular maintenance. By documenting your yearly angle stop valve checks, you strengthen your coverage and safeguard your home’s value.
The reassuring part: You don’t need special tools or plumbing expertise. With basic guidance and a gentle touch, anyone can master this task and keep their family safe.
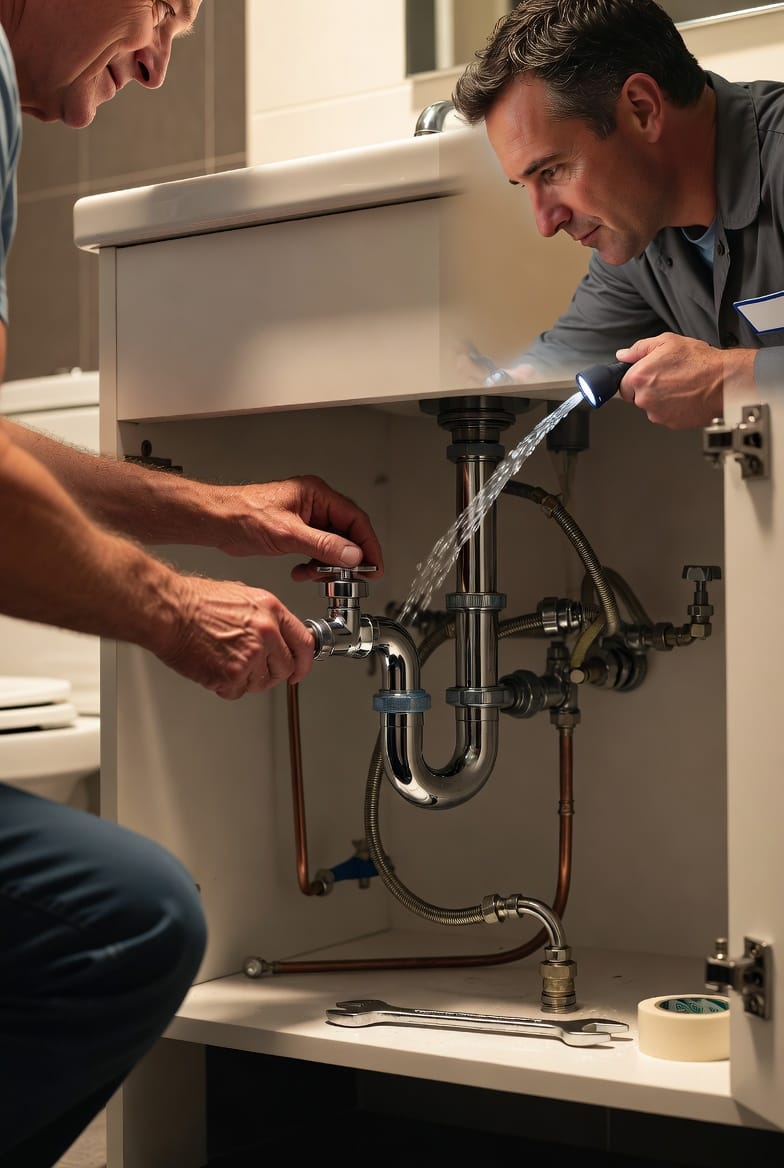
Step-by-Step: How to Locate and Test Your Angle Stop Valves
Ready to take control? Follow these clear, easy-to-master steps. Grab a flashlight, a towel for any minor drips, and your phone to record dates for future reference.
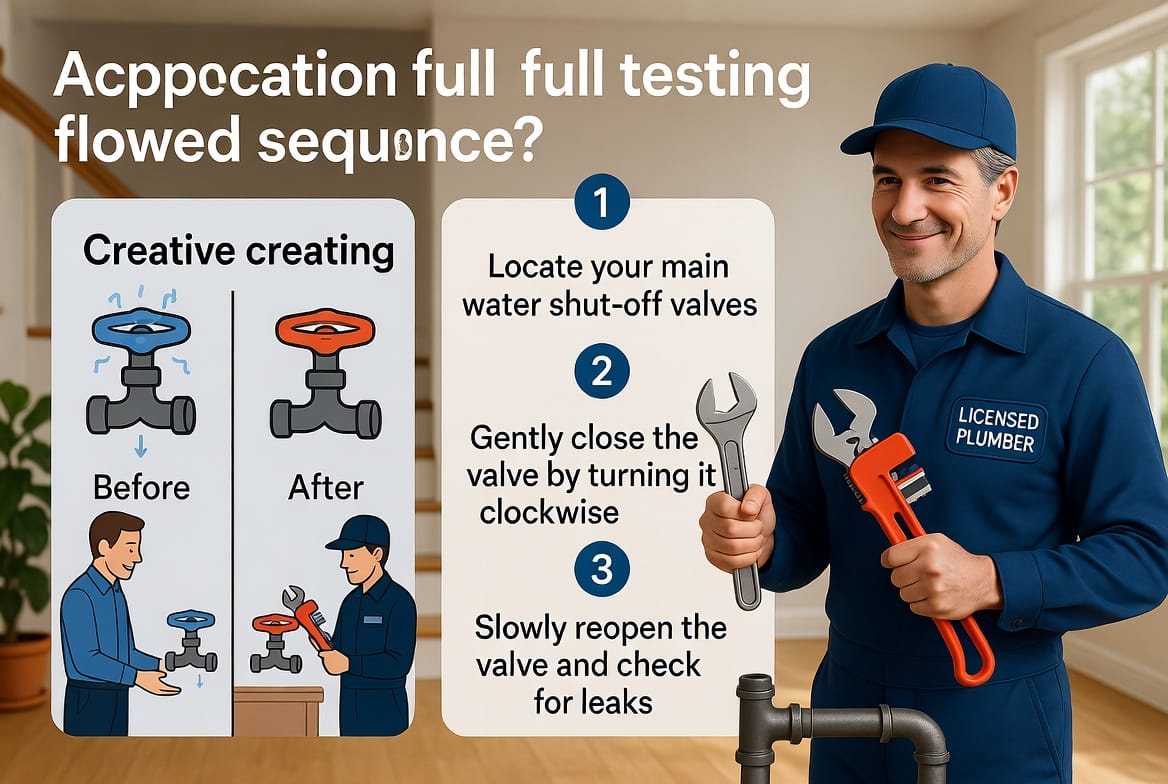
Step 1: Locate all angle stop valves in your home.
- Under bathroom and kitchen sinks: Look inside the cabinet for small valves connected to hot and cold supply lines.
- Behind toilets: Check the lower left or right side near the floor.
- Near other fixtures: Inspect dishwashers, washing machines, or refrigerator lines if applicable.
Step 2: Prepare the area. Clear clutter for easy access. Place a towel underneath to catch any drips.
Step 3: Exercise the valve gently. Turn the handle clockwise (right) until it stops – usually just a quarter turn on modern valves. You should feel smooth resistance, not grinding. Never force it.
Step 4: Verify shut-off success. Run the fixture. No water should flow. If water continues, the valve needs professional attention.
Step 5: Reopen the valve. Turn the handle counterclockwise (left) to restore full flow. Check for any new leaks at connections.
Step 6: Repeat for every valve. Test hot and cold lines separately where applicable.
Pro tip: Mark your calendar each year. Many homeowners combine this with spring or fall cleaning routines. If a valve feels stiff, apply a small amount of penetrating oil (designed for plumbing) and work it gently back and forth. Never use excessive force.
This process takes less than 15 minutes per fixture yet delivers priceless protection. Make it a family activity – teaching kids about home maintenance builds lifelong skills and confidence.
What to Do If Your Valve Is Stuck or Leaking
Sometimes testing reveals issues. A stuck angle stop valve or one that drips after closing signals immediate action. Do not ignore these warning signs.
If the valve resists movement even after gentle lubrication, stop and call a professional. Forcing it risks breaking the valve or supply line, worsening the problem. Similarly, any persistent leak around the valve stem or connections requires expert replacement.
The authoritative advice here is clear: when in doubt, call a licensed plumber. Attempting DIY repairs on faulty valves often leads to bigger headaches. Professional replacement uses modern, high-quality valves designed for longevity and easy future operation.
When to Call a Professional Plumber for Valve Replacement
While testing is a homeowner task, valve replacement demands experience and the right parts. Call immediately if you notice:
- Complete inability to close the valve
- Visible corrosion or cracking
- Water seepage even when closed
- Older compression-style valves in a home over 20 years old
Our team stands ready to help. Fast, reliable valve replacement prevents emergencies before they start. Call (844) 578-2593 today to schedule your inspection and replacement service. We bring peace of mind with every job.
Long-Term Benefits of Regular Angle Stop Valve Maintenance
Beyond emergency readiness, yearly testing offers lasting advantages. You reduce water waste, lower utility bills, and minimize stress during unexpected events. Homes with maintained shut-off valves experience fewer insurance claims and faster recovery when issues do arise.
This practice also extends the life of your plumbing system overall. Early detection of problems prevents cascading failures. Most importantly, it gives you control – the empowering feeling that comes from understanding and protecting your home.
Take Action Today – Test Before You Need To
Your angle stop valves are silent guardians of your home’s safety. By knowing their locations and testing them annually, you transform potential disasters into manageable moments. The process is quick, the rewards are immense, and the protection is priceless.
Test your shut-off valves before you need them. Make it a yearly habit starting today. And if any valve shows signs of trouble, don’t hesitate – professional help is just a phone call away.
Our licensed plumbers deliver fast, dependable service you can trust. Protect what matters most – your home, your family, and your peace of mind.
Get Your Angle Stop Valves Checked & Replaced – Call Today