The Skylight Integration: Flashing, Curb, and Sealant Details That Prevent Leaks Around Roof Penetrations
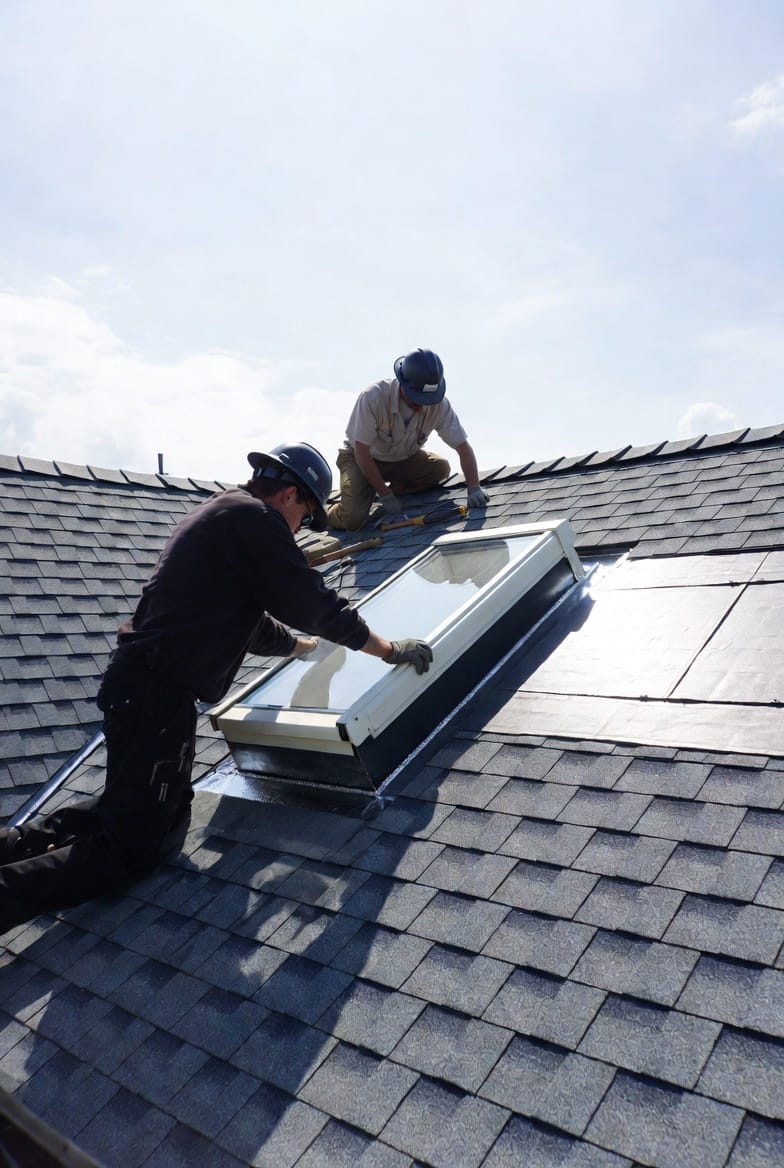
Skylights bring natural light into homes, enhancing ambiance and energy efficiency. However, improper installation can lead to persistent leaks, turning a dream feature into a nightmare. As roofing experts, we're here to guide you through the intricacies of skylight integration, focusing on flashing, curb, and sealant details that safeguard against water intrusion around roof penetrations. With our authoritative insights, you'll understand how to avoid common pitfalls and ensure a leak-free setup.
Trustworthy Skylight Integration – Call for Professional Help
Understanding Roof Penetrations and Leak Risks
Roof penetrations, such as those for skylights, vents, or chimneys, are prime spots for leaks. Water naturally seeks the path of least resistance, and any gap or improper seal can allow it to seep in, causing structural damage, mold growth, and costly repairs. Skylights, in particular, pose unique challenges due to their size and exposure to the elements.
Why do leaks occur? Often, it's due to rushed installations or overlooked details. But rest assured, with proper techniques, these risks are entirely preventable. Let's delve into the anatomy of a skylight installation, starting with the foundational elements that direct water away effectively.
- Common Penetration Points: Skylights cut through roofing materials, creating vulnerabilities at edges and joints.
- Environmental Factors: Heavy rain, snow accumulation, or high winds exacerbate issues if seals aren't robust.
- Long-Term Impacts: Untreated leaks can compromise insulation, leading to higher energy bills and interior damage.
By prioritizing quality materials and expert methods, homeowners can enjoy skylights without worry.
The Role of the Curb in Skylight Stability
The curb acts as a raised frame that elevates the skylight above the roof plane, allowing for better water runoff. Typically constructed from wood or metal, it's the first line of defense against leaks. A well-built curb integrates seamlessly with the roof's slope, ensuring water flows around rather than pooling.
In professional installations, the curb is flashed and sealed meticulously. This raised structure not only supports the skylight glass but also provides a mounting point for flashing layers. Without a sturdy curb, even the best sealants fail under pressure.
Consider this: A curb that's too low might allow ice dams to form in winter, pushing water upward. Our approach emphasizes custom curbs tailored to your roof's pitch, guaranteeing durability.
Building a Reliable Curb
- Material Selection: Opt for pressure-treated lumber or corrosion-resistant metal to withstand weather.
- Height Considerations: Aim for 4-6 inches above the roof to facilitate proper flashing overlap.
- Integration Tips: Secure the curb to roof rafters for structural integrity, preventing shifts over time.
With these steps, the curb becomes a fortress against infiltration.
Mastering Step Flashing for Water Diversion
Step flashing is essential for directing water around the skylight's sides. These L-shaped metal pieces interweave with shingle courses, creating a stepped barrier that guides rainwater downward and outward.
Installed in overlapping segments, step flashing starts at the bottom of the skylight and works upward. Each piece tucks under the shingles above and over those below, forming a continuous path. This method prevents water from sneaking under the roofing material—a common leak culprit.
Improper step flashing, such as gaps or misalignments, can lead to capillary action, where water wicks upward. But when done right, it's a foolproof system.
Step-by-Step Flashing Installation
- Prepare the Area: Remove old shingles around the curb and apply underlayment.
- Base Layer: Install the first flashing piece at the downhill side, nailing it securely.
- Weaving with Shingles: Alternate flashing and shingles, ensuring at least 2-inch overlaps.
- Upper Edges: Seal joints with high-quality sealant for added protection.
This layered approach mimics nature's own water-shedding designs, like overlapping leaves on a tree.
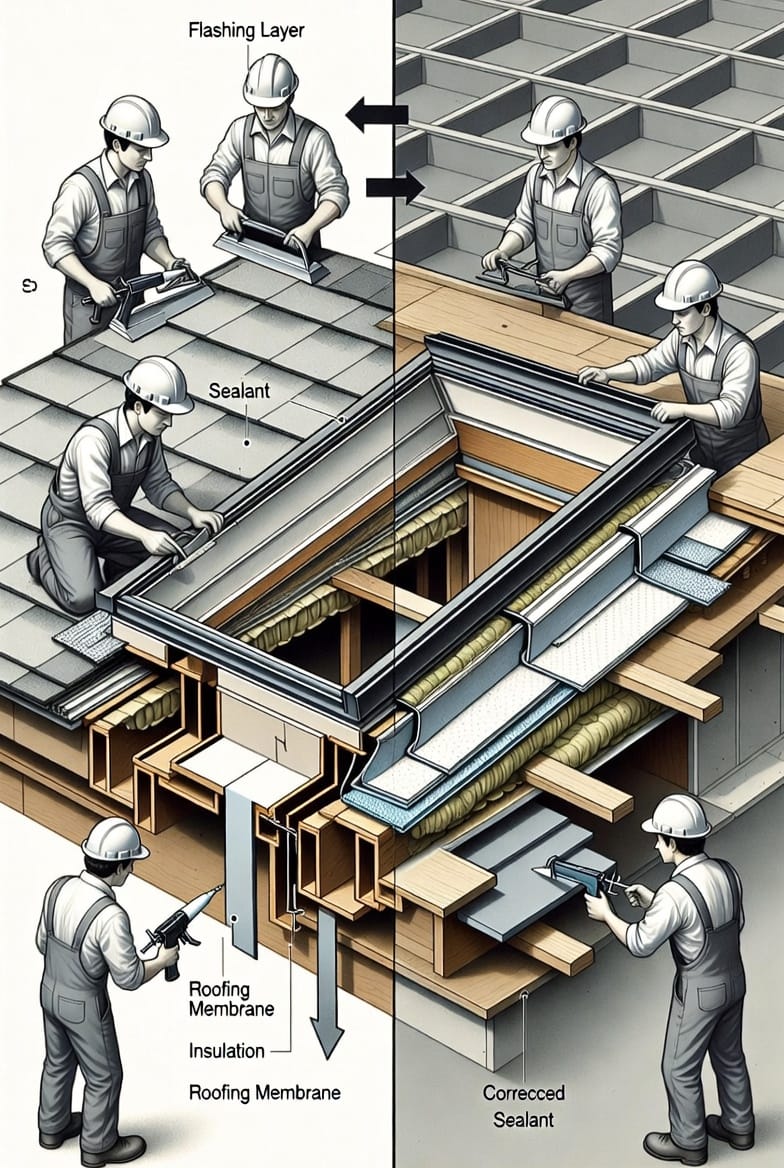
Continuous Head Flashing: The Top Barrier
At the uphill side of the skylight, continuous head flashing provides a solid, unbroken shield. This single piece of metal extends across the top of the curb, diverting water over the sides and into the step flashing below.
Unlike segmented flashing, the head piece must be custom-bent to fit the roof's contour. It's installed under the shingles above the skylight, with the lower edge overlapping the curb's top. This creates a seamless transition, crucial for high-flow areas during storms.
Neglecting head flashing often results in leaks at the peak, where water pressure is greatest. Our expertise ensures this component is prioritized for maximum protection.
Enhancing Head Flashing Effectiveness
- Material Choices: Use galvanized steel or copper for longevity and rust resistance.
- Slope Adaptation: Bend flashing to match roof pitch, avoiding flat spots that trap debris.
- Integration with Sealants: Apply sealant along edges to bond flashing to the curb firmly.
These details make the difference between a temporary fix and a lasting solution.
The Critical Importance of Sealants
Sealants are the unsung heroes of skylight integration, filling microscopic gaps and providing flexibility against expansion and contraction. Silicone or polyurethane-based products are ideal, offering UV resistance and adhesion to various surfaces.
Applied around the curb, flashing edges, and glass perimeter, sealants create a watertight bond. However, they must be compatible with roofing materials to avoid degradation.
Common errors include using cheap caulk that cracks over time or skipping reapplication during maintenance. Rest assured, professional-grade sealants endure for years.
Best Practices for Sealant Application
- Surface Prep: Clean areas thoroughly to remove dirt and old residue.
- Even Distribution: Use a caulk gun for uniform beads, smoothing with a tool for neatness.
- Curing Time: Allow full cure before exposure to rain, typically 24-48 hours.
- Inspection Routine: Check seals annually to catch wear early.
With vigilant application, sealants complement flashing for unbeatable defense.
Integrating with Shingle Courses for Optimal Flow
The true magic happens when all elements integrate with shingle courses. Shingles must overlap flashing correctly, directing water like a series of gutters. Starting from the bottom, each course builds upon the last, ensuring no undercuts.
Misaligned shingles can channel water inward, but precise cutting and nailing prevent this. This integration not only prevents leaks but also maintains aesthetic appeal.
Shingle Integration Techniques
- Bottom-Up Approach: Install lower shingles first, tucking under flashing.
- Overlap Standards: Ensure 5-7 inches of overlap for redundancy.
- Edge Sealing: Seal shingle edges near the skylight for extra security.
- Roof Pitch Adjustments: Steeper roofs require tighter overlaps to handle faster water flow.
This methodical process guarantees water flows around, not under, the skylight.
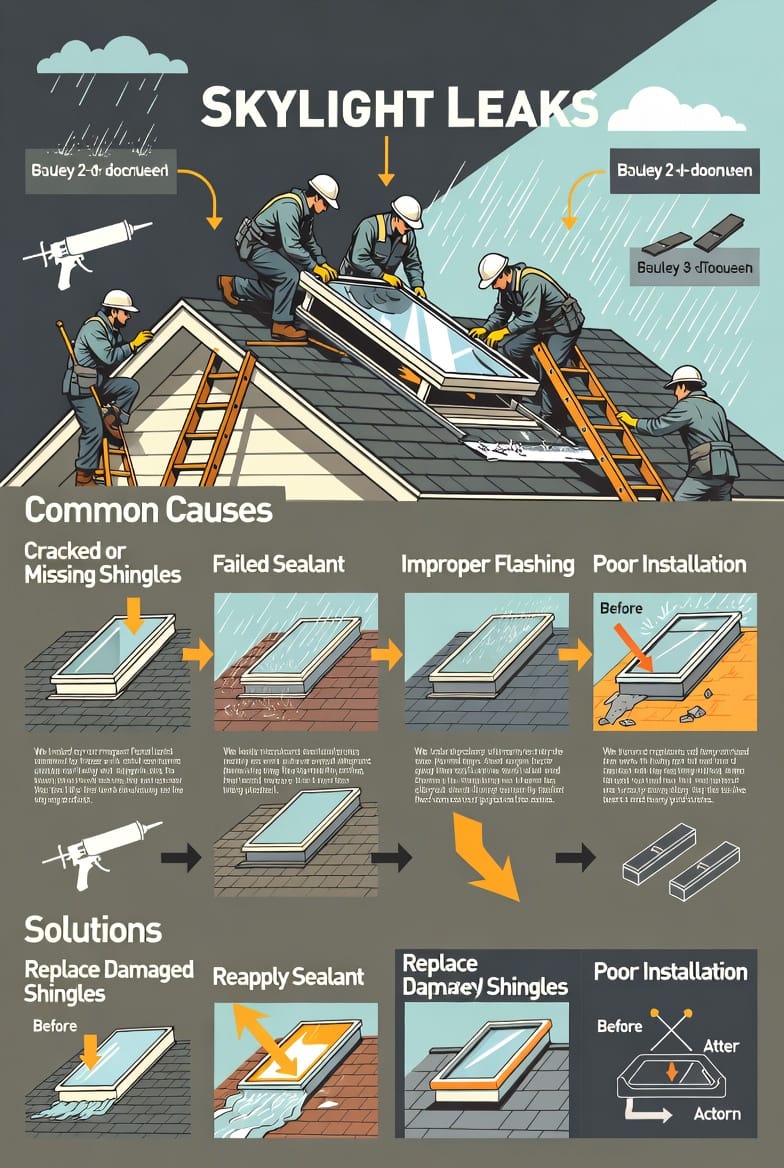
Common Leak Causes and Prevention Strategies
Even with solid basics, leaks can arise from overlooked issues. Let's explore frequent problems and how to mitigate them.
- Failed Sealant: Aging or incompatible products crack; prevent by using premium, flexible sealants and scheduling reapplications.
- Improper Step Flashing: Gaps allow entry; ensure overlaps and secure fastening during install.
- Cracked Glass: Impacts or thermal stress; choose tempered glass and protect during storms.
- Debris Buildup: Leaves clog drains; regular cleaning maintains clear paths.
- Poor Curb Design: Insufficient height pools water; customize to roof specs.
By addressing these proactively, leaks become a non-issue.
Maintenance Tips for Long-Term Leak Prevention
Ongoing care extends your skylight's life. Inspect flashing and seals seasonally, especially after severe weather. Clean glass and curbs to prevent algae or dirt accumulation.
Professional inspections catch subtle issues early. Our team offers comprehensive checks, ensuring peace of mind.
Essential Maintenance Checklist
- Visual Scans: Look for discoloration or wet spots inside.
- Seal Testing: Probe gently for flexibility; replace if brittle.
- Flashing Integrity: Check for rust or detachment.
- Shingle Condition: Replace damaged ones promptly.
These habits safeguard your investment.
Materials and Tools for Professional Results
Quality matters. Recommend self-adhering underlayment for extra barriers, and tools like flashing benders for precision.
- Flashing Metals: Aluminum for affordability, copper for premium durability.
- Sealant Types: Silicone for glass, butyl for metal.
- Installation Tools: Hammers, seal guns, and safety gear.
Equipped properly, installations thrive.
Case Studies: Real-World Successes
In one project, a homeowner faced chronic leaks from faulty flashing. Our team replaced it with integrated step and head pieces, resolving issues permanently.
Another involved a curb rebuild, transforming a leaky attic into a bright space. These stories highlight expertise's impact.
Environmental and Energy Benefits
Beyond leak prevention, proper skylights reduce lighting needs, lowering energy use. They also boost home value, appealing to eco-conscious buyers.
Integrate with solar options for added sustainability.
Choosing the Right Professionals
DIY attempts often falter; trust certified roofers. Look for experience in penetrations and warranties.
Our services ensure compliance with codes, delivering flawless results.
In conclusion, mastering skylight integration through curb, flashing, and sealant details prevents leaks around roof penetrations. This knowledge empowers you to make informed choices.
Protect Your Roof Penetrations – Get a Free Consultation Now