The Roof Deck Preparation: Ensuring a Solid Base for New Shingles
When it comes to installing new shingles, the roof deck is the critical foundation that everything else depends on. Proper roof deck preparation is not just a preliminary step — it is the single most important factor in determining whether your new roof will deliver decades of reliable protection or fail prematurely. At its core, roof deck preparation involves systematically removing old fasteners, repairing damaged sheathing, installing drip edge, and applying high-quality underlayment before any shingles go down.
Prepare Your Roof Right – Call for Professional Help Today
Skipping or rushing this phase is one of the most common — and costly — mistakes homeowners encounter. A poorly prepared deck invites water intrusion, structural weakness, shingle buckling, and even complete roof failure long before the manufacturer’s warranty expires. By contrast, a meticulously prepared roof deck creates a stable, weather-resistant platform that maximizes the performance and longevity of your new shingles.
Roof deck preparation ensures every layer above it performs exactly as engineered. Whether you live in a region with heavy rain, snow, or high winds, the time invested in the deck pays dividends in peace of mind and lower long-term repair costs. In this comprehensive guide, we walk through every essential stage of roof deck preparation, explain why each step matters, and share proven techniques that deliver lasting results.
Why Roof Deck Preparation Is the Foundation of Every Successful Roof
The roof deck — typically made of plywood or oriented strand board (OSB) sheathing — serves as the structural platform that supports the entire roofing system. It must be flat, solid, and completely free of defects before underlayment and shingles are installed. Any compromise in the deck transfers directly to the layers above, creating vulnerabilities that weather will eventually exploit.
Poor deck preparation is a leading cause of premature shingle failure, leaks at the eaves, and voided manufacturer warranties. When old fasteners protrude, damaged sheathing flexes, or water can seep beneath the drip edge, the consequences compound over time. Moisture trapped beneath shingles accelerates rot, mold growth, and deck deterioration — issues that are expensive to correct once the roof is finished.
Conversely, thorough roof deck preparation delivers measurable benefits: enhanced wind resistance, superior water shedding, reduced noise from rain and hail, and extended roof lifespan. Homeowners who prioritize this stage report fewer callbacks, smoother installations, and greater confidence in their investment. The process is straightforward when performed correctly, and the results are both visible and enduring.
Understanding Your Roof Deck: What It Is and Why It Matters
Before any work begins, it is essential to understand exactly what the roof deck is and the role it plays. The deck consists of the sheathing panels nailed or screwed to the roof trusses or rafters. These panels distribute weight, provide a nailing surface for underlayment and shingles, and create a continuous barrier against the elements.
Over years of service, the original deck can suffer from protruding nails, water damage, rot, delamination, or insect infestation. Even minor imperfections — a single loose panel or overlooked fastener — can create points of failure once new materials are added. That is why roof deck preparation begins with a complete and honest inspection rather than assumptions.
A properly prepared deck eliminates flexing, ensures uniform thickness, and creates clean, straight edges for drip edge and underlayment to bond perfectly. This attention to detail is what separates a roof that merely looks new from one that truly performs like new for twenty, thirty, or even fifty years depending on the shingle system chosen.
Step-by-Step: Removing Old Fasteners and Clearing the Deck
The first critical task in roof deck preparation is the complete removal of all old fasteners. Every nail, screw, staple, and scrap of previous underlayment must come out. Protruding fasteners are a primary cause of shingle dimpling, punctures in new underlayment, and uneven surfaces that accelerate wear.
Professional roofers use pry bars, claw hammers, and magnetic sweepers to extract every remnant systematically. They work methodically across the entire deck, section by section, ensuring nothing is overlooked. Any fastener left behind will telegraph through the new layers, creating visible bumps or, worse, weak points where water can penetrate.
After fastener removal, the deck is swept clean of all debris, old felt paper, and loose particles. This clean-slate approach prevents contamination that could compromise adhesion of the new underlayment. The result is a smooth, debris-free surface ready for inspection and repair.
Key risks if this step is skipped:
- Shingle failure due to pressure points
- Underlayment tears during installation
- Uneven roof appearance that worsens over time
- Warranty denial from manufacturers who require a clean deck
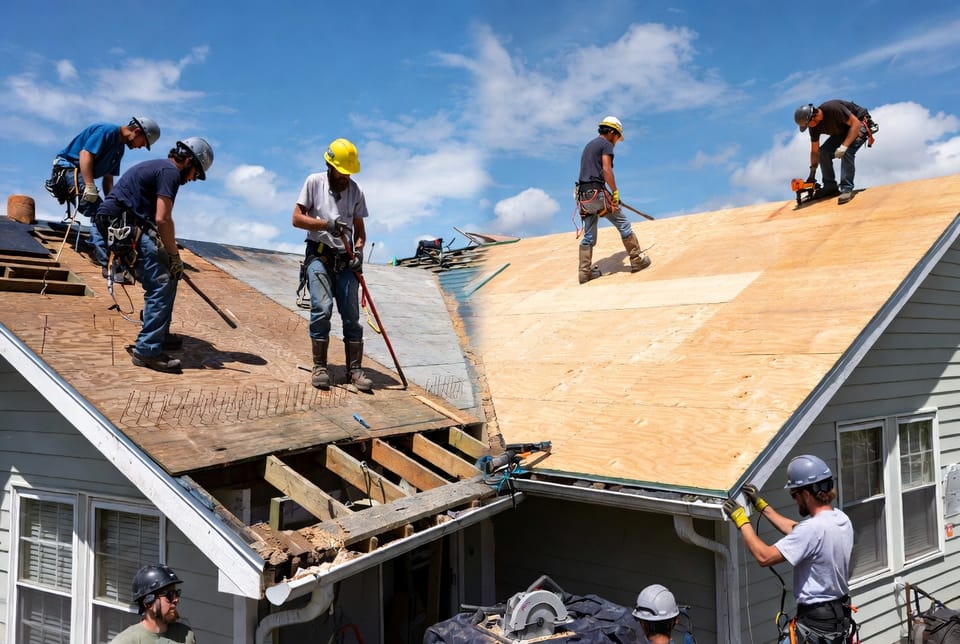
Repairing or Replacing Damaged Sheathing
Once the deck is cleared, every panel must be inspected for damage. Rotted sections, delaminated edges, soft spots, and cracked panels must be cut out and replaced with new, code-compliant sheathing of the same thickness.
This is where true craftsmanship shines. Roofers measure precisely, cut replacement panels to fit snugly, and secure them with the manufacturer-recommended fastener pattern. Proper nailing schedules — typically 6 inches on center at edges and 12 inches in the field — ensure the new sheathing becomes an integral part of the structure rather than a patchwork repair.
Before-and-after documentation at this stage provides homeowners with visual proof of the transformation. A deck that once flexed and creaked underfoot becomes rock-solid and perfectly flat, ready to support the weight of the entire roofing system without movement.
Replacing damaged sheathing is not optional — it is essential for structural integrity and long-term performance. Homeowners who invest in this repair avoid the far greater expense of future deck replacement after the new roof is installed.
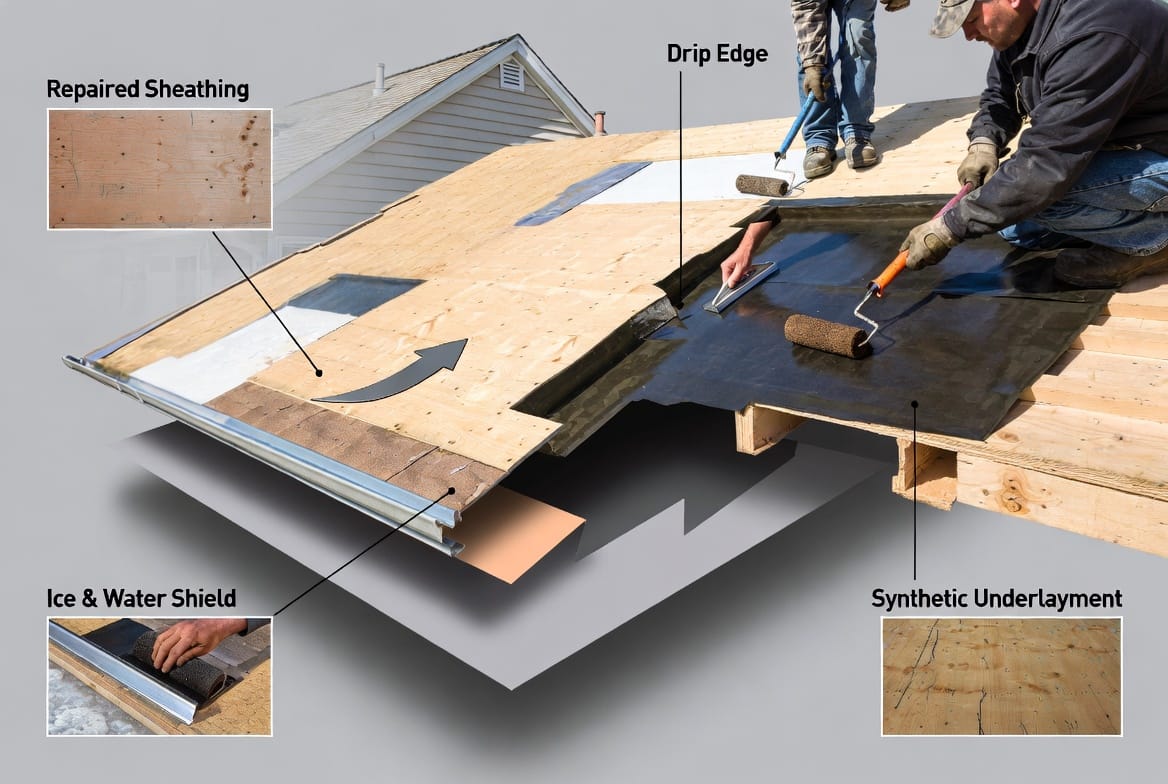
Installing Drip Edge: Protecting the Most Vulnerable Areas
With the deck repaired and level, drip edge installation is the next vital layer of defense. This L-shaped metal flashing is applied along all eaves and rakes to direct water away from the fascia and deck edges.
The drip edge must overlap seams by at least two inches and be fastened securely every 10 to 12 inches. Proper placement ensures water cannot wick back under the underlayment or shingles — one of the most common sources of eave rot and fascia damage.
Installing drip edge before underlayment creates a continuous water-shedding plane from the very first layer. This sequence is non-negotiable for preventing leaks at the most exposed parts of the roof.
Applying High-Quality Underlayment and Ice Shield
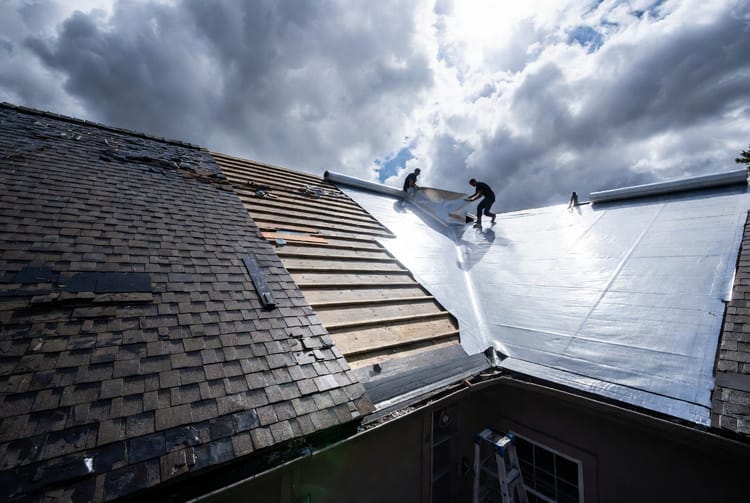
The final preparatory step is the installation of underlayment, including ice and water shield in vulnerable areas such as eaves, valleys, and around penetrations. Modern synthetic underlayments provide superior slip resistance, UV protection during installation, and exceptional waterproofing performance.
Ice and water shield is self-adhering and creates a watertight seal in zones where ice dams or wind-driven rain are concerns. It is applied first in critical areas, followed by standard underlayment that overlaps according to manufacturer specifications.
Every roll is rolled out smoothly, fastened securely, and sealed at all seams. The result is a secondary waterproof barrier that protects the deck even if shingles are damaged by hail or high winds.
Benefits of proper underlayment application:
- Superior protection against wind-driven rain
- Reduced risk of ice dam leaks
- Enhanced shingle adhesion and wind uplift resistance
- Extended overall roof system lifespan
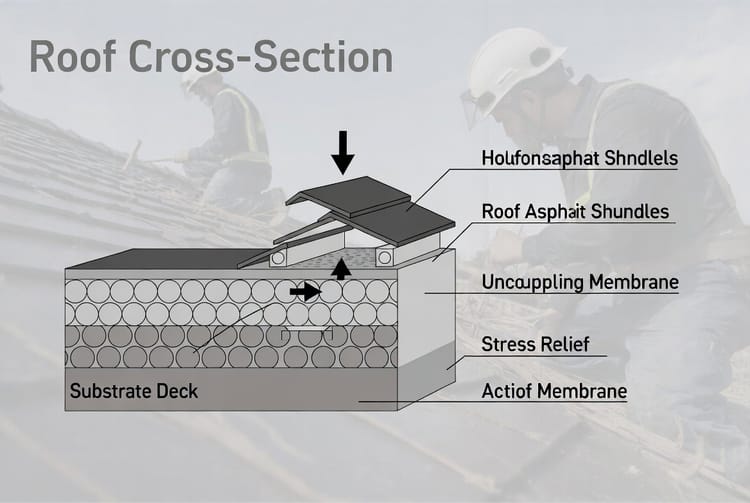
Visual Guide to Proper Deck Preparation Layers
Common Pitfalls to Avoid During Roof Deck Preparation
Even experienced DIYers can make costly errors. Rushing the inspection, using incorrect fastener spacing, installing drip edge after underlayment, or skipping ice shield in cold climates are frequent mistakes that lead to callbacks and repairs.
Another pitfall is failing to account for deck thickness variations. All replacement panels must match the existing thickness exactly; otherwise, the roof surface will have visible dips or high spots once shingles are installed.
Proper roof deck preparation demands patience, the right tools, and strict adherence to industry standards. Cutting corners here undermines every subsequent layer.
The Long-Term Advantages of Investing in Quality Preparation
A meticulously prepared roof deck translates into fewer repairs, lower insurance premiums, and higher home resale value. Homeowners enjoy quieter interiors, reduced energy costs from better attic ventilation compatibility, and the confidence that their roof is built to last.
The preparation phase also ensures full warranty coverage from shingle manufacturers, who universally require a sound deck as a condition of their multi-decade guarantees.
When Professional Expertise Makes All the Difference
While some aspects of roof deck preparation may appear straightforward, the cumulative knowledge required to execute every step flawlessly is substantial. Professional roofing teams bring calibrated tools, years of experience identifying hidden damage, and the ability to work safely at heights.
They also carry the proper insurance and follow local building codes — details that protect you as the homeowner.
A quality roof starts with quality preparation. If you are planning a new roof or replacement, do not leave the foundation to chance. Our experienced team will inspect, prepare, and deliver a roof deck that stands strong for decades to come.
Ensure a Strong Foundation for Your New Shingles – Call Now