The Kitchen Faucet Aerator: Cleaning or Replacing for Better Flow

In every kitchen, the faucet aerator plays a quiet but essential role in delivering a smooth, efficient water stream. Over time, however, mineral buildup, debris, and hard water can turn this small component into a source of frustration. Fortunately, cleaning or replacing a kitchen faucet aerator is one of the simplest yet most effective plumbing fixes you can perform. This straightforward maintenance task can dramatically improve water pressure, reduce splashing, and help conserve water—all without calling in major repairs.
Restore Your Faucet Flow Today – Call Now!
At our home services team, we’ve helped countless homeowners restore their kitchen faucets to peak performance. In this comprehensive guide, we’ll walk you through everything you need to know about aerators, from their function to step-by-step cleaning instructions and when it’s time for a replacement. By the end, you’ll feel confident tackling this issue yourself or knowing exactly when to seek professional assistance.
What Is a Kitchen Faucet Aerator and Why Does It Matter?
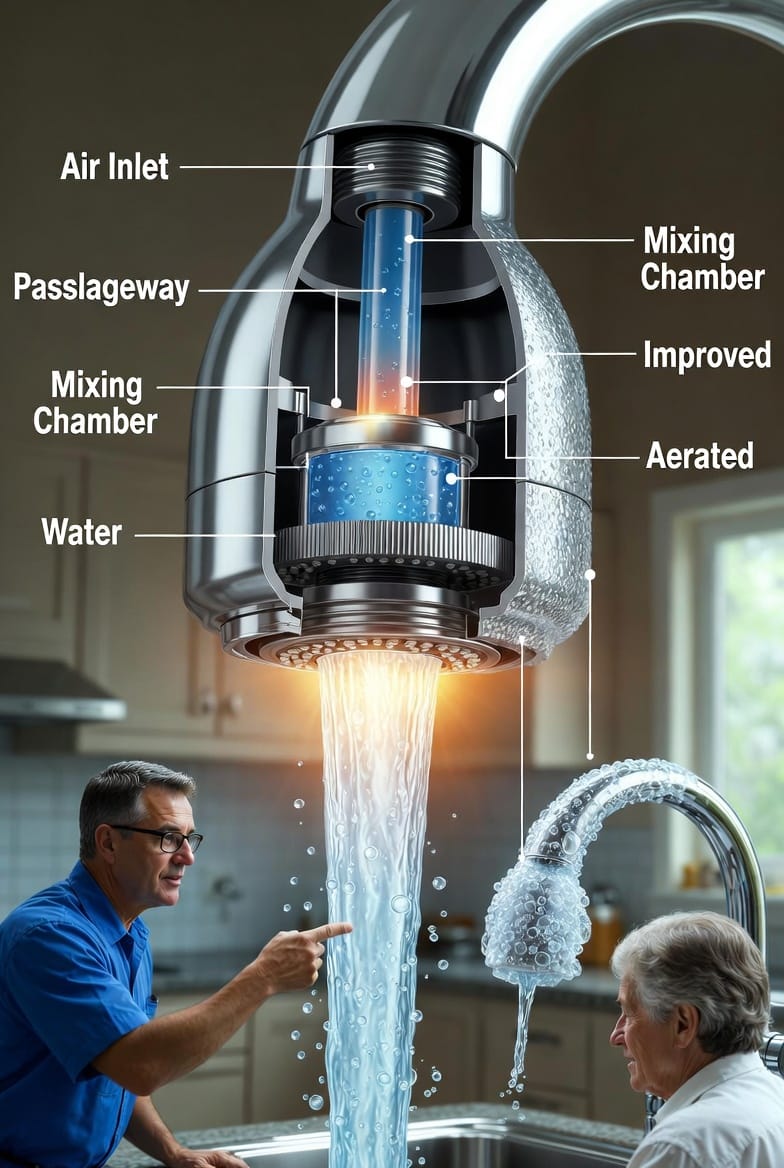
A faucet aerator is a small screen-like device that screws onto the end of your kitchen faucet spout. It mixes air into the water stream, creating a softer, more controlled flow. This simple addition offers several key benefits:
- Reduces splashing by breaking up the solid water stream into a gentle, aerated spray.
- Conserves water without sacrificing performance—many aerators can cut usage by up to 30-50%.
- Improves perceived water pressure by adding air, making the flow feel fuller and more efficient.
- Filters out larger debris before it reaches your sink.
When functioning properly, an aerator ensures consistent performance for everyday tasks like washing dishes, filling pots, or rinsing produce. However, neglect can lead to noticeable problems that disrupt your kitchen routine.
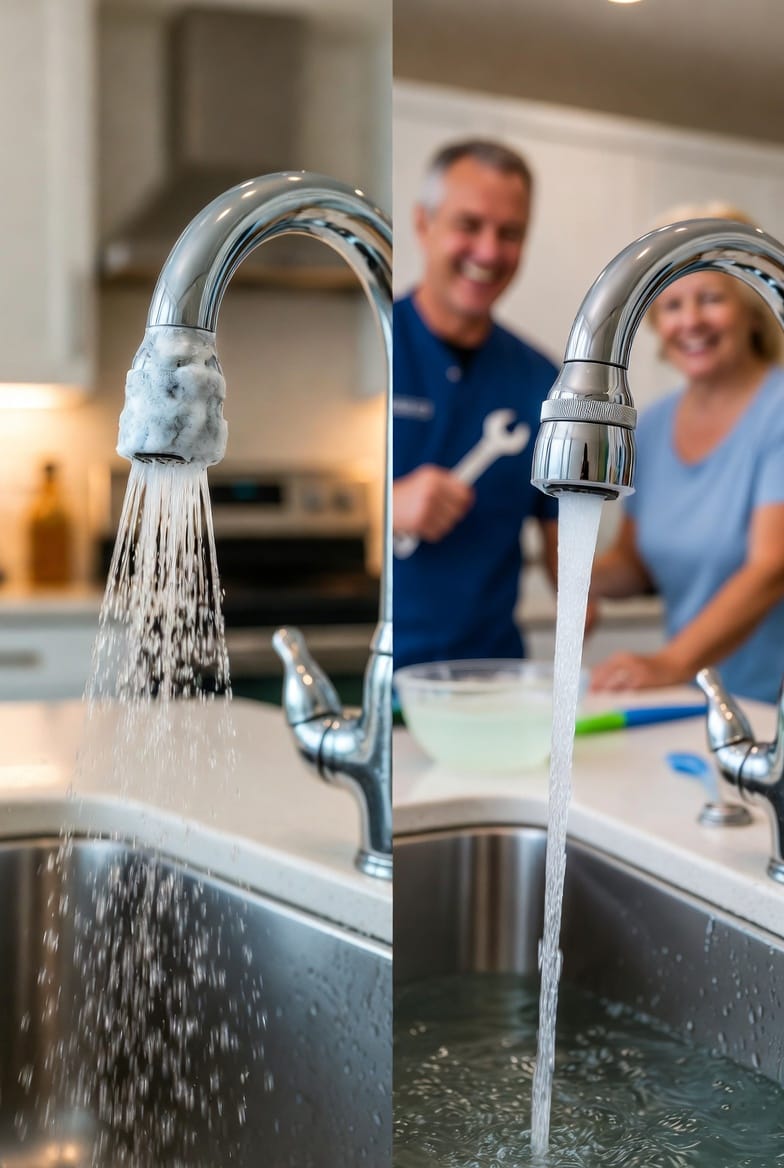
Common Signs Your Faucet Aerator Needs Attention
Don’t ignore these warning signs that indicate it’s time to inspect your aerator:
- Low water flow despite fully open valves
- Uneven or sputtering spray pattern
- Visible mineral deposits or white crusty buildup around the faucet tip
- Increased splashing even at low pressure
- Strange noises like hissing or whistling when water runs
These issues often stem from hard water minerals, sediment, or lime scale accumulating inside the aerator’s small openings. Addressing them promptly prevents further complications and extends the life of your entire faucet system.
How a Faucet Aerator Works: The Science Behind Better Flow
The magic happens through thousands of tiny holes that introduce air into the water. This aeration process not only saves water but also creates a more pleasant user experience. Without proper maintenance, those holes become clogged, restricting both water and air flow.
Regular cleaning keeps these pathways clear, ensuring reliable performance for years to come.
Tools and Materials You’ll Need for Cleaning
Before starting, gather these common household items:
- Adjustable wrench or pliers (with protective cloth to avoid scratches)
- White vinegar or a mild descaling solution
- Soft-bristled brush or old toothbrush
- Small towel or rag
- Optional: New aerator if replacement is needed
Safety note: Always turn off the water supply before disassembling any faucet parts.
Step-by-Step Guide to Cleaning Your Kitchen Faucet Aerator
Follow these detailed steps for a thorough cleaning:
- Prepare the area — Place a towel in the sink to catch any small parts. Turn off the water supply under the sink.
- Unscrew the aerator — Use your wrench or pliers (wrapped in cloth) to gently loosen the aerator counterclockwise. It should come off easily in most cases.
- Disassemble if possible — Many aerators have multiple pieces. Carefully separate the screens, washers, and housing.
- Soak in vinegar — Submerge the parts in a bowl of undiluted white vinegar for 15-30 minutes (or longer for heavy buildup). The acetic acid naturally dissolves mineral deposits.
- Scrub gently — Use a soft brush to remove remaining debris from each hole and screen. Avoid harsh abrasives that could damage the finish.
- Rinse thoroughly — Run clean water through all components to flush out loosened particles.
- Reassemble and reinstall — Put everything back together in the correct order and screw the aerator back onto the faucet hand-tight, then give it a final snug with the tool.
- Test the flow — Turn the water back on and check for improved pressure and even spray.
This entire process typically takes less than 30 minutes but delivers immediate, satisfying results.
When to Replace Instead of Clean
Sometimes cleaning isn’t enough. Consider replacing your aerator if:
- The screen is damaged or corroded beyond repair
- Flow remains poor after thorough cleaning
- You want to upgrade to a more efficient model (look for WaterSense certified options)
- Threads are stripped, making reinstallation difficult
Replacement aerators are inexpensive and widely available at hardware stores. Choose one that matches your faucet’s thread size and desired flow rate.
Benefits of Maintaining Your Faucet Aerator
Regular attention to this small part yields big rewards:
- Lower water bills through improved efficiency
- Reduced strain on your plumbing system
- Better overall kitchen experience with reliable water flow
- Prevention of larger issues like full faucet replacement
- Eco-friendly impact by conserving water
Many homeowners are surprised by how much difference a clean aerator makes in daily life.
Professional Tips for Long-Term Aerator Care
To keep your faucet performing optimally:
- Clean the aerator every 3-6 months, especially in areas with hard water
- Install a whole-house water softener if mineral buildup is chronic
- Use a mesh screen filter on your main water line for extra protection
- Avoid over-tightening during installation to prevent thread damage
- Check for leaks around the aerator after maintenance
These proactive steps minimize future problems and maintain peak performance.
Common Mistakes to Avoid
- Using excessive force when removing the aerator, which can damage the faucet
- Skipping the vinegar soak and only brushing (less effective on scale)
- Reinstalling without proper rinsing, which reintroduces debris
- Ignoring other potential causes like clogged pipes or low water pressure from the main supply
By steering clear of these pitfalls, you’ll achieve better, longer-lasting results.
Frequently Asked Questions About Faucet Aerators
How often should I clean my kitchen faucet aerator?
Every few months, or immediately if you notice reduced flow.
Can I clean it without removing it?
While some surface cleaning is possible, full disassembly and soaking provide the best results.
Are all aerators the same size?
No—common sizes include 15/16-27 and 55/64-27 threads. Check your faucet before purchasing replacements.
Will cleaning improve hot water flow too?
Yes, since the aerator affects both hot and cold lines.
Is this something I can do myself?
Absolutely. It’s one of the easiest plumbing tasks for beginners.
Restoring Optimal Kitchen Performance
A well-maintained kitchen faucet aerator ensures your sink works efficiently every single time you turn it on. Whether you’re tackling a simple cleaning or opting for a fresh replacement, this small investment of time pays off in better flow, water savings, and peace of mind.
Don’t let poor water pressure slow down your kitchen tasks. Restore your faucet flow with a clean aerator today. If the issue persists or you prefer professional help, our experienced team is ready to assist.
By following the guidance in this article, you’re taking control of one of the most common yet overlooked household maintenance tasks. Your kitchen faucet will thank you with consistent, powerful performance for months to come.
Get Stronger Kitchen Water Flow – Call Now!