The Window Sash Lift: Replacing the Handle That Helps Raise the Window
Windows are essential features in every home, providing natural light, ventilation, and a connection to the outdoors. Yet, many homeowners overlook small components that make these windows function effortlessly. One such critical but often ignored part is the window sash lift – the handle attached to the bottom of the lower sash that allows you to easily raise and lower the window.
Replace Your Sash Lifts Today – Call Now!
If your windows feel stuck, the handle wobbles, or you find yourself straining to open them, a worn sash lift could be the culprit. Replacing this simple hardware restores smooth operation, improves home comfort, and prevents bigger issues down the line. In this comprehensive guide, we’ll walk you through everything you need to know about sash lifts, from identification to a straightforward DIY replacement process that most homeowners can complete in under an hour.
Bolded risks of ignoring the problem include difficulty ventilating your home, increased energy bills from poor sealing, and potential safety hazards if windows can’t be opened quickly during emergencies. The good news? Fixing a sash lift is an accessible project that delivers immediate results and long-term satisfaction.
Understanding the Window Sash Lift
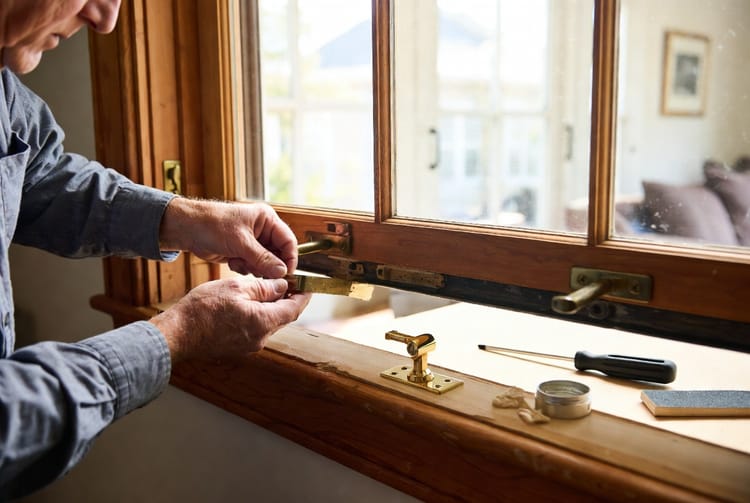
A window sash lift is a small handle mounted on the bottom rail of the lower sash in double-hung or single-hung windows. It provides a secure gripping point, distributing force evenly so you can lift the sash without damaging the frame or straining the balance system (the weights, springs, or cords that counterbalance the window).
Modern sash lifts come in various finishes to match your décor – from classic brass and oil-rubbed bronze to sleek brushed nickel and white vinyl. Beyond aesthetics, they play a functional role in maintaining window efficiency. A sturdy lift ensures proper closure, which helps with insulation, noise reduction, and keeping pests out.
Why focus on this small part? Because it bears repeated daily stress. Over years of use, especially in high-traffic Texas homes where windows are opened frequently for cooling breezes, the lift can loosen, crack, or strip its mounting screws.
Signs Your Window Sash Lift Needs Replacement
Don’t wait until the handle breaks completely. Watch for these common indicators:
- Loose or wobbly handle that shifts when you grip it
- Stripped screw holes where the lift pulls away from the sash
- Cracked or broken plastic/metal components
- Difficulty raising the window without slipping
- Visible wear, rust, or corrosion on the lift
- Uneven operation where one side of the window lifts easier than the other
These issues can lead to frustration and inefficiency. In Dallas-area homes with fluctuating temperatures, stuck windows make climate control harder and may even affect your home’s resale value if left unaddressed.
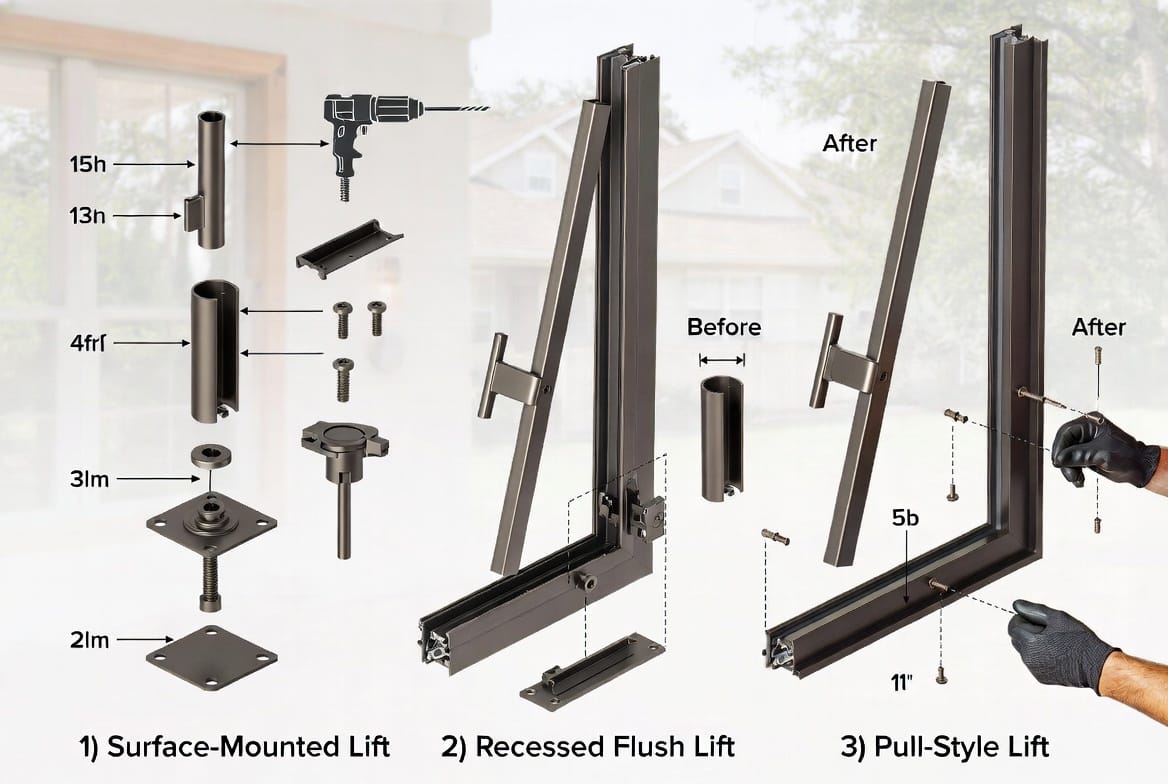
Types of Window Sash Lifts
Choosing the right replacement starts with understanding the main varieties:
- Surface Mount Sash Lifts: The most common type. These sit on top of the sash and attach with screws. Easy to install and widely available in multiple finishes.
- Recessed (Flush) Sash Lifts: Built into the sash for a sleek, low-profile look. Ideal for historic or modern minimalist homes.
- Pull Sash Lifts: Extended design for easier grip, often preferred for taller windows or homeowners with limited reach.
- Locking Sash Lifts: Combine lifting with security features to prevent unauthorized opening from outside.
Consider your window style, material (wood, vinyl, aluminum), and existing hardware when selecting a new lift. Matching the finish ensures a seamless, professional appearance.
Tools and Materials Needed for Replacement
This project requires minimal tools, making it perfect for beginners:
- New sash lift (matched to your window)
- Screwdriver (Phillips or flathead, depending on screws)
- Drill with small bits (optional, for pilot holes)
- Wood filler or dowel plugs (for stripped holes)
- Sandpaper
- Measuring tape
- Safety gloves and glasses
Most replacements cost under $10–20 per lift, offering excellent value.
Step-by-Step DIY Guide to Replacing a Window Sash Lift
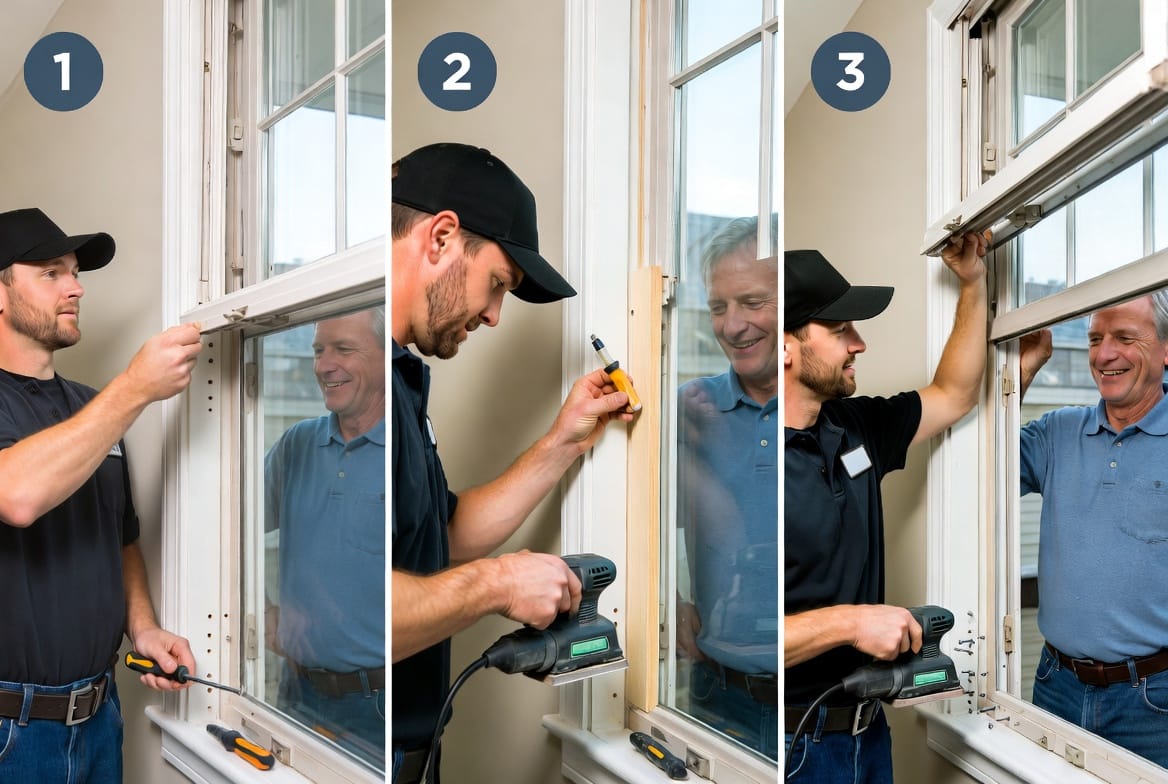
- Prepare the Work Area
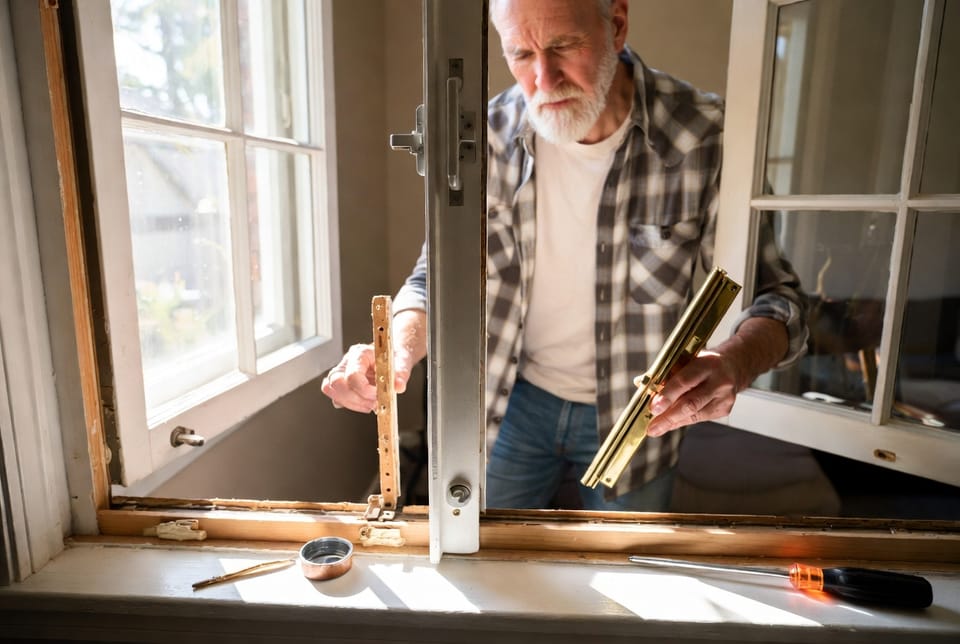
Open the window fully if possible and lay down a protective cloth. Remove any window treatments for clear access. - Remove the Old Sash Lift
Unscrew the old handle carefully. If screws are stripped, use a screw extractor or gently pry while supporting the sash. - Repair Mounting Holes
For damaged holes, insert wood filler, dowels, or toothpicks with glue. Let dry, then sand smooth. This step ensures the new lift sits securely. - Position the New Lift
Align the new sash lift centered on the bottom rail. Use a pencil to mark screw holes precisely. - Pre-Drill if Necessary
For hardwood sashes, create small pilot holes to prevent splitting. - Secure the New Lift
Drive screws firmly but avoid over-tightening. Test the window operation multiple times. - Final Check and Clean
Wipe away dust, lubricate the window tracks lightly if needed, and enjoy the smooth glide.
The entire process typically takes 15–45 minutes per window. Follow these steps and you’ll restore effortless operation quickly.
Benefits of Well-Maintained Window Hardware
Properly functioning sash lifts contribute to:
- Better energy efficiency through tight seals
- Improved indoor air quality via easy ventilation
- Enhanced home security and emergency egress
- Reduced wear on balance systems and frames
- Increased property appeal for potential buyers
In Texas climates, where summers are hot and storms frequent, reliable windows are more than a convenience – they’re a smart investment in comfort and safety.
Tips for Choosing Quality Replacement Sash Lifts
- Select heavy-duty metal over cheap plastic for longevity
- Match the screw spacing of your original lift
- Consider child-safe designs if applicable
- Purchase extras for future repairs
- Check compatibility with your specific window brand
Local hardware stores or online specialists often carry comprehensive selections with helpful staff guidance.
When to Call a Professional
While most sash lift replacements are straightforward DIY tasks, consider professional help if:
- Your windows are historic or custom
- Multiple windows need attention
- You notice issues with balances, pulleys, or seals
- You’re uncomfortable working at heights
Experienced technicians can handle complex repairs efficiently while ensuring everything meets safety standards.
Preventive Maintenance for Long-Lasting Windows
Keep your sash lifts performing optimally with regular care:
- Clean tracks and hardware quarterly
- Lubricate moving parts annually
- Inspect screws for tightness
- Address minor issues before they escalate
- Schedule professional window inspections every few years
These habits extend the life of your entire window system and maintain home value.
Conclusion: Small Fix, Big Impact
Replacing a window sash lift is one of those satisfying home improvement projects that delivers outsized benefits. What starts as a small handle upgrade restores smooth daily operation, improves energy efficiency, and brings peace of mind knowing your windows work as they should.
Don’t let worn hardware compromise your home comfort. Take action today and experience the difference a simple repair can make.
Replace worn sash lifts for easier operation.
Restore Effortless Window Operation – Call Now