The Dryer Belt Replacement: Symptoms of a Broken Belt and Repair Steps
Your clothes dryer is one of the hardest-working appliances in your home, quietly handling load after load to keep your family’s laundry fresh and ready. When it suddenly falls silent or the drum stops turning while the motor still hums, frustration sets in fast. Rest assured, this is often a straightforward issue caused by a broken dryer belt – a common failure that our expert technicians handle every day with speed and precision.
Fix Your Dryer Fast – Call Now for Belt Replacement!
In this comprehensive guide, we walk you through exactly how the dryer belt works, the clear symptoms of a broken belt, and the professional dryer belt replacement steps that get your appliance back to full operation. Whether you are considering a DIY approach or prefer the peace of mind of calling a trusted service, this article equips you with the knowledge you need. A properly functioning belt ensures even drying, energy efficiency, and longer appliance life. Ignoring the problem only leads to bigger headaches, so let’s get your dryer tumbling again quickly and reliably.
How the Dryer Belt Connects the Motor to the Drum
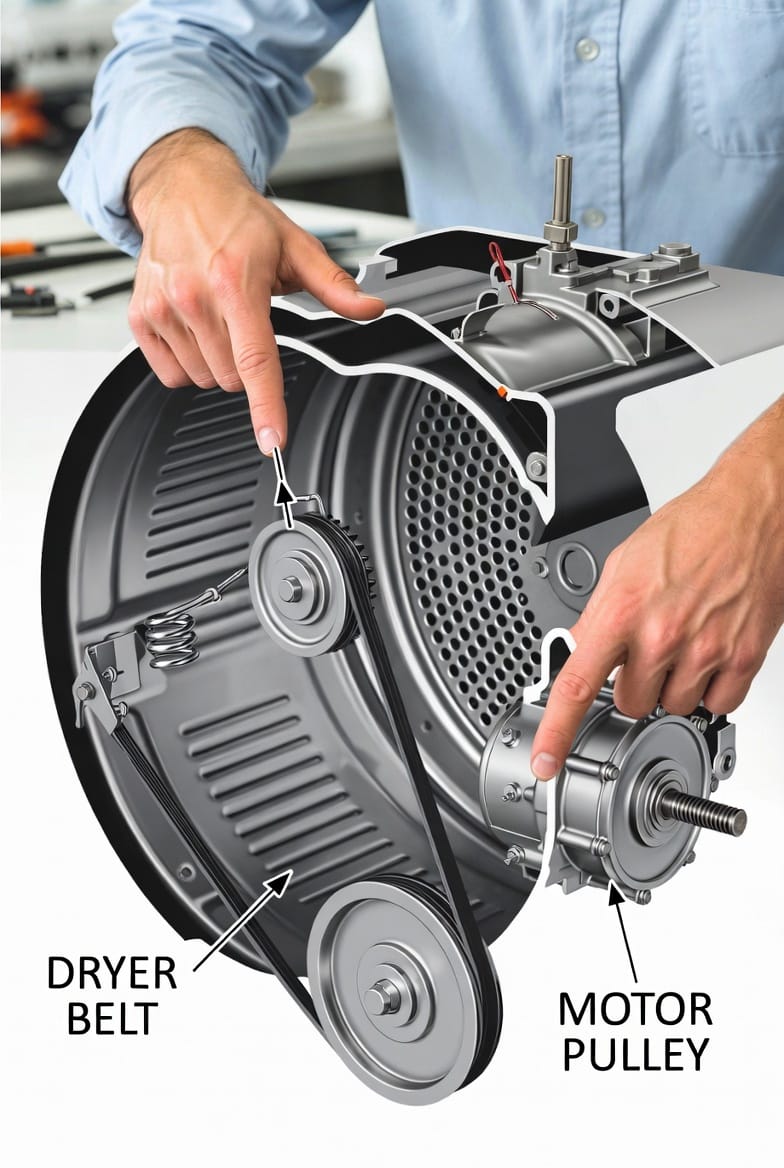
The dryer belt is a simple yet vital rubber loop that transfers power from the drive motor to the large rotating drum inside your appliance. It wraps tightly around the drum’s exterior, runs over the motor pulley, and is kept at the perfect tension by the idler pulley. When you start a cycle, the motor spins the belt, which in turn rotates the drum so your clothes tumble freely through warm air.
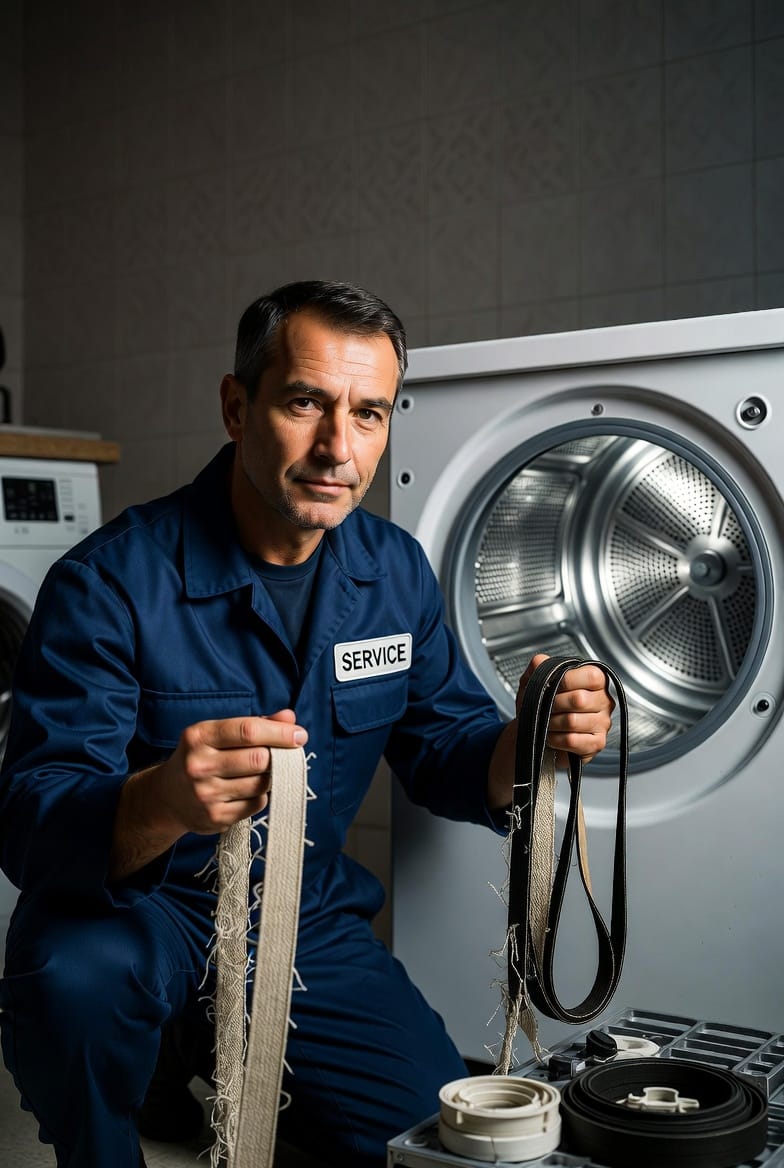
Over years of use, constant friction, heat, and occasional overloading cause the belt to wear, crack, or snap completely. Most belts last between five and ten years depending on usage, but factors like lint buildup or unbalanced loads accelerate failure. Understanding this connection gives you confidence when diagnosing issues and performing dryer belt replacement. The design is intentionally straightforward, which is why this repair restores full function without expensive parts or major disassembly.
Bold fact: A single broken belt halts the entire tumbling action even while the motor continues to run and heat is produced. This mismatch is your first clue that the belt – not the motor or heating element – is the culprit.
Recognizing the Symptoms of a Broken Dryer Belt
Spotting the signs early prevents unnecessary stress and potential secondary damage. Here are the most common symptoms of a broken belt:
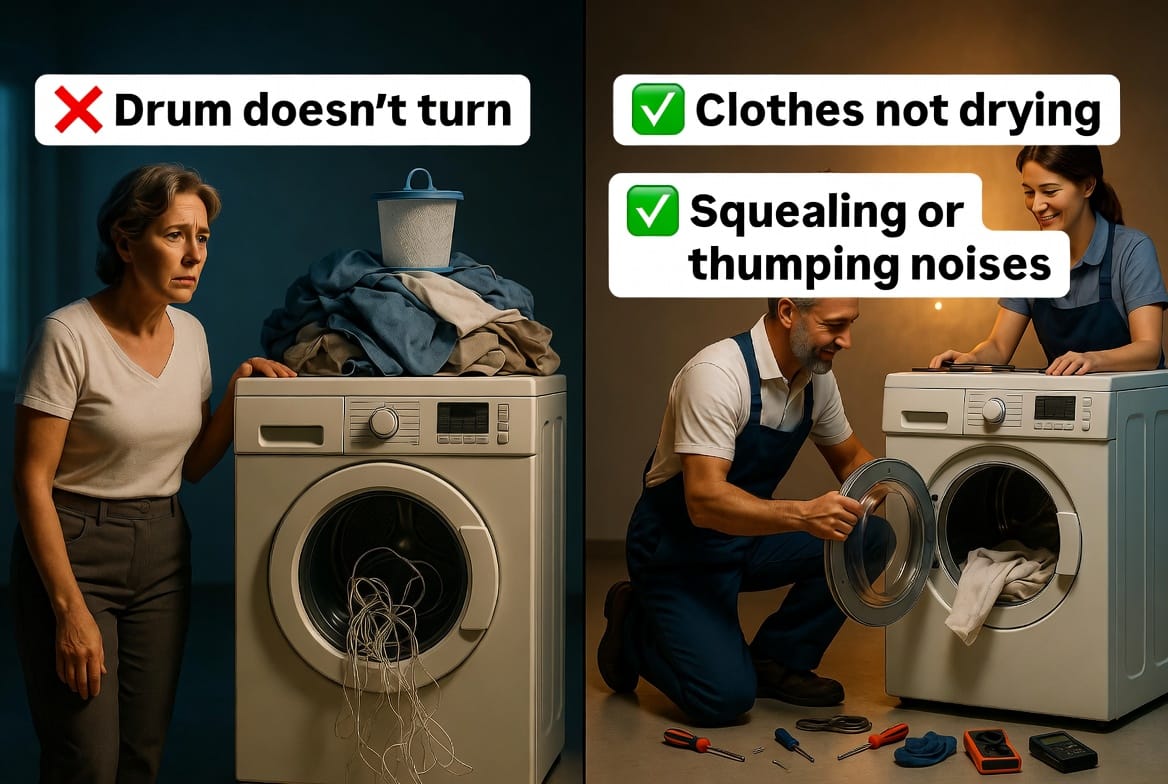
- Drum doesn’t spin while the motor runs – You hear the familiar humming but the drum stays completely still.
- Clothes remain wet or damp even after a full cycle because there is no tumbling action to circulate heat evenly.
- Squealing or thumping noises during operation – These often appear just before complete failure as the belt slips or frays.
- Burning rubber smell or visible belt fragments when you inspect the dryer interior.
- Longer drying times or repeated cycles needed to finish a load.
These indicators are unmistakable once you know what to listen and look for. The motor continues running because it is not directly affected, but without the belt connecting it to the drum, your clothes simply sit there. This is not a major breakdown – it is a focused component failure that our team resolves in under an hour in most cases.
If your dryer shows any of these signs, stop using it immediately. Continuing operation can overheat the motor or cause lint to ignite. Early action saves time, money, and protects your entire appliance.
Why Timely Dryer Belt Replacement Matters
A broken dryer belt stops drying completely, turning a simple chore into a household disruption. Prompt replacement restores efficiency, lowers energy bills, and extends the life of your dryer by preventing strain on the motor and other components. Delaying the fix risks costly secondary repairs that could have been avoided.
Homeowners who address the issue quickly report immediate satisfaction – clothes dry evenly again, cycles finish on time, and the appliance sounds smooth once more. Professional service ensures the correct belt model is used and the tension is set perfectly for years of reliable performance.
Tools and Safety First
Before beginning any dryer belt replacement, gather these essentials:
- Phillips and flathead screwdrivers
- Putty knife or panel removal tool
- Vacuum with crevice attachment for lint cleanup
- The exact replacement dryer belt matched to your model
- Work gloves and eye protection
Safety is non-negotiable: Unplug the dryer from the wall outlet. If it is a gas model, shut off the gas valve. Move the appliance away from the wall to allow full access. These simple steps protect you and keep the repair straightforward.
Step-by-Step Dryer Belt Replacement Procedure
- Prepare the workspace – Unplug the unit, slide it forward, and remove the lint trap and any visible debris.
- Access the interior – Remove the top panel by releasing the clips or screws at the back, then lift it off carefully. On some models the front panel comes away after disconnecting the door switch wires.
- Release belt tension – Locate the idler pulley and push it to slacken the old belt. Slip the worn belt off the motor pulley and drum.
- Remove the old belt – Carefully lift the drum slightly if needed and pull the broken belt free. Inspect the drum grooves for wear while you have access.
- Install the new belt – Loop the fresh dryer belt around the drum first (grooved side against the drum), then route it over the motor pulley and idler pulley following the exact original path. The idler should apply firm tension automatically.
- Reassemble and test – Replace all panels, plug the dryer back in, and run a short no-heat cycle. Listen for smooth operation and confirm the drum turns freely.
Each step is designed for clarity and safety. Take your time, keep track of screws, and vacuum thoroughly to remove any lint that could affect future performance. Most homeowners complete the process in 45 to 75 minutes once they follow the sequence.
Common Mistakes to Avoid
Even experienced DIYers can slip up. Never force the belt into place, use the wrong size replacement, or forget to reconnect wires properly. Over-tightening or under-tensioning the idler pulley leads to premature wear or noise. Always double-check that the drum spins freely by hand before powering the unit on.
Professional vs DIY – When to Call the Experts
While dryer belt replacement is within reach for many, certain situations call for professional help: limited mechanical experience, unfamiliar appliance model, or simply wanting the job done right the first time. Our trained technicians arrive equipped with the correct belt, perform the repair cleanly, and test the entire system before leaving.
You gain peace of mind knowing every component is inspected and the repair is guaranteed.
Maintenance Tips to Prevent Future Belt Failure
Keep your dryer running smoothly by cleaning the lint filter after every load, avoiding overloads, and scheduling annual professional inspections. These habits dramatically extend belt life and keep energy costs low.
Frequently Asked Questions
How long does a dryer belt last?
Typically five to ten years with normal use.
Can I run the dryer with a broken belt?
No – it wastes energy and risks motor damage.
Is the repair expensive?
Parts are affordable and labor is quick, making this one of the most cost-effective fixes.
Do all dryer models use the same belt?
No – always match the part number to your specific make and model for perfect fit and performance.
Final Thoughts and Next Steps
A broken dryer belt stops drying completely, but the solution is simple, fast, and reliable. By recognizing the symptoms early and following the proper dryer belt replacement steps, you restore your appliance to peak performance and protect your investment.
A broken belt stops drying. Our team is ready to deliver fast, professional service that gets your laundry routine back on track with confidence and care.
Restore Your Dryer Today – Call for Reliable Belt Replacement