The Shower Niche Design: Depth, Placement, and Waterproofing for Built-In Shelving
In the world of bathroom remodeling, few features combine functionality and aesthetics as seamlessly as the shower niche. This built-in shelving solution has become a staple in modern showers, offering a dedicated space for essentials like shampoos, conditioners, and soaps without the clutter of hanging caddies or bulky shelves. As a professional remodeler with years of experience, I can assure you that a well-designed shower niche not only elevates your daily routine but also adds lasting value to your home. In this comprehensive guide, we'll delve into the key elements of shower niche design: the ideal depth for accommodating standard bottles, strategic placement for easy accessibility, and—most crucially—the waterproofing techniques that safeguard against costly leaks. Whether you're planning a full renovation or a simple upgrade, understanding these aspects ensures a durable, beautiful result.
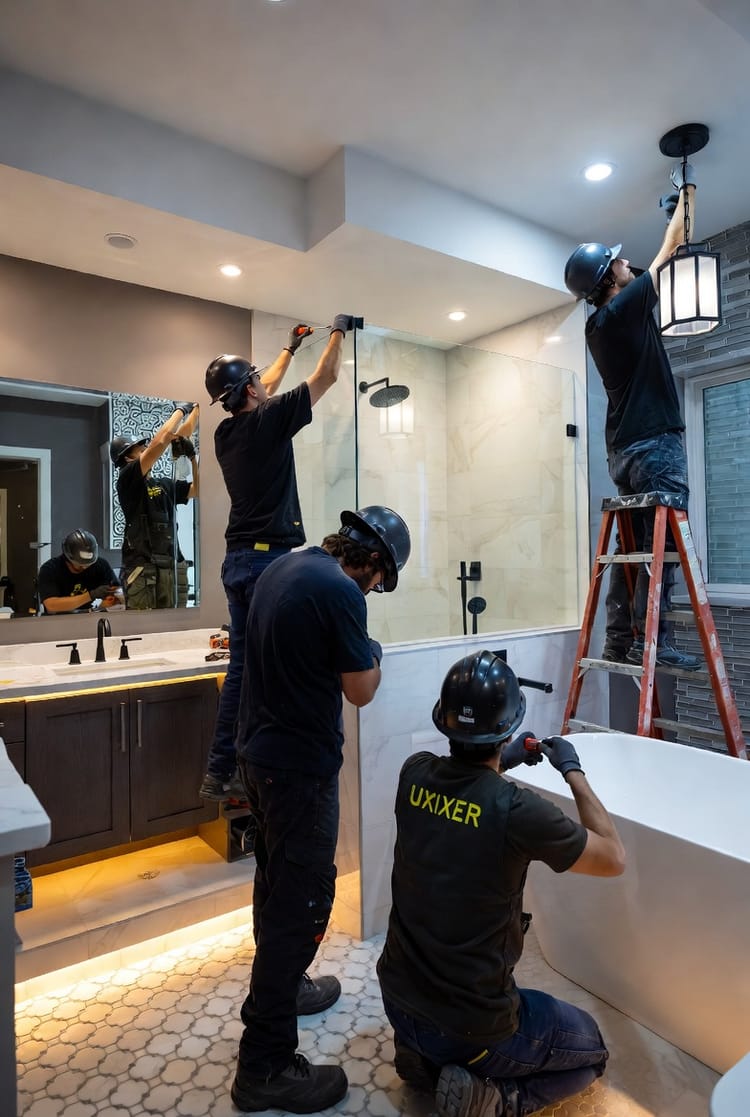
Custom Shower Niche Done Right – Call for Your Free Quote
Understanding the Shower Niche: A Must-Have Feature
A shower niche, also known as a recessed shelf or built-in cubby, is essentially a hollowed-out space within your shower wall, tiled to match the surrounding area. It's a popular choice in bathroom renovations because it provides discreet storage while maintaining a clean, streamlined look. Unlike traditional shelves that protrude and collect water, a niche is integrated into the wall, reducing visual clutter and enhancing the spa-like feel of your shower.
Why has the shower niche surged in popularity? Homeowners appreciate its versatility—it can be customized in size, shape, and material to fit any style, from minimalist modern to rustic traditional. According to industry trends, over 70% of recent bathroom remodels incorporate at least one niche, as it addresses common pain points like slippery bottles on the floor or unstable wire racks. Rest assured, incorporating a niche is a smart investment; it not only improves usability but also boosts your home's appeal if you ever decide to sell.
When designing your niche, consider its role in the overall shower layout. It should complement other elements like benches, grab bars, or multiple showerheads. For instance, in a family bathroom, multiple niches at varying heights can cater to adults and children alike. In luxury setups, niches might feature LED lighting for a dramatic effect. The key is balance: functionality without overwhelming the space.
Ideal Depth for Shower Niches: Balancing Storage and Aesthetics
One of the most critical decisions in shower niche design is determining the depth. Too shallow, and it won't hold standard-sized bottles; too deep, and it can disrupt the wall's structural integrity or create awkward shadows. The ideal depth typically ranges from 3 to 6 inches, with 4 inches being the sweet spot for most households.
Why 4 inches? Standard shampoo and conditioner bottles measure about 3 inches in diameter, so a minimum of 3 inches ensures they fit snugly without tipping over. However, adding an extra inch provides wiggle room for larger products or multiple items side by side. In my experience, clients often regret skimping on depth—leading to frustration when oversized bottles don't fit.
Here are some key considerations for niche depth:
- Minimum Depth: Stick to at least 3 inches to accommodate basic toiletries. Anything less risks items protruding, which defeats the recessed purpose.
- Optimal Depth for Versatility: 4-5 inches allows for stacking smaller items or housing bulkier ones like body washes.
- Maximum Depth Risks: Beyond 6 inches, you may encounter issues with wall framing or increased material costs. Deeper niches can also trap water if not properly sloped.
- Custom Options: For specialty needs, like storing razors or loofahs, consult a pro to adjust depth without compromising stability.
Remember, depth impacts not just storage but also the niche's visual integration. A well-proportioned niche blends seamlessly, enhancing your shower's aesthetic. If you're unsure, measuring your go-to products beforehand is a simple step that prevents post-installation regrets.
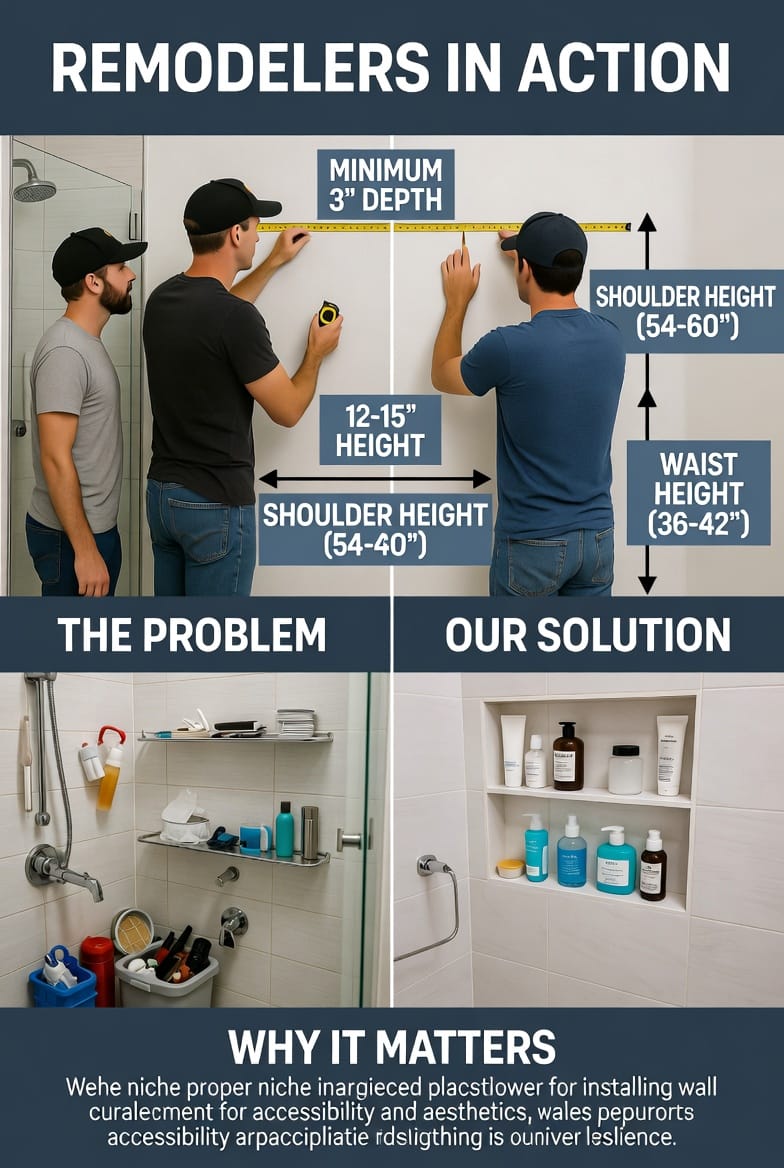
Strategic Placement: Height and Location for Maximum Accessibility
Placement is where ergonomics meets design in shower niche installation. The goal is accessibility—ensuring you can reach items effortlessly without stretching or bending awkwardly, especially in a wet environment where slips are a risk.
The ideal height for a shower niche is between waist and shoulder level, roughly 36 to 60 inches from the shower floor. This range caters to average adult heights, allowing easy access while keeping items out of direct water spray. For precision:
- Waist Height (36-42 inches): Perfect for lower-body products like body washes or for households with children.
- Chest Height (48-54 inches): Ideal for everyday essentials, reducing the need to bend.
- Shoulder Height (54-60 inches): Great for less-frequently used items, but avoid higher to prevent strain.
Location-wise, place the niche on the wall opposite or adjacent to the showerhead to minimize water exposure. Avoid corners if possible, as they can complicate tiling and waterproofing. In larger showers, consider multiple niches: one for each user or dedicated to specific items.
Accessibility tips include:
- User-Specific Adjustments: For taller individuals, aim higher; for shorter ones or those with mobility issues, lower placements enhance safety.
- Horizontal vs. Vertical Orientation: Vertical niches (taller than wide) suit bottle storage, while horizontal ones work for bars of soap.
- Integration with Fixtures: Ensure the niche doesn't interfere with valves or handles—professional planning avoids these pitfalls.
By prioritizing placement, you create a user-friendly space that feels intuitive and safe, turning your daily shower into a relaxing ritual.

Waterproofing Essentials: Preventing Leaks and Ensuring Longevity
Now, let's address the heart of shower niche durability: waterproofing. This step is non-negotiable—poor waterproofing is the leading cause of leaks, mold, and structural damage behind walls. As an authority in bathroom remodeling, I emphasize that proper techniques can prevent these issues, saving you thousands in repairs.
The process begins with a continuous waterproofing membrane, such as liquid-applied or sheet membranes, that covers the entire shower area, including the niche. This barrier must extend at least 2-3 inches into the niche's back and sides, creating a seamless envelope.
Key waterproofing details:
- Membrane Application: Apply the membrane before tiling, ensuring no gaps. Liquid membranes are flexible for irregular shapes, while sheets offer robust protection.
- Slope for Drainage: Incorporate a slight 1-2% slope toward the shower floor to direct water away, preventing pooling that leads to mildew.
- Sealing Edges and Corners: Use reinforced tape or fabric at all seams—corners are vulnerability points where leaks often start.
- Tile and Grout Choices: Opt for waterproof grout and seal it annually. Porcelain or ceramic tiles with low absorption rates enhance protection.
- Flashing and Pans: Integrate metal flashing at the niche base and ensure the shower pan ties in perfectly.
Common risks if waterproofing is overlooked include water intrusion behind walls, leading to rot, mold growth, and compromised structural integrity. Symptoms like discolored grout or musty odors signal problems early—address them promptly to avoid escalation.
For peace of mind, always hire certified installers who follow codes like those from the Tile Council of North America (TCNA). With proper waterproofing, your niche will withstand daily use for decades, maintaining its beauty and function.
Installation Best Practices: From Planning to Finishing Touches
Installing a shower niche requires precision, but with the right approach, it's achievable. Start with planning: Sketch your design, measure twice, and select materials that match your bathroom's theme.
Step-by-step installation guide:
- Framing the Niche: Cut into the wall studs, reinforcing with blocking for stability. Depth here is set—aim for that 4-inch sweet spot.
- Waterproofing Layer: As discussed, apply the membrane meticulously, testing for leaks with a flood test.
- Tiling the Interior: Use smaller tiles inside for easier contouring, ensuring grout lines align with the outer wall.
- Finishing: Add shelves if needed (glass or tile-ledged) and seal everything.
Tools like levels, trowels, and waterproofing kits are essentials. If DIY-ing, watch tutorials, but for complex jobs, professionals ensure compliance and quality.
Common Mistakes to Avoid and Maintenance Tips
Even seasoned remodelers encounter pitfalls. Boldly avoid these:
- Inadequate Depth: Leading to unstable storage—measure products first.
- Poor Placement: Too high or low causes inconvenience; ergonomics matter.
- Skipped Waterproofing Steps: The biggest risk—always prioritize the membrane.
For maintenance, rinse the niche after use, clean with mild soap weekly, and reseal grout yearly. These habits extend lifespan.
Benefits of a Well-Designed Shower Niche
Beyond storage, a niche enhances bathroom safety by reducing clutter-related slips. It promotes organization, reduces cleaning time, and adds a custom touch that impresses guests. In terms of ROI, features like this can increase home value by 5-10% in competitive markets.
Conclusion: Elevate Your Shower Experience
Incorporating a shower niche is a game-changer in bathroom design. With the right depth, placement, and waterproofing, you'll enjoy a leak-free, accessible space that blends form and function. Don't settle for less—add function and beauty with a perfectly built niche.
Waterproof, Accessible Shower Niches – Call the Experts