The Photo-Eye Alignment: Troubleshooting the Safety Sensor That Prevents Your Door From Closing
Garage door photo-eye sensors serve as essential safety devices that protect your family, pets, and property by stopping the door from closing on obstacles. When these sensors malfunction due to misalignment, one of the most frequent garage door issues occurs: the door refuses to close, reverses unexpectedly, or the opener lights flash as a warning.
Get Your Door Working Perfectly – Call Today!
This problem ranks among the top reasons for service calls, yet it is often a simple fix you can handle safely at home. Misaligned photo-eye sensors commonly result from door vibrations, accidental bumps, temperature shifts, or accumulated dust. The good news is that diagnosing and correcting photo-eye alignment requires only basic tools and careful steps—no advanced skills needed.
In this guide, learn how the infrared beam functions, interpret solid versus blinking lights, clean the sensor lenses effectively, and manually realign the sensors on their brackets. Follow these instructions carefully to restore smooth operation quickly and confidently. Proper maintenance of your garage door safety sensor ensures reliable performance and peace of mind.
How Garage Door Photo-Eye Sensors and the Infrared Beam Work
Photo-eye sensors consist of two components: the sender unit (which emits the signal) and the receiver unit (which detects it). Mounted roughly six inches above the floor on opposing sides of the garage door opening, these units create an invisible infrared beam that spans the doorway.
The sender continuously projects an infrared beam toward the receiver. When the receiver detects the beam without interruption, it confirms a clear path and allows normal door operation. Should anything break the beam—such as a child, pet, vehicle, or tool—the safety feature activates immediately. The opener reverses the door or prevents closure entirely, avoiding potential injuries or damage.
Alignment is critical because even slight shifts disrupt the beam path. Vibrations from repeated use, minor impacts from stored items, or environmental factors like humidity can gradually knock sensors out of position. When photo-eye alignment fails, the system errs on the side of caution by halting operation.
Most modern openers display status through LED lights on the sensors themselves. A solid sending light (usually amber or red) paired with a solid receiving light (green) confirms proper function. Understanding this mechanism empowers you to troubleshoot effectively and avoid unnecessary frustration with your garage door opener.
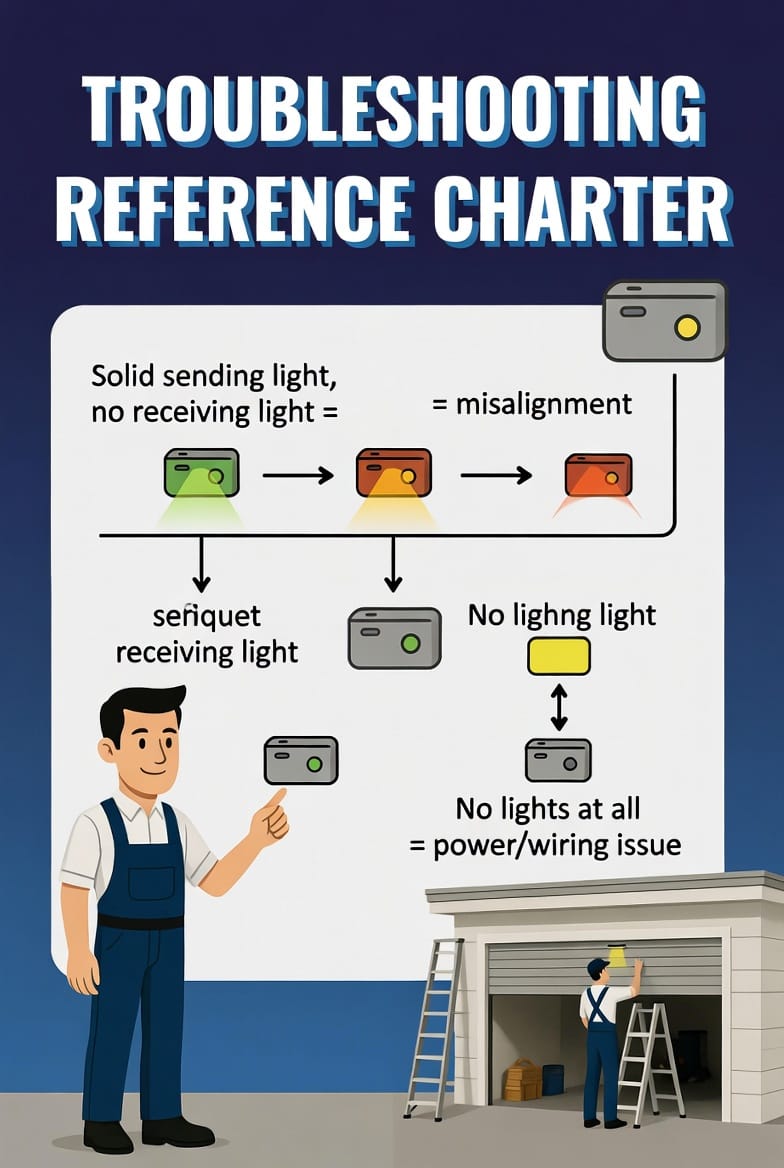
Diagnosing Alignment Issues with Sensor Lights
Start diagnosis by observing the sensor lights closely while the door is open and the opener powered. Solid lights indicate successful alignment: the sender shows a steady amber/red glow, and the receiver displays a steady green light. This means the infrared beam travels uninterrupted.
Blinking lights, by contrast, signal problems. Rapid blinking on the receiver often points to misalignment or a blocked beam. A completely dark sensor suggests power supply issues, loose wiring, or a failed unit. The opener may also flash its overhead lights ten times as an error code confirming sensor trouble.
Common symptoms of misaligned photo-eye sensors include the door starting to close but then reversing, failing to close from the remote or wall button, or operating only in the open direction. These behaviors stem directly from the safety system interpreting the missing beam as an obstruction.To diagnose accurately:
- Ensure no objects block the beam path
- Check for direct sunlight interference (which can overwhelm the receiver)
- Inspect brackets for looseness or damage
Solid sending light but no receiving light typically confirms misalignment. No lights at all usually indicates a power or wiring fault. Take time to observe these indicators—they provide clear guidance without guesswork.

Cleaning the Sensor Lenses
Dirt, dust, cobwebs, or grease on the lenses frequently causes false alignment issues. Cleaning restores the infrared beam path without realignment in many cases.
Follow these steps safely:
- Unplug the garage door opener from the power outlet or switch off the circuit breaker to prevent accidental activation
- Locate both sensors on their brackets
- Use a soft microfiber cloth or cotton swab lightly dampened with water or glass cleaner (avoid harsh solvents or abrasives that could scratch the lenses)
- Gently wipe each lens in a circular motion, removing all debris
- Dry thoroughly with a clean, dry cloth
- Reconnect power and observe the sensor lights for solid confirmation
Perform cleaning monthly or after dusty conditions. Never use compressed air, as it can push debris deeper into the unit. Proper lens maintenance significantly reduces service calls related to garage door safety sensors.
Manually Realigning the Sensors on Their Brackets
When cleaning fails to resolve blinking lights, manual realignment is the next reliable step. Most sensors mount on adjustable brackets with wing nuts or screws allowing height and angle modifications.
Detailed realignment process:
- Confirm power is disconnected initially for safety
- Loosen the wing nut or adjustment screw on each bracket just enough to allow movement without full removal
- Adjust the sender and receiver so they face each other directly at the same height (usually 6 inches from the floor)
- Fine-tune the angle by tilting slightly until the receiver light changes from blinking to solid green
- Hold the position steady while tightening the nut firmly but without over-torquing
- Restore power and test thoroughly
Test by attempting to close the door normally, then interrupting the beam with a cardboard box or broom handle—the door should reverse instantly. Repeat adjustments in small increments if lights remain inconsistent.
Common pitfalls include over-tightening (which can crack brackets) or ignoring minor height differences. Patience during fine-tuning ensures lasting photo-eye alignment. After successful realignment, the garage door should operate smoothly without unwanted reversals.
Safety Precautions and Additional Troubleshooting Tips
Safety comes first during any garage door sensor work. Always disconnect power, avoid placing body parts under the door, and keep children and pets away. Never bypass sensors or tape them over—these actions disable critical safety features and violate safety codes.
If lights remain problematic after cleaning and realignment:
- Inspect wiring for frays, loose connections, or rodent damage
- Verify secure mounting brackets without corrosion
- Check for interference from bright lights or reflective surfaces
Persistent issues may stem from faulty sensors, damaged wiring harnesses, or opener board problems requiring professional diagnosis.
Conclusion: Restore Reliable Operation Confidently
Photo-eye alignment troubleshooting resolves the majority of garage door closing failures efficiently. By understanding the infrared beam, reading sensor lights, cleaning lenses, and performing careful realignment, you maintain a safe and functional system.
Fix the simple stuff safely yourself when possible.
New Garage Door or Repair? Call Experts Today