The Garage Door Bottom Seal: The Unsung Hero Keeping Water, Pests, and Drafts Out

In every well-maintained home, countless components work silently to protect your family, your belongings, and your peace of mind. Few, however, play as vital a role as the garage door bottom seal. Often overlooked until problems arise, this humble strip of flexible material forms the final, critical barrier between your garage and the outside world.
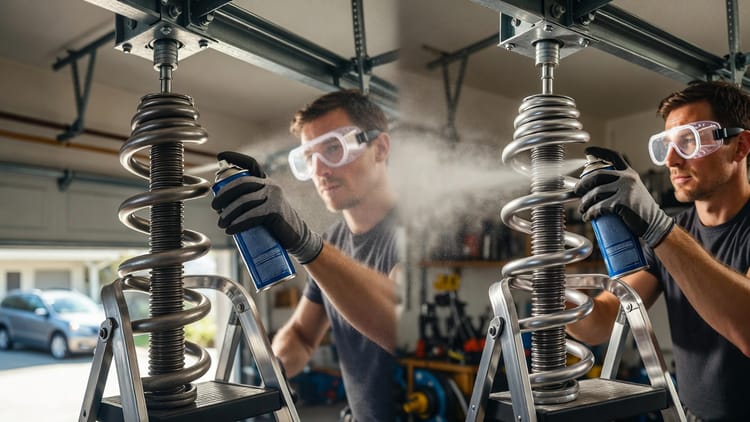
Protect Your Garage – Call for Expert Seal Replacement
When the garage door bottom seal functions perfectly, you enjoy a dry, pest-free, energy-efficient space. When it fails, water seeps in during storms, rodents find easy entry, and expensive heated or cooled air escapes through even the smallest gaps. At first glance it may seem like a minor part, yet its performance directly affects your home’s comfort, safety, and monthly utility bills.
Rest assured, understanding and maintaining your garage door bottom seal is straightforward, and professional replacement delivers lasting results you can trust. In this comprehensive guide, we focus exclusively on this single critical component – why it matters, the different types available, how it wears out, and exactly how to keep it performing at its best.
What Exactly Is the Garage Door Bottom Seal?
The garage door bottom seal (also called a garage door weather seal or threshold seal) is the flexible rubber or vinyl strip attached to the very bottom panel of your sectional garage door. Its job is simple yet essential: it compresses tightly against the concrete floor every time the door closes, creating a continuous, weather-tight barrier.
Unlike the side and top seals that protect the vertical and overhead edges, the bottom seal must accommodate the natural unevenness of concrete floors while enduring constant friction, temperature swings, and exposure to the elements. Made from durable materials engineered for repeated compression, a quality garage door bottom seal can last years when properly selected and installed.
The Critical Role in Weatherproofing and Pest Exclusion
A properly functioning garage door bottom seal delivers three primary protections that directly impact your home:
- Water and Moisture Blockage – Heavy rain, melting snow, or sprinkler runoff cannot penetrate beneath the door. This prevents flooded garages, warped flooring, and mold growth that can spread into living areas.
- Draft and Energy Savings – Gaps as small as ¼ inch allow warm air to escape in winter and cool air to leak out in summer. A tight seal helps maintain consistent garage temperatures, reducing strain on your HVAC system and lowering energy costs.
- Pest Exclusion – Insects, rodents, snakes, and even birds are stopped at the threshold. Without an intact seal, mice can squeeze through tiny openings, bringing nesting materials, droppings, and potential disease into your space.
Imagine pulling into your garage after a thunderstorm only to discover standing water and soaked cardboard boxes. Or hearing scratching sounds at night and discovering a rodent family has taken up residence. These scenarios are far more common than most homeowners realize – and they all trace back to a compromised garage door bottom seal.
Fortunately, restoring this protection is one of the most cost-effective home maintenance tasks available. A timely replacement delivers immediate, noticeable improvements in comfort and security.

Different Types of Garage Door Bottom Seals
Not all seals are created equal. Choosing the correct type for your specific garage door and climate ensures maximum performance and longevity. The three most common styles are:
Bulb Seals
The bulb seal features a rounded, hollow bulb profile that compresses easily and springs back reliably. Its design excels at filling irregular gaps caused by settled concrete or slightly warped doors.
Best for: Homes in areas with frequent rain, snow, or significant temperature fluctuations. The bulb shape creates multiple contact points, making it exceptionally effective against water intrusion.
T-Style Seals
T-style seals have a distinctive T-shaped cross-section with a wide base and narrower top that slots into a retainer channel on the door. They provide a strong, stable seal and are often used on heavier commercial-style doors.
Best for: High-traffic garages or doors that experience frequent use. The rigid base helps maintain alignment over time.
Astragal Seals
Also known as flap or finger seals, astragal seals feature a flexible flap or multiple “fingers” that sweep across the floor as the door closes. They are gentler on the floor surface and accommodate greater floor variations.
Best for: Garages with decorative or epoxy-coated floors where minimizing scratching is important. They also perform well in windy regions by creating a broader sealing surface.
Each type comes in various widths (typically 2″ to 4″) and materials (EPDM rubber for extreme weather, vinyl for milder climates, or reinforced hybrids). Our recommendation is always to match the replacement exactly to your door’s original retainer channel for a perfect fit and professional appearance.
How Garage Door Bottom Seals Wear Out Over Time
Even the highest-quality garage door bottom seal eventually shows signs of aging. Common causes include:
- UV Exposure and Weathering – Constant sunlight hardens and cracks the rubber, reducing flexibility.
- Friction and Abrasion – Every open/close cycle drags the seal across the concrete, gradually wearing down the contact surface.
- Temperature Cycling – Extreme heat makes the material brittle; freezing temperatures can cause micro-tears.
- Dirt and Debris Buildup – Sand, salt, and leaves embed in the seal, accelerating deterioration.
- Improper Installation – If the original seal was not seated correctly or the wrong size was used, premature failure is almost guaranteed.
Key warning signs that your seal needs immediate attention:
- Visible daylight or gaps under the closed door
- Cracks, splits, or missing sections
- Hard, brittle texture when touched
- Water stains or dampness inside the garage after rain
- Increased dust, leaves, or insect activity near the threshold
- Higher-than-normal energy bills
When these symptoms appear, do not delay. A small gap today can become a major problem tomorrow.
Step-by-Step Guide to Replacing Your Garage Door Bottom Seal
Replacing the garage door bottom seal is a manageable DIY project for many homeowners, but professional installation guarantees perfect results and often includes a warranty. Here is the complete professional process:
- Prepare safely – Disconnect the garage door opener and secure the door in the fully closed position using clamps.
- Remove the old seal – Slide or pull the worn seal out of the retainer channel. For stubborn seals, a utility knife and pliers make the job easier.
- Clean thoroughly – Remove all debris, old adhesive, and rust from the retainer channel and door bottom.
- Measure precisely – Pull out a 12-inch sample of the old seal and measure both width and thickness. Note the exact profile (bulb, T-style, or astragal).
- Select the correct replacement – Purchase a seal that matches your measurements and door type exactly. Quality EPDM rubber seals offer the best long-term performance.
- Cut to length – Measure the full width of your garage door and cut the new seal ½ inch longer for a snug fit.
- Install the new seal – Slide or press the new garage door bottom seal into the retainer channel, working from one end to the other.
- Test and adjust – Reconnect power, cycle the door several times, and verify complete contact along the entire floor.
Pro tip: If your concrete floor has significant slopes or cracks, consider adding a threshold seal or floor-mounted weatherstripping for extra protection.
While many homeowners successfully complete this repair, professional technicians bring specialized tools, years of experience, and access to commercial-grade materials that deliver superior results.

Choosing the Right Replacement Seal and Avoiding Common Mistakes
Selecting the correct garage door bottom seal goes beyond simply matching the width. Consider your local climate, floor condition, and door weight. For example, homes in coastal or high-rainfall areas benefit most from bulb-style EPDM seals, while households with children or pets may prefer the gentler astragal style to protect flooring.
Avoid these frequent mistakes:
- Buying a “universal” seal without measuring
- Installing without cleaning the retainer channel
- Cutting the seal too short
- Forcing a seal into the wrong channel type
When in doubt, a quick call to an experienced technician ensures you receive the perfect match the first time.
Ongoing Maintenance for Long-Lasting Performance
Once your new garage door bottom seal is installed, simple seasonal care keeps it performing optimally:
- Wipe the seal monthly with a damp cloth to remove dirt and debris
- Inspect for cracks every spring and fall
- Apply a rubber conditioner twice per year to maintain flexibility
- Keep the area in front of the door clear of leaves and snow
These small habits extend the life of your seal and protect your entire garage investment.
When Professional Help Makes the Smartest Choice
While DIY replacement works for straightforward cases, professional service is the wiser choice when:
- Your door is heavy or commercial-grade
- The floor has major unevenness
- You want a full warranty on parts and labor
- Multiple weather seals need simultaneous attention
Our trained technicians complete garage door bottom seal replacements quickly, cleanly, and with guaranteed results.
Keep the elements out. Our team arrives prepared with the exact seal your door needs and restores complete protection in one efficient visit.
Don’t let a failing garage door bottom seal compromise your home’s comfort and security another day. With the right knowledge and expert assistance, you can enjoy a dry, pest-free, energy-efficient garage for years to come.
Keep Elements Out for Good – Schedule Seal Replacement