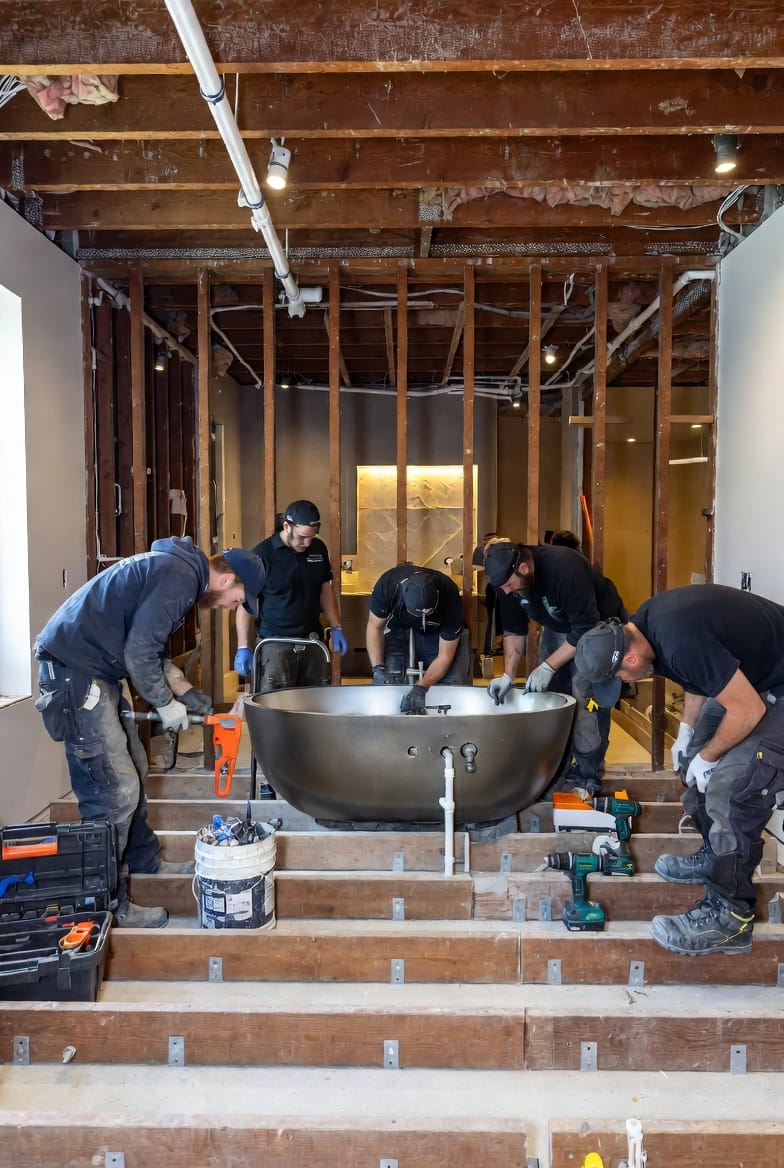
The Freestanding Tub Installation: Plumbing, Floor Reinforcement, and Access Considerations
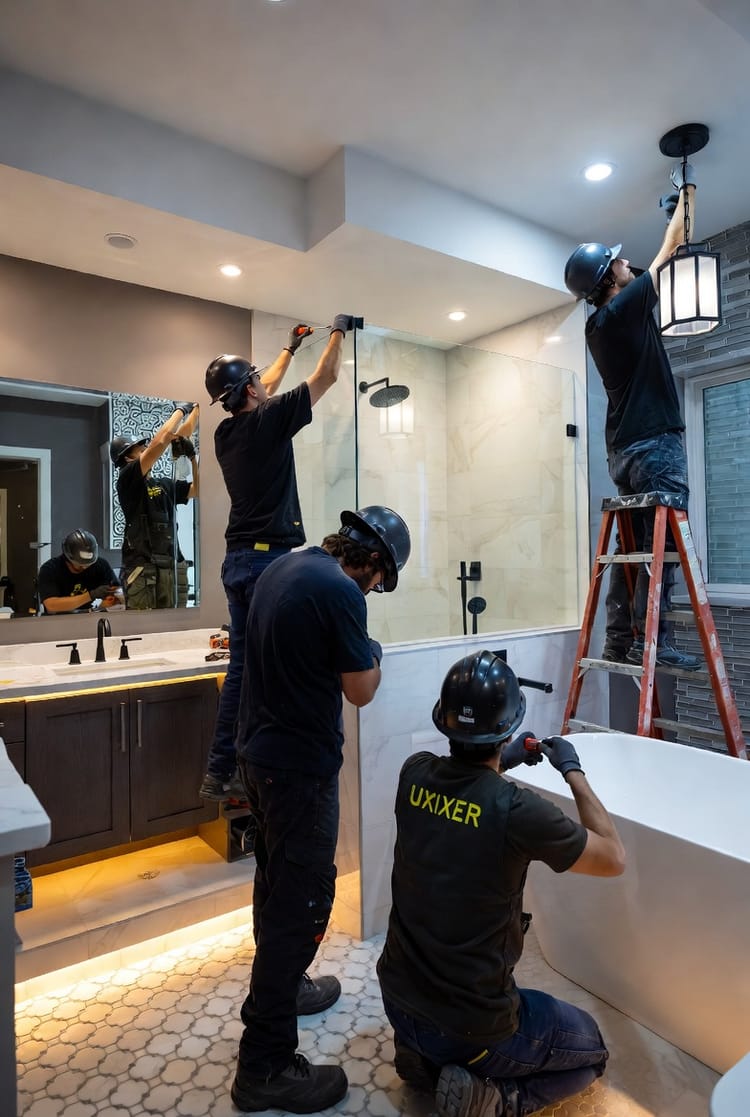
In the world of bathroom remodeling, few elements evoke luxury quite like a freestanding tub. These standalone fixtures, often crafted from heavy materials like cast iron or acrylic, serve as stunning focal points that elevate any space into a spa-like retreat. Whether you're envisioning a classic claw-foot design or a sleek modern oval, proper installation is key to ensuring longevity, safety, and functionality. This comprehensive guide delves into the essential aspects of freestanding tub installation, including structural requirements for weight support, rough-in plumbing for seamless integration, and strategic access considerations for future maintenance. With the right approach, you can enjoy this indulgent feature without worry—rest assured, professional expertise makes the process straightforward and rewarding.
Repair Your Cracked Concrete—Call Today for a Flawless Finish!
As a homeowner or designer embarking on a bathroom renovation, understanding these elements empowers you to make informed decisions. We'll break it down step by step, highlighting potential risks and best practices to achieve a flawless result. From reinforcing your floor to positioning faucets optimally, every detail contributes to a durable and aesthetically pleasing outcome.
Understanding the Appeal and Challenges of Freestanding Tubs
Freestanding tubs have surged in popularity for good reason. They offer unparalleled design flexibility, allowing placement anywhere in the room without the constraints of built-in models. Imagine soaking in a claw-foot tub under a chandelier or a contemporary vessel tub beside a window with panoramic views—these setups transform ordinary bathrooms into personal sanctuaries.
However, their standalone nature introduces unique challenges. Unlike alcove tubs supported by walls, freestanding models bear their full weight on the floor, often exceeding 500 pounds when filled with water and a bather. This demands careful planning to avoid structural failures, such as sagging floors or cracks. Additionally, plumbing must be routed through the floor or walls discreetly, and access points need to be preserved for repairs without dismantling the entire setup.
Rest assured, these hurdles are manageable with professional guidance. By addressing them early, you'll prevent costly issues down the line and enjoy a tub that's as practical as it is beautiful.
Key Benefits of Freestanding Tubs
- Aesthetic Versatility: Position them as room centerpieces for a dramatic effect.
- Comfort and Relaxation: Deeper basins and ergonomic shapes promote ultimate unwinding.
- Value Addition: Enhances property appeal, potentially increasing resale value by 5-10% in luxury markets.
- Customization Options: Available in various materials, sizes, and styles to match any decor.
Structural Requirements: Reinforcing Your Floor for Heavy Loads
One of the most critical steps in freestanding tub installation is ensuring your floor can handle the substantial weight. A standard tub might weigh 100-300 pounds empty, but add water (up to 60 gallons or more) and a person, and you're looking at loads over 800 pounds concentrated in a small area. Without proper support, this can lead to floor deflection, joist damage, or even collapse in extreme cases.
Assessing Your Existing Floor Structure
Begin with a thorough inspection. Most homes have floor joists spaced 16-24 inches apart, typically made of wood or engineered materials. For heavy freestanding tubs, you'll need to evaluate:
- Joist Size and Spacing: Standard 2x10 joists may suffice for lighter tubs, but heavier ones require upgrades.
- Subfloor Thickness: At least 3/4-inch plywood is ideal; thinner materials risk buckling.
- Load-Bearing Capacity: Consult building codes—residential floors are designed for 40 pounds per square foot live load, but tubs demand localized reinforcement.
If your assessment reveals weaknesses, don't panic. Reinforcement is a common and effective solution, often completed in a day or two by skilled contractors.
Floor Joist Reinforcement Techniques
To bolster your floor, professionals employ proven methods tailored to your home's architecture:
- Sistering Joists: Attaching additional lumber alongside existing joists to double strength. Use construction adhesive and bolts for a secure bond.
- Adding Blocking or Bridging: Installing perpendicular supports between joists to distribute weight evenly and reduce vibration.
- Beam Installation: For larger spans, insert steel or laminated veneer lumber (LVL) beams beneath the tub area.
- Plywood Overlays: Layering extra subfloor sheets with screws every 6 inches for added rigidity.
Risk Alert: Skipping reinforcement can result in uneven settling, leading to leaks or tub instability. Always hire a structural engineer for older homes to verify compliance with local codes.
In practice, these enhancements not only support the tub but also improve overall floor stability, making your bathroom feel more solid underfoot.

Rough-In Plumbing for Floor-Mounted Faucets
Plumbing is the backbone of any freestanding tub installation, particularly when opting for elegant floor-mounted faucets. These fixtures rise directly from the floor, creating a clean, minimalist look without wall clutter. However, they require precise rough-in work during the early stages of remodeling.
Planning the Plumbing Layout
Rough-in refers to installing pipes and drains before finishing the floor and walls. For freestanding tubs:
- Drain Positioning: Center the drain under the tub's outlet, typically 15-18 inches from the wall if applicable.
- Supply Lines: Run hot and cold water lines through the floor, ensuring they're insulated to prevent condensation.
- Valve Placement: Install shut-off valves accessible via a panel or trapdoor for easy maintenance.
Coordinate with your plumber to align with the tub's specifications—manufacturers provide templates for exact measurements.
Installing Floor-Mounted Faucets
These faucets demand a dedicated rough-in valve buried in the floor:
- Valve Selection: Choose a pressure-balanced or thermostatic valve to maintain consistent water temperature.
- Pipe Routing: Use PEX or copper pipes for flexibility and durability; secure them to joists to avoid movement.
- Height Considerations: Faucet spouts should clear the tub rim by 6-8 inches for optimal flow.
Pro Tip: Test the system with temporary caps before final installation to catch leaks early, saving time and resources.
By investing in quality plumbing upfront, you'll enjoy reliable performance and avoid disruptive repairs later.
Common Plumbing Pitfalls and Solutions
- Inadequate Water Pressure: Solution: Upgrade to a larger supply line or add a booster pump.
- Drain Slope Issues: Ensure a 1/4-inch per foot drop to prevent clogs; use a P-trap for odor control.
- Material Compatibility: Match pipes to your home's system to prevent corrosion.
With authoritative planning, these elements integrate seamlessly, enhancing the tub's luxurious appeal.
Access Considerations: Planning for Future Repairs
A often-overlooked aspect of freestanding tub installation is ensuring easy access for maintenance. Tubs can last decades, but plumbing and structural components may need attention over time. Designing with foresight prevents the need for major demolitions.
Strategic Tub Placement
Position your tub thoughtfully:
- Clearance from Walls: Maintain 12-18 inches on all sides for cleaning and repairs; this also allows air circulation to prevent mold.
- Faucet Accessibility: For floor-mounted units, leave space around the base for valve access.
- Room Layout: Avoid tight corners—opt for central placement in larger bathrooms for 360-degree approachability.
This not only facilitates upkeep but also improves usability, like easier entry and exit.
Incorporating Access Panels
- Floor Trapdoors: Install hinged panels near drains for quick plumbing access without lifting the tub.
- Wall Cutouts: If walls are involved, use removable tiles or magnetic panels.
- Under-Tub Space: Elevate the tub slightly on a platform with inspection ports.
Reassuring Note: These features don't compromise aesthetics—modern designs conceal them artfully, maintaining your bathroom's elegance.
Long-Term Maintenance Tips
- Schedule annual inspections to check for leaks or wear.
- Use gentle cleaners to preserve finishes and avoid chemical damage.
- Document your installation details for future reference.
By prioritizing access, you'll safeguard your investment and enjoy peace of mind.
Cost and Timeline Expectations
Budgeting for a freestanding tub installation varies, but expect $5,000-$15,000 including the tub, labor, and reinforcements. Timelines range from 1-2 weeks, depending on complexity. Factors like custom plumbing or structural work can extend this, but professional teams streamline the process efficiently.
Choosing the Right Professionals
Select licensed contractors with experience in bathroom remodeling. Look for reviews emphasizing attention to floor reinforcement and plumbing expertise. A good team will provide warranties, ensuring your luxurious tub stands the test of time.
In conclusion, installing a freestanding tub is a worthwhile endeavor that combines beauty with functionality. By addressing structural requirements, rough-in plumbing, and access considerations, you'll create a space that's both opulent and practical.
Repair Your Cracked Concrete—Call Today for a Flawless Finish!