The Dry-Out Dossier: What to Expect During the Professional Water Damage Restoration Process
Water damage can strike unexpectedly, turning your home into a soggy nightmare. Whether from a burst pipe, heavy rainfall, or appliance malfunction, the aftermath requires swift, professional intervention to prevent long-term issues like mold growth and structural weakening. As experts in water damage restoration, we're here to guide you through the process with clarity and confidence. This comprehensive guide outlines the multi-day timeline, demystifying each step so you know exactly what to anticipate. Our systematic approach ensures your home returns to its pre-loss condition safely and efficiently.
Start Your Professional Dry-Out Today – Call Us
Rest assured, professional restoration isn't just about drying things out—it's a science-backed method that prioritizes your health, property, and peace of mind. By understanding the stages, you'll feel empowered rather than overwhelmed. Let's dive into the details of this essential service.
Understanding Water Damage: The Basics
Before we explore the restoration timeline, it's crucial to grasp why professional help is non-negotiable. Water damage falls into three categories: clean water (from sources like rain or pipes), gray water (slightly contaminated, e.g., from appliances), and black water (highly contaminated, like sewage). Each type demands tailored handling to mitigate risks such as electrical hazards, bacterial proliferation, and material degradation.
Homeowners often underestimate the hidden dangers. Water seeps into porous surfaces like drywall, insulation, and subflooring, creating ideal conditions for mold within 24-48 hours. Attempting DIY fixes can exacerbate problems, leading to costly repairs. That's where certified technicians step in, armed with industry-standard tools and protocols from organizations like the Institute of Inspection, Cleaning and Restoration Certification (IICRC).
In this guide, we'll cover a typical 3-7 day process, though timelines vary based on damage extent. Factors influencing duration include the water volume, affected area size, and material types. Our goal? To restore your space while minimizing disruption.
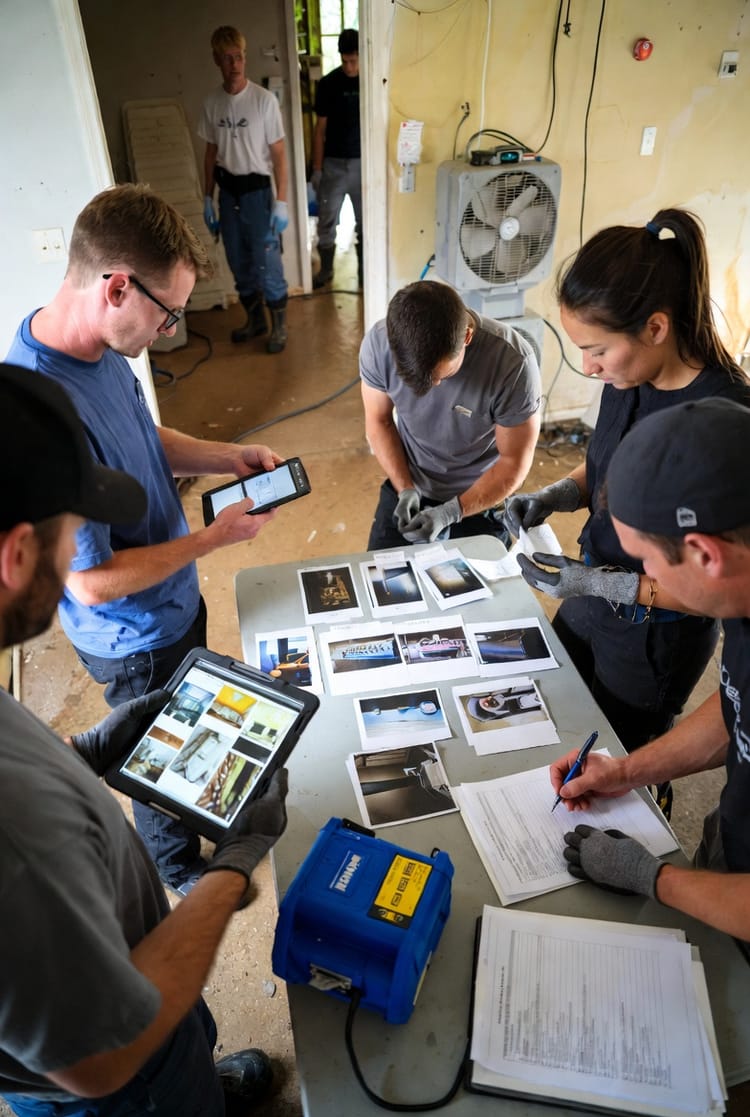
Day 1: Initial Assessment and Emergency Extraction
The restoration journey begins the moment you call. Expect a rapid response—our teams are available 24/7 to assess and act.
- Arrival and Safety Check: Technicians arrive equipped with personal protective gear. They prioritize safety by shutting off utilities if needed and identifying hazards like slippery floors or compromised structures.
- Damage Evaluation: Using moisture meters and thermal imaging cameras, we map out affected areas. This non-invasive tech reveals hidden moisture pockets, ensuring nothing is overlooked.
- Water Extraction: High-powered pumps and vacuums remove standing water. For carpets, we use weighted extraction tools to pull out embedded moisture, preventing further saturation.
This phase is critical to halt damage progression. By extracting water promptly, we reduce the risk of secondary damage like warping wood or delaminating tiles. Homeowners often report immediate relief seeing the visible water vanish, but remember: extraction is just the start.
During this day, expect some noise from equipment, but our teams work efficiently to limit inconvenience. We'll also document everything for insurance purposes, easing your claims process.
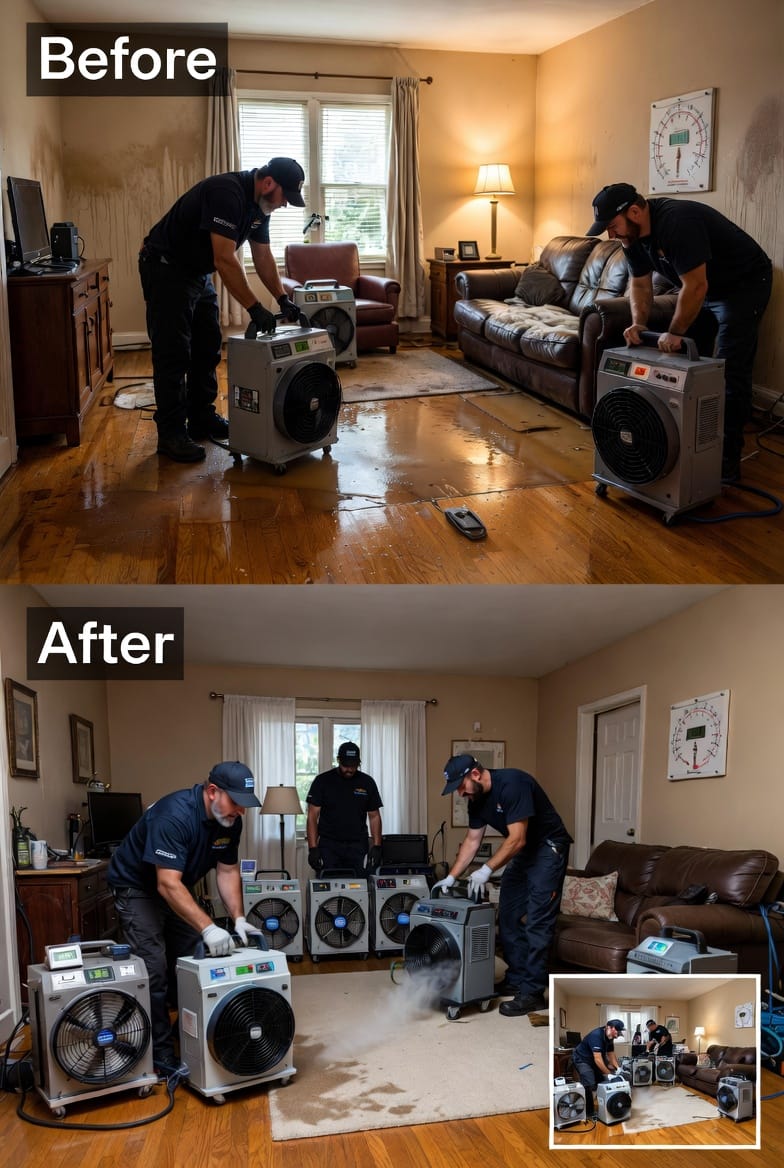
Setting Up for Success: Equipment Placement
Once extraction is complete, we transition to active drying. This involves strategically placing industrial-grade equipment to create a controlled environment.
- Air Movers: These high-velocity fans direct airflow across wet surfaces, accelerating evaporation. Placed at angles, they target walls, floors, and ceilings without causing dust storms.
- Dehumidifiers: These machines pull moisture from the air, condensing it into collectible water. We select units based on room size and humidity levels for optimal performance.
- Air Scrubbers: For contaminated scenarios, HEPA-filtered scrubbers remove airborne particles, improving indoor air quality.
Think of your home as a temporary drying chamber. Equipment is positioned to maximize efficiency—fans along baseboards, dehumidifiers in central spots. We'll explain placements to you, ensuring you're comfortable with the setup.
This step typically wraps up Day 1, with equipment running continuously. Power usage might increase slightly, but it's a small price for thorough restoration.
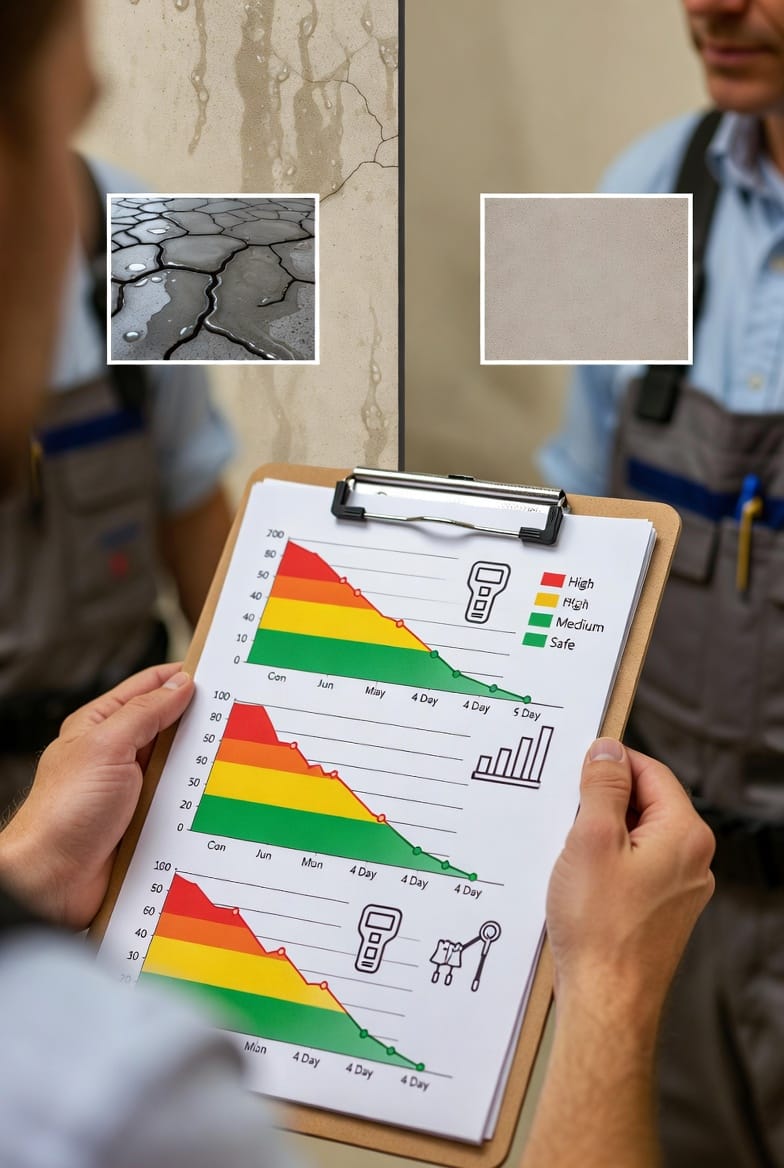
Days 2-4: Monitoring and Moisture Management
The heart of restoration lies in vigilant monitoring. Over the next few days, technicians visit daily (or more if needed) to track progress and adjust as necessary.
- Daily Moisture Readings: Using pin-type and non-invasive meters, we measure moisture content in materials. Readings guide decisions—high levels might require additional fans.
- Humidity Control: We monitor ambient humidity, aiming for 30-50% to prevent over-drying, which can crack wood or plaster.
- Progress Adjustments: If drying stalls, we reposition equipment or introduce desiccants for stubborn areas.
Expect transparency: We'll share readings with you, often via logs or apps. Seeing numbers drop—from, say, 40% to 15%—builds reassurance. This phase also includes initial cleaning, wiping down surfaces to remove residues.
Potential challenges? In severe cases, we might encounter hidden moisture in cavities, requiring minor probes. Rest easy—our methods are minimally invasive.
When Demolition is Necessary: Controlled Removal
Not all damage is salvageable. If materials are irreparably compromised, selective demolition ensues, typically on Days 2-3.
- Identifying Unsavable Items: Swollen drywall, saturated insulation, or warped flooring may need removal to access and dry underlying structures.
- Safe Demolition Practices: We use containment barriers to prevent dust spread, cutting out only affected sections with precision tools.
- Debris Management: Removed materials are bagged and disposed of responsibly, often with antimicrobial treatments applied to exposed areas.
This step can feel disruptive, but it's essential for complete recovery. By removing contaminated elements, we eliminate mold risks and ensure a solid foundation for rebuilding. Homeowners appreciate our focus on salvaging what we can—furniture might be moved to unaffected rooms or off-site storage.
Throughout, communication is key. We'll discuss options, costs, and timelines, aligning with your insurance coverage.
Cleaning and Sanitizing: Restoring Hygiene
As drying advances, usually by Day 3-4, we shift to thorough cleaning. This isn't your average mop-up—it's a deep, professional sanitize.
- Surface Cleaning: Non-porous items like tiles and metals are scrubbed with EPA-approved cleaners.
- Antimicrobial Application: Fogging or spraying treats hard-to-reach spots, killing bacteria and inhibiting mold.
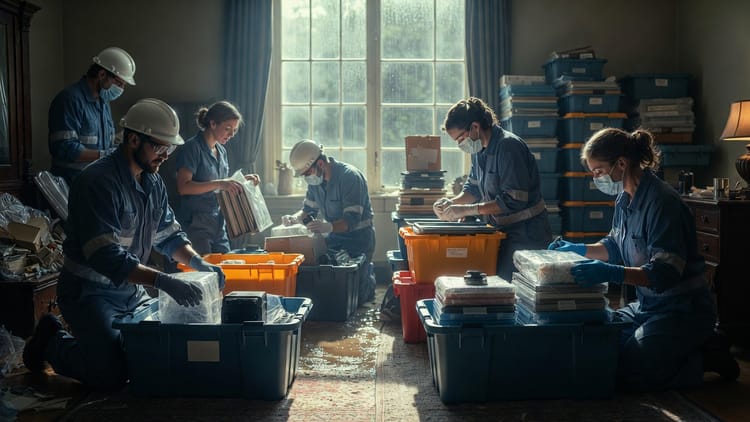
- Content Restoration: Personal belongings are inventoried, cleaned, and deodorized. Specialized techniques handle textiles, electronics, and documents.
This phase addresses odors and health concerns, transforming your space from damp and musty to fresh. For category 2 or 3 water, extra precautions like biohazard protocols apply.
By now, equipment hums steadily, and visible improvements emerge—floors feel firm, walls look intact.
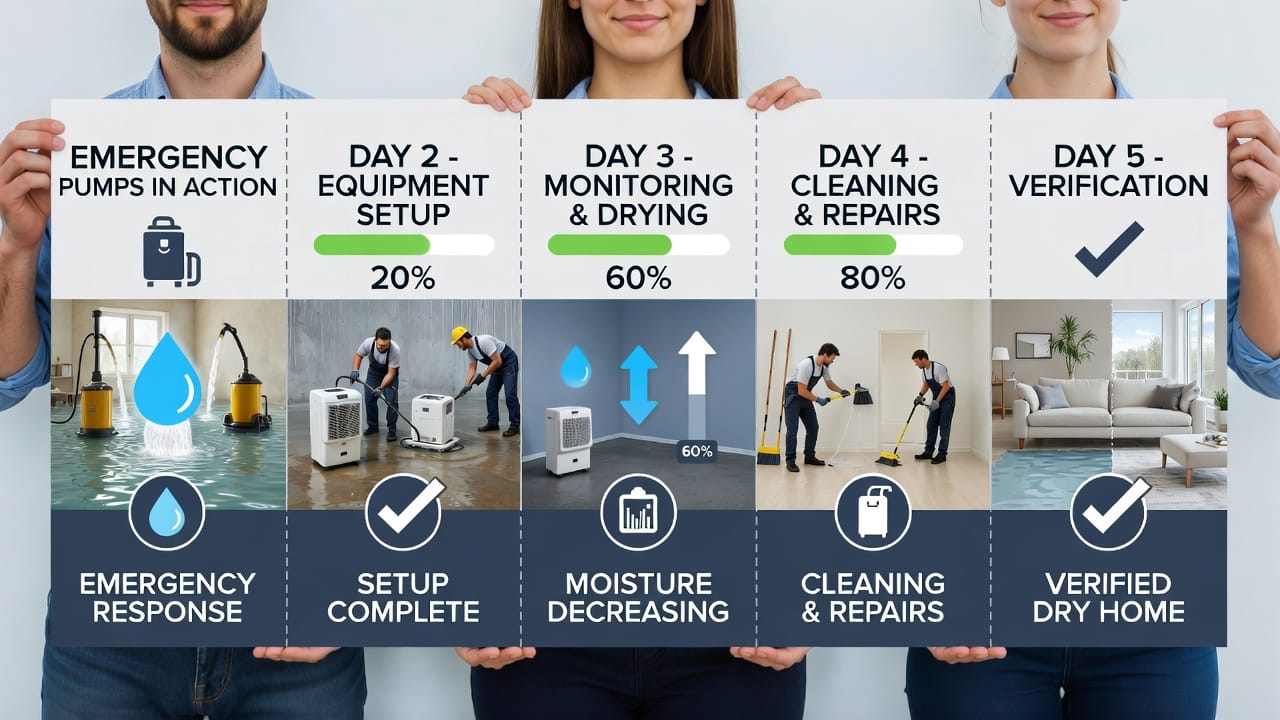
Final Stages: Verification and Wrap-Up
Approaching the end, typically Days 4-5, we verify dryness against industry standards.
- Dry Standard Checks: Materials must meet specific moisture thresholds (e.g., wood below 16%, drywall under 1%). Multiple readings confirm consistency.
- Equipment Removal: Once verified, we dismantle setups, cleaning up thoroughly.
- Final Inspection: A walkthrough with you ensures satisfaction. We provide reports for insurance and future reference.
If rebuilding is needed—replacing drywall or flooring—we coordinate seamlessly. Our authoritative process guarantees no lingering issues, protecting your investment.
Preventing Future Water Damage: Proactive Tips
Knowledge empowers prevention. While not part of the restoration, these tips fortify your home:
- Install sump pumps and backflow valves.
- Regularly inspect roofs, gutters, and appliances.
- Consider smart leak detectors for early alerts.
By staying vigilant, you reduce recurrence risks.
Why Choose Professional Restoration?
DIY attempts often fall short, leading to incomplete drying and hidden problems. Professionals bring expertise, efficiency, and equipment you can't match. Our IICRC-certified teams ensure compliance with best practices, saving time and money long-term.
In summary, the water damage restoration process is methodical: from extraction and drying to verification. Each step builds toward full recovery, delivered with care.
Call for Professional Restoration & Peace of Mind